Scooby Doo Haunted Castle Cake Tutorial
This haunted castle cake featuring Scooby Doo and Shaggy is not only easy to make, but is an instant cake that any child or adult will fall in love with. With just a few tools and simple steps, you can create this cake at home too!
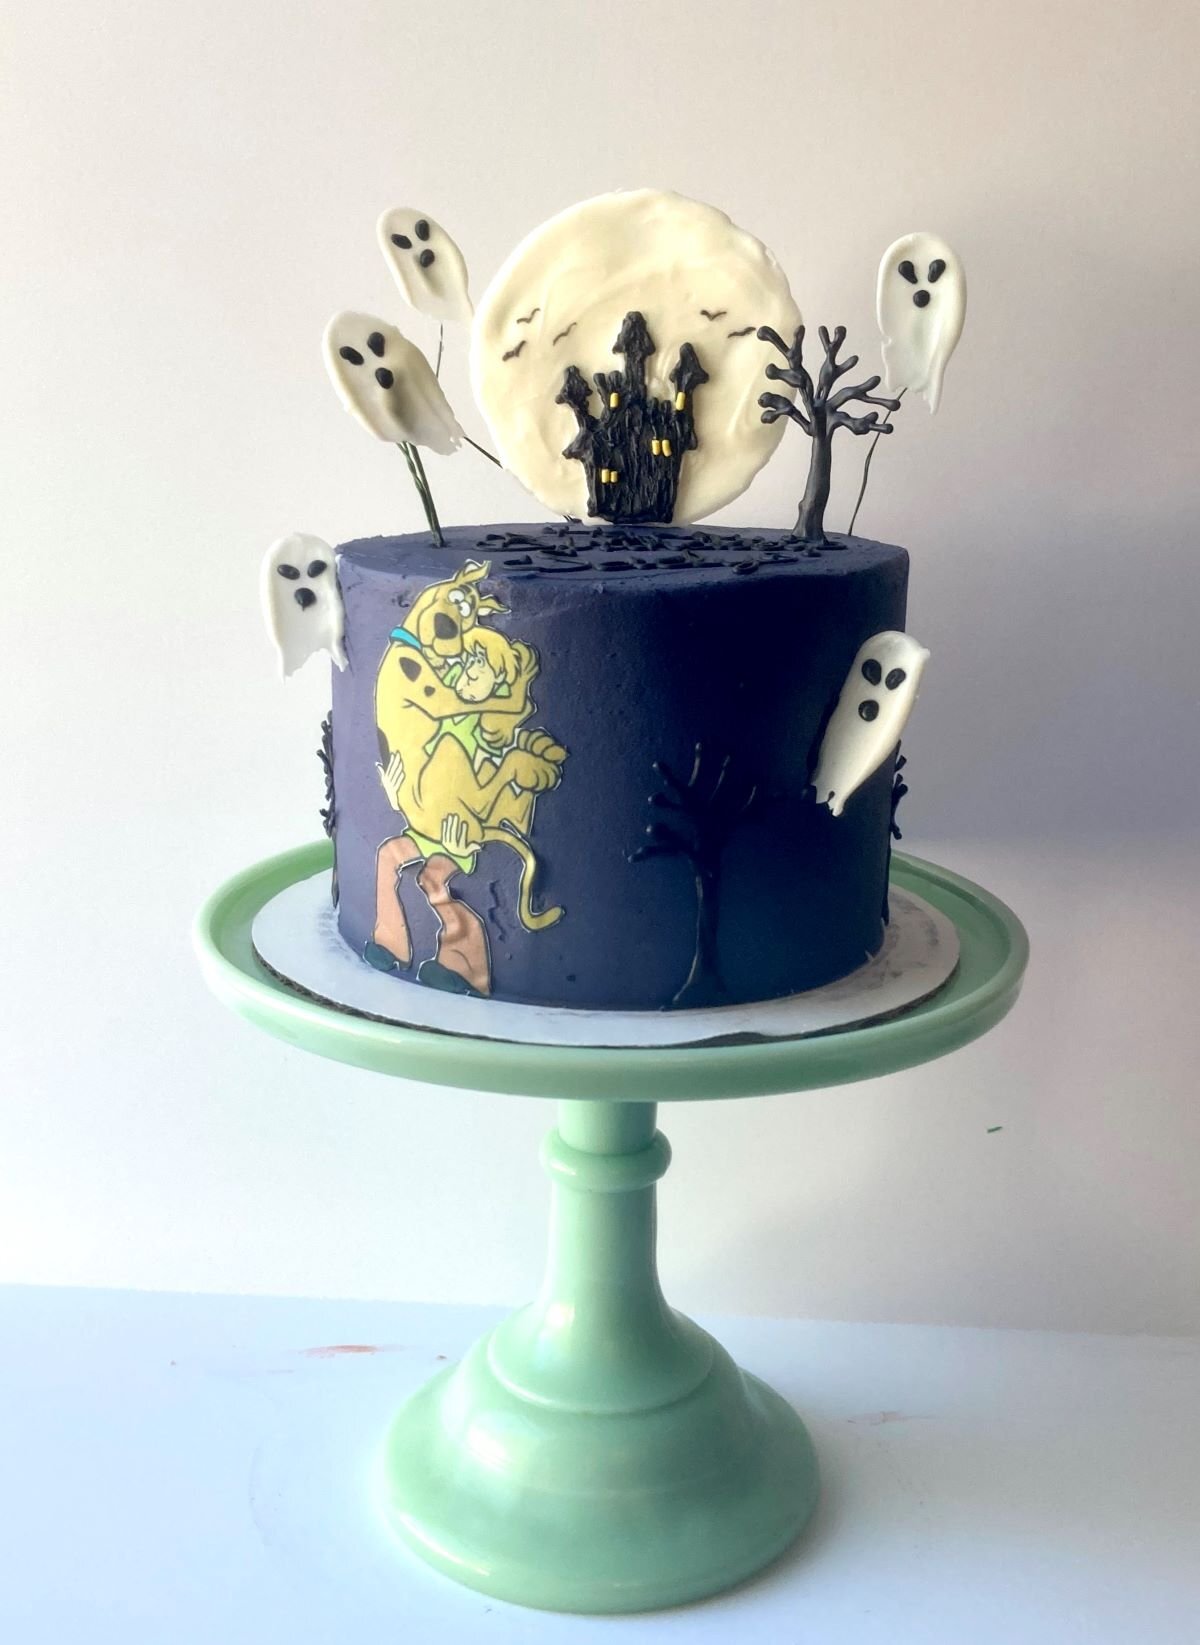
I had so much fun making this Scooby Doo haunted castle cake! My sister requested a birthday cake a few weeks back wanting it to be Scooby Doo themed. Like always, I have to research Pinterest for ideas, which usually ends up being combining 2 or even 3 different cake ideas into one. And then this haunted castle cake came about. Something easy, simple and not difficult to make at all. Just a few simple tools and pieces of equipment that are easy to find at your local craft store.
What You Will Need
- Cake: 3, 6-inch cake layers of your choice of flavor.
- Buttercream: 1 large batch of simple butter cream in a dark purple color.
- Black candy melts
- White candy melts
- Yellow jimmy sprinkles
- Floral wire
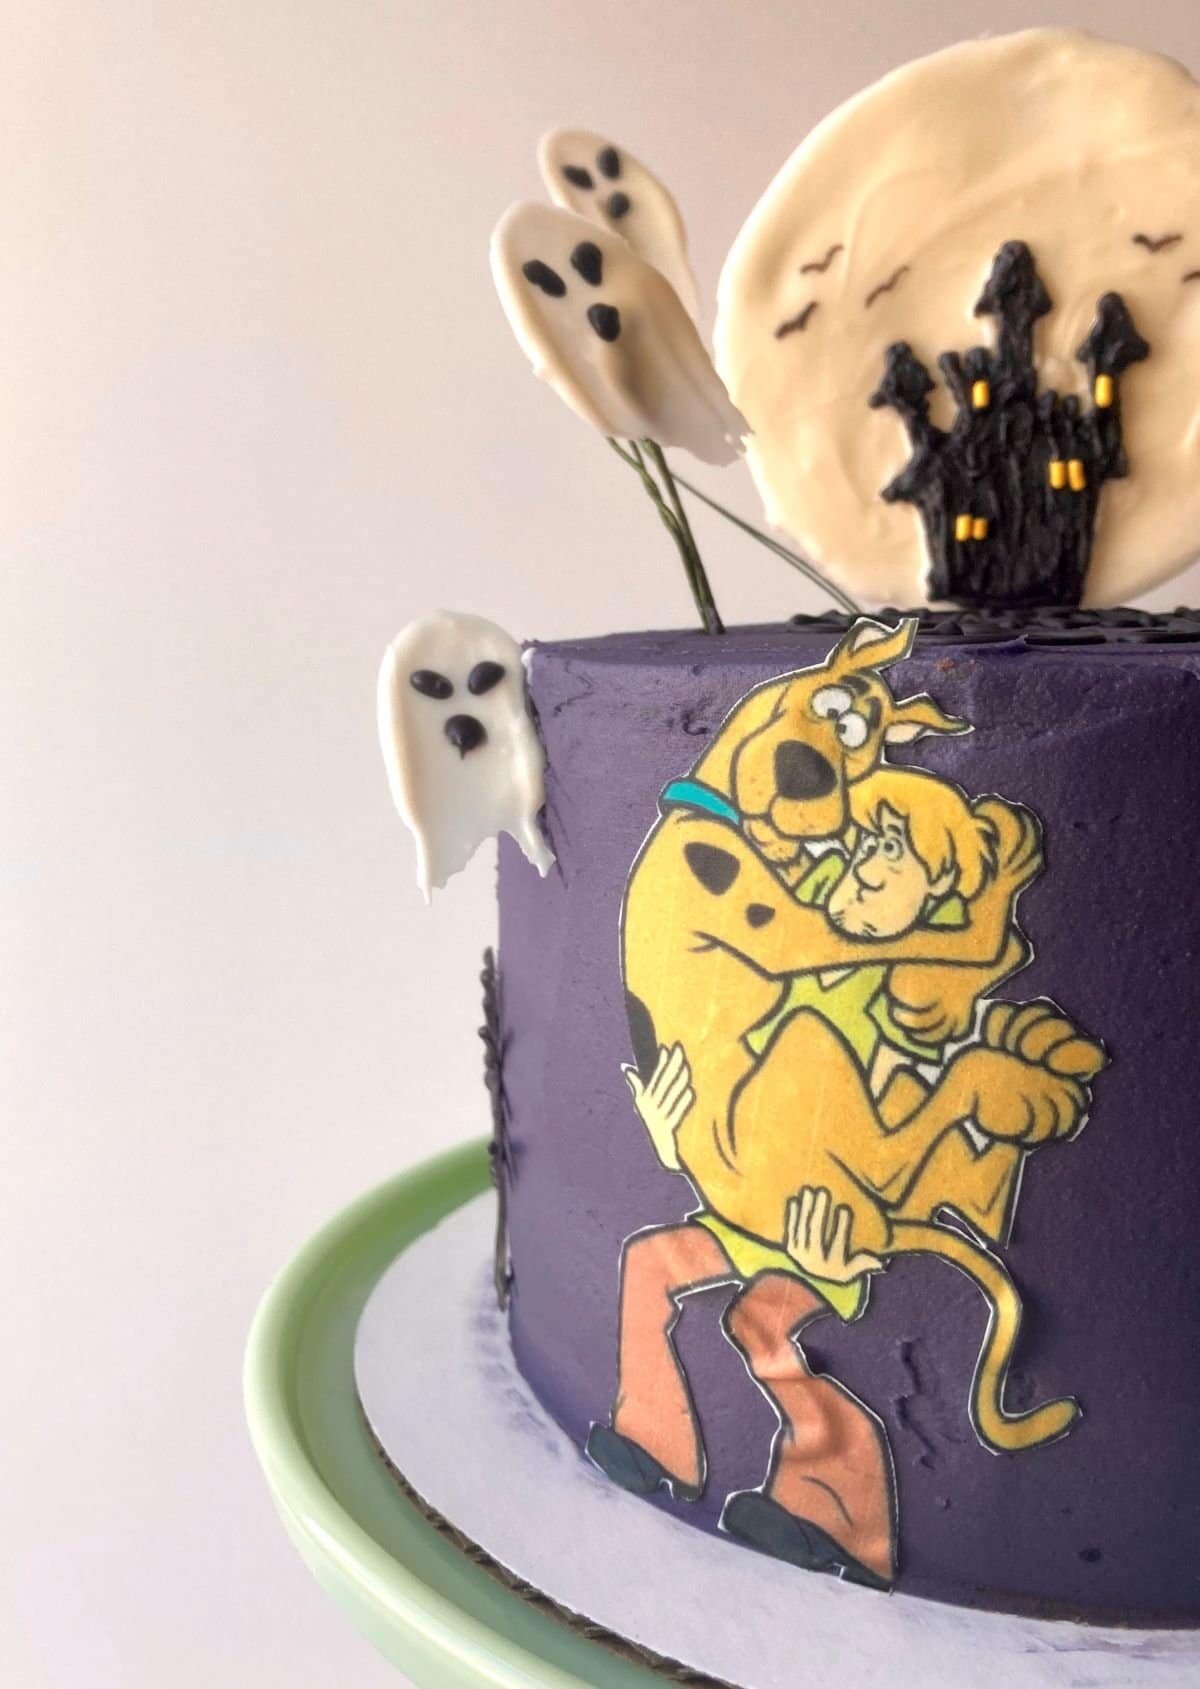
- Edible images of Scooby and Shaggy (optional).
How to Make This Haunted Castle Cake
Making this cake is really only a few simple steps that requires using candy melts! It's easy, straightforward, and customizable too! All you need is a few tools and some wax paper to get your chocolate decorations just right!
How To Make The Moon & Haunted Castle

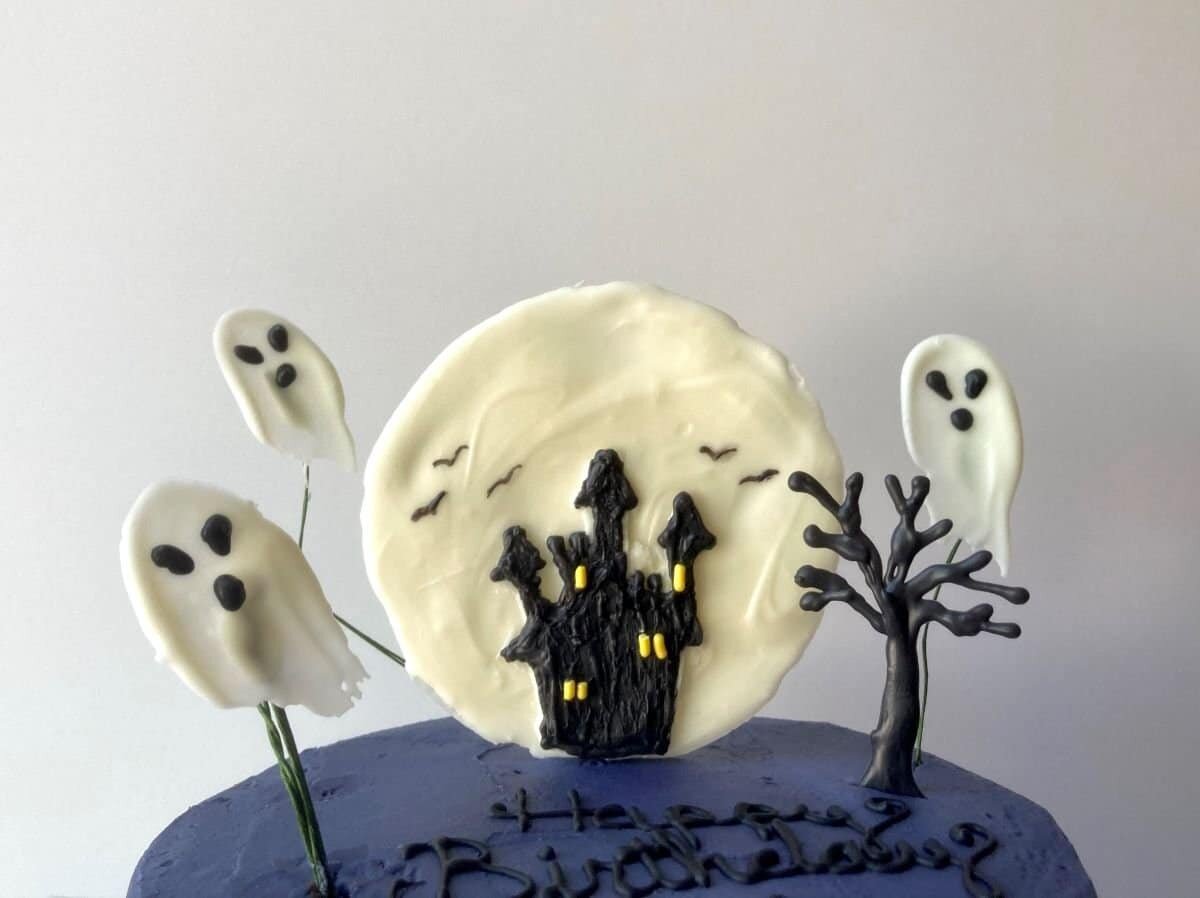
- Melt the white candy melts and create a large round, about 4-5 inches in diameter.
- Melt the black candy melts and free hand a castle.
- Add some yellow jimmy sprinkles to the castle for the lights.
- When dry, flip over and place the large lollipop stick to the back of the chocolate moon and glue it with more chocolate.
How To Make The Ghosts

- Place a small dime size of melted white candy melts on some wax paper.
- Take a small offset spatula and place on the chocolate and drag down.
- Take a small piping bag of black candy melts and pipe a ghost face.
- Glue the floral wire to the back of the ghost.
Tips & Tricks
- Take the black candy melts and free hand some spooky trees to help bring the cake together even more! You can even add in some classic Scooby Doo spooky eyes to the side of the cake too.
- On the chocolate "moon", you can take a small paint brush and some black food color and paint on some bats for an added effect and to make the castle pop!
- If you don't have a way to get any edible images of Scooby Doo and Shaggy, then you can completely omit it. The cake will still look absolutely amazing either way! Or you can pipe it out using candy melts and a printed image as a stencil to place on the side of the cake instead!
Other Recipes You May Like
Scooby Doo Ice Cream Sandwiches
Scooby Doo Haunted Castle Cake

A easy cake tutorial on creating a haunted castle scene made with candy melts, featuring Scooby Doo and Shaggy.
- 1 cup white candy melts
- 1/2 cup black candy melts
- 1 cake (3, 6-inch layers)
- 1 batch buttercream (colored dark purple)
-
Frost your choice of cake with the dark purple buttercream. Let chill until the buttercream has set.
Chocolate Moon & Haunted Castle
-
Place a piece of wax paper on the counter. Melt the white candy melts in a piping bag, in 15 second intervals, until melted. Pipe out a large round, about 4-5 inches in diameter. Let set.
-
Melt the black candy melts in a piping bag and free hand a castle on top of the chocolate "moon". Before the chocolate starts to set, place the yellow jimmy sprinkles to resemble the windows of the castle. Let set.
-
Take the large lollipop stick or skewer and glue it to the back of the chocolate "moon". Let set.
Chocolate Ghosts
-
For the chocolate ghosts, pipe dime size rounds of the white candy melts on wax paper. Take a small offset spatula or a butter knife and gently place on top of the chocolate and drag down. Let set.
-
Take the black candy melts and pipe on the faces of the ghosts. Let set.
-
Using the floral wire, gently flip the chocolate ghosts over and glue the floral wire to the back of them using a little more white candy melts. Let set.
Assembly
-
To assemble, carefully place the lollipop stick with the chocolate "moon" into the cake.
-
Carefully take the chocolate ghosts on the floral wire and place randomly on the cake.
-
If you have edible images of Scooby and Shaggy, then carefully brush the back of the image with some corn syrup and place on the cake.
Alien Cake Pops
Out of this world alien cake pops makes for a fun treat this Halloween! Easy to make with only a few ingredients and steps to create these fun cake pops.

Cake pops are all the rage these days as they are a easy, handheld treat that comes in all shapes and colors. Kids love them with all of the fun designs that the cake can be molded into, like these aliens!
I went on a crazy chocolate mold shopping spree awhile back and I had saw this alien mold. When I saw it I knew that I had to buy it! It's meant to be a chocolate lollipop mold, but that doesn't mean you can't get creative with it. That's when I thought of making them into alien cake pops!

What You Need
- Chocolate mold: You will need this alien chocolate mold.
- Lollipop sticks
- Cake: Bake whatever kind of cake you like! It can be your family's favorite from scratch or just a simple box mix.
- Frosting: You will need a small batch of simple buttercream. You can always use store bought frosting too.
- Candy melts: Green and black candy melts are the main colors that you will need, but you can always use a different color.
How to Make the Alien Cake Pops
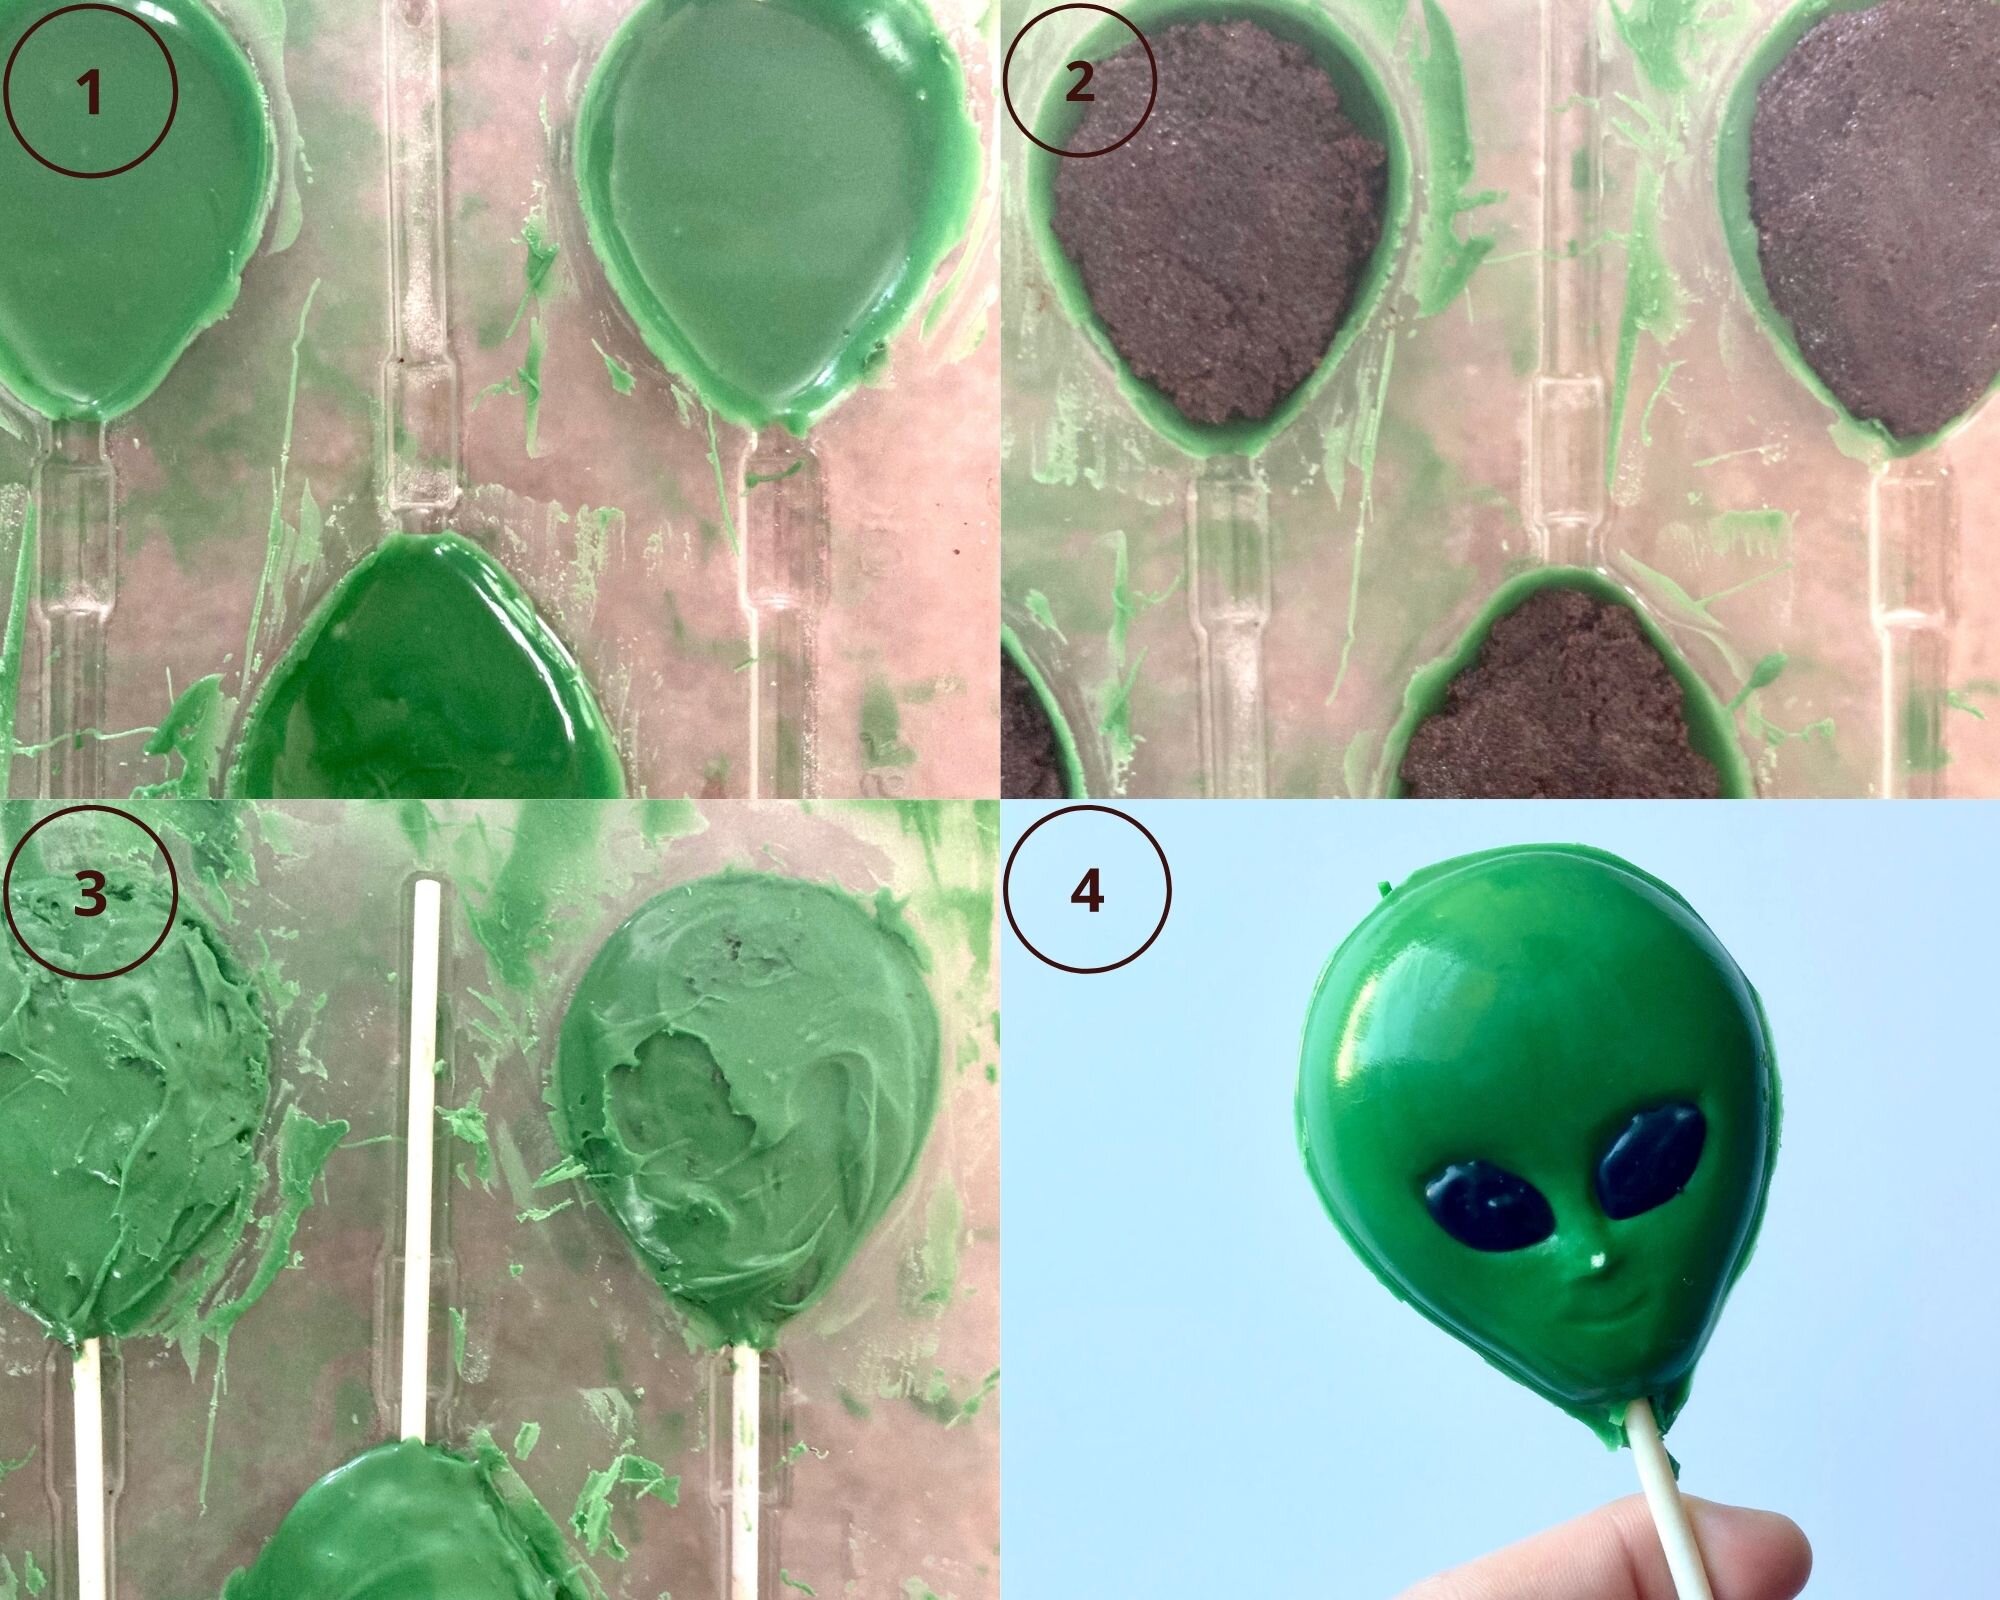
- Start by melting the candy melts and putting a little into each mold and spreading it around to create a nice smooth base.
- Fill each mold 3/4 of the way with the cake pop mixture.
- Top with more chocolate and let harden.
- Remove the alien cake pops from the mold and add the details with the black chocolate.
Tips & Tricks
- Tap the mold against the counter to create that nice smooth finish for when you take the cake pop out of the mold.
- Make sure not to fill it too much with the cake mixture or else when you add the rest of the chocolate it won't get that flat surface, but it doesn't have to be perfect either.
- You can always add in the black chocolate details beforehand. Just take a small piping bag and pipe in the details. Let it harden and then continue following the rest of the steps to make these cake pops.
Other Recipes You May Like
Vanilla Cake with Pumpkin Spice White Chocolate Ganache
Alien Cake Pops

Cake pops made in the shape of alien faces with the help of a chocolate mold.
- 1 bag green candy melts
- 1/4 cup black candy melts
- 1 cup frosting
- 1 cake (baked in a 8x8 inch pan)
-
Take the cake and crumble it up. Add in the frosting and mix it up until the cake starts to stick together easily and can be formed into balls. Cover and set aside.
-
Melt the green chocolate and spread a thin layer into each mold. Let set.
-
Add in enough cake pop mix to fill up 3/4 of the mold. Insert the lollipop sticks and cover it with the cake.
-
Top with more chocolate and let set until firm.
-
Once firm, carefully remove from the mold and add in the details of the eyes with the black chocolate.
This can be time consuming if you only buy 1 chocolate mold. You can always make cupcakes and use a few cupcakes instead of making a cake for these cake pops.
Star Shaker Cookies

*Disclaimer: This post contains affiliate links. To learn more, please go here.
It's almost the 4th of July which means lots of BBQ's and fireworks! But you need a showstopper treat for these fun festivities, like these star shaker cookies! They may be a little time consuming, but the kids will love them! They are interactive with the little treats you can fill them with and will have everyone asking how you made them.
Amplify it!
Want to make these star shaker cookies extra fun? Here is a fun list of things that you can fill them with!
- Sprinkles
- Pop rocks candy
- Mini chocolate candies
How to assemble
It's super easy to make these cookies! There are a lot of steps, but anyone can make them. Here's how!
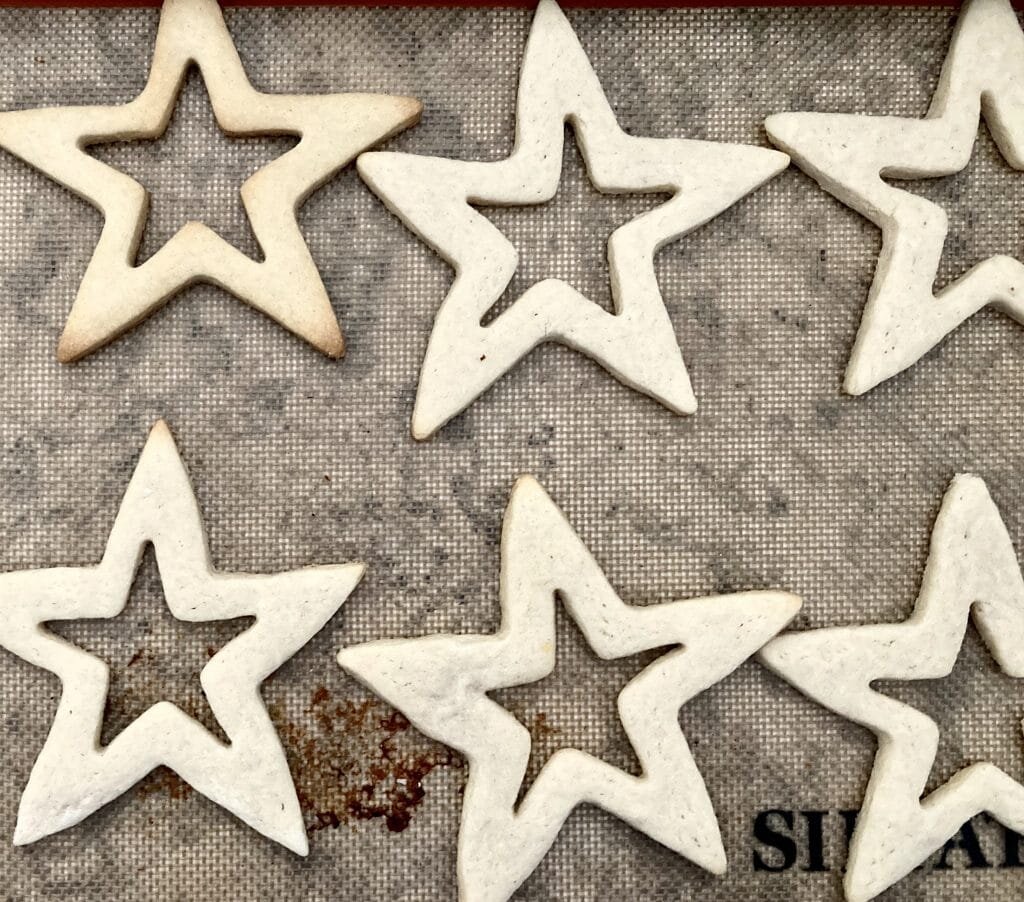
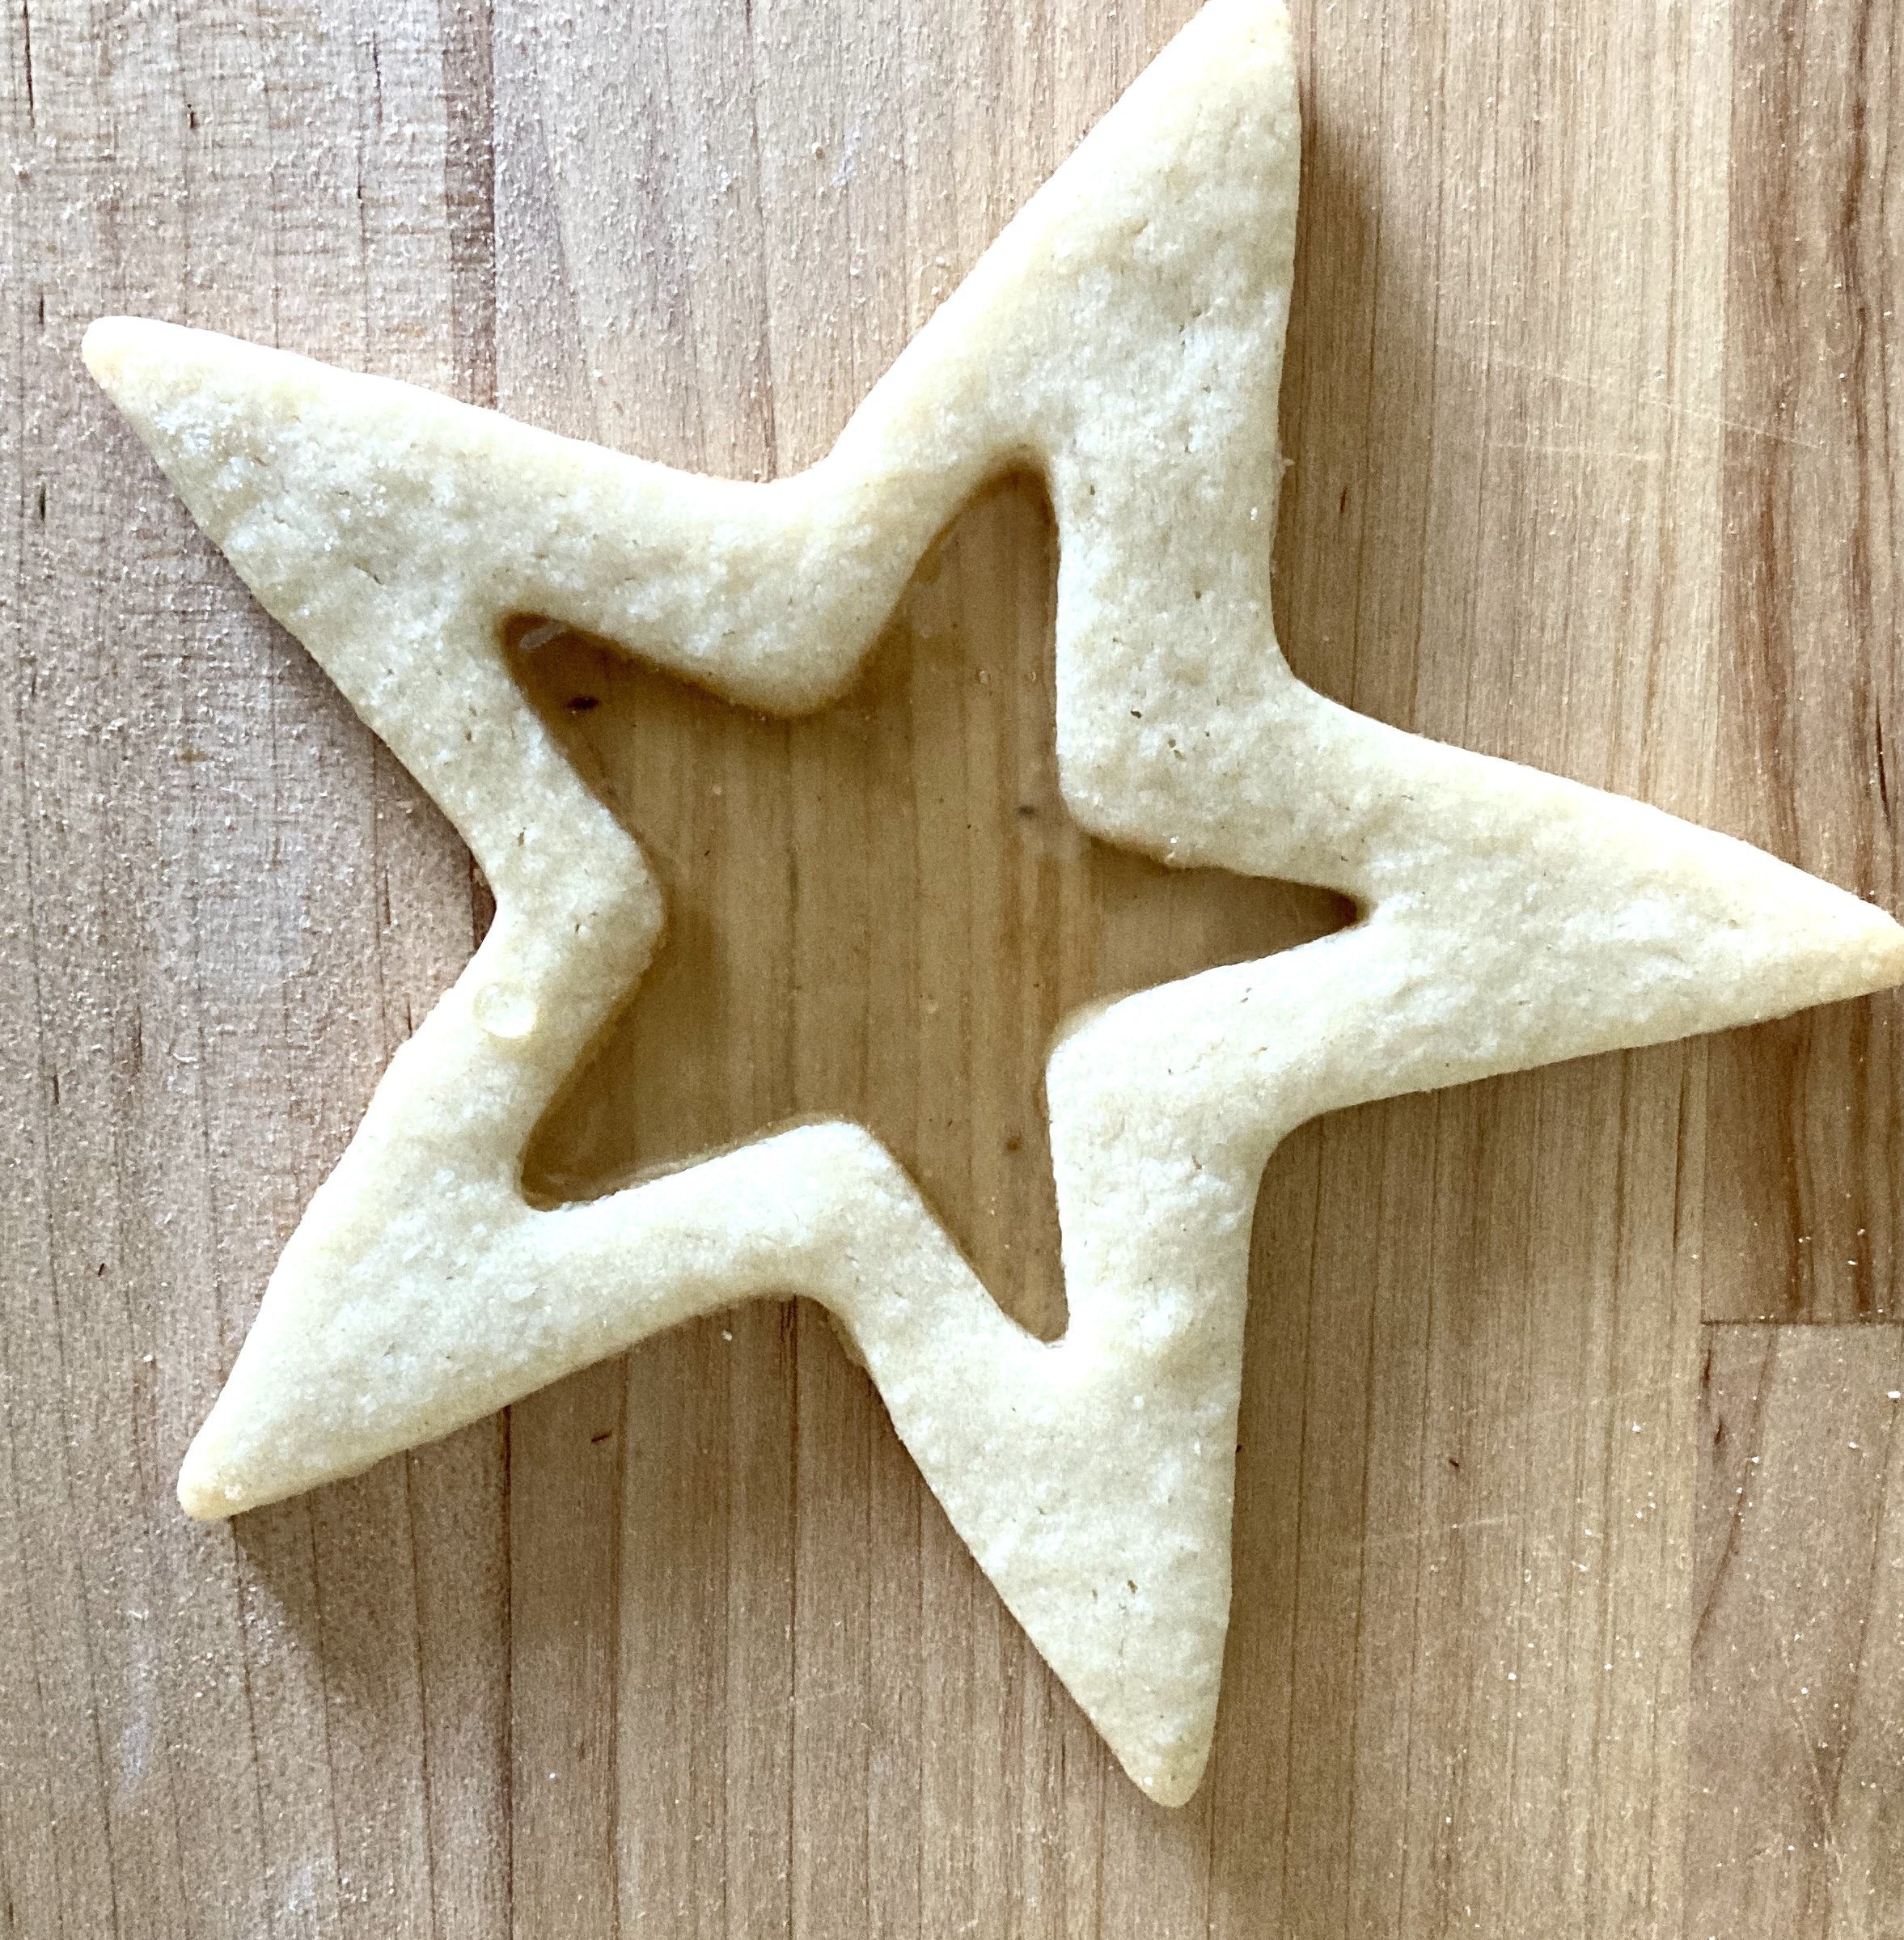
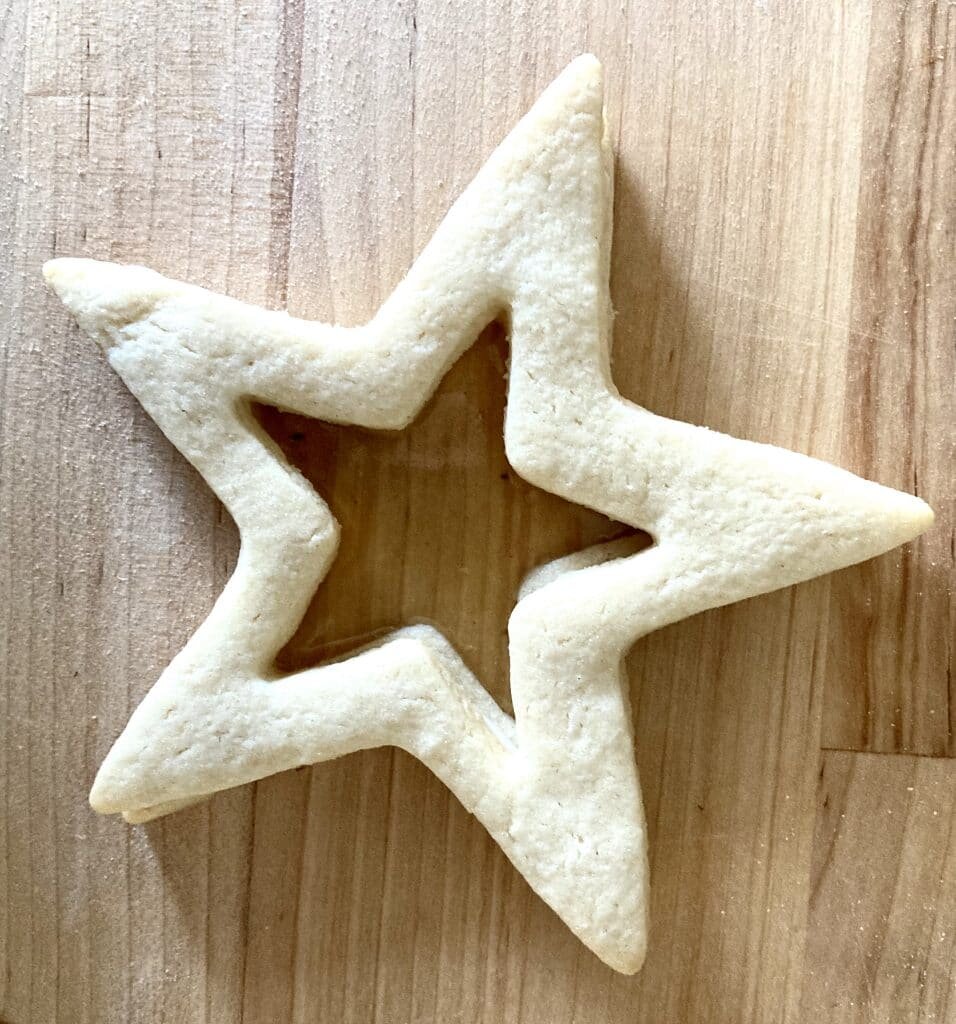
- Start by making a batch of sugar cookies. I used my sugar cookie recipe. You will need 2 cookie cutters; 1 that is larger and a smaller one to remove the middle portion of the cookie. Bake the cookies and let cool.
- After the cookie are cooled, you'll want to take 2/3 of the cookies and leave the other 1/3 of the cookies to the side.
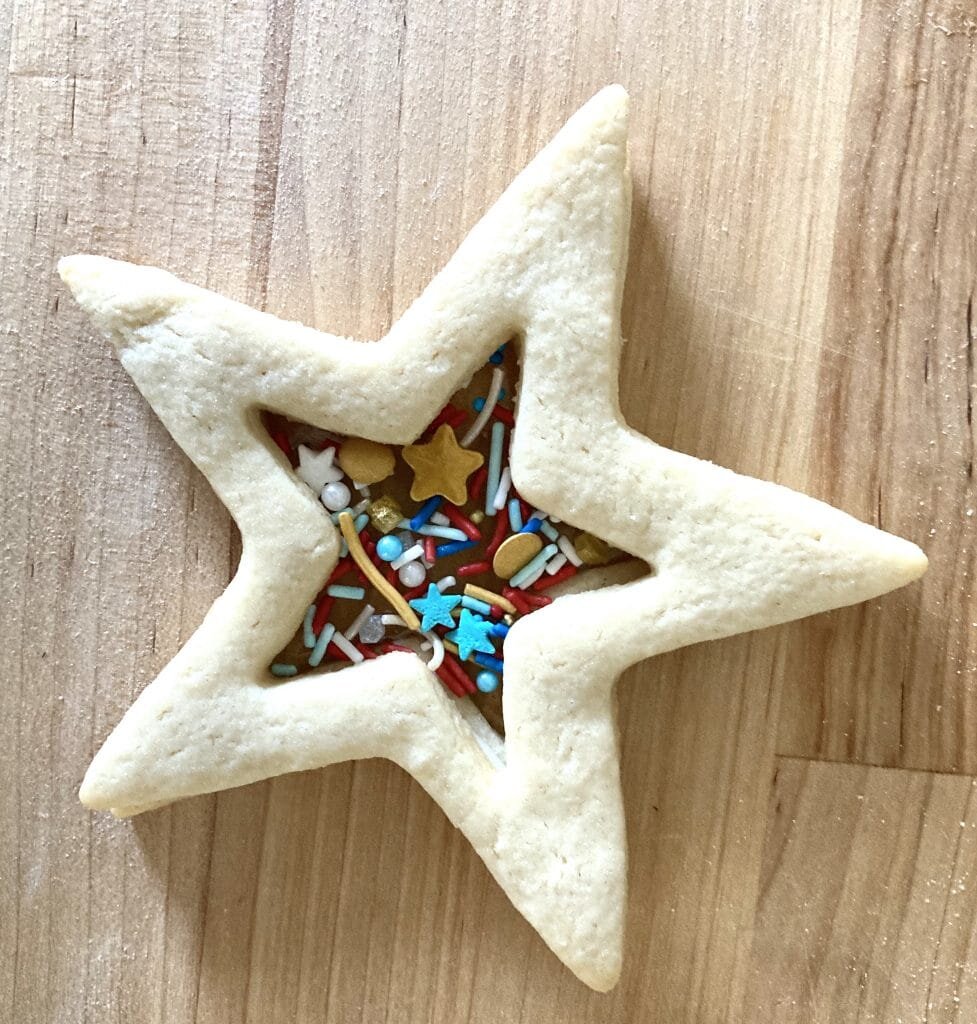
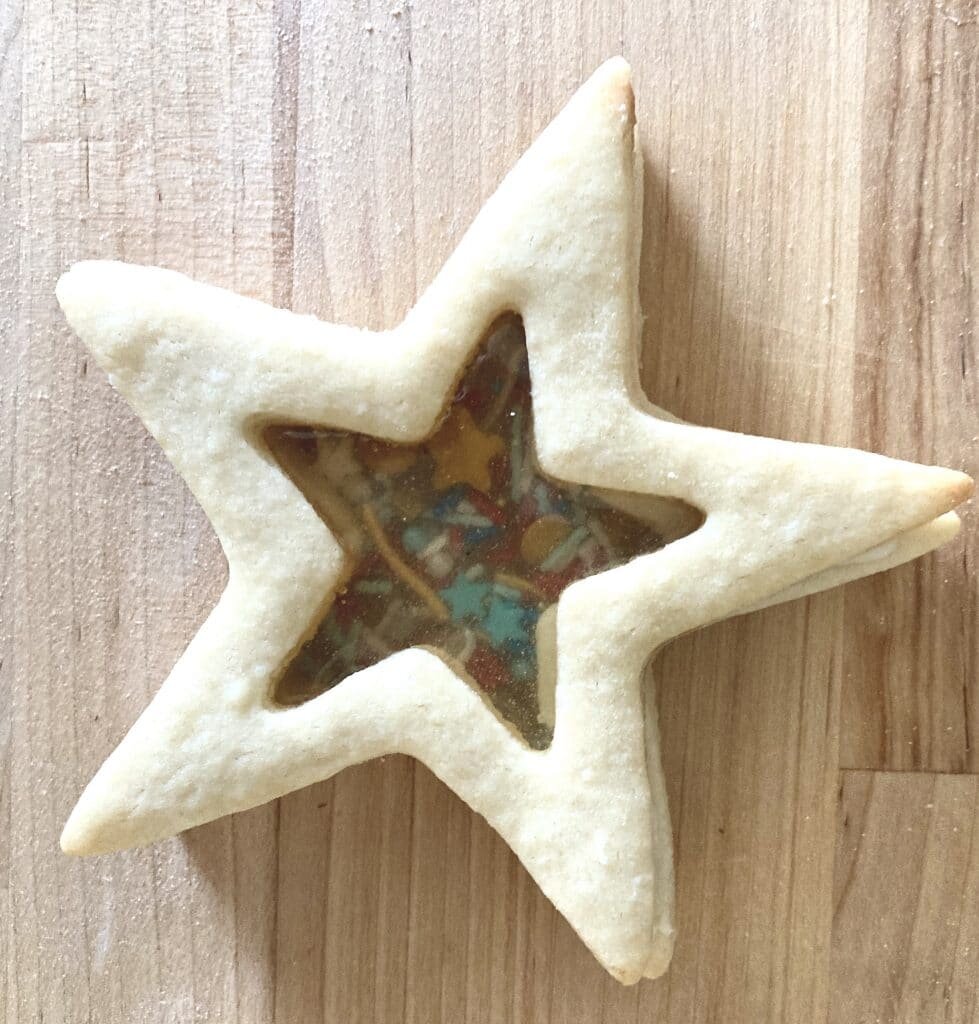
- Take the 2/3 of the cookies and lay them out on a silpat. You will then make a hard sugar candy with some isomalt (just follow the directions on the bag) and poor about a tablespoon of the hard sugar into the center of the cookies.
- Once the sugar has cooled and hardened you will then want to make a stiff royal icing.
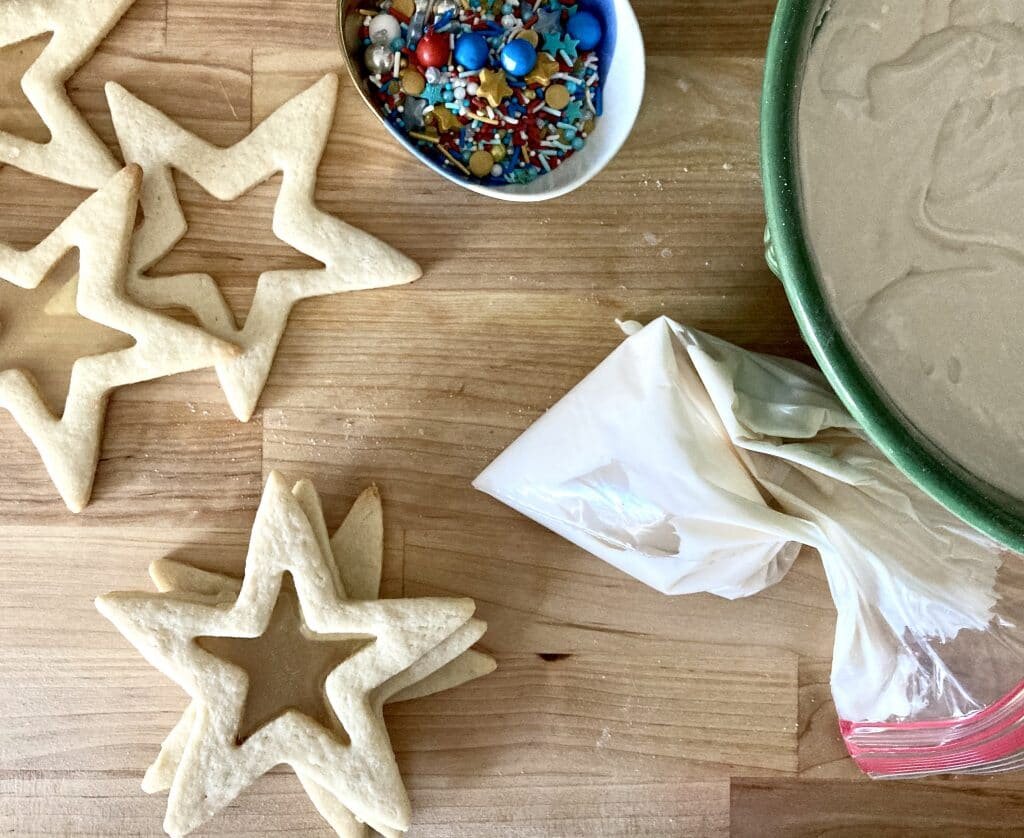
- Lay one of the cookies with the candy center on the counter. Take the royal icing and pipe a thin layer along the edges. Place the next cookie, one that doesn't have the candy center, on top. Next place some sprinkles and candies in the center.
- Repeat the process of the royal icing and the last candy centered cookie.
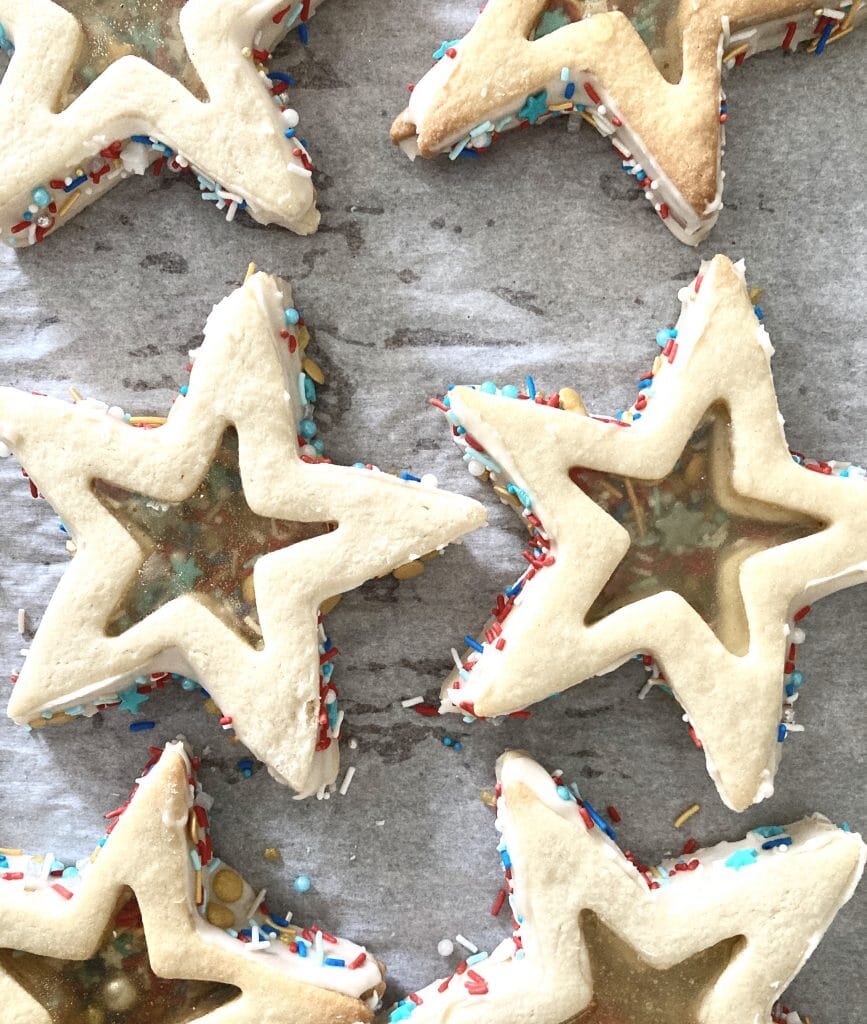
- Decorate the cookies as desired!



Products I recommend
Above are some products that I personally use and recommend for this recipe and to have for everyday use. I highly suggest getting the isomalt for these cookies. It may not taste very good since it's a sugar free type of hard candy, but it gives it a super clear, non-cloudy look. You can always add in a little bit of clear flavor oil to give it more appeal. (Don't do what I did and use a candy oil that's colored, I used key lime with a green tint to it and it turned a bit murky.)
shaker cookies

create a fun cookie treat using isomalt and candies!
- 1 batch sugar cookie dough (link in post)
- 1 batch stiff royal icing (link in post)
- isomalt
- sprinkles and candies
- Start by making a batch of sugar cookies. I used my sugar cookie recipe. You will need 2 cookie cutters; 1 that is larger and a smaller one to remove the middle portion of the cookie. Bake the cookies and let cool.
- After the cookie are cooled, you'll want to take 2/3 of the cookies and leave the other 1/3 of the cookies to the side.
- Take the 2/3 of the cookies and lay them out on a silpat. You will then make a hard sugar candy with some isomalt (just follow the directions on the bag) and poor about a tablespoon of the hard sugar into the center of the cookies.
- Once the sugar has cooled and hardened you will then want to make a stiff royal icing.
- Lay one of the cookies with the candy center on the counter. Take the royal icing and pipe a thin layer along the edges.
- Place the next cookie, one that doesn't have the candy center, on top. Next place some sprinkles and candies in the center.
- Repeat the process of the royal icing and the last candy centered cookie.
- Decorate the cookies as desired!



Mango Orange Peeps
[wprm-recipe-jump]
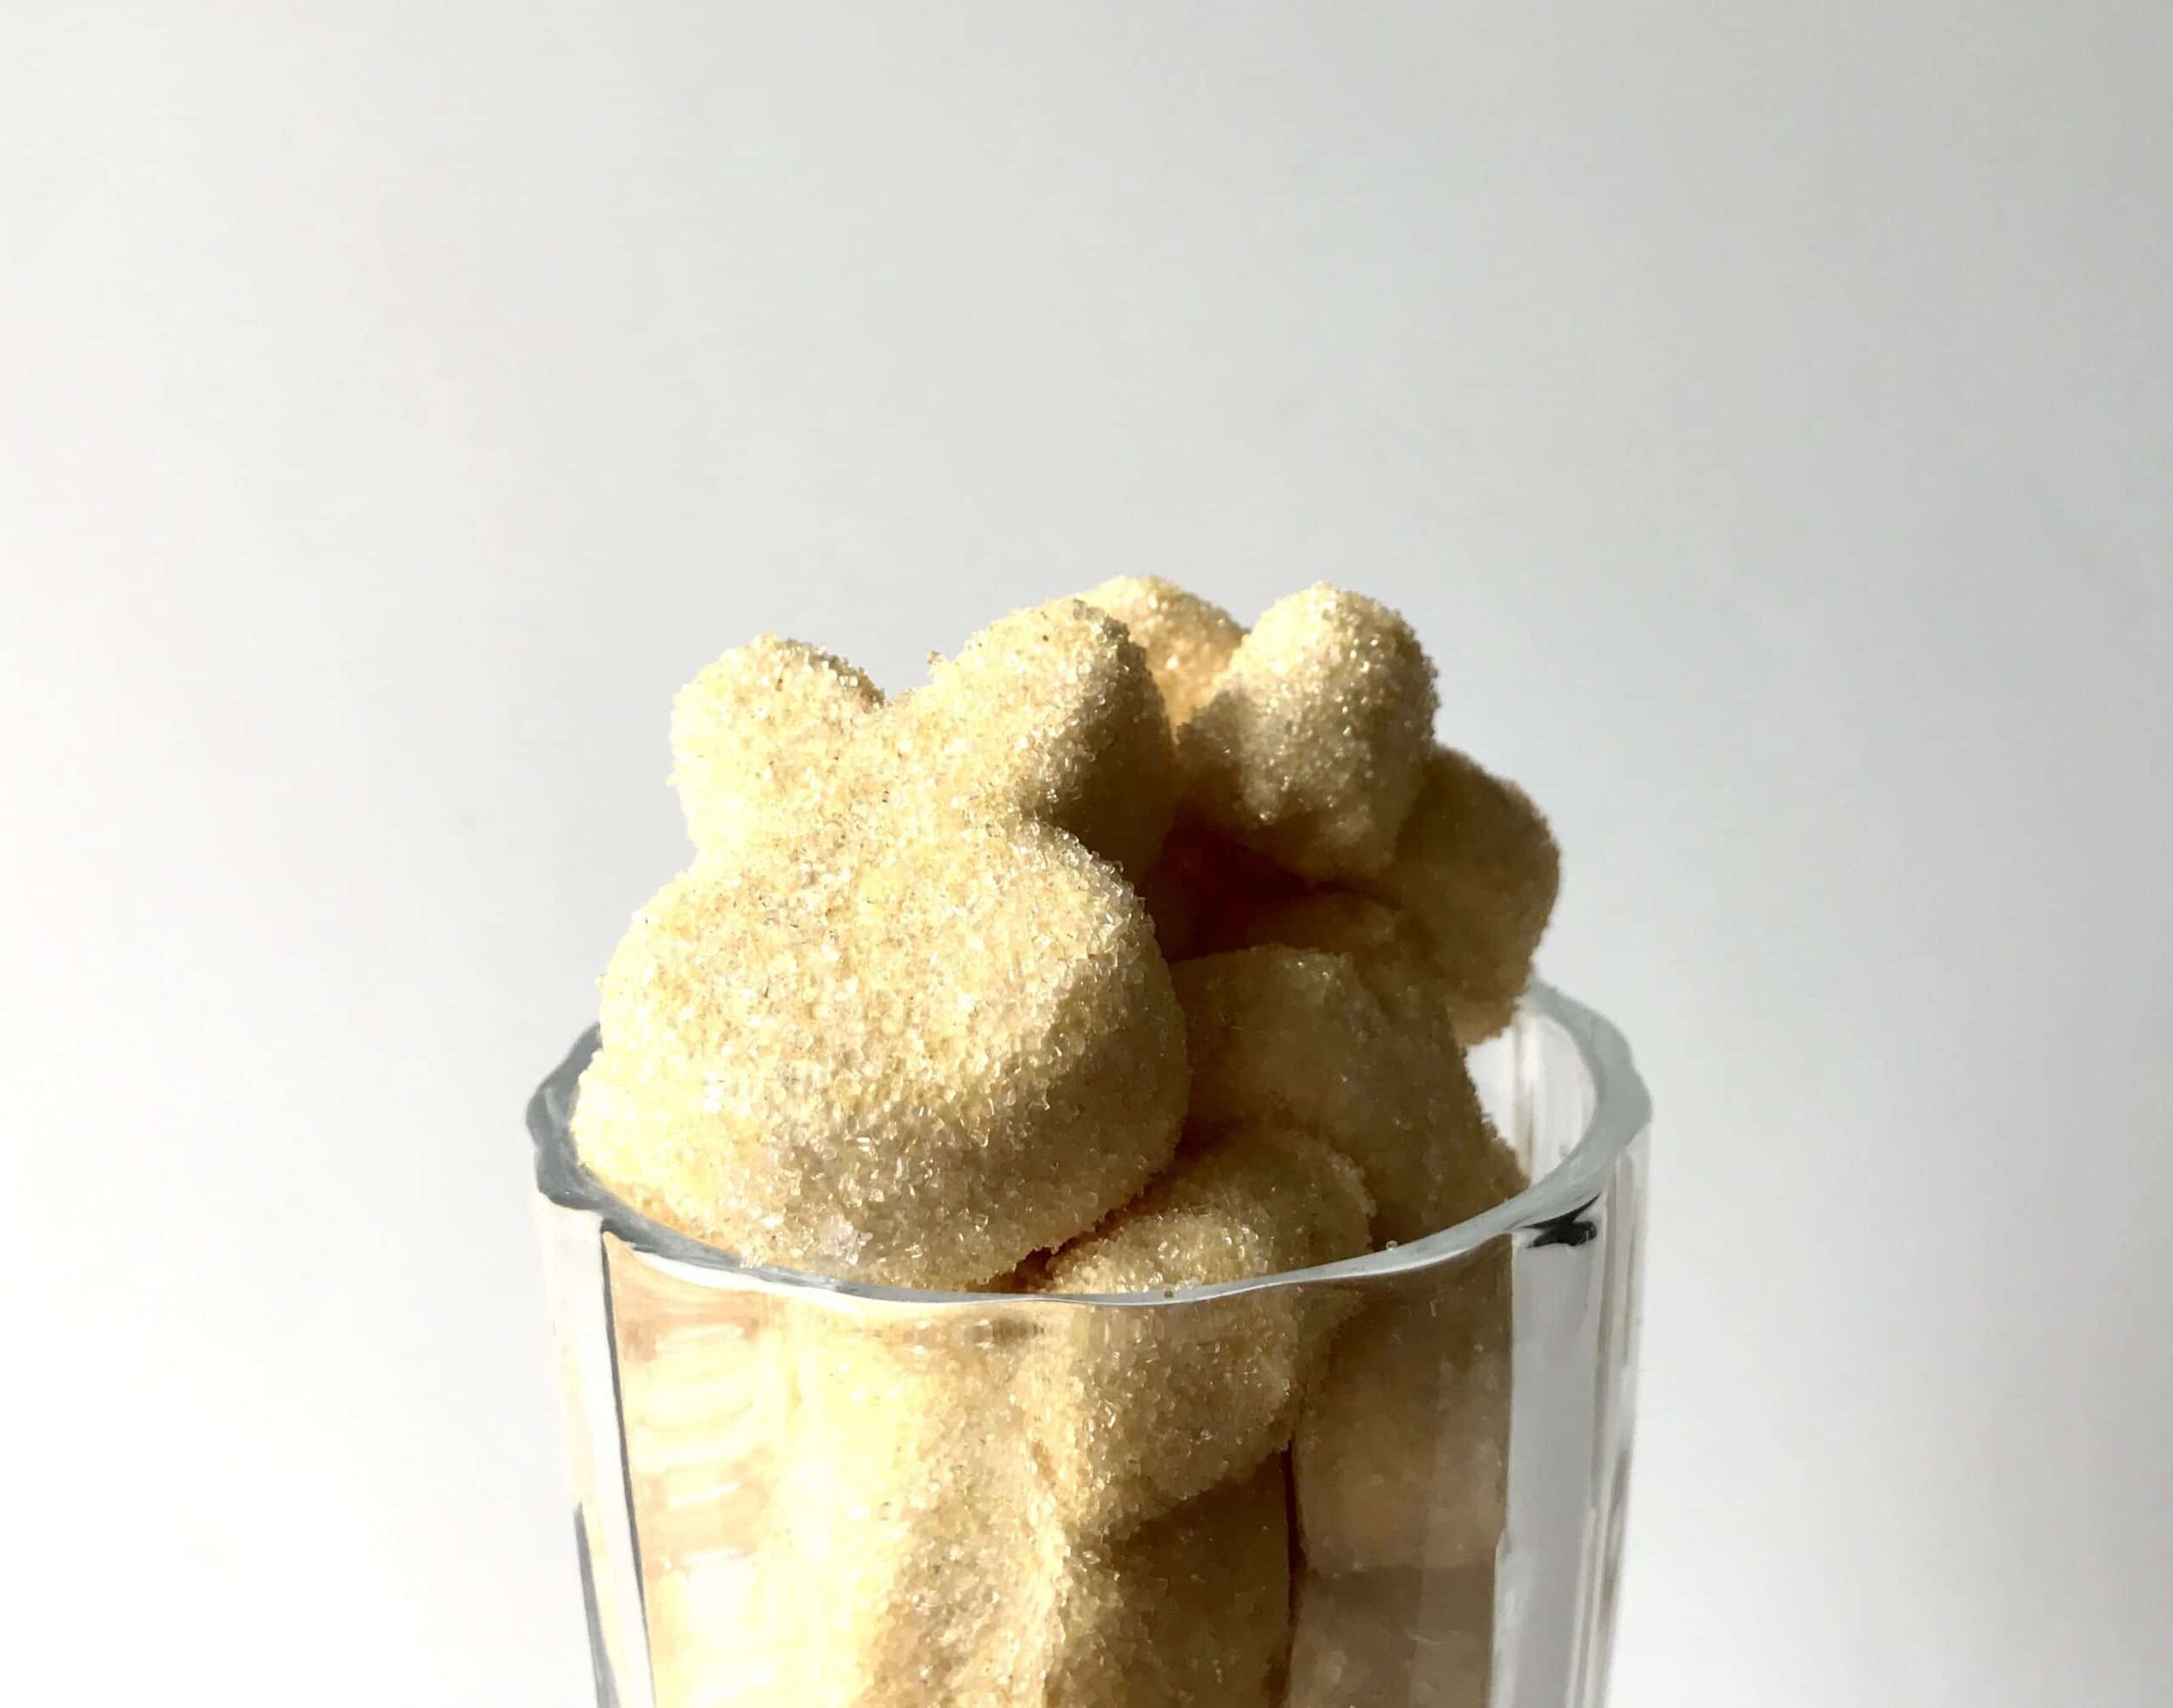
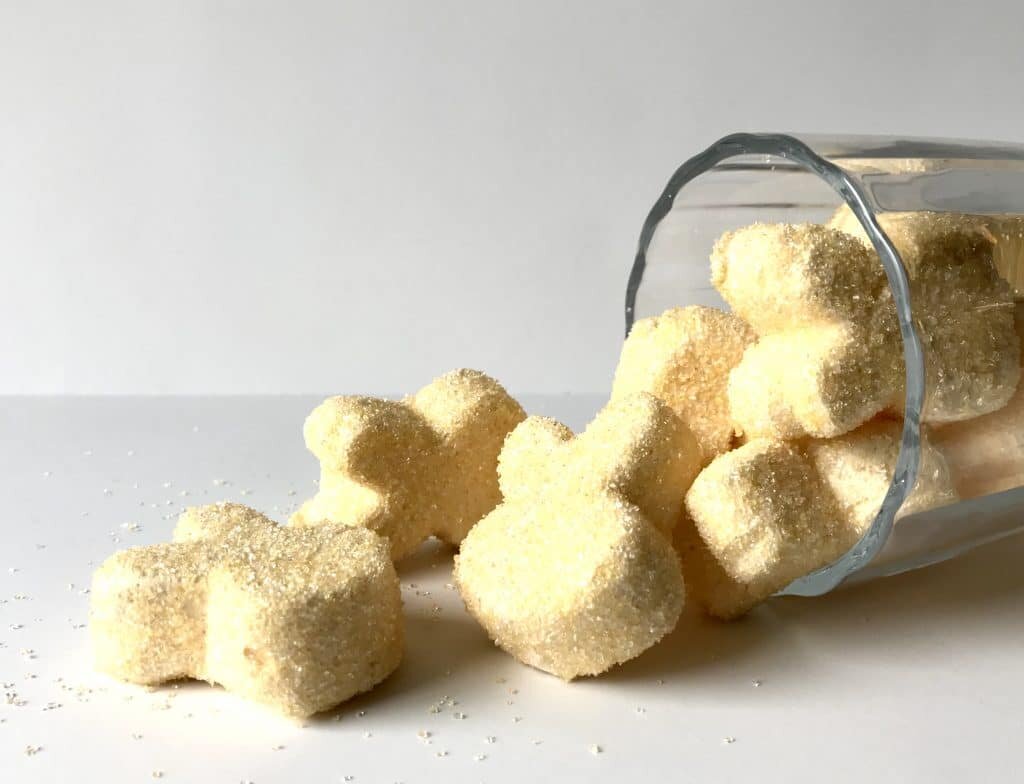
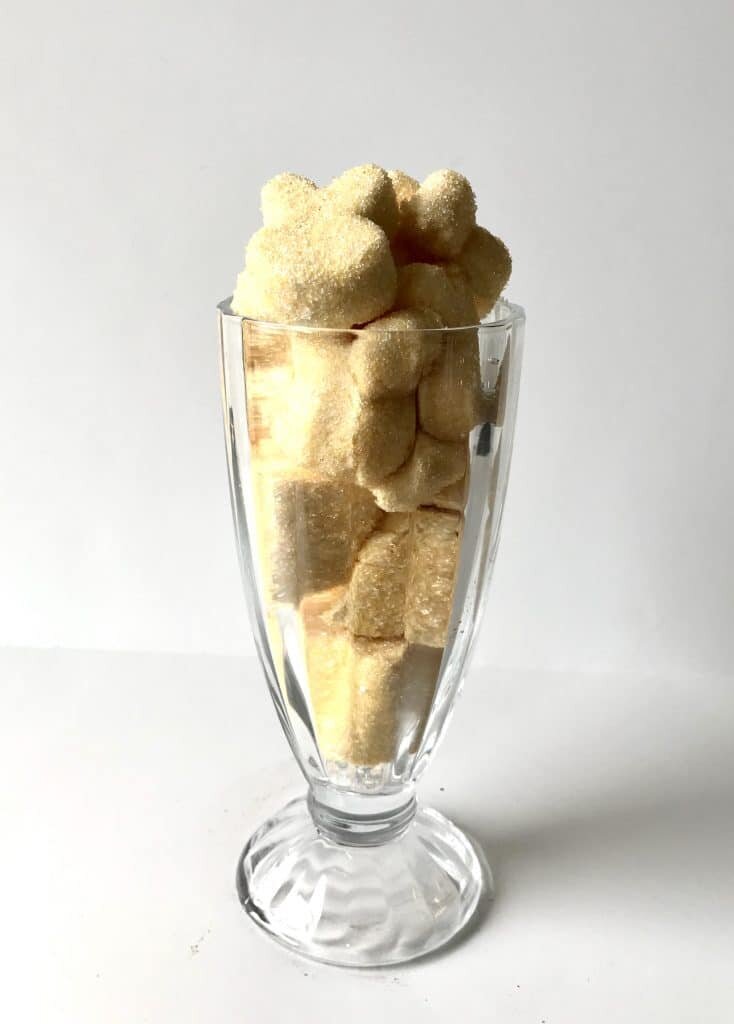
*Disclaimer: This post contains affiliate links. To learn more, please go here.Easter is just around the corner and with these trying times being stuck at home, these homemade mango orange peeps are just what the doctor ordered. Making homemade marshmallows is super easy and most will have all of the ingredients already in their pantry. Only calling for some simple ingredients like sugar, water, gelatin, and corn syrup and the flavor is completely versatile too! You don't have to make them mango and orange, but can do strawberry or just plain lemon. The possibilities are endless!To make the peeps, you'll need either to get a bunny shaped silicone mold to get the cute shapes. The mold will also help to create less waste. Or you can pour the marshmallows directly into a pan and use a cookie cutter and cut out little bunny shapes. This all depends on you and what you are willing to do to get the desired peep shape. You can make these mango orange peeps any way and form you like.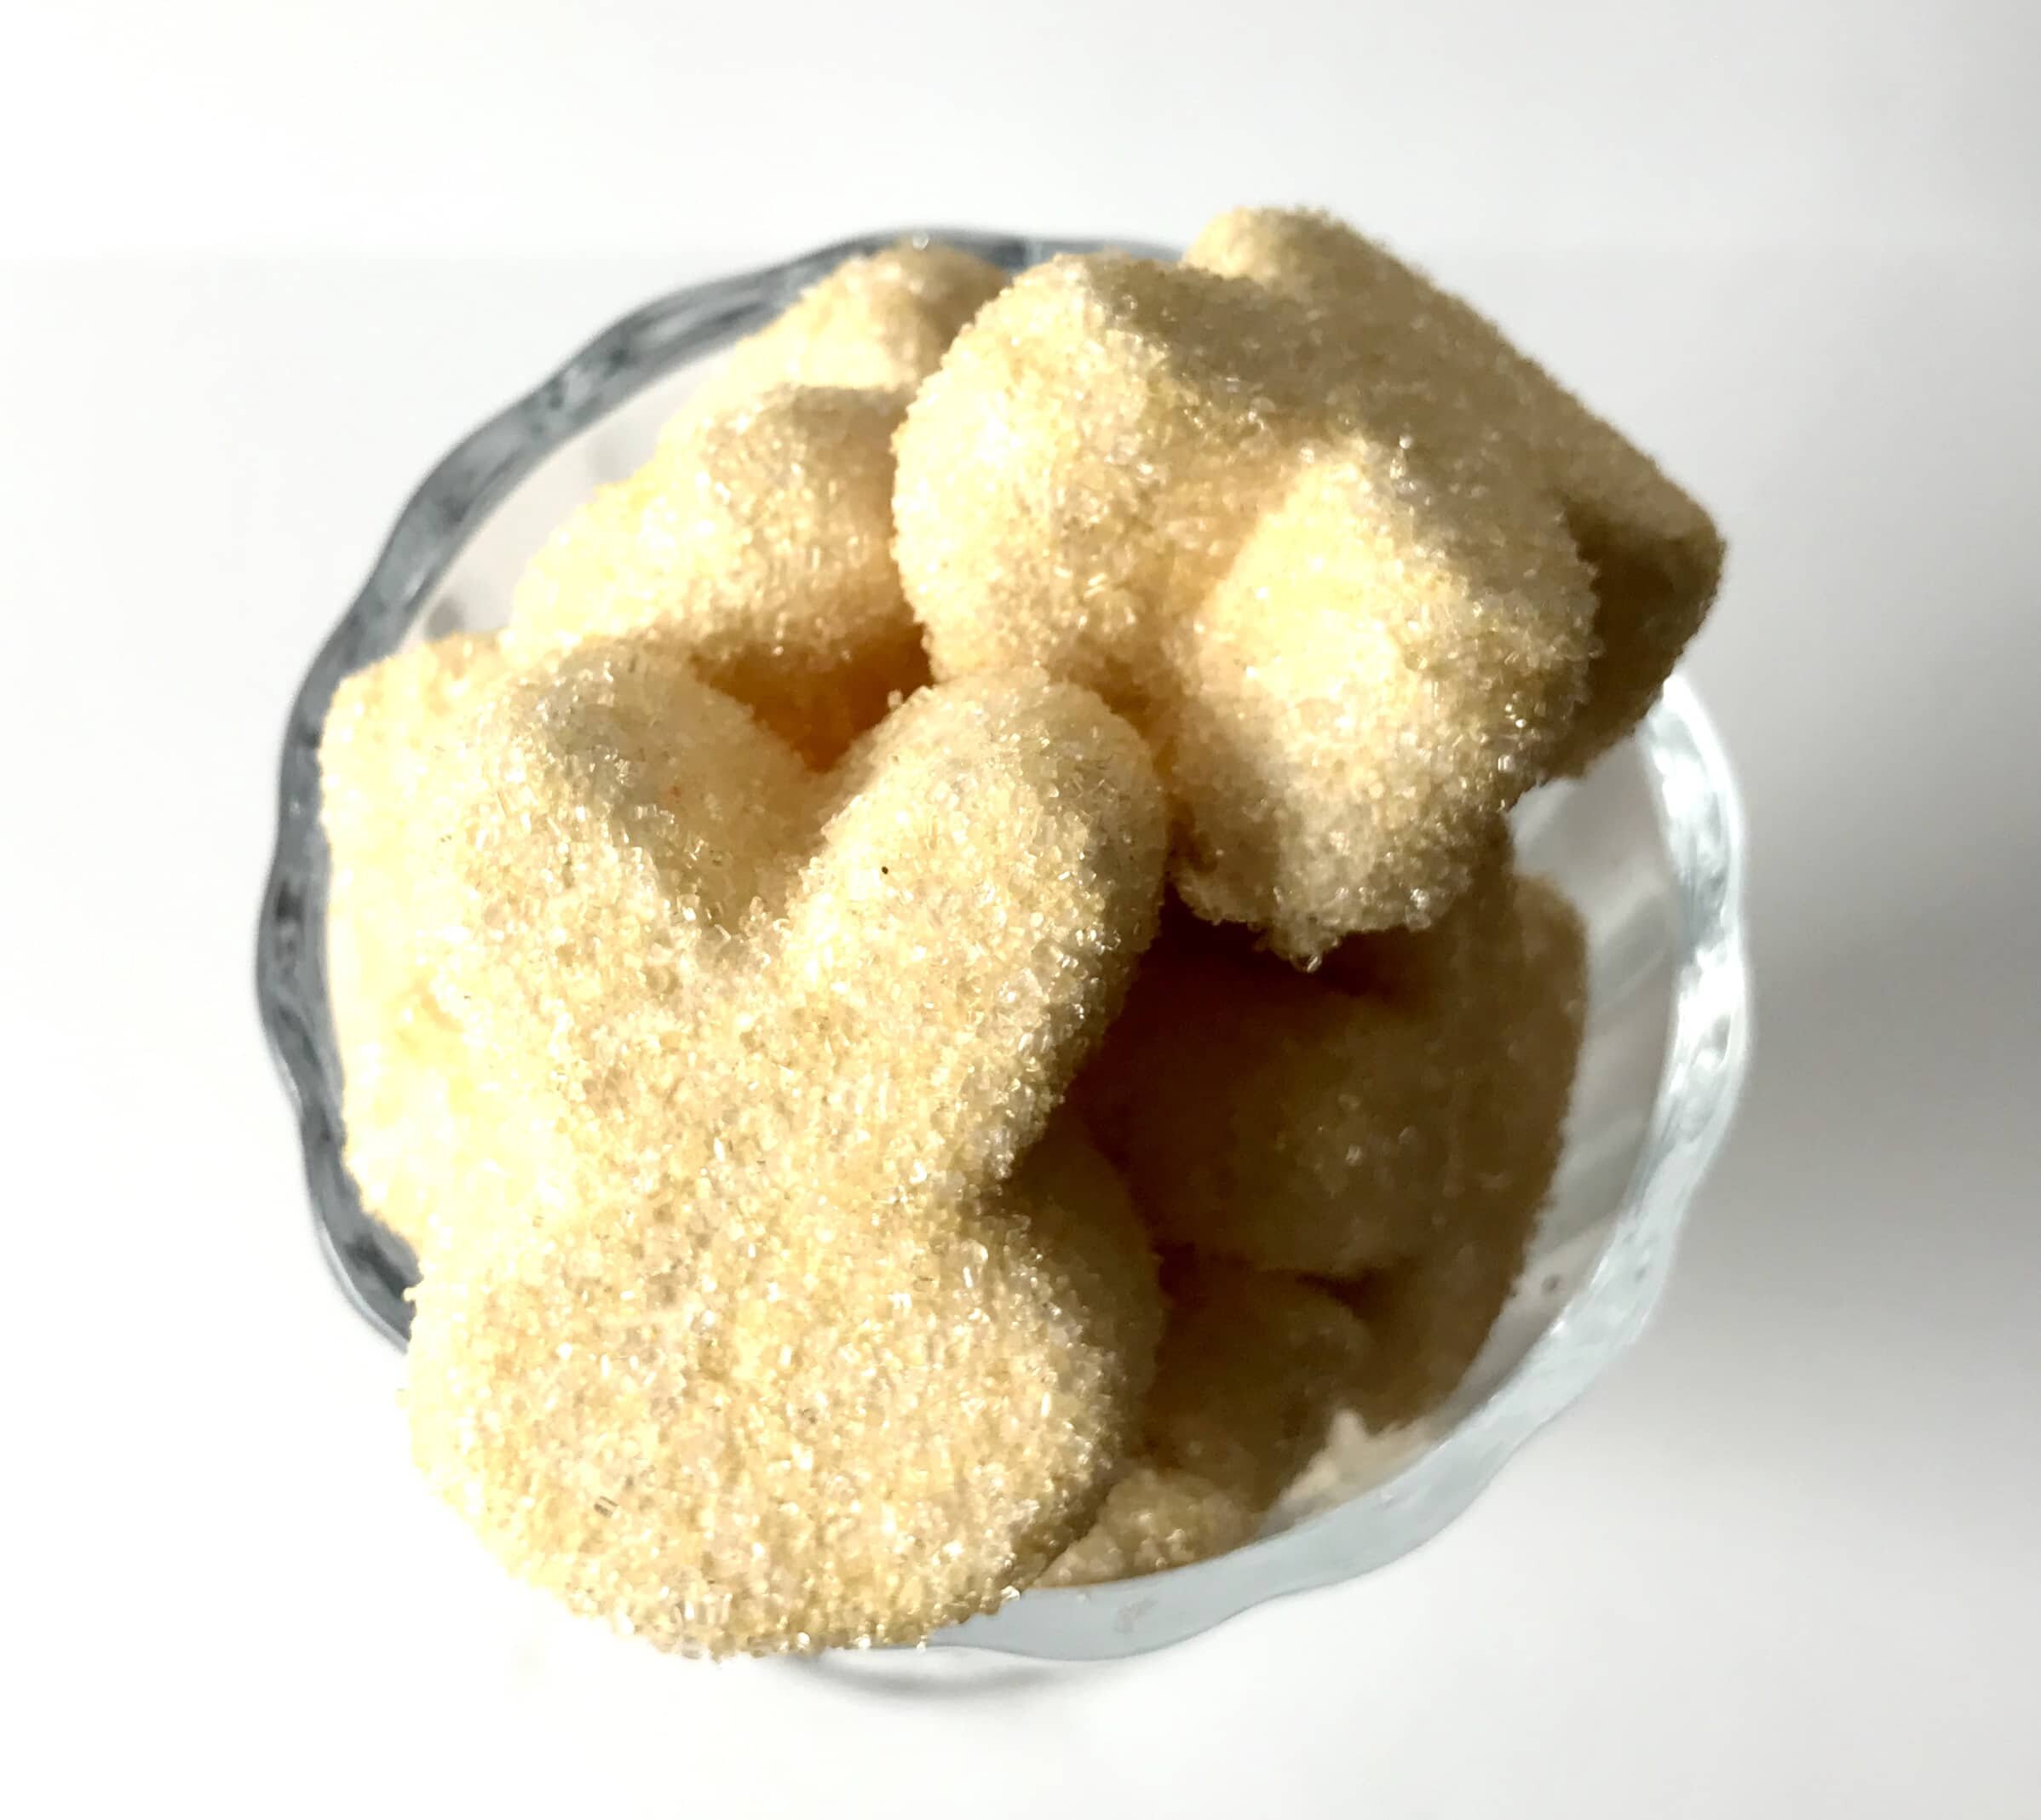
[mailerlite_form form_id=1]
Above are some products that I personally use and recommend for this recipe and to have for everyday use. One thing that you 100% need when making marshmallows is a candy thermometer. It won't be accurate if you use a meat thermometer, plus a candy thermometer is nice since you can just clip it to the side of your pot and not have to hold it over the blistering heat while the sugar cooks. It also tells you what the sugar stage is which is helpful when making marshmallows or any other form of candy.
__________________________________________________________________________
mango orange peeps
a chewy sugary treat that's made with mangoes and fresh orange juice.
- 1 cup mango (fresh or frozen)
- 1 large lemon or orange (zested and juiced)
- 2 tbsp powdered gelatin
- 1/2 cup mango orange puree
- 1 tsp vanilla
- 1 cup granulated sugar
- 1/2 cup corn syrup
- 1/4 cup mango orange puree (add water if it doesn't equal a 1/4 cup)
- pinch salt
- food color (optional)
- colored sanding sugar for decoration
- place the mango, zest and juice into a blender and blend until smooth. strain through a fine mesh sieve.
- place the 1/2 cup puree, vanilla and gelatin in the bowl of an electric mixer fitted with a whisk attachment and let sit until the gelatin blooms. in the mean time place the sugar, corn syrup, salt and remaining 1/4 cup puree into a small pot with a candy thermometer. put over high heat and bring to a boil until it reaches 240 degrees, or softball stage. turn the mixer on low speed and slowly pour the hot sugar into the gelatin mixture. increase the speed and whip until the bottom of the bowl is cool to the touch and the mixture is light and fluffy, about 10 minutes. spray the bottom of a pan with non-stick spray and then pour the marshmallow into the pan. (i used this cute bunny mold and piped the marshmallow in) sprinkle with the colored sanding sugar and let sit until the marshmallow is set, preferably overnight. cut into pieces and sprinkle with more colored sugar around the sides and enjoy.
Pumpkin Mousse Dessert

[wprm-recipe-jump]
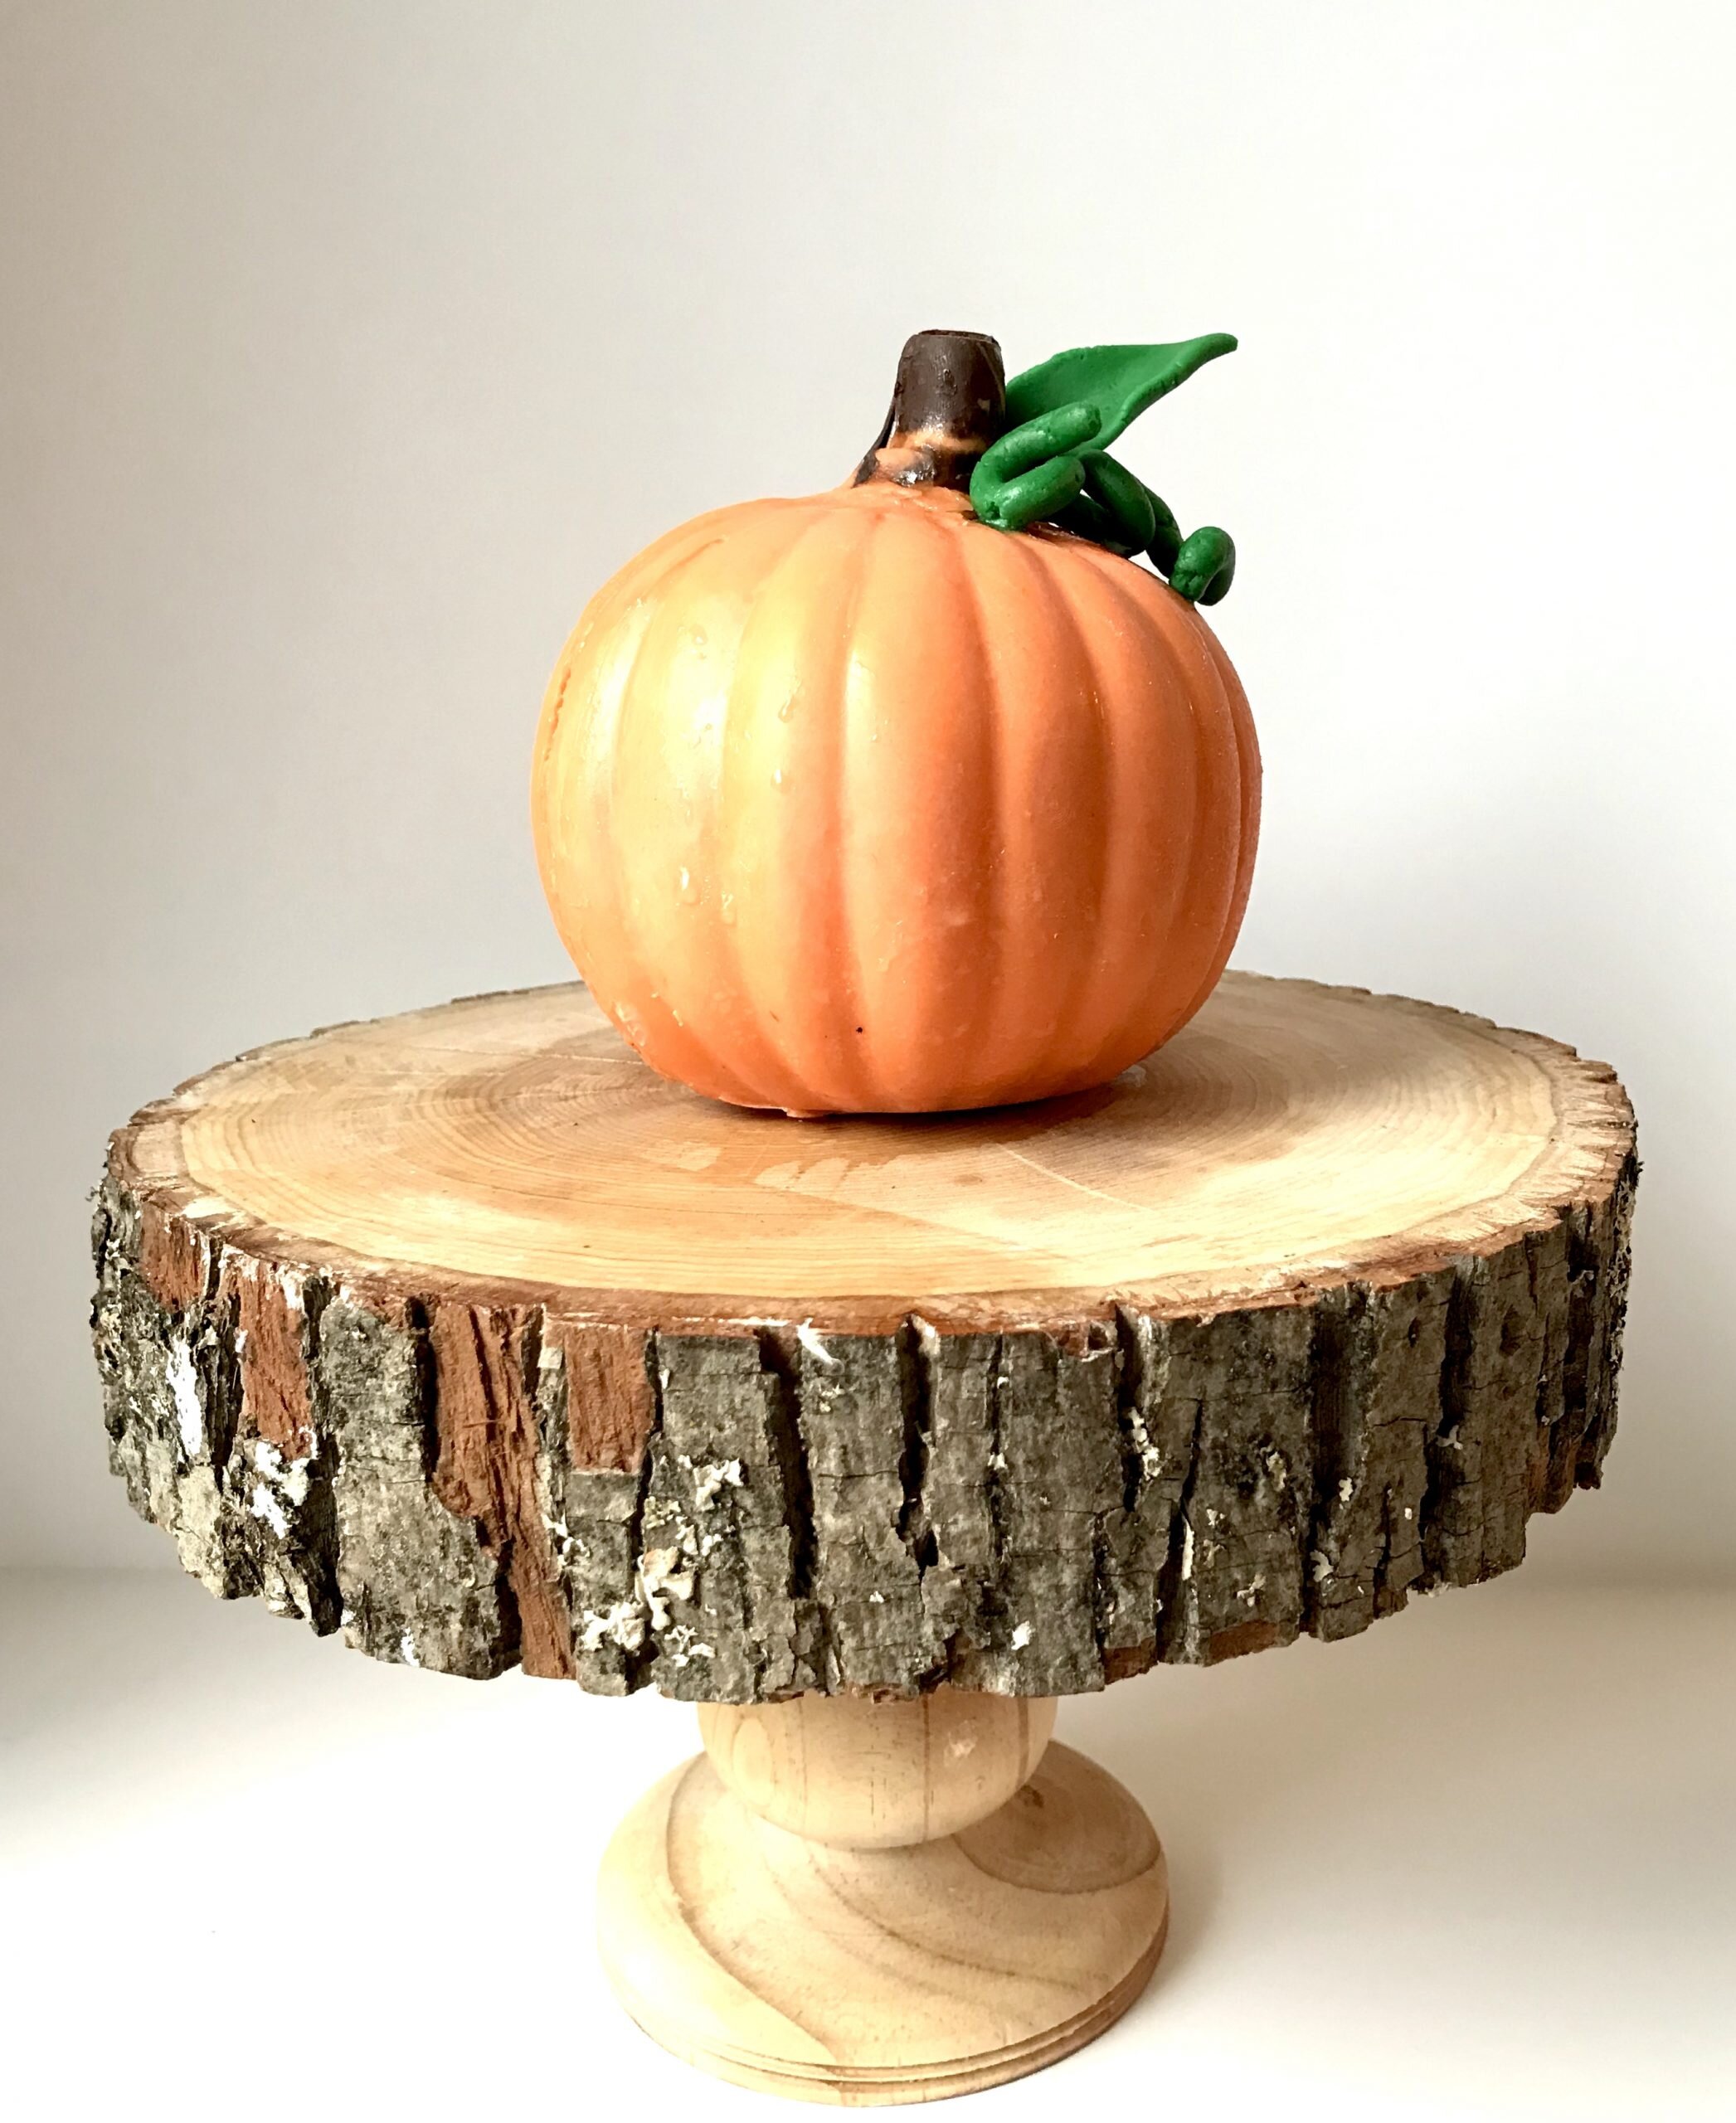
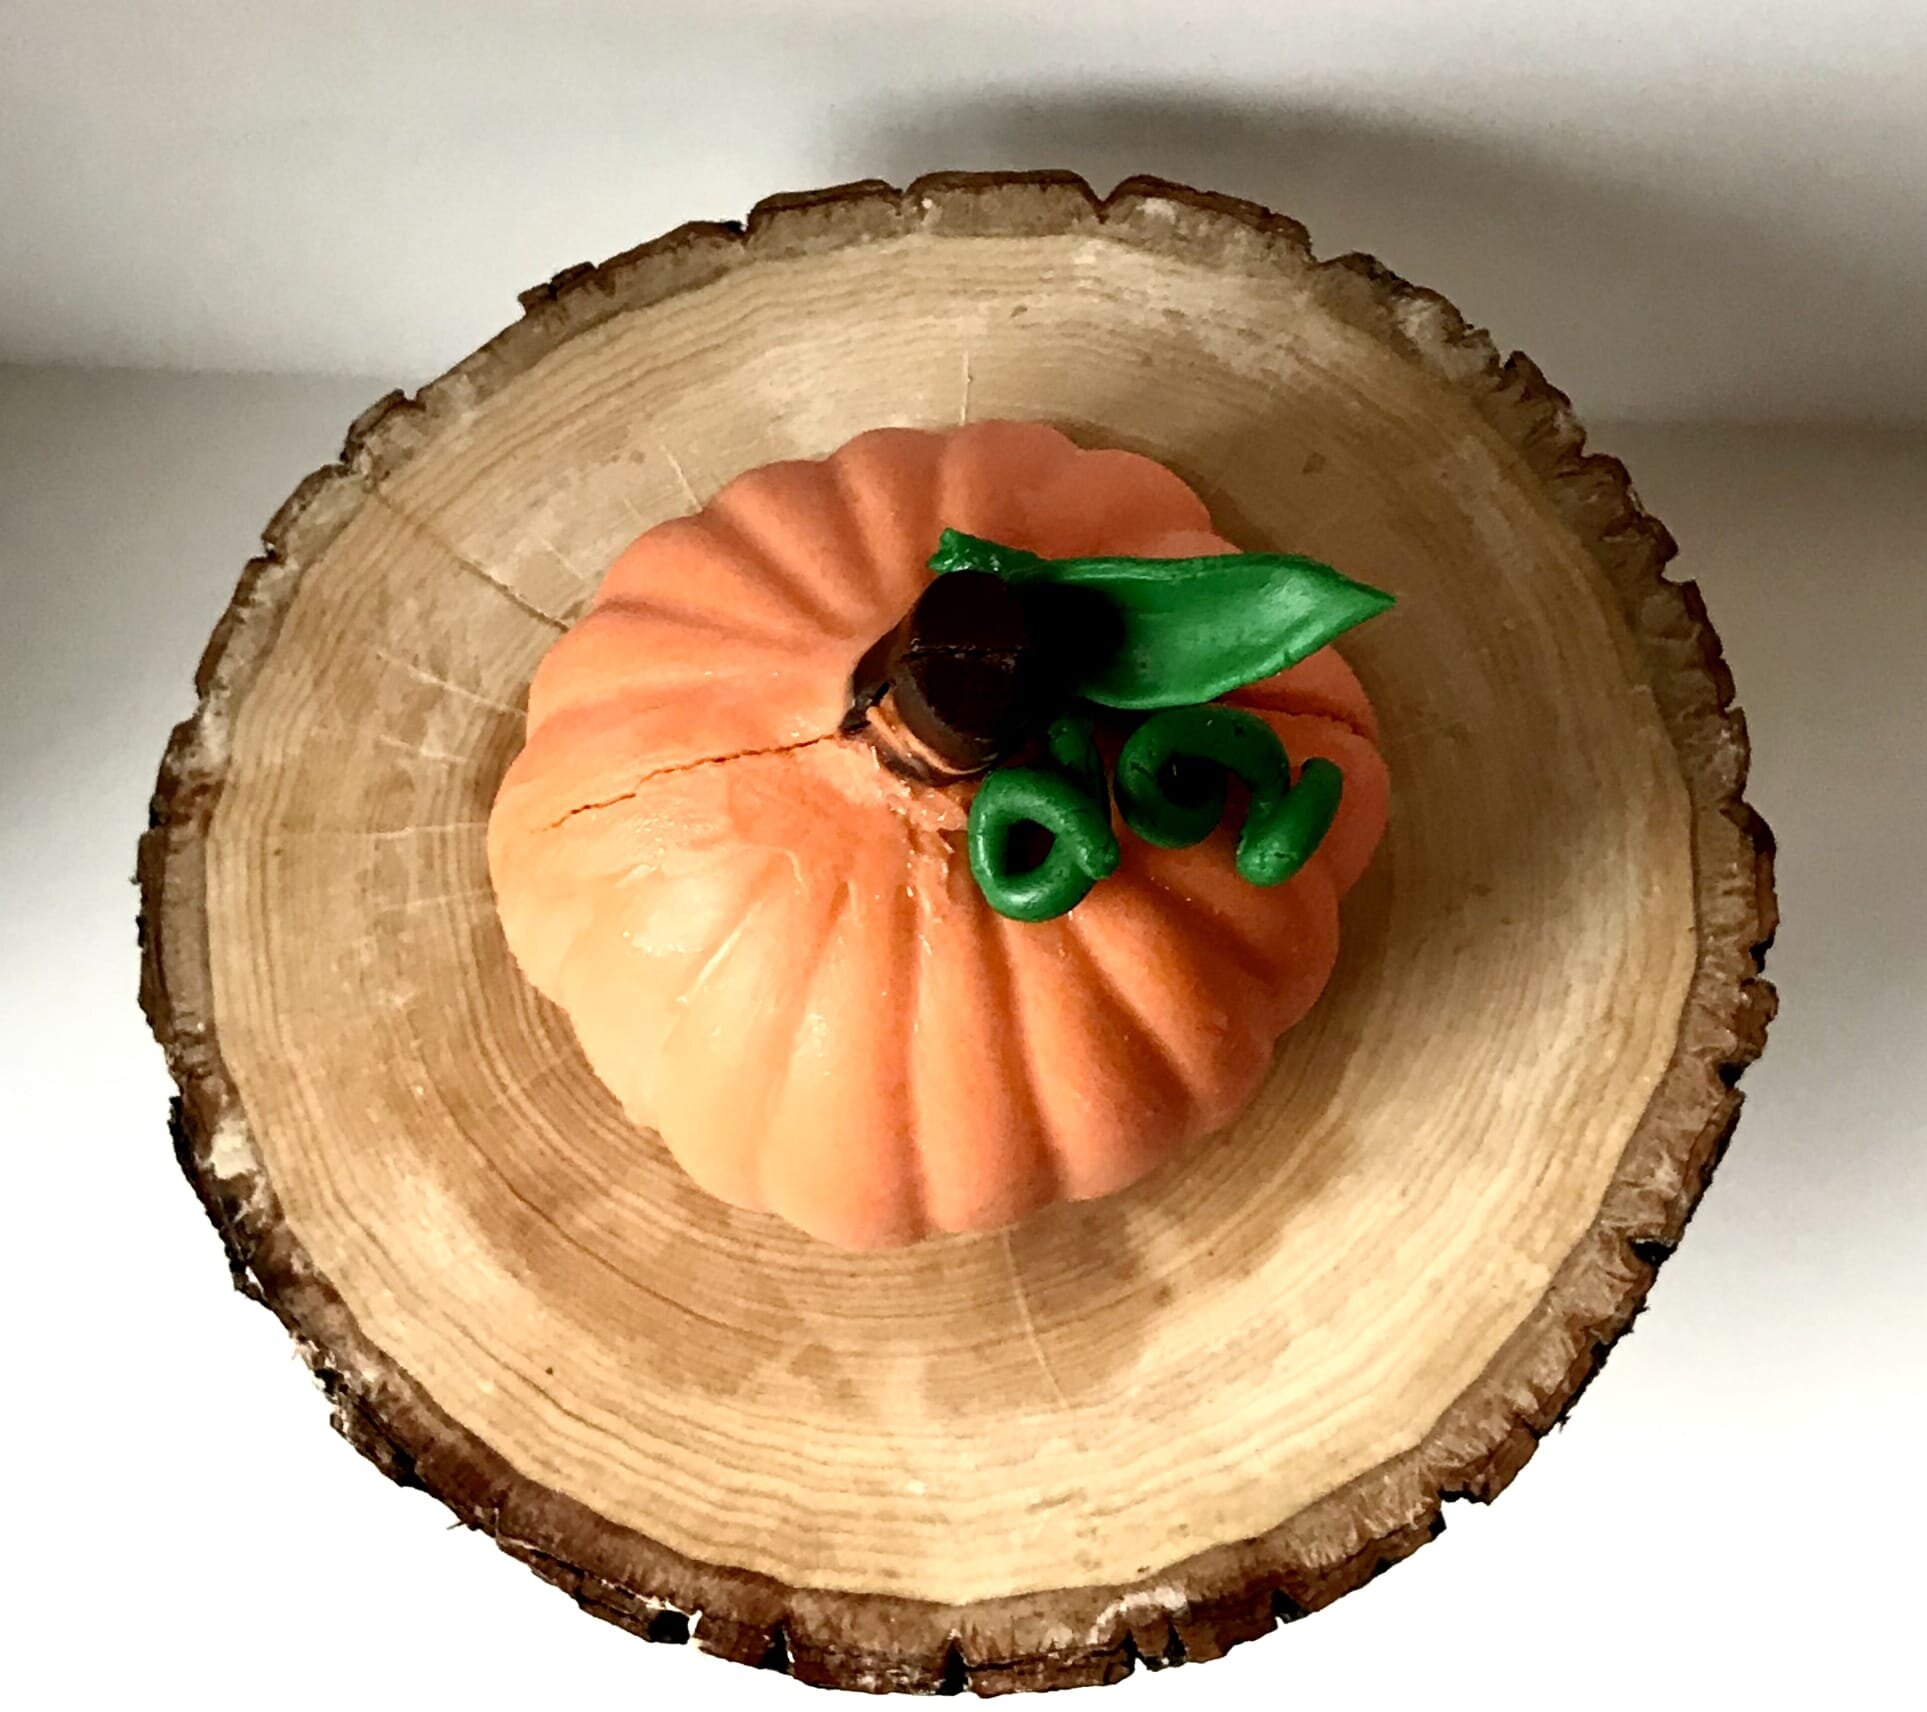
*Disclaimer: This post contains affiliate links. To learn more, please go here.This pumpkin is no ordinary pumpkin. It's a pumpkin mousse dessert! A chocolate pumpkin that's filled with a creamy deliciousness that will have you replacing the old basic pumpkin pie this year.It's a pumpkin chocolate shell that's filled with a creamy pumpkin mousse with little drops of chocolate ganache and sweetened cream cheese. This dessert is pure heaven in every way for a family event this fall. If you can't find the 3D pumpkin mold, than use a different mold. I'm sure there is a 3D turkey that would be so cute for Thanksgiving!In this dessert I added in some extras as mix-ins. I made a quick chocolate ganache and just cut up a few mini chunks of cream cheese. Now you don't have to use these exact mix-ins I used. You can use chocolate chips, pecans, caramel pieces, and even some ginger cookie chunks too! Make it yours!
[mailerlite_form form_id=1]

Above are some products that I personally use and recommend for this recipe and to have for everyday use. Essentials for making this dessert is the pumpkin mold and the coating chocolate. If you use regular chocolate you won't get that color to make it look like a pumpkin and could bloom.
________________________________________________________________________
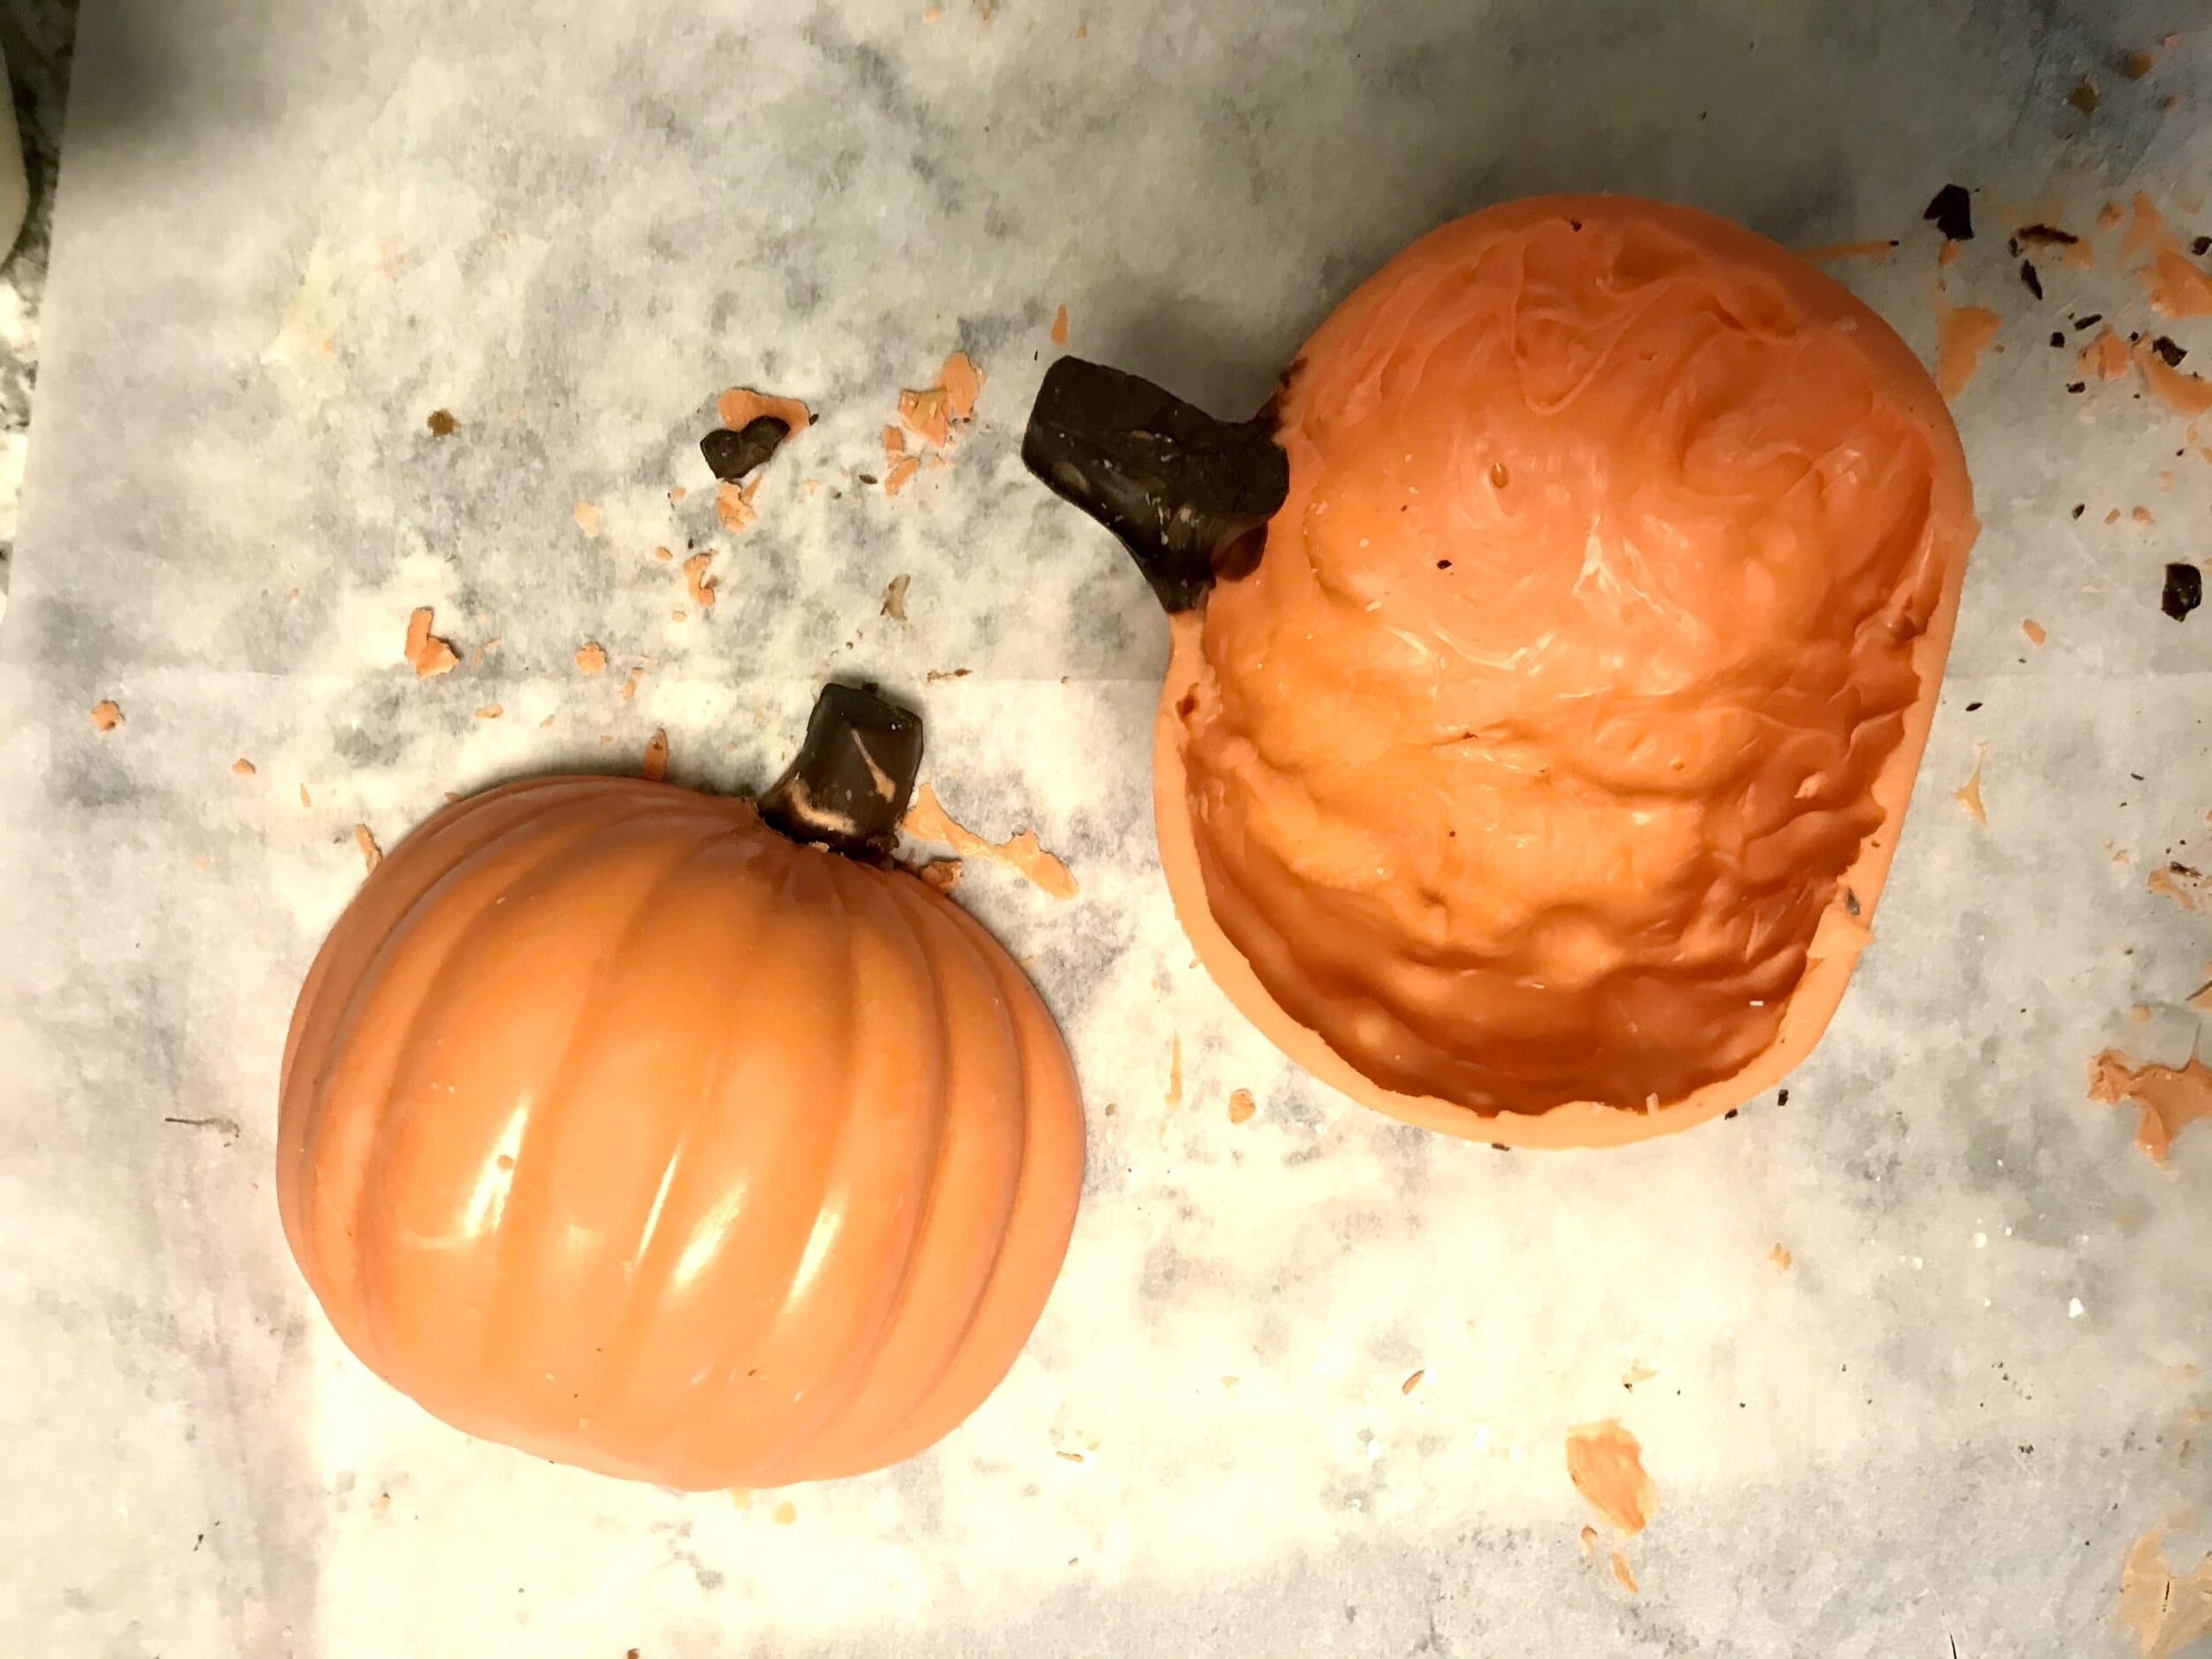

pumpkin mousse dessert
an adorable pumpkin chocolate shell that's filled with pumpkin mousse, chocolate ganache, and cream cheese.
chocolate shell
- pumpkin mold
- orange candy melts
- brown candy melts
pumpkin mousse
- 1/2 cup milk
- 1 tsp vanilla extract
- pinch salt
- 4 egg yolks
- 1/4 cup pumpkin puree
- 1/3 cup brown sugar
- 1 tsp cinnamon
- 1/2 tsp ginger
- 1/4 tsp cloves
- 1 1/2 tsp gelatin
- 1 tbsp water
- 1/2 cup heavy cream
fillings
- ganache, cream cheese, chocolate chips, nuts, caramel pieces, etc...
chocolate shell
- start by taking the orange candy melts and melting it. fill the pumpkin part of the mold and let it sit for about a minute. invert the molds to let the chocolate fall out to create the chocolate shell. scrape down the sides to create that even edge. take the brown chocolate and melt that and fill in the stem part of the pumpkin. i found it easier to have that as a solid part and not inverting the mold to let the chocolate drip out. let the chocolate set. i find it easier to put it into the freezer to pop the chocolate shells out.
pumpkin mousse
- bloom the gelatin in the 1 tbsp of water and set aside. in a bowl, combine the egg yolks, sugar, pumpkin puree, cinnamon, ginger, and cloves. meanwhile, bring the milk, vanilla and salt to a simmer. once hot, slowly temper into the yolk mixture. do this by pouring a little amount of the hot milk into the yolks and whisking together. keep doing this until all of the milk is added to the yolks. place the mixture over a double boiler and heat until it reaches 140 degrees F. and then stir in the bloomed gelatin. place the mixture into a bowl and wrap with cling wrap and put in the fridge overnight, or until firm.
- whip the heavy cream until stiff peaks form. add in the firm and chilled pumpkin mixture and whip until fully incorporated. place into the fridge until ready to use.
assembly
- start by taking both parts of the chocolate shell and add in a thin layer of the pumpkin mousse. sprinkle in some of the fillings you have chosen and continue to layer each component.
- don't overfill the chocolate shells, you want to be able to seal it without having any of the mousse exploding out of the sides.
- melt a little of the orange candy melts that you have leftover and pipe a thin line along the edges of the chocolate shell. carefully take both parts and carefully put them together to get the 3D pumpkin.
- use a little bit of green fondant to create the vines and leaves for the pumpkin and glue on with a little more of the orange chocolate.
- keep refrigerated until ready to serve.
Slice and Bake Cookies

[wprm-recipe-jump]
*Disclaimer: This post contains affiliate links. To learn more, please go here.
This was originally supposed to be posted back in February, but I got into a funk and just didn't feel like doing anything at all. So the pictures aren't the best but at least these slice and bake heart cookies themselves are pretty freaking great. Plus they're cute!
You can use this technique to make all kinds of cute slice and bake cookies. Instead of using a heart shaped cutter you could use a Christmas tree for the holidays or a pumpkin for Halloween. There are really so many different ways you could go about making these cookies as your own! You can even try to make your own design! How fun would that be?!
[mailerlite_form form_id=1]
Above are some products that I personally use and recommend for this recipe and to have for everyday use. One thing these slice and bake heart cookies have in them is princess extract. Now this extract is delicious and is one of my favorite things to have in my kitchen at all times. It's a mix of vanilla, lemon and almond extracts and when they are all combined they make an addicting concoction.
_________________________________________________________________________
heart cookies

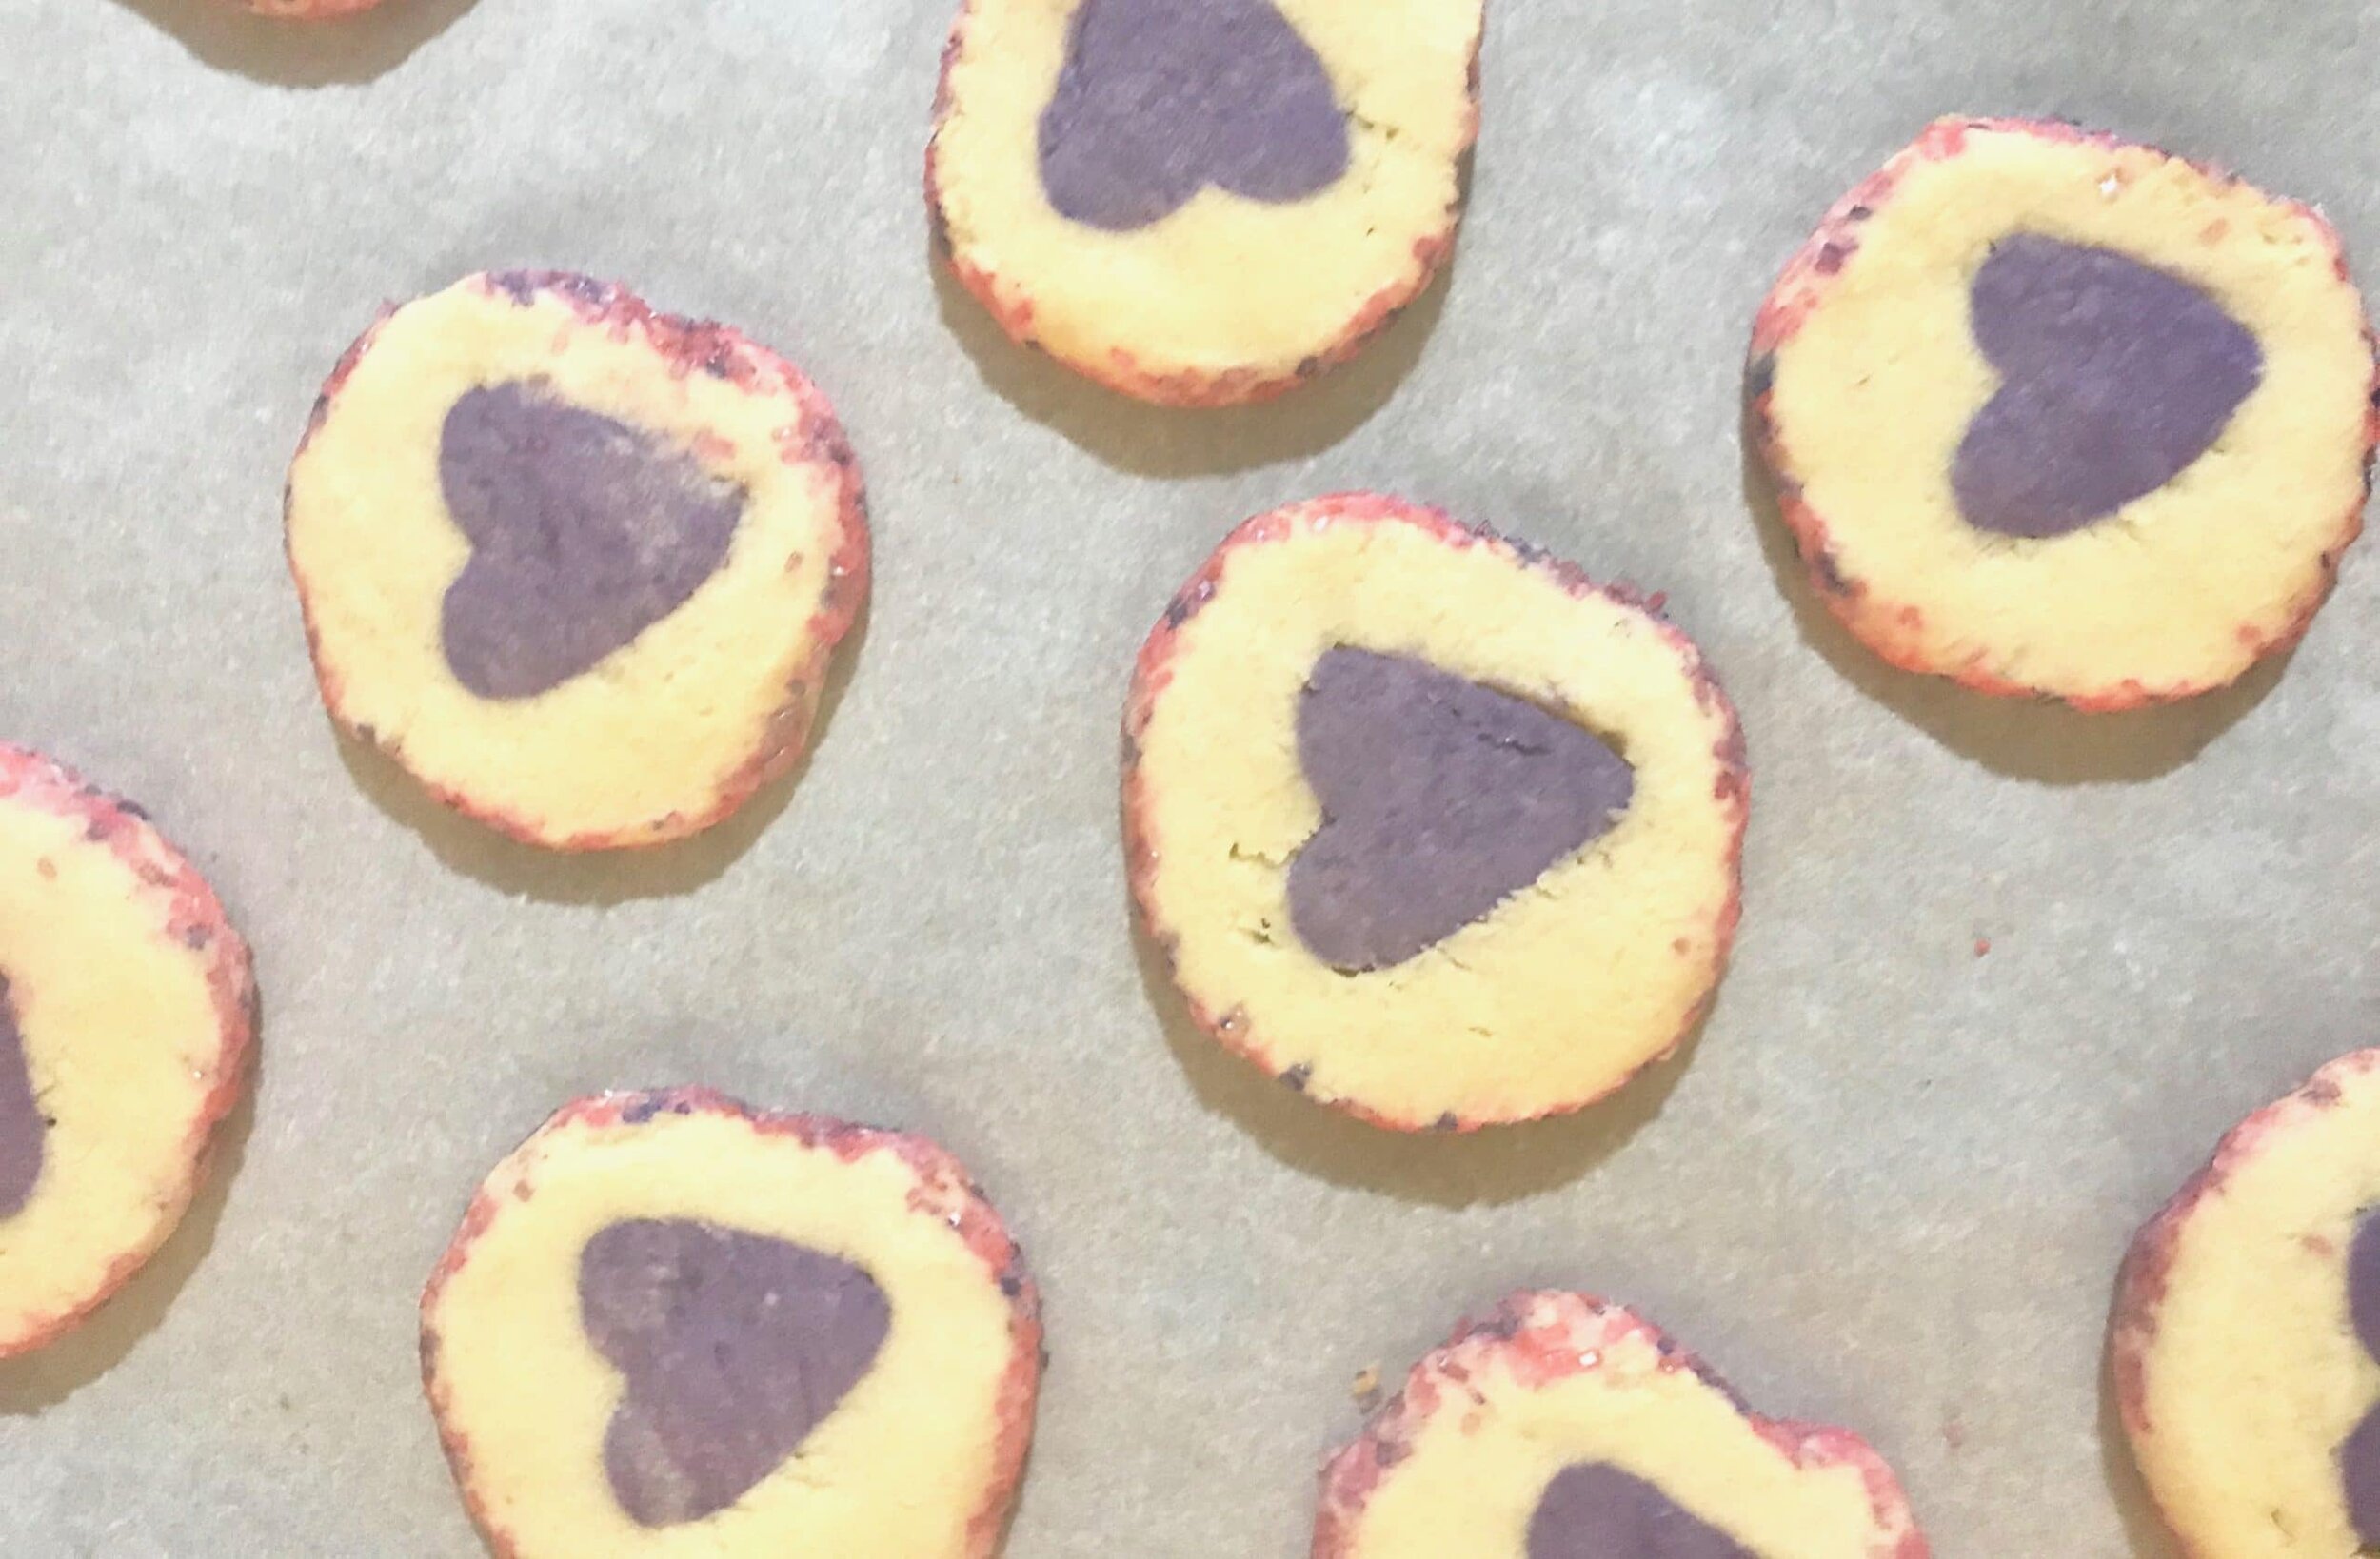
cute slice and bake cookies with a heart in the middle and surrounded with sprinkles. perfect for valentines day
- 2 sticks unsalted butter
- 3/4 cup granulated sugar
- 1 egg
- 1 tsp princess extract
- 1 1/2 tsp baking powder
- pinch salt
- 2 1/2 cup all-purpose flour
- food coloring
- sprinkles
-
preheat the oven to 350 degrees F. in a bowl, combine the salt, baking powder, and flour; set aside. in another bowl, combine the butter and sugar and cream together with a paddle attachment until fluffy, about 1 minute. scrape down the sides of the bowl then add in the egg and princess extract. mix until incorporated, about 1 minute. scrape down the sides of the bowl again and then gradually add in the dry ingredients.
-
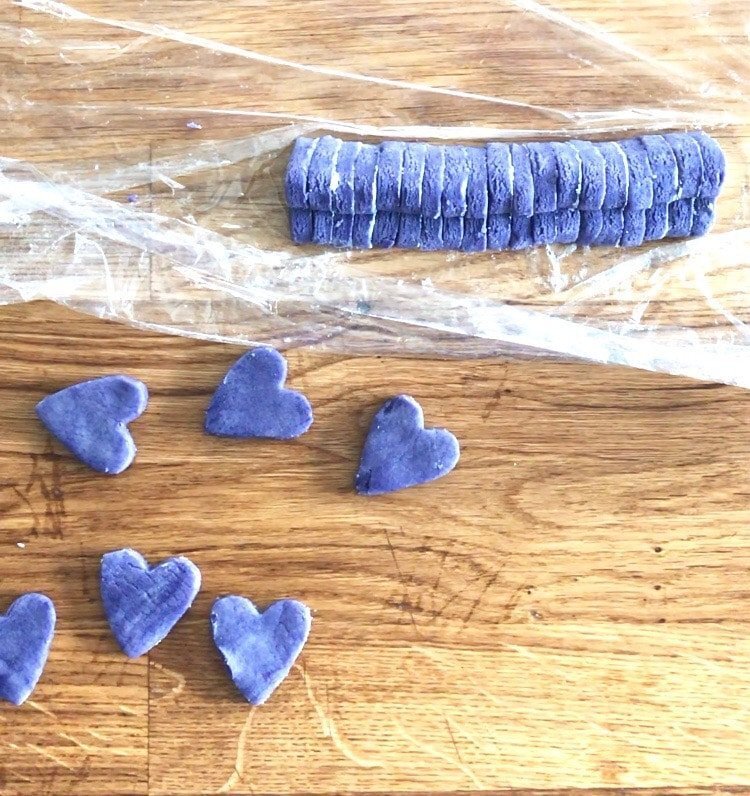
separate the dough in 1/4 and 3/4. take the 1/4 amount of dough and color it with your desired color of choice. roll out the colored dough and using a small heart cutter, cut out multiple hearts shapes. stack the heart shapes and place on some cling-wrap and roll it. freeze the dough for about 15 minutes until firm.
-
taking the remaining dough, roll out multiple long ropes of the dough and then carefully mold them around the heart shaped log. freeze for a couple minutes until firm and i found it easier to rub a little water on the dough and then press the sprinkles in firmly. carefully cut the cookies with a sharp knife into 1/4 inch thick pieces. place on a lined sheet pan and bake for 10-12 minutes. let cool.
Cookie Dough Mousse
[wprm-recipe-jump]
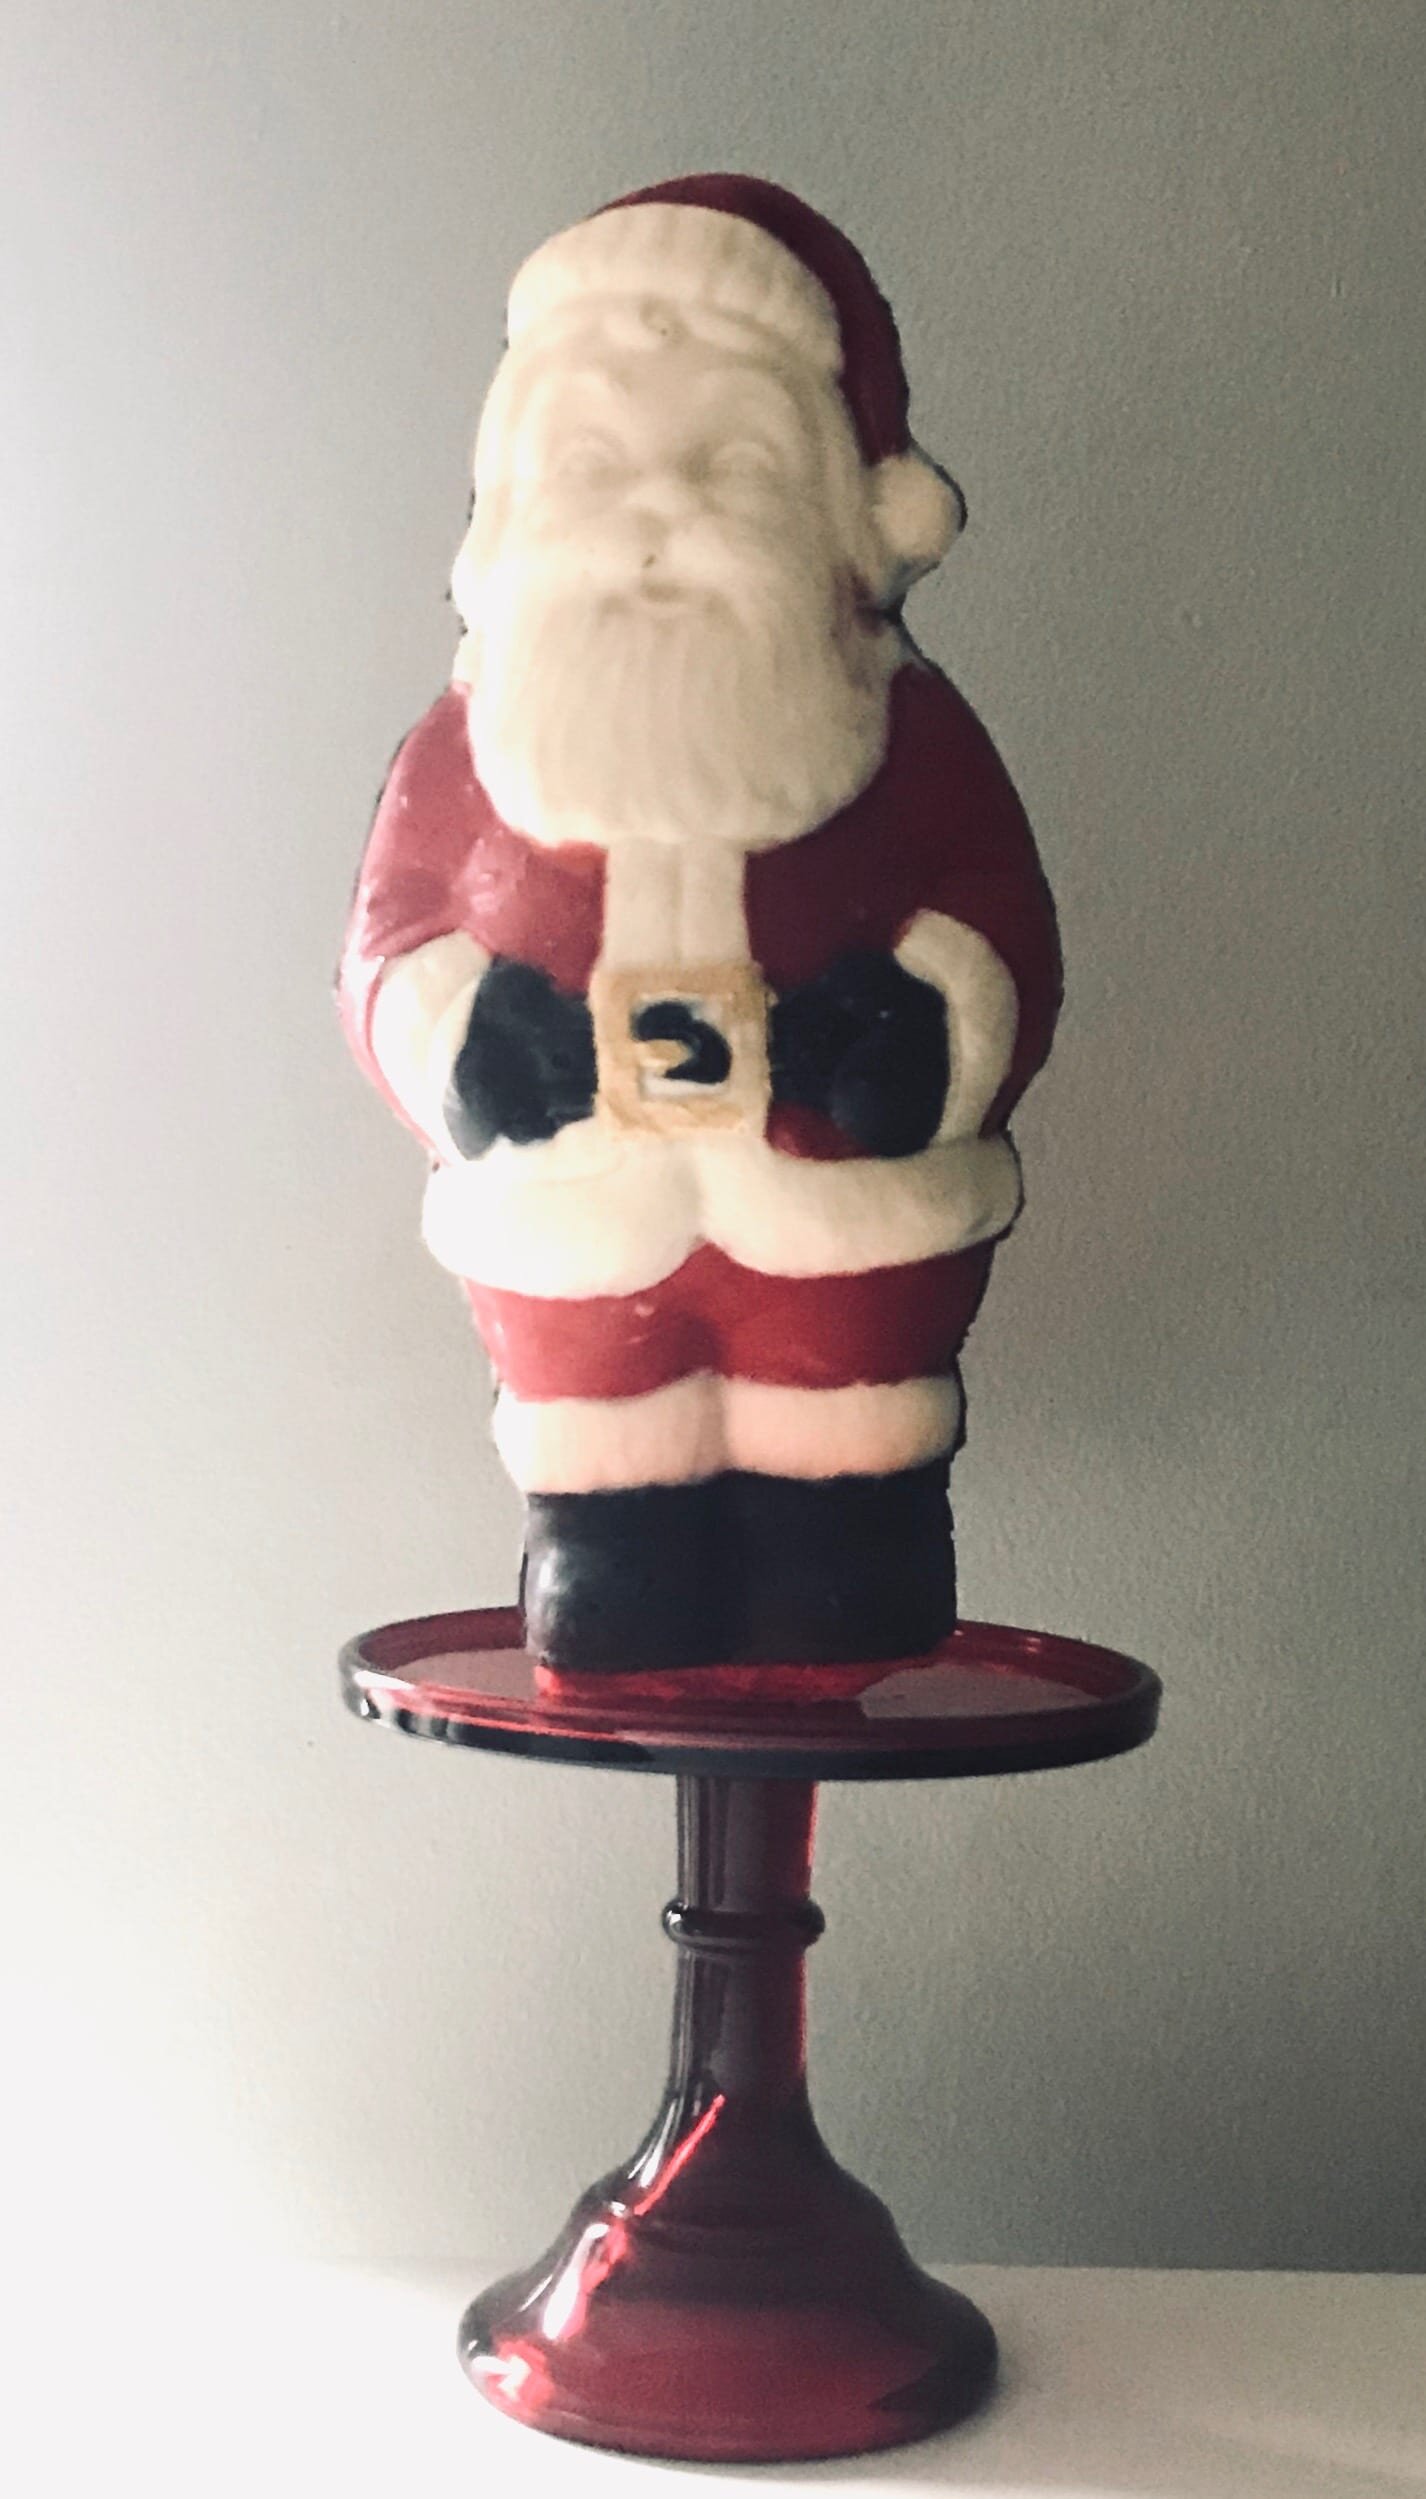
Cookies for Santa mousse dessert.
*Disclaimer: This post contains affiliate links. To learn more, please go here.
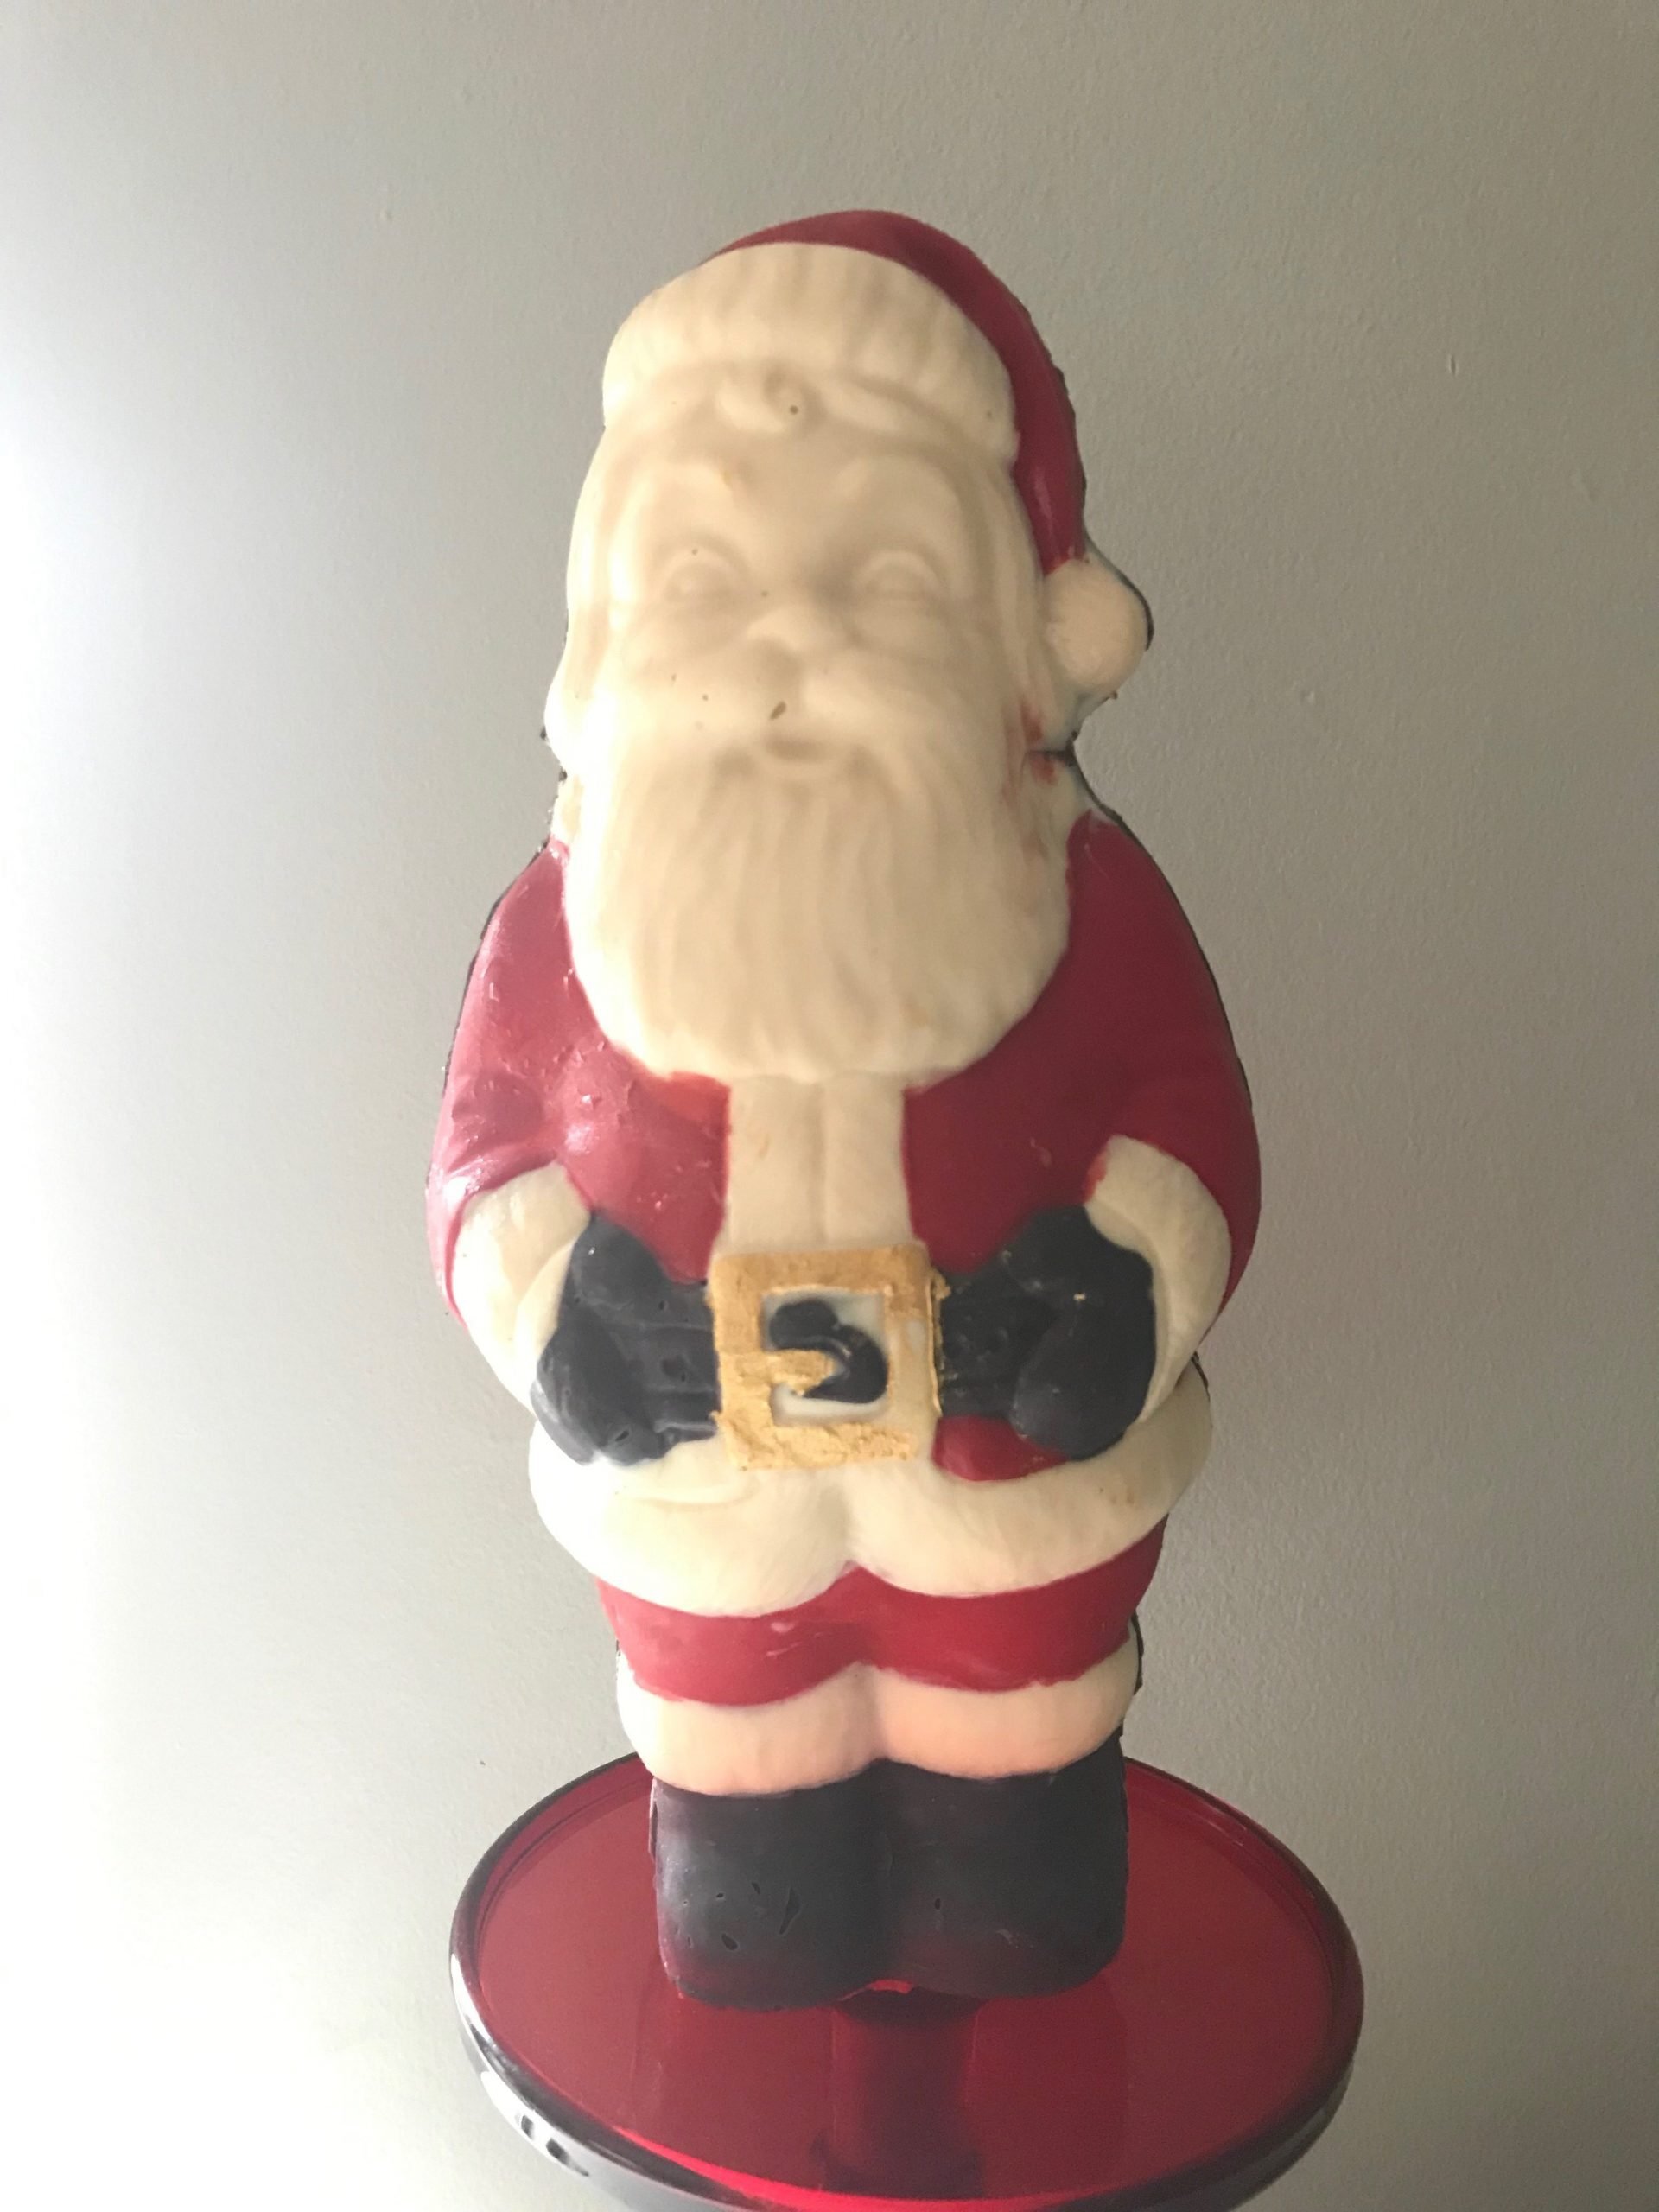
This is really the cutest most delicious thing that I've made in awhile. I found this adorable Santa chocolate mold on amazon and knew that I could have a little fun with it for a dessert. What's better than cookie dough and mousse for this??? It's definitely a project but the end result will have everyone asking you how in the world you made it.
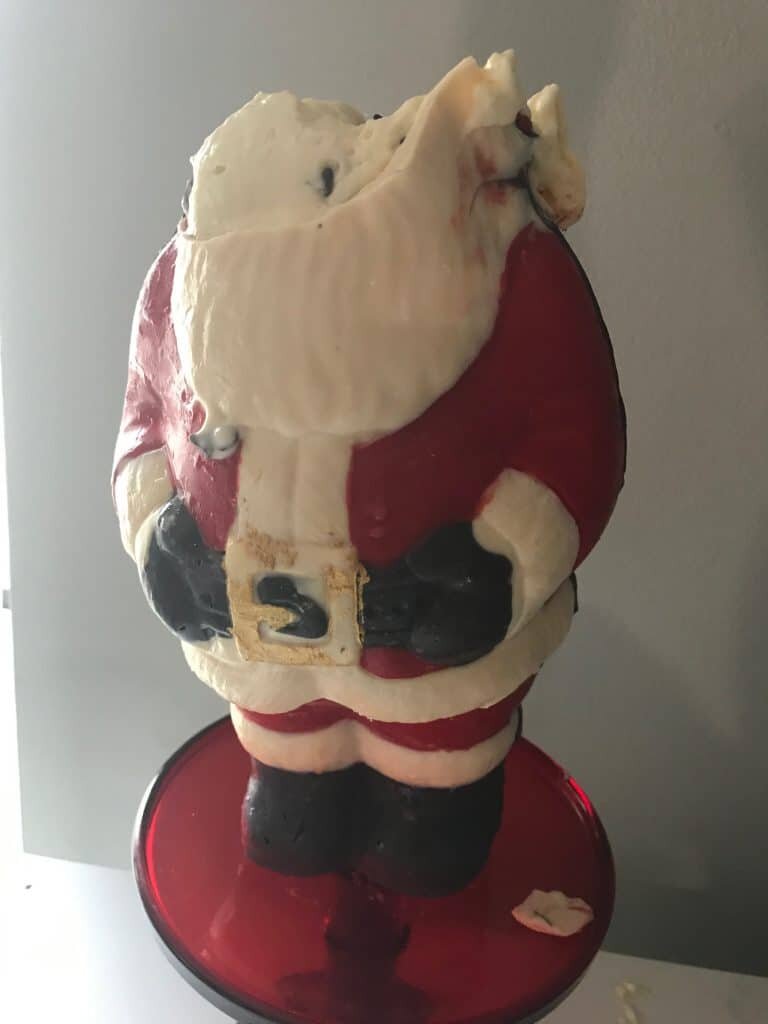
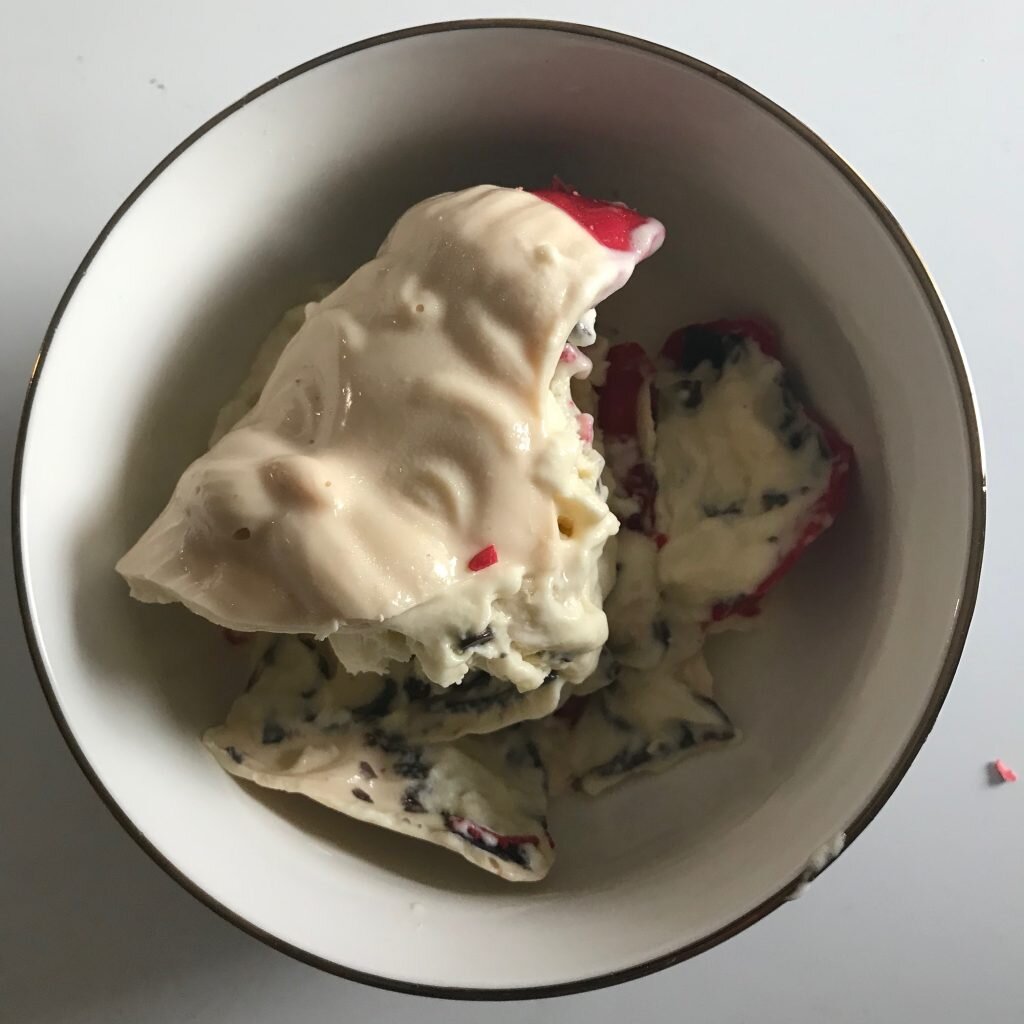
I found the fun part to be to crack Santa open and then eating the mousse. It was still a little frozen when I tried it, but it tasted just like ice cream to me. With the cookie dough pieces in there, it was just like ice cream which makes it so good.
Change it up
For the mix-ins, I used chocolate chip cookie dough from the grocery store and some mini chocolate chips. I made a list down below of other fun options that you can use instead. Nuts or some candy bars would be great too!
Can't find the Santa mold or don't want to use it? No worries! You don't have to use a mold if you don't want to. You can easily just put the mousse into a container and serve it in a bowl if you want. The Santa shape is just for fun and a cute appeal for the holidays that both kids and adults alike will find super cute and fun.

______________________________________________________________________________
cookie dough mousse
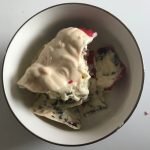
a santa chocolate shell that is filled with a creamy vanilla mousse that is mixed with cookie dough pieces and mini chocolate chips
mousse
- 6 egg yolks
- 1 cup granulated sugar
- 1 1/2 cup milk
- 1 tbsp vanilla extract
- 2 tsp powdered gelatin
- 1 tbsp water
- 1 1/2 cup heavy cream
- 1/2 cup powdered sugar
- 1 tsp vanilla extract
mix-in options
- cookie dough
- mini chocolate chips
- chocolate candies
- sprinkles
- brownie pieces
- cake pieces
- nuts
mousse
- bloom the gelatin in the 1 tbsp of water and set aside. in the bowl of an electric mixer fitted with a whisk attachment, whip the egg yolks and granulated sugar until pale and fluffy, about 5 minutes. meanwhile, bring the milk to a boil. once hot, slowly temper into the whipped yolks. do this by pouring a little amount of the hot milk into the yolks and whisking together. keep doing this until all of the milk is added to the yolks. place the mixture over a double boiler and heat until it reaches 140 degrees F. stir in the bloomed gelatin and vanilla. place the mixture into a bowl and wrap with cling wrap and put in the fridge overnight, or until firm.
- whip the heavy cream, powdered sugar, and vanilla until stiff peaks form. add in the firm and chilled mixture and whip until fully incorporated. place into the fridge until ready to use.
assembly
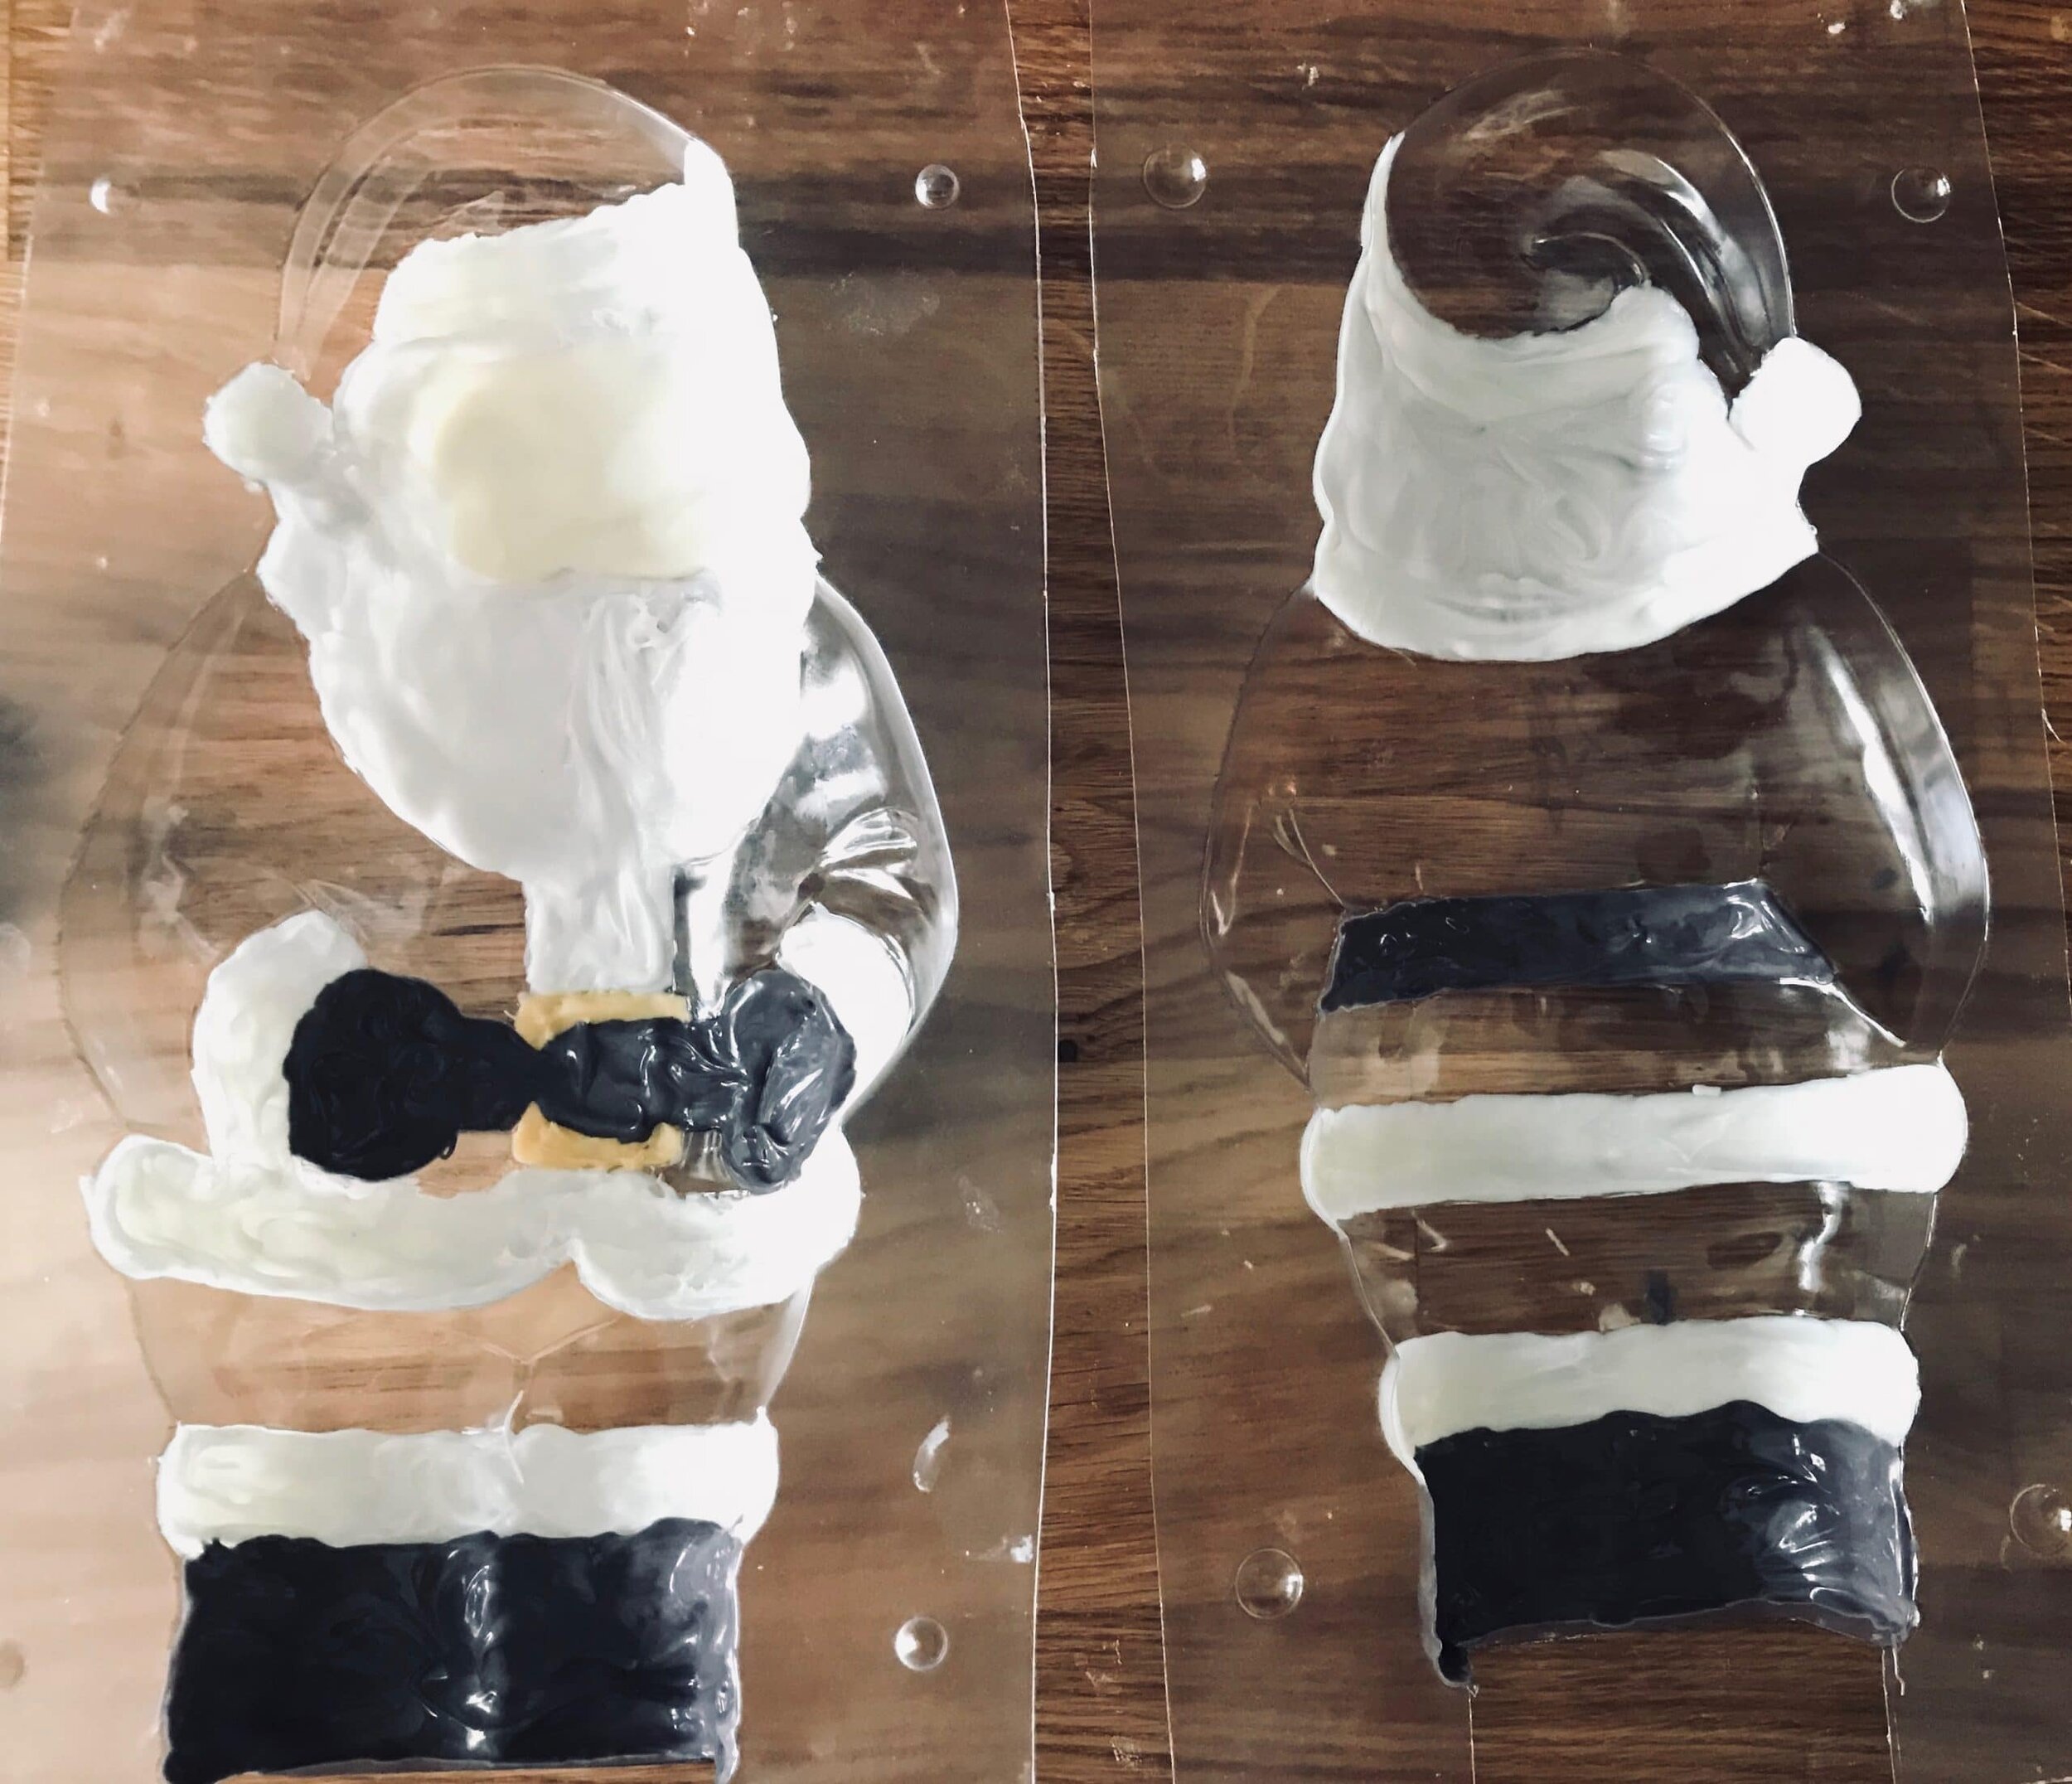
- i find it easier to melt the chocolate in the piping bags instead of in bowls. melt the chocolate as you need it and as you go.
- you will pipe a small amount, one part of the mold at a time, and then use the paintbrush to spread the chocolate.
- start by painting the white parts first in the molds, which includes the face, hair, beard, and white cuffs of the jacket, gloves, and hat.
- let set, you can speed this process up by putting the mold into the freezer for a minute or two. you will do this between each color so they don't spread and mix together.
- melt a little bit of yellow and fill in the buckle of the belt.
- the next color you will want to do is the black, which includes the boots, gloves, and belt.
- lastly, fill in the red, which includes the pants, jacket and hat.
- spread a thick layer on both sides of the mold to fill in any thin spots to prevent the chocolate from breaking. you want the mold to be sturdy to hold the mousse and to prevent leakage or breaking.
- carefully glue both sides of the chocolate molds together to make it 3D and to bring santa to life :)
- to fill santa, i found it easier to put him back into the mold and then use chip clips or clothes pins to hold it together. this part might be a 2 person job if it seems a bit scary to you, or you can do what i did and just prop the mold up carefully between some heavy objects to keep it sturdy.
- using a spoon or scoop, fill with a little of the mousse and then sprinkle in the mix-ins. keep doing this process until the mold is completely full.
- to seal the bottom of the mold, either carefully pipe some candy melts on top and let set or make a small candy plaque to glue to the bottom with more chocolate.
- if you notice any leaks coming through the sides of the molds (which i did!) i just placed the whole thing carefully into the freezer until it was completely solid and then carefully fill in the gaps with some chocolate.
- i kept santa in the freezer until i was ready to serve him, and took him out for about 30 minutes beforehand. (he might get a little sticky on the surface, but it's fine)
- crack open with a small hammer, spoon, or whatever you have on hand.
Lemon Baked Alaska

[wprm-recipe-jump]
*Disclaimer: This post contains affiliate links. To learn more, please go here.
Since it's June and it's so freaking hot out I thought it would be a great idea to make something tangy, creamy, and cold: lemon baked Alaska.
This baked Alaska starts off with a pound cake base (that I may have bought from the store). On top of the base is a lovely dome of lemon ice cream that is stuffed with a light cream cheese mousse to help balance off all of the tang from the lemon. And to top it all off, a beautifully toasted meringue. It is so good, it reminds me of a orange creamsicle, but lemon flavored! I suggest making this dessert for a summer night barbecue that your family can enjoy on a hot night.
Toasting the Meringue
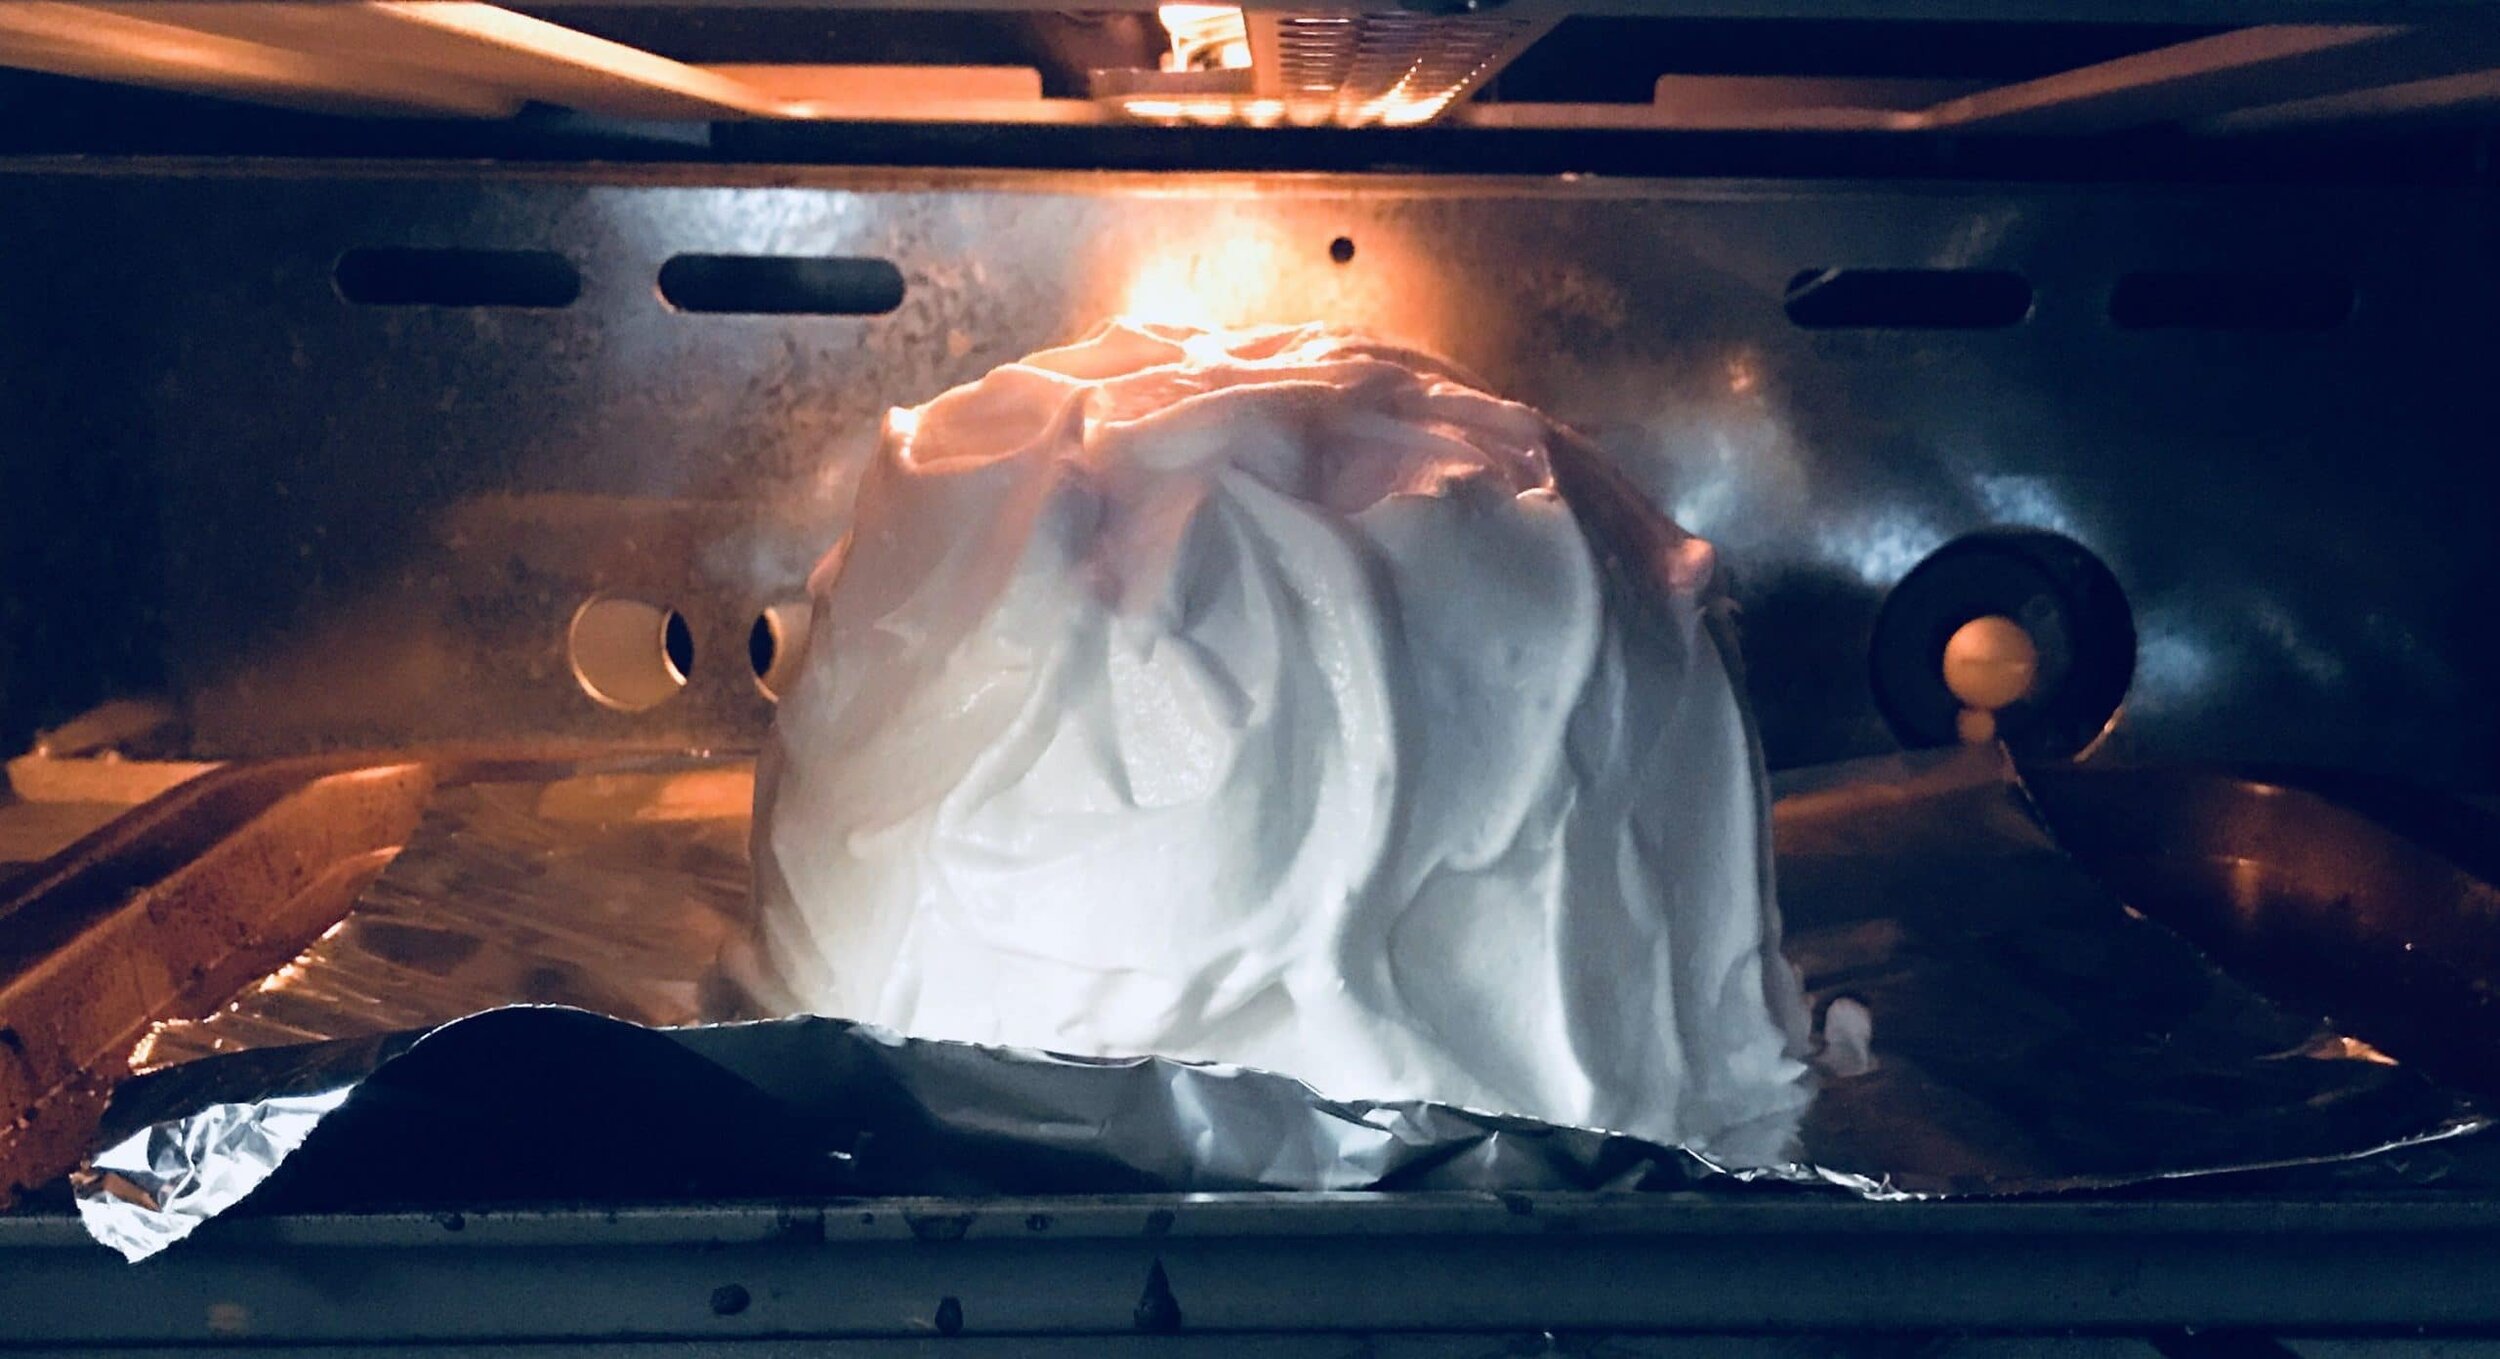
Now when it comes to toasting the meringue, don't do what I did. Please don't. I read that you can use a broiler to brown it if you don't have a torch (which I do have, but didn't feel like hunting down a propane canister all over Minneapolis just to use it). J figured "oh, I have a broiler in my oven! I'll use that instead." Well instead of getting a beautiful golden brown all over the baked Alaska, it only slightly burned the top.
Stupid. Annoying. Piece. Of. Crap.
So please use a torch! Or if you have a different method, then let me know in the comments! I'm always looking to learn new techniques from others.


Products I recommend.
Above are some products that I personally use and recommend for this recipe and to have for everyday use. I highly recommend starting off with the cuisinart ice cream machine as your first ice cream maker. It's the cheapest one on amazon and I personally use it and love it! I also suggest getting a reusable ice cream container as well, it's dishwasher safe and you can use it over and over again!
__________________________________________________________________________
lemon baked alaska
a simple pound cake topped with a dome of tart lemon ice cream with a cream cheese filling and toasted meringue
cake
- 6 inch (round pound cake (i bought mine from the store. you can always make your own favorite pound cake recipe too!))
filling
- 1 tbsp cream cheese
- 1/4 tsp vanilla
- 3 tbsp powdered sugar
- 1/3 cup heavy cream
ice cream
- 1/2 cup heavy cream
- 1 1/3 cup half and half
- 1/2 cup lemon juice
- 2 tsp lemon zest
- 1 1/3 cup granulated sugar (split)
- pinch salt
- 2 tsp vanilla extract
- 3 egg yolks
meringue
- 3 egg whites
- 1/3 cup granulated sugar
- 1/4 tsp cream of tartar
- 1/4 tsp vanilla extract
- pinch of salt
filling
- in a small bowl with a hand-held mixer, whip the cream cheese, vanilla, and powdered sugar until smooth. add in the heavy cream and whip until stiff peaks form. place the mousse into a silicone mold or a small bowl with plastic wrap and place into the freezer until solid.
ice cream
-
place the half and half, heavy cream, lemon juice, lemon zest, pinch of salt, and 1 cup of the granulated sugar into a pot and bring to a boil. in a bowl, whisk together the egg yolks, vanilla, and the remaining 1/3 cup of sugar. once the milk mixture is at a boil, slowly pour into the egg yolks whisking at the same time to prevent the eggs to scramble. strain the base through a fine mesh sieve and place into the fridge over night. turn the ice cream base following the instructions of your ice cream machine. put 3/4 of the ice cream into a cereal size bowl lined with plastic wrap or tinfoil, place the small dome of frozen cream cheese mousse into the center, and then place the rest of the lemon ice cream on top and smooth out with a spatula. freeze overnight until solid.
meringue
- place the egg whites, cream of tartar, vanilla, and salt in the bowl of an electric mixer fitted with a whisk attachment. start on low speed and slowly sprinkle the sugar into the egg whites. once all of the sugar is added, increase the speed to high and let whip until stiff peaks form, about 5 minutes.
assembly
- place the pound cake on serving platter. carefully un-mold the ice cream and place on top of the cake. if you haven't made the meringue yet, place the cake and ice cream into the freezer and make the meringue. once the meringue is made, pipe of frost it onto the ice cream and down to cover the cake so nothing is exposed. using your torch, lightly brown the meringue. serve right away.
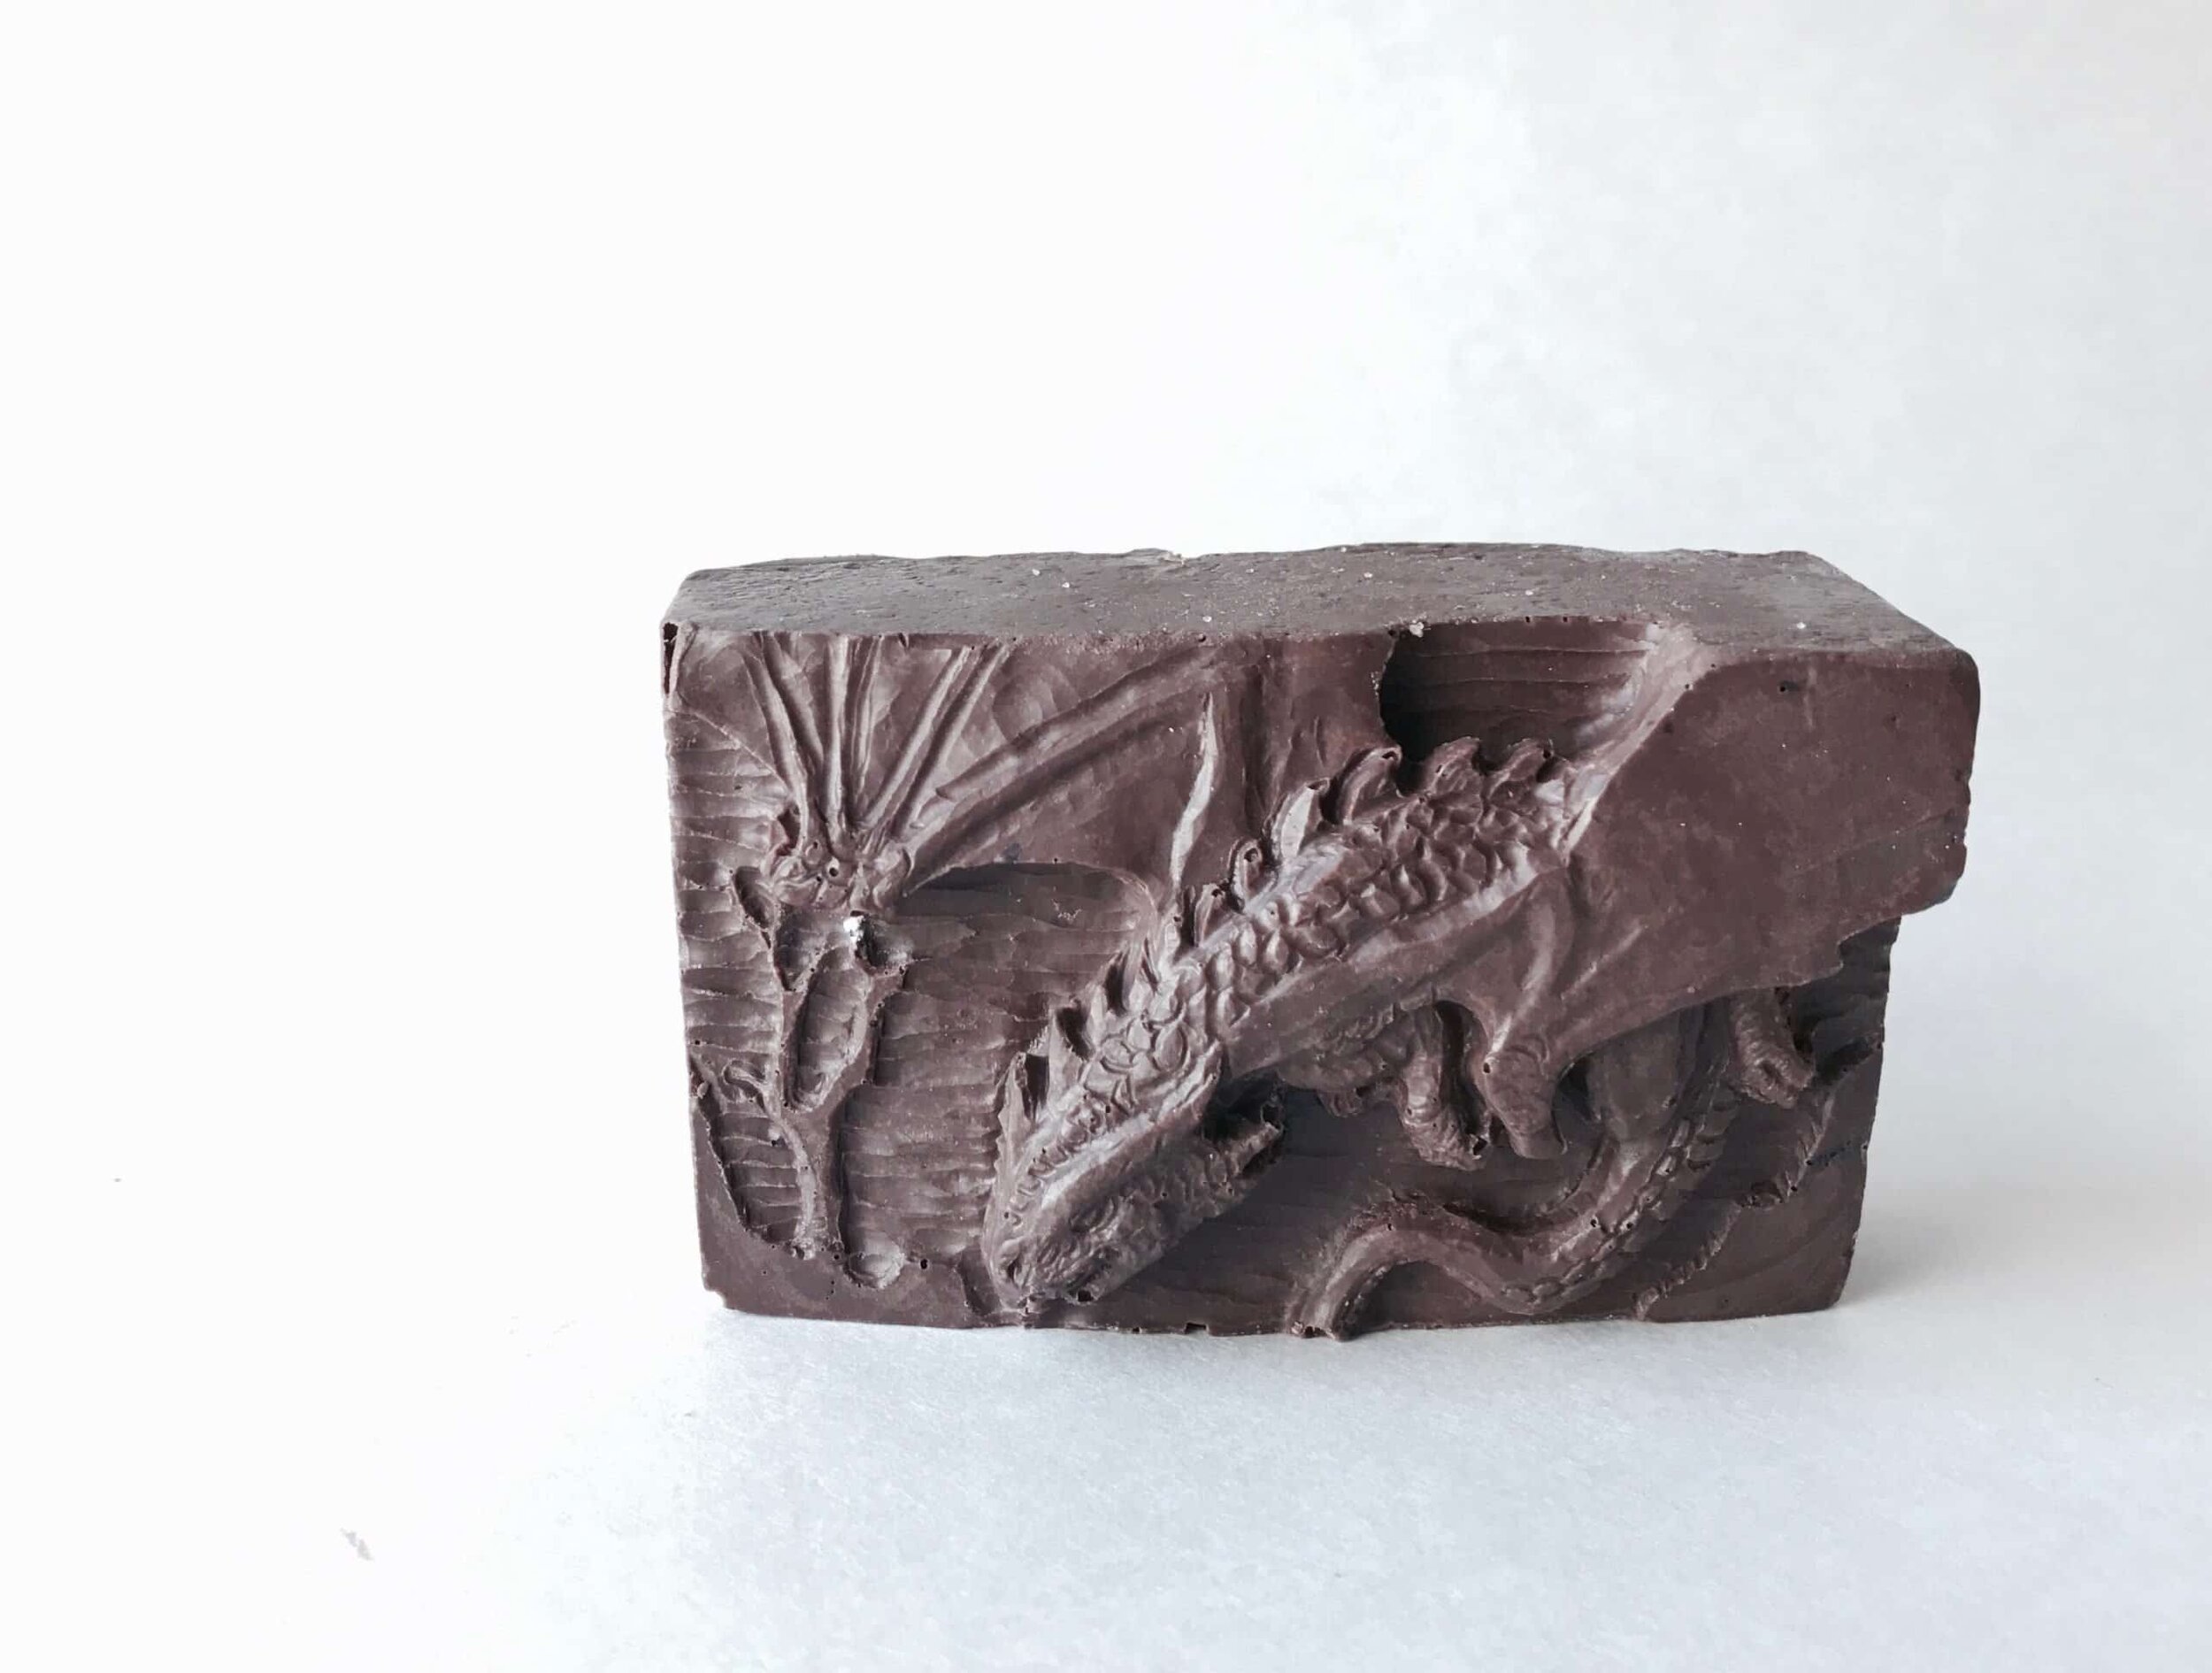
Dragon Chocolate Bars

*Disclaimer: This post contains affiliate links. To learn more, please go here.
Mmmm, chocolate! I love chocolate, but playing with it can be such a messy situation. The only way I think that it would be fun is with super fun molds to use it with. Like these dragon molds that made these dragon chocolate bars!
I found these super cool molds on Etsy. There are so many fun homemade things on that website. It's fun to see how other's can be so creative and in turn use their products to make something of your own. Originally these molds were for soap! Really any kind of mold can be used for food, but always make sure to ask if the silicone they use to make the molds are food safe. It wouldn't be great to find out the mold you purchased isn't supposed to be used for food and could contain harmful chemicals. No one wants to consume chemicals when they eat chocolate.
When I made these I was at my parent's house back in North Dakota, and the town grocery store is super small with hardly anything to choose from. Meaning that these dragon chocolate bars were pretty basic with only using good ole' almond bark chocolate, peanut butter, and a caramel filling. They were so fun to make though and I can't wait to find other fun molds to use and try other flavor combos!
Fillings galore.
What makes chocolate even more fun is that you can get pretty crazy with flavor combinations. You can always stick to classic flavors like peanut butter or caramel. Or you can go out of the box and do something like cookie butter or something more fun like stuffing it with little candies like a little surprise!
I find that using nice big soap molds for chocolate can leave endless possibilities since it's so thick and big! When I made these it can literally feed 3-4 people or just one person in a few portions. It's at least a 4 serving chocolate bar.


Products I recommend.
__________________________________________________________________________
chocolate bars
- Food safe chocolate mold
- chocolate
- i used almond bark, but any kind of chocolate can be used. like candy melts in fun colors!
- fillings
- peanut butter
- caramel
- ganache
- coconut filling
- cookie butter
- almond butter
- little candies
- marshmallow fluff
- nuts
Start by melting the chocolate. I find it easier to melt in a piping bag. Place the mold on a flat surface. Completely fill the mold with chocolate and then place into the freezer until the sides have become solid but the middle is still melted.
If you are using small molds, then fill them with the chocolate and then flip over to let the excess chocolate drip out. Scrape the edges and let set.
Carefully tip the excess chocolate out of the mold. Place your choice of filling in the center, but don't fill it completely to the top. Make sure you leave a little room to top with more chocolate to lock the filling in.
Put more melted chocolate on top and put into the freezer once again until completely solid. When the chocolate is solid and no longer soft, carefully remove from the mold.
Bloody Brain Cake Tutorial

*This post contains affiliate links. Please read disclosure to learn more
It is officially almost Halloween! Ugh, I can't wait! This bloody brain cake tutorial is super fun and perfect for Halloween with a very fun surprise when you cut into it. It will both please and gross out anyone and everyone and although it takes some time to make, it is easy to do. Maybe a little messy as well. but isn't that what Halloween is about? To have some fun and do some tricks if you don't get any treats?
And there you have a lovely gory, bloody brain cake tutorial. Perfect for Halloween or even just because!
Have fun with it!
Let's be honest. Making a cake is no feat but the edible blood is super easy to make and fool proof. If you aren't one for carving cakes than make some cupcakes instead and fill it with edible blood. Use it as a filling in a cake and make it ooze out for a vampire theme party.
Change it up!
The edible blood calls for strawberries to give it a better flavor. But if you would rather use a different fruit than by all means, give it a try! I suggest cherries or raspberries. But be careful since the ratios may be different as well as the water content in the fruit. The water content can make the edible blood more runny and not as thick as the original recipe.


Products I recommend
Above are some products that I personally use and recommend for this recipe and to have for everyday use. My absolute favorite is the BlueQ oven mitts. I have a collection of them and I love them! They are great quality and it’s nice to have a kitchen item with a sense of humor.


bloody brain cake

tutorial on making this gory brain cake covered in edible blood
- 4 layers red velvet cake
- 1 batch buttercream
- 1 batch edible blood
- 1 bag white candy melts
- The very first step is to make the cake! And you can make any kind of cake you want, but the requested, and I highly suggest, was red velvet. The red velvet adds the "bloody" aspect to the cake. I used this recipe from Hummingbird High and I doubled the recipe. I used a large, square cake pan for this cake, and made 6 layers but only ended up using 5 of the layers and put the extra in the freezer for something else.
- Once the cake is baked and ready to go, fill and stack the cakes with a plain vanilla frosting. I also did a crumb coat then placed the cake in the fridge for about 30 minutes until the cake is cold to make it easier to carve.
- Carving the cake was interesting. I was trying to figure out how to make the shape of a brain and concluded to base is off the shape of a football. I carved the cake on the diagonal of the square shape and rounded it until I was happy with the look.
- Using a paring knife, I carved out a decent sized round at the top of the cake. Carefully remove the piece that you carved and set it on a piece of wax paper or a plate.
- Melt white candy melts and using a small off-set spatula, carefully coat the inside of the cake that was carved out to create a shell. Once the candy has set, do a second coat. The piece of cake that was removed, carefully remove a layer or two of the cake and do a coat of the candy melts on there as well.
- Now the fun part is making the surprise that goes into the part that you just carved out in the cake! Blood! Now this is an edible blood and it's quite an interesting mixture of ingredients that actually worked out really well to make this blood (recipe at end of post).Fill the cake with as much blood as you can or want and once you have it filled, but make sure to leave a little bit leftover, take the piece of cake that you took out and coated with the candy melts and carefully insert back into the cake. I melted more candy melts and did a little coating along the edges of the re-inserted cake piece to prevent some blood back splash.
- Once the chocolate has hardened to a quick crumb coat on the whole cake, make an indentation line across the center of the cake and then put into the fridge to let harden and set.
- With a piping bag fitted with a large, round tip and filled with a nude/peach colored frosting, start piping zigzag like designs on one half of the cake and then continue onto the other half. The center line is there to help create that brain look and keep the piping in line.
- With the leftover blood that you have, use a spoon and drop the blood onto the cake to give it the bloody look.
Edible Blood

edible blood flavored with strawberries and cocoa
- 1/2 cup light corn syrup
- 1 1/2 tbsp cocoa powder
- 2 1/2 tbsp cornstarch
- 3 small strawberries
- 1 tbsp milk
- Red food coloring
- Blend the strawberries and milk into a food processor or blender.
- In a bowl, combine the light corn syrup, cocoa powder, cornstarch, and strawberry mixture. Once combined add in the red food coloring until just the right coloring of blood.
NOTE: i suggest using a hot knife to cut into this cake. the chocolate can be hard to cut through so a hot knife will help. just boil some water, stick the knife in and wipe with a towel.
Mystery Machine Cake Tutorial

*This post contains affiliate links. Please read disclosure to learn more.
This is the most fun cake that I've made so far. My sister and I love Scooby Doo. We grew up on it and other old cartoons thanks to our dad. So for her birthday she had requested a cake featuring the Scooby gang. And a surprise guest too of course! So here is a scooby doo mystery machine cake tutorial for you all!
Fondant or not to fondant?
Personally I think this scooby doo mystery machine cake would've been 100% better if it had been decorated with just fondant. But my sister hates fondant. And since it's her birthday cake I couldn't use it to decorate the cake. Well except for the two small pieces that I painted the gang and Mr. Hyde on. Thankfully she lived with it after complaining for a few minutes. The chocolate did come out very well though after a few trial and errors. It's definitely not the best looking cake, but it is the most fun. It being Scooby Doo makes it even better.
Make it extra!
I made this cake into a pinata cake and filled it with a bunch of sprinkles and some chocolate chips too. But I think it would be even more fun if it had had some of those graham cracker Scooby snacks and fruit snacks too! Make it completely a Scooby Doo theme I think! Or you could go for the glutenous ways of Scooby and Shaggy and filled it with fun food shaped gummy candy. Little pizzas and ice cream cones would have been a hoot in this mystery machine cake!
Stencil
Use these stencils to accurately carve out the mystery machine into the correct shape. I also included stencils to draw out the gang and Mr. Hyde as well if you want to make it look exactly like I made the cake. This is completely optional though! The stencils also include notes on what each stencil is used for and how to use them.


Products I recommend


mystery machine cake tutorial

leanr how to make a fun scooby doo mystery machine cake featuring the gang and mr. hyde!
- candy melts (light blue, green, white, black, and orange)
- 4 layers cake (use a 9 x 13 inch cake pan. any flavor)
- 1 batch vanilla frosting (tinted light blue)
- white fondant (optional)
cake filling ideas
- candy
- scooby snacks graham crackers
- scooby doo fruit snacks
- sprinkles
- candy
- once the cakes are cooled, start by filling and stacking the first 3 layers of cake. in the center, cut out a decent sized whole. fill this whole with whatever you like, or use some of my ideas!
- place the last layer of cake on top and do a crumb coat. place the cake into the fridge for about 30 minutes to chill.
- use the stencils i've provided to cut the cake to be the exact shape. i used some pins to help keep the stencils in place while i trimmed. if you make a mistake, just use the cake trimmings mixed with frosting (like making a cakepop) and form it into the shape you want.
- once the cake is formed, do another crumb coat and place the cake into the fridge to chill.
- while the cake is chilling, use the other stencils and the candy melts to trace the mystery machine designs to put onto the cake. let dry
- while the chocolate is drying, take the cake and do a final thick coat of frosting on the cake.
- carefully peel the chocolate designs off the wax paper and place onto the designated areas of the cake.
- if you have the artistic ability or a projector then paint the scooby gang on some fondant. do the same thing for the back of the cake with mr. hyde.
- eat and enjoy!


