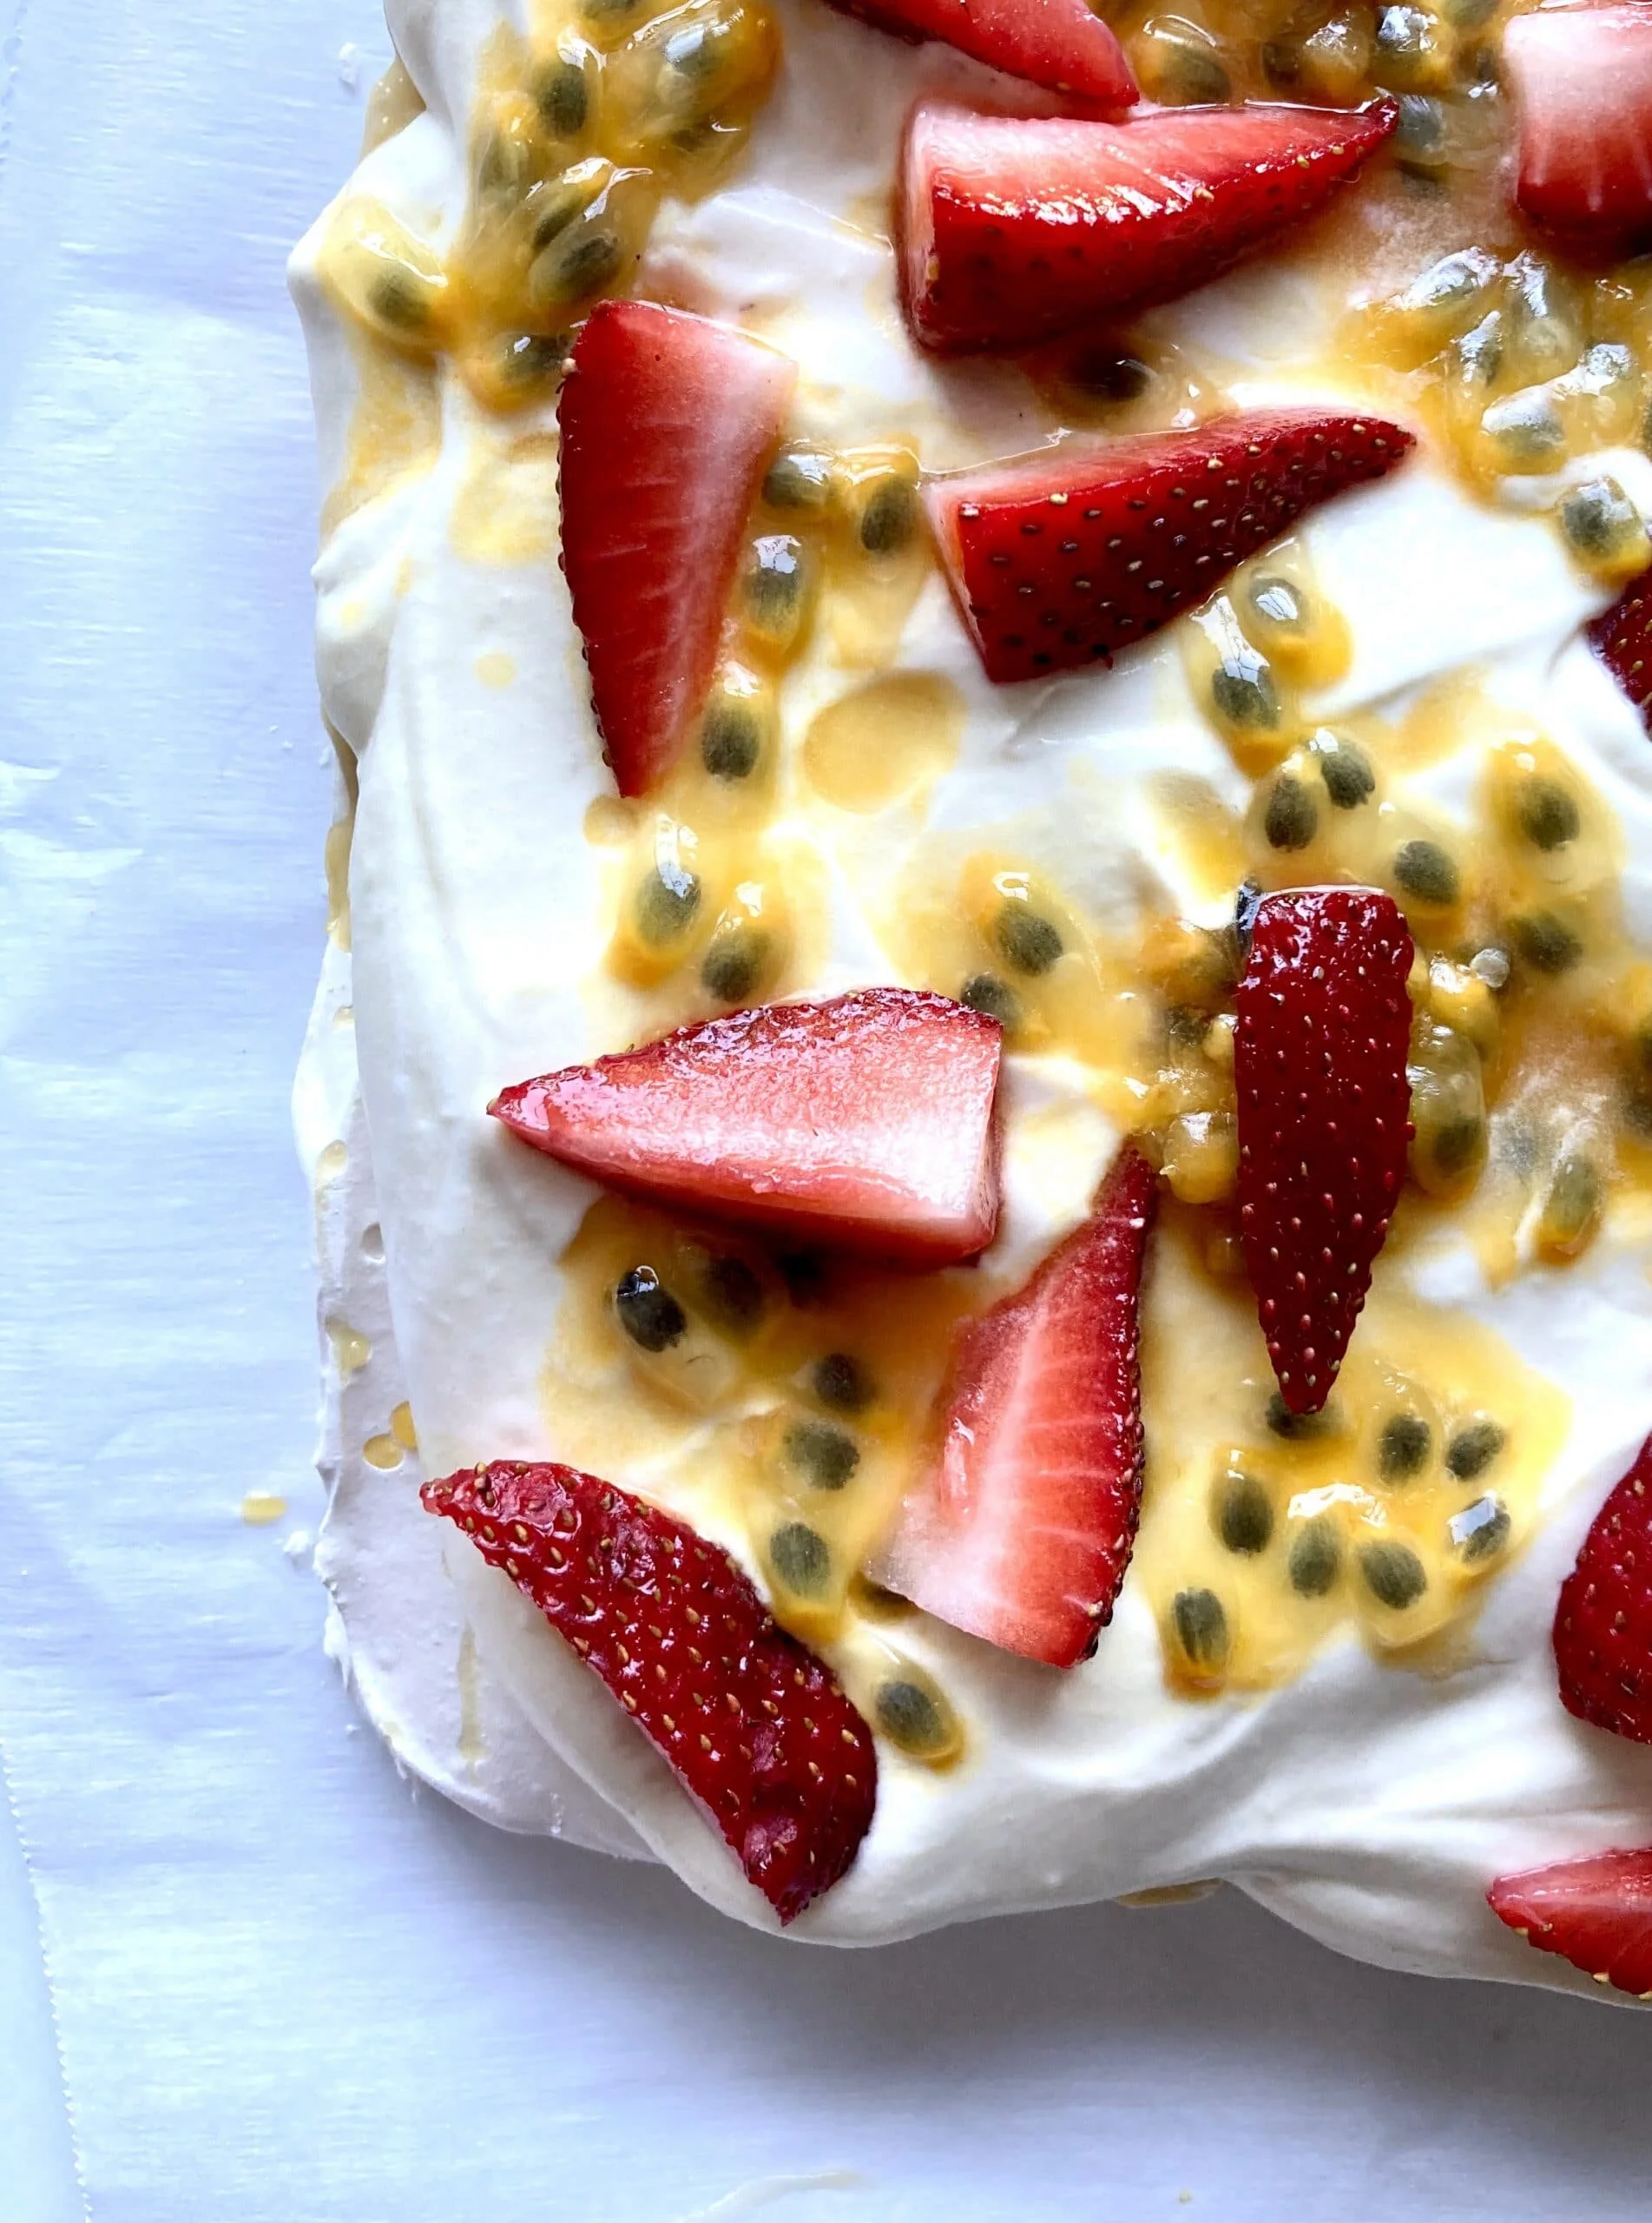
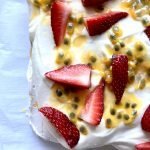
Passion Fruit Pavlova

*Disclaimer: This post contains affiliate links. To learn more, please go here.
This passion fruit pavlova is creamy, tart, and light. It's also incredibly easy to make! All you need is some egg whites and sugar to make a meringue, some whipped cream and fruit! It's that easy!
I made a lemon whipped cream and then topped it with fresh passion fruit and strawberries. Makes it perfect for summer because it's not a heavy dessert for a hot day.
Change it up!
I know that passion fruit isn't easy to find, but what's great about pavlova is that you can use whatever kind of fruit you'd like. Top it with blueberries, raspberries, pineapple or even kiwi. Literally you can add whatever your favorite fruit is on top of a pavlova.
Edible printing
Want to learn how to get images onto cookies and even cakes and chocolates? Then check out my new online edible printing course that will guide you through everything you need to know about edible printing, from start to finish! You won't regret it! Not too sure if you want to buy something so pricey if you aren't sure you'd like it? Ten you can certainly check out my array of edible paper images you buy and try out before making such a huge purchase. You can even buy these images here in my shop!


Products I recommend


Above are some products that I personally use and recommend for this recipe and to have for everyday use. One I highly suggest is the silpat. This is a great tool to have in your kitchen! It may be on the expensive side but it's a reusable alternative to parchment paper and is worth the investment.
passion fruit pavlova
light and airy pavlova topped with lemon whipped cream and fresh passion fruit and strawberries
pavlova
- 5 egg whites (room temp)
- 1 1/4 cup granulated sugar
- pinch salt
- 1 tsp vinegar
- 1 tbsp cornstarch
lemon whipped cream
- 1 1/2 cup heavy cream
- 1/2 cup powdered sugar
- 1 tsp vanilla
- 1 tbsp lemon zest
- 2 tbsp lemon juice
- 3 passion fruit (pulp scraped out)
- 1/2 cup strawberries (quartered)
pavlova
-
preheat the oven to 350 degrees F and line a sheet pan with parchment paper. in the bowl of an electric mixer, whip the egg whites until foamy and then add the cream of tartar. continue whipping on high until soft peaks start to form and then gradually add in the sugar and whip until stiff peaks form and the meringue is nice and glossy. add in the cornstarch. put the meringue onto the sheet pan and form into a mound. turn the heat down to 235 degrees F and bake for 2 hours. turn the heat off and leave in the oven for 20 minutes. open the oven door slightly and let cool for an additional 2 hours or over night.
-
I made 2 pavlova shells by splitting the meringue in half and baking them on separate sheet pans and adding one sugar sheet on one of them before baking. but you can make one large pavlova instead if you'd like.
lemon whipped cream
-
add all of the ingredients into the bowl of a stand mixer fitted with a whisk attachment. whip until stiff peaks form and spread on top of your baked pavlova. top with fresh fruit.

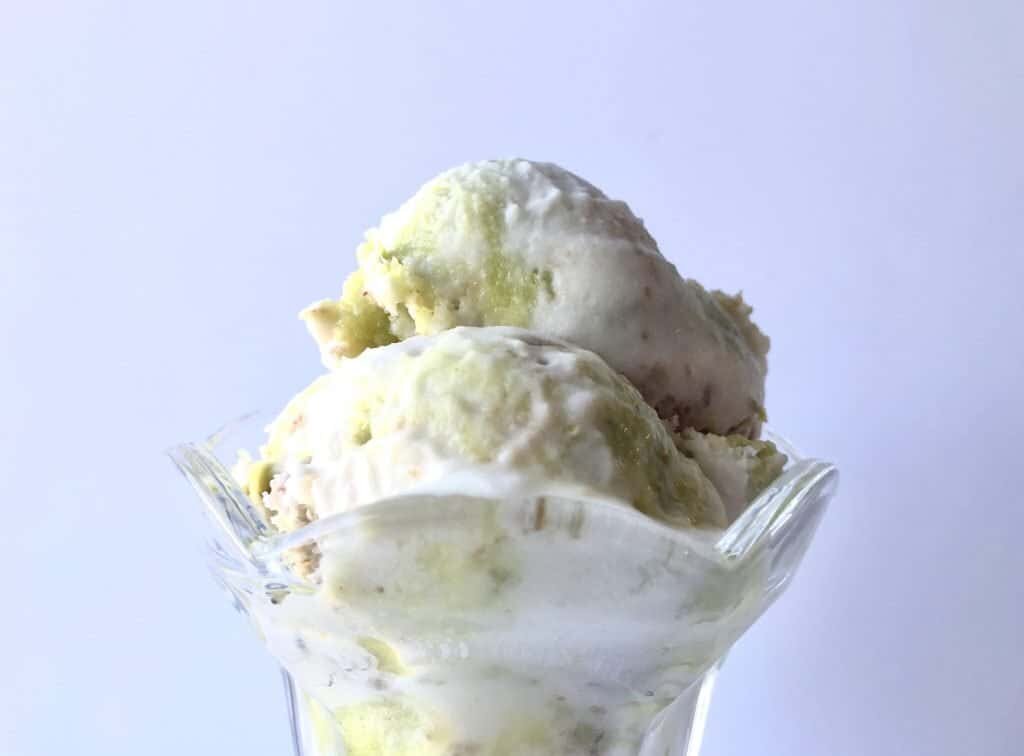
Toasted Coconut Ice Cream


*Disclaimer: This post contains affiliate links. To learn more, please go here.
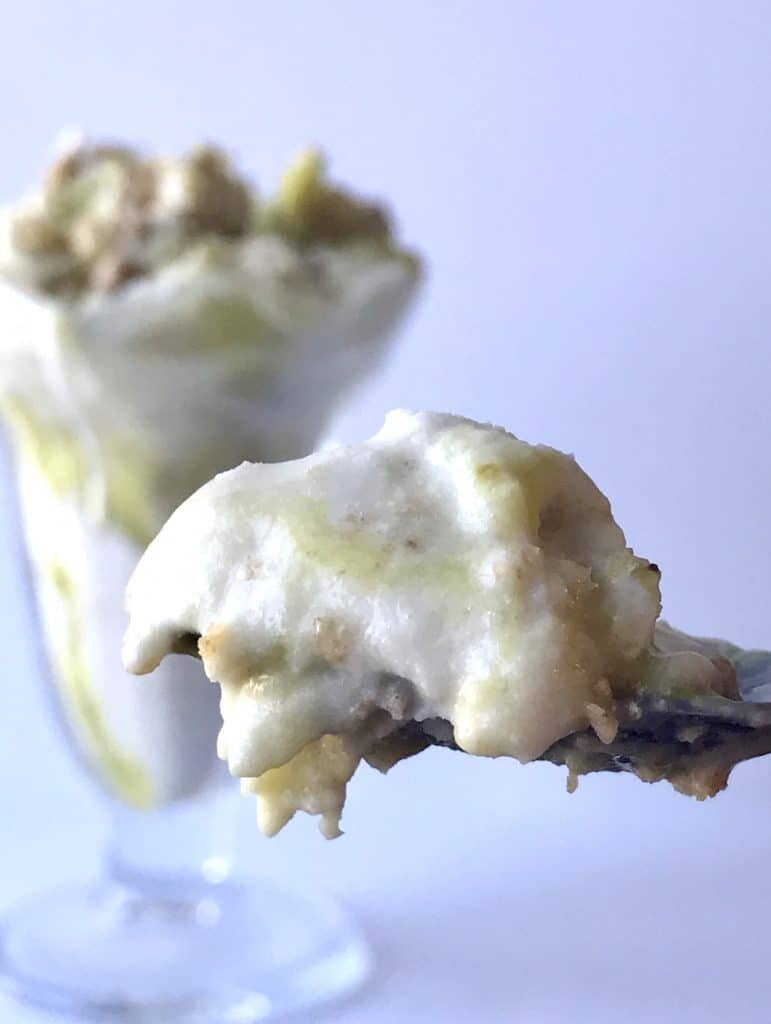
Toasted coconut ice cream. This stuff is so good! I swear I couldn't stop eating it, it's so addicting! It's the perfect ice cream to treat yourself to on a hot day this July; especially on top of a sugar ice cream cone!
To get the natural flavor in this ice cream, I used toasted coconut and steeped it in the ice cream base over night. I figured it would be so much better to do it this way than to use the awful artificial extract that tastes nothing like the real deal. But by steeping the toasted coconut into the base instead, leaving it over night, makes this ice cream a coconut lovers dream! It's that good guys, you have no idea!
Amplify it!
This ice cream reminds me of an almond joy candy bar in a way. The only thing that's missing is almonds and chocolate. You can easily replicate it to be like an almond joy by just topping the ice cream with some chocolate sauce and some sliced almonds and a touch of toasted coconut on top.
Now I added in some toasted coconut into this creamy cold stuff, but I discovered that that was a mistake to do. It tastes amazing, but adding in too much texture as it did was off putting for me. I'd definitely prefer to sprinkle a little bit on top instead of mixing it in.


Products I recommend


Above are some products that I personally use and recommend for this recipe and to have for everyday use. I highly suggest the ice cream maker that I listed above. It's cheaper than others and it does it's job just like the other's. It's also easy to clean and super easy to use!
toasted coconut ice cream
this ice cream is steeped in toasted coconut that gives it a delicious natural coconut flavor
- 3/4 cup shredded coconut (toasted)
- 15 oz can cream of coconut
- 1 cup heavy cream
- 1 1/2 ` cup milk
- 2/3 cup granulated sugar
- 1 vanilla bean (scraped)
- pinch salt
-
toast the coconut in a 350 degree oven for about 10-15 minutes. make sure to check it every 5 minutes and to toss the coconut for even toastiness and to prevent burning. remove from oven when golden brown.
-
place the heavy cream, milk, cream of coconut, sugar, salt, vanilla bean, and the toasted coconut into a pot and mix together. put over medium-high heat and bring to a simmer. remove from the heat and cover with cling wrap and place the ice cream base into the fridge overnight to cool and to let the flavor increase.
-
strain out the toasted coconut using a fine mesh sieve.
-
following the manufacturer's instructions of your ice cream machine, turn the base for 20-25 minutes. place the ice cream into a freezer safe container and freeze overnight to firm up.

Strawberry Tiramisu


*Disclaimer: This post contains affiliate links. To learn more, please go here.
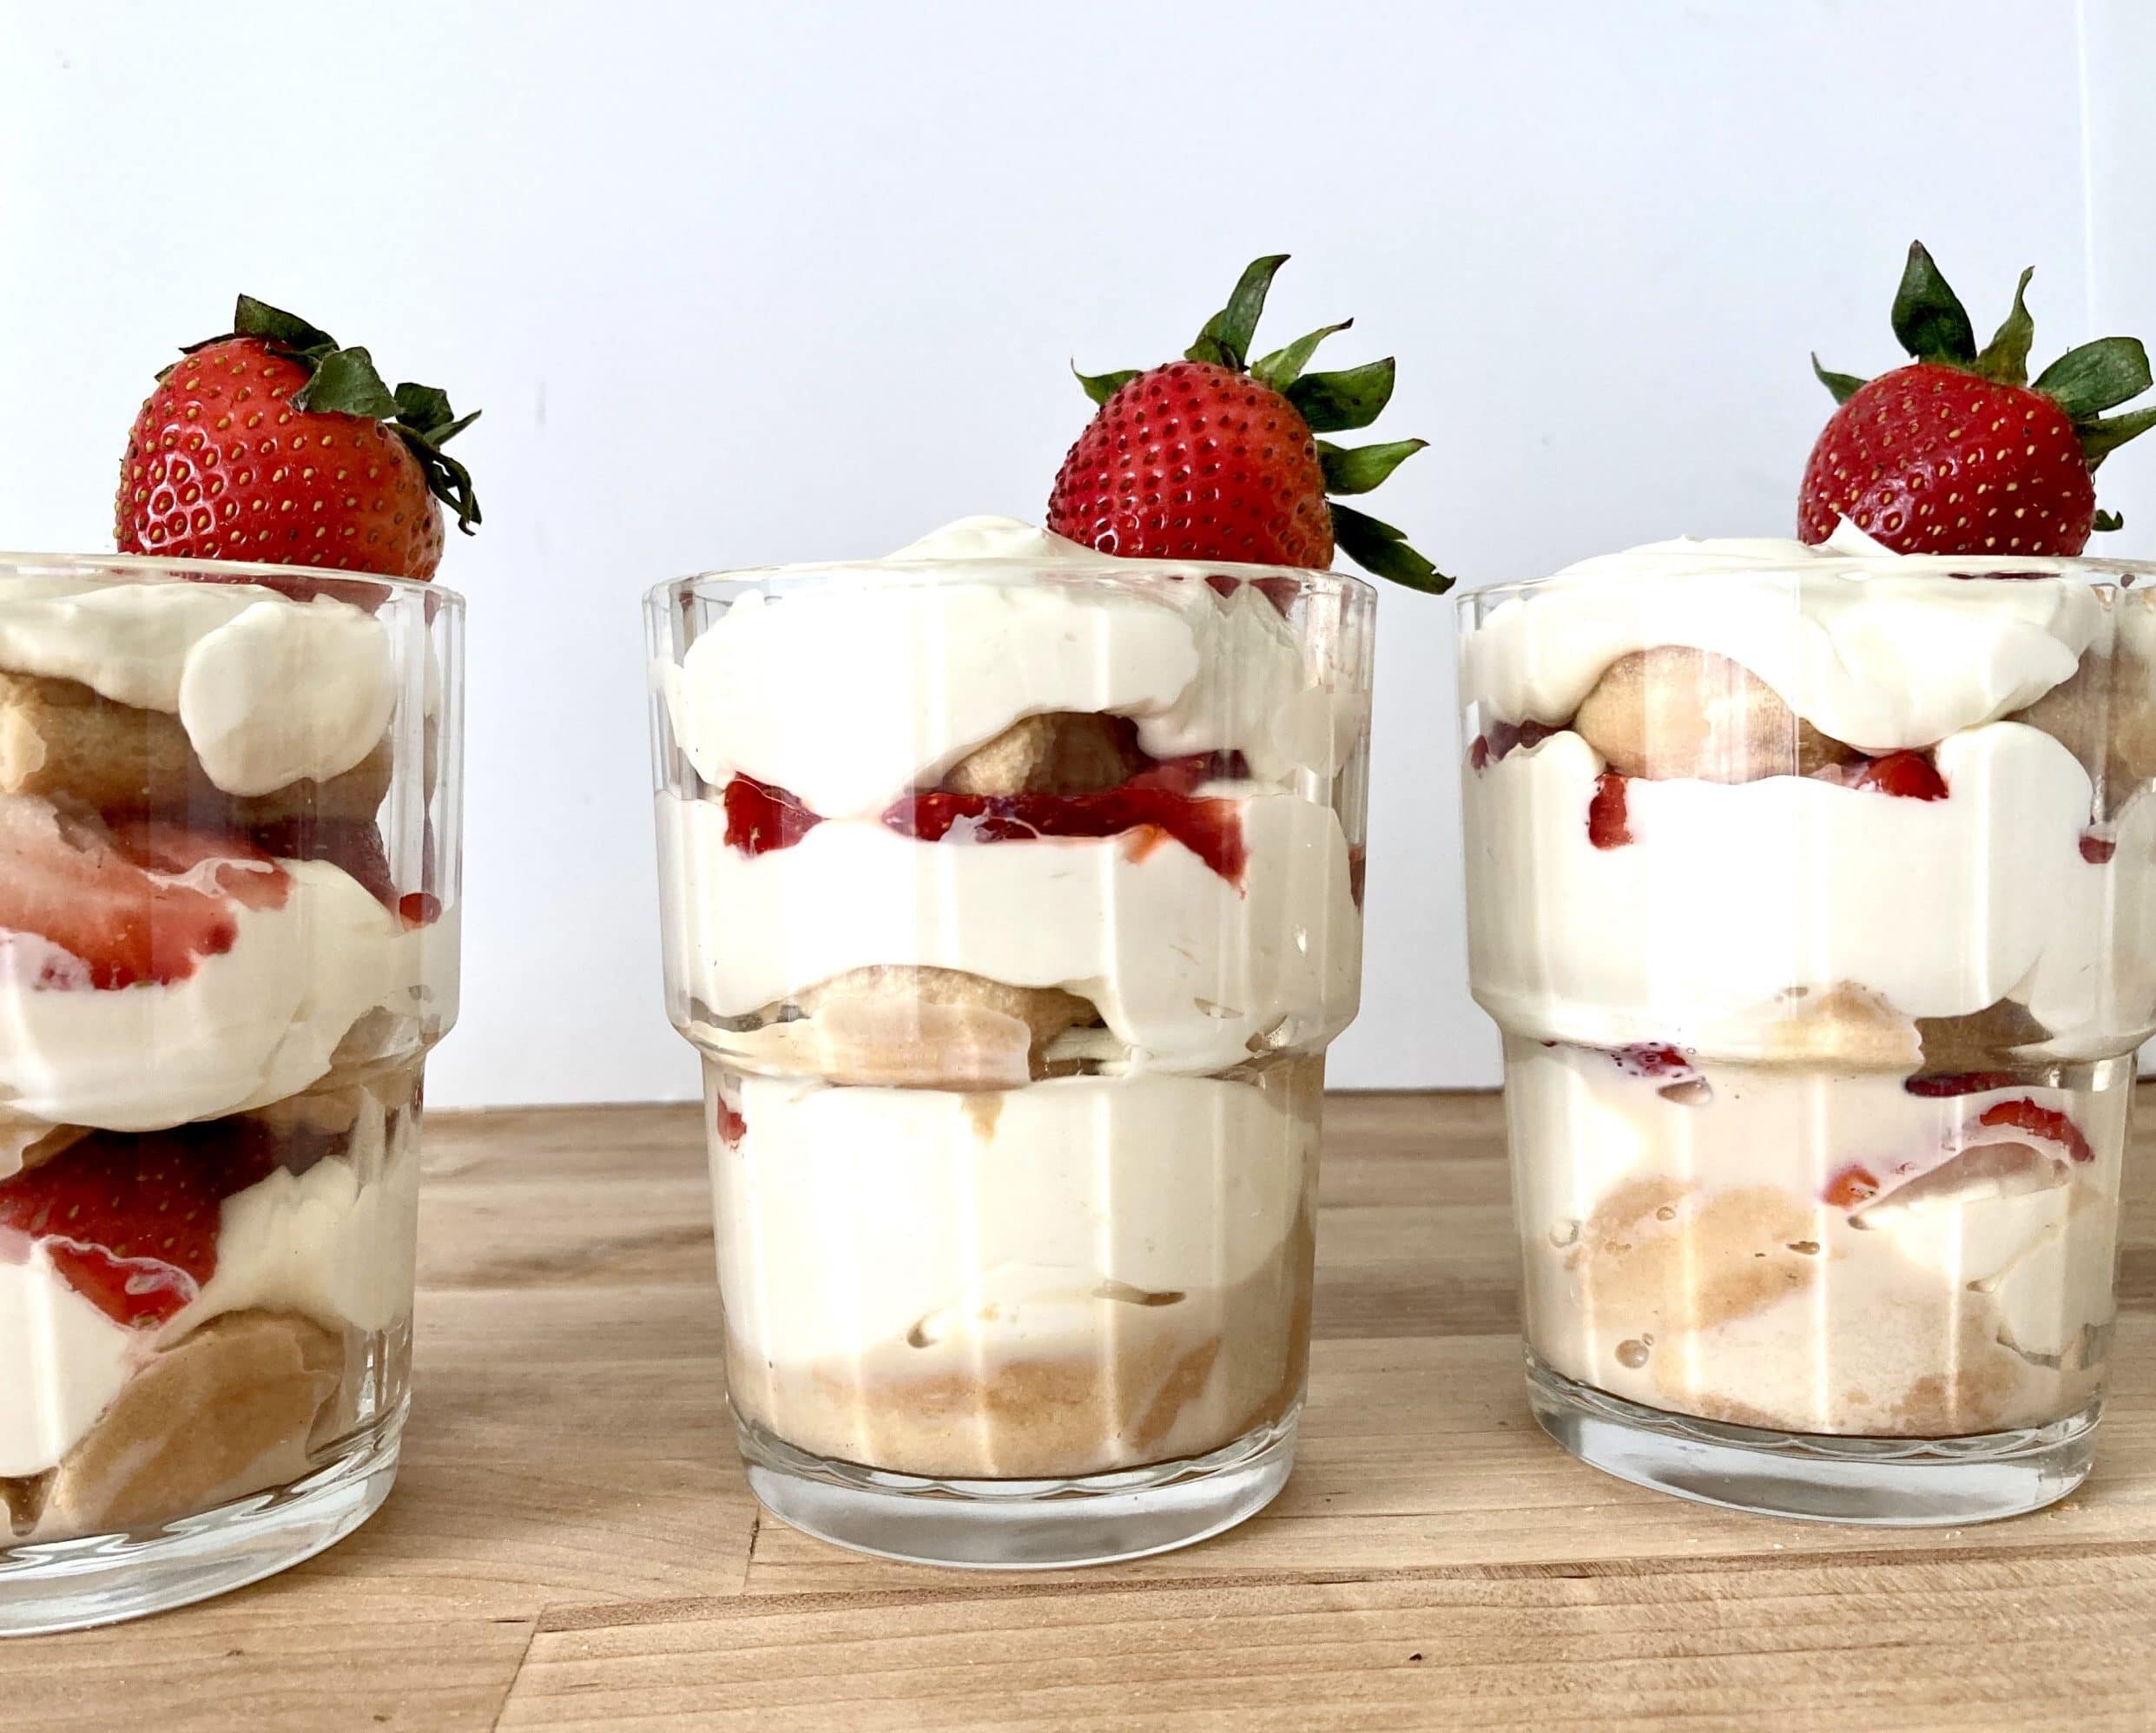
This is by far not your traditional tiramisu. Its tart, sweet, and perfect for this seasons strawberry pickings. Strawberry tiramisu is a perfectly light dessert for this summer. And it's also incredibly easy to make too! It's so easy you can make it within 20 minutes! It's also super easy to switch it up and make it your own too!
Change it up!
There are lots of ways to make tiramisu unique and fun! This strawberry tiramisu is delicious, but you can always replace the fruit with something else if you'd like. You can even change the soaking liquid for the lady fingers too! Instead of using bailey's you can use:
Vodka! Grab a flavored vodka that will pair up well with the fruit or filling you've chosen. Like white chocolate or lemon!
Rum chata! Did you know that they make a lemon rum chata? That would be delicious with the strawberries or even blueberries!
Malibu rum! This would be an interesting one to soak the lady fingers in if you are wanting something tropical. If you are in an area that has mango's or passion fruit that would go perfect with this!


Products I recommend


Above are some products that I personally use and recommend for this recipe and to have for everyday use. If you can't find lady fingers in your local grocery store, than I suggest getting these from amazon. Most grocery stores back home in North Dakota don't have any of the fancy grocery items, like these lady fingers, so amazon is typically the way to go when I'm home.
strawberry tiramisu

this tiramisu is filled with bailey's soaked lady fingers, mascarpone, and fresh tart strawberries.
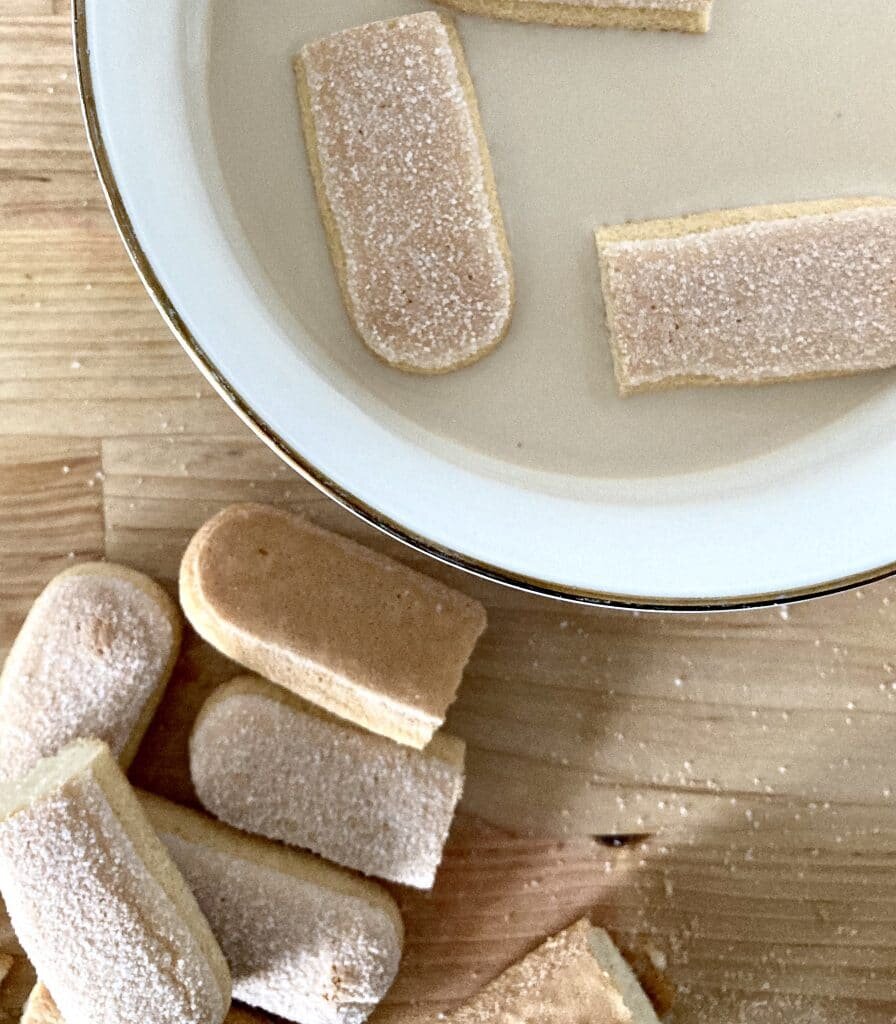
- lady finger cookies
- strawberries (sliced)
mascarpone mousse
- 8 oz mascarpone
- 1/2 cup powdered sugar
- 1 tsp vanilla
- 1 1/2 cup heavy cream
Soak
- 1/2 cup bailey's
- 1/2 cup milk
mascarpone mousse
-
place all of the ingredients, mascarpone, sugar, vanilla and heavy cream, into the bowl of a stand mixer fitted with a whisk attachment. start on low speed, to incorporate all of the ingredients, and gradually increase and whip to stiff peaks. set aside.
soak
-
combine the bailey's (or alcohol of choice) and the milk into a bowl. set aside.
assembly
-
place 4 glasses or a small casserole dish onto your work space.
-
start by soaking the lady finger cookies in the bailey's soak until saturated. make sure not to soak to long for the cookies to completely disintegrate.
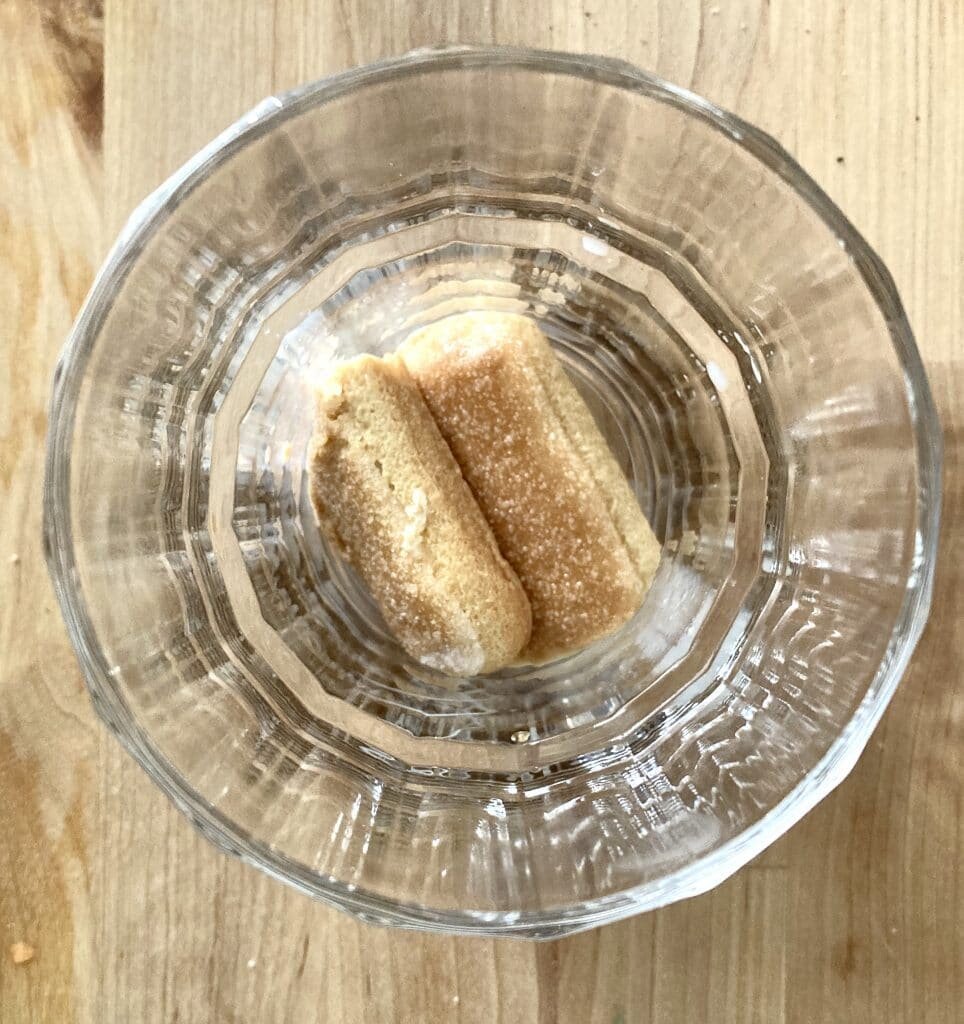
if you are using individual glasses, it's easier if you cut the lady fingers in half before soaking so that they fit in the glass easily.
place the soaked lady finger cookies onto the bottom of your glasses or dish.
-
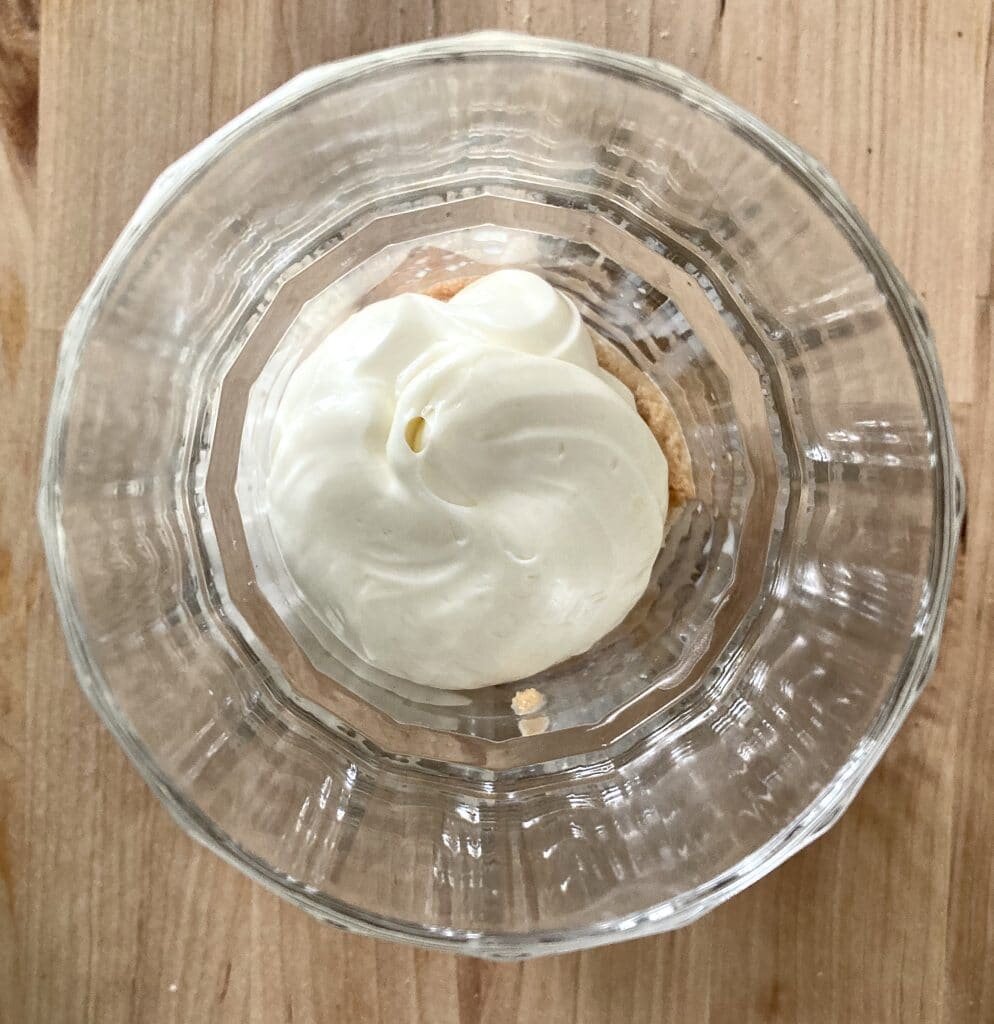
take a piping bag (or ziplock baggie) and fill with the mascarpone mousse. fill your glasses with a small layer of the mousse.
-
top with strawberry slices.
-
repeat these steps 2 more times for layering the tiramisu, ending with mousse on top and a whole strawberry. (reference the photos in the post for layering)
-
refrigerate until serving.


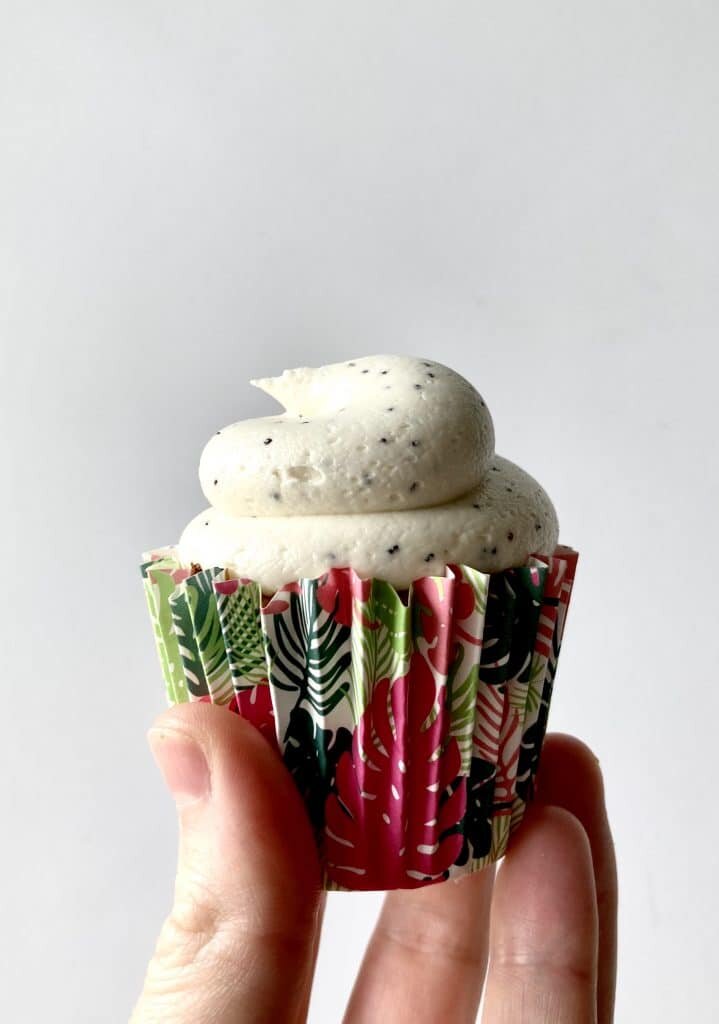
Grapefruit Poppy Seed Cupcakes

[wprm-recipe-jump]
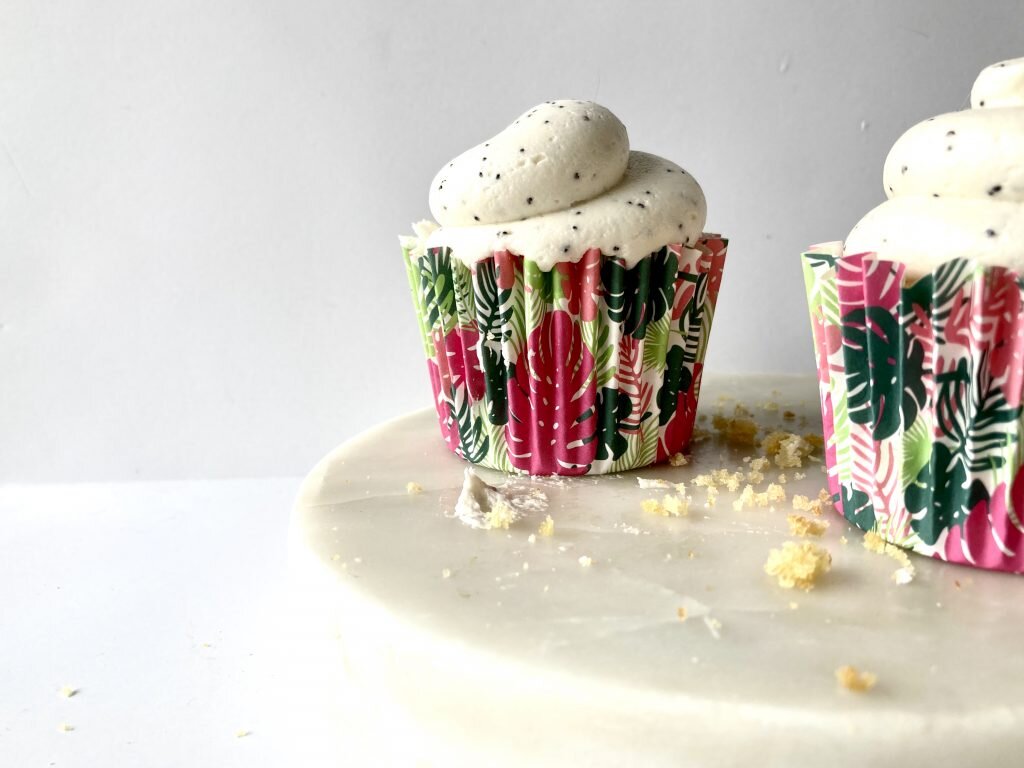
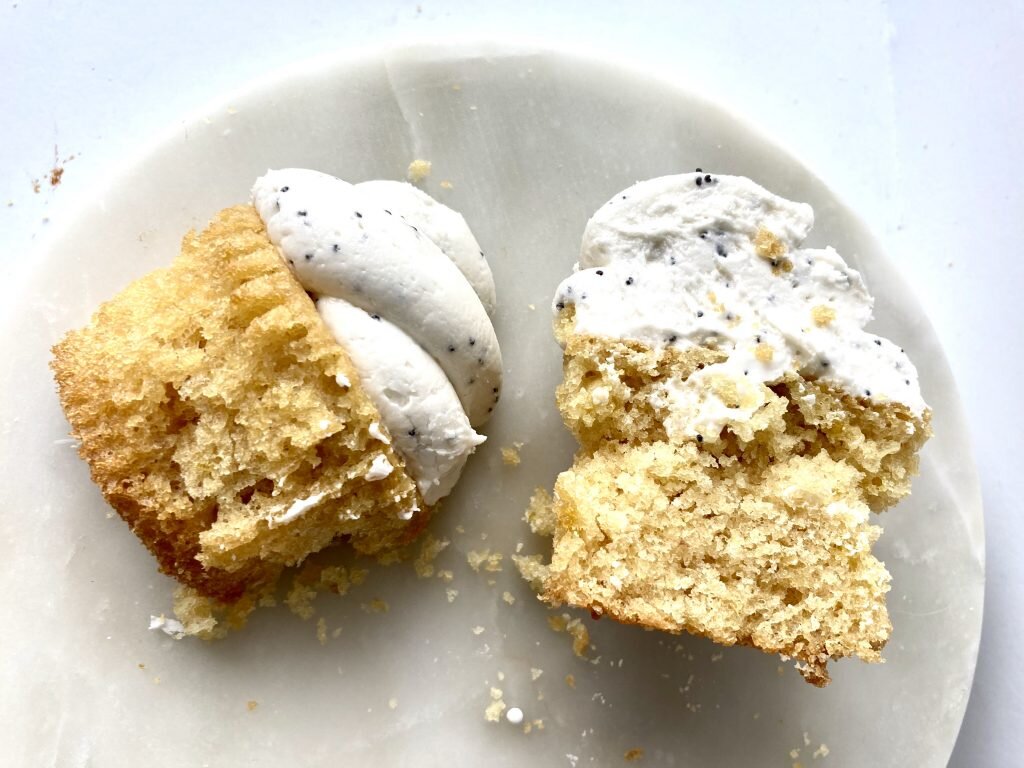
*Disclaimer: This post contains affiliate links. To learn more, please go here.Who's ready for some grapefruit poppy seed cupcakes?? I know I certainly am! These cupcakes are light and pack a citrus punch of grapefruit that's topped with such a simple buttercream that has a little texture and crunch from the poppy seeds. Want to add even more to the buttercream? Just add in a little bit of grapefruit zest or even make it into a poppy seed cream cheese buttercream for a little more tang. It'll be delicious either way you go!Not a fan of grapefruit? No problem! Just replace the juice with lemon, lime, or even orange juice and make it your own! I cannot say this enough and will always give you other options when it comes to baking. It's a science and it's always fun to make it your own! Just follow the recipe and just substitute out the juice and zest for what suits your needs. So instead of grapefruit poppy seed cupcakes you can make them into lemon poppy seed cupcakes! Now that sounds delicious!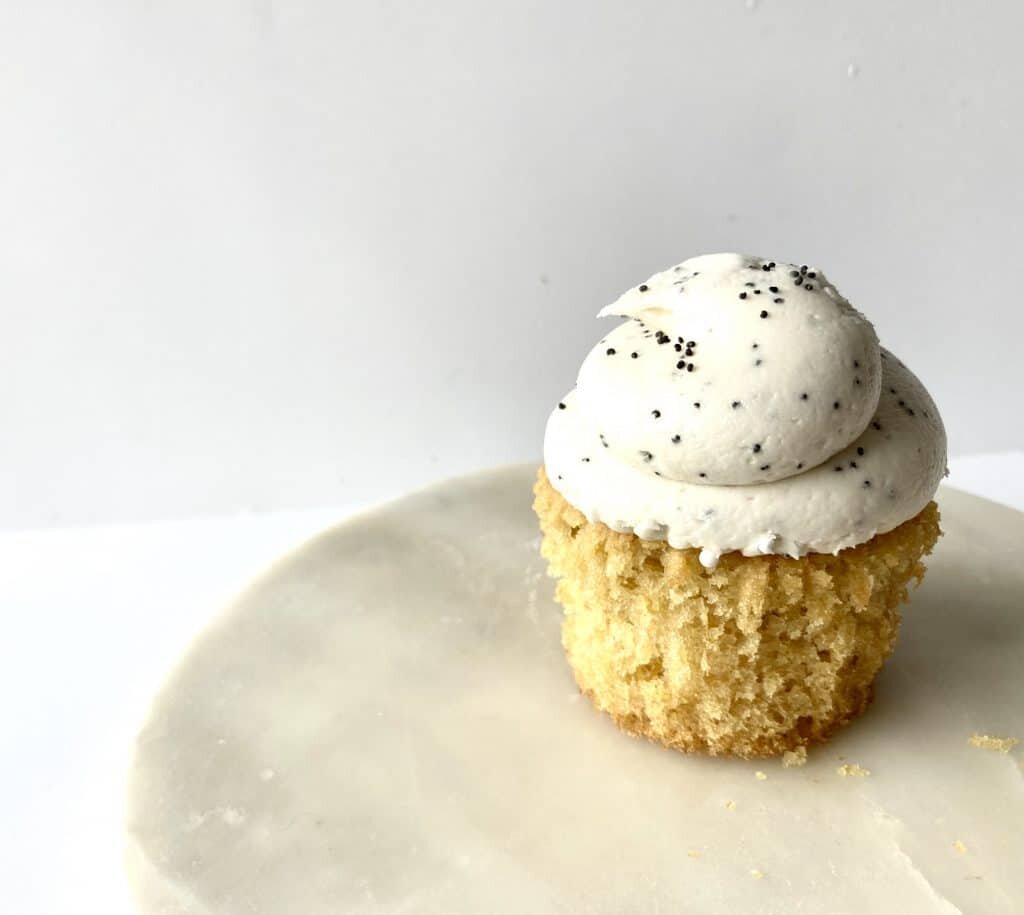
[mailerlite_form form_id=1]
Above are some products that I personally use and recommend for this recipe and to have for everyday use. I highly recommend having a cookie/ice cream scoop in your kitchen arsenal. Having one makes it easy to scoop cupcake batter into the liners and makes the batter distributed evenly.
___________________________________________________________________________________________________
grapefruit poppy seed cupcakes
light and tart cupcakes topped with a simple buttercream with poppy seeds
cupcakes
- 1 1/4 cup cake flour
- 1/2 cup granulated sugar
- 1 1/2 tsp baking soda
- 1/2 tsp salt
- 1 egg
- 1/3 cup vegetable oil
- 1 tsp vanilla extract
- 1 tbsp grapefruit zest
- 1/4 cup grapefruit juice
- 3/4 cup buttermilk
buttercream
- 1 cup unsalted butter (room temp)
- 4 cup powdered sugar
- 1 tbsp poppy seeds
- 1 1/1 tsp vanilla
- pinch salt
- 2-3 tbsp heavy cream
cupcakes
- preheat the oven to 350 degrees F and place cupcake liners into the cupcake tins. in a large bowl combine the cake flour, sugar, salt, and baking soda and whisk to combine. in another bowl, mix together the egg, oil, grapefruit zest and juice, buttermilk and vanilla. add the wet into the dry and mix until everything is fully incorporated. using an cookie scoop, distribute the batter into the cupcake tins and bake for 14-16 minutes or until a toothpick comes out clean. let cool.
buttercream
-
put all of the ingredients into the bowl of an electric mixer fitted with a whisk attachment. start slow and then gradually increase the speed. whip on high until light and fluffy, about 3 minutes.

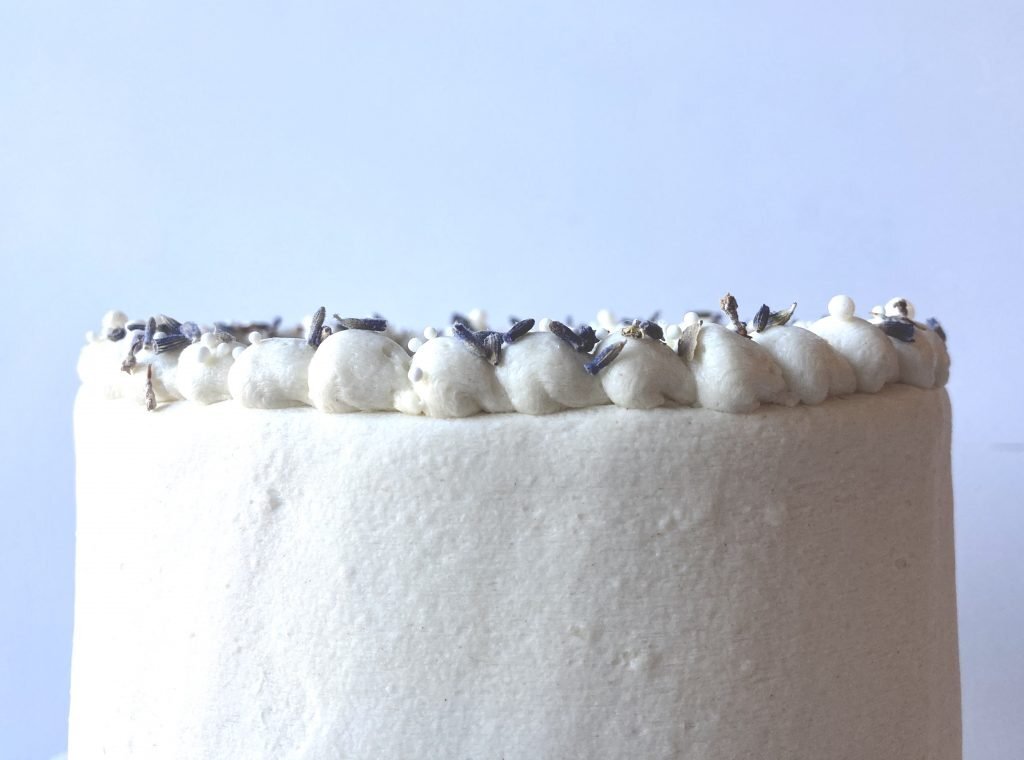
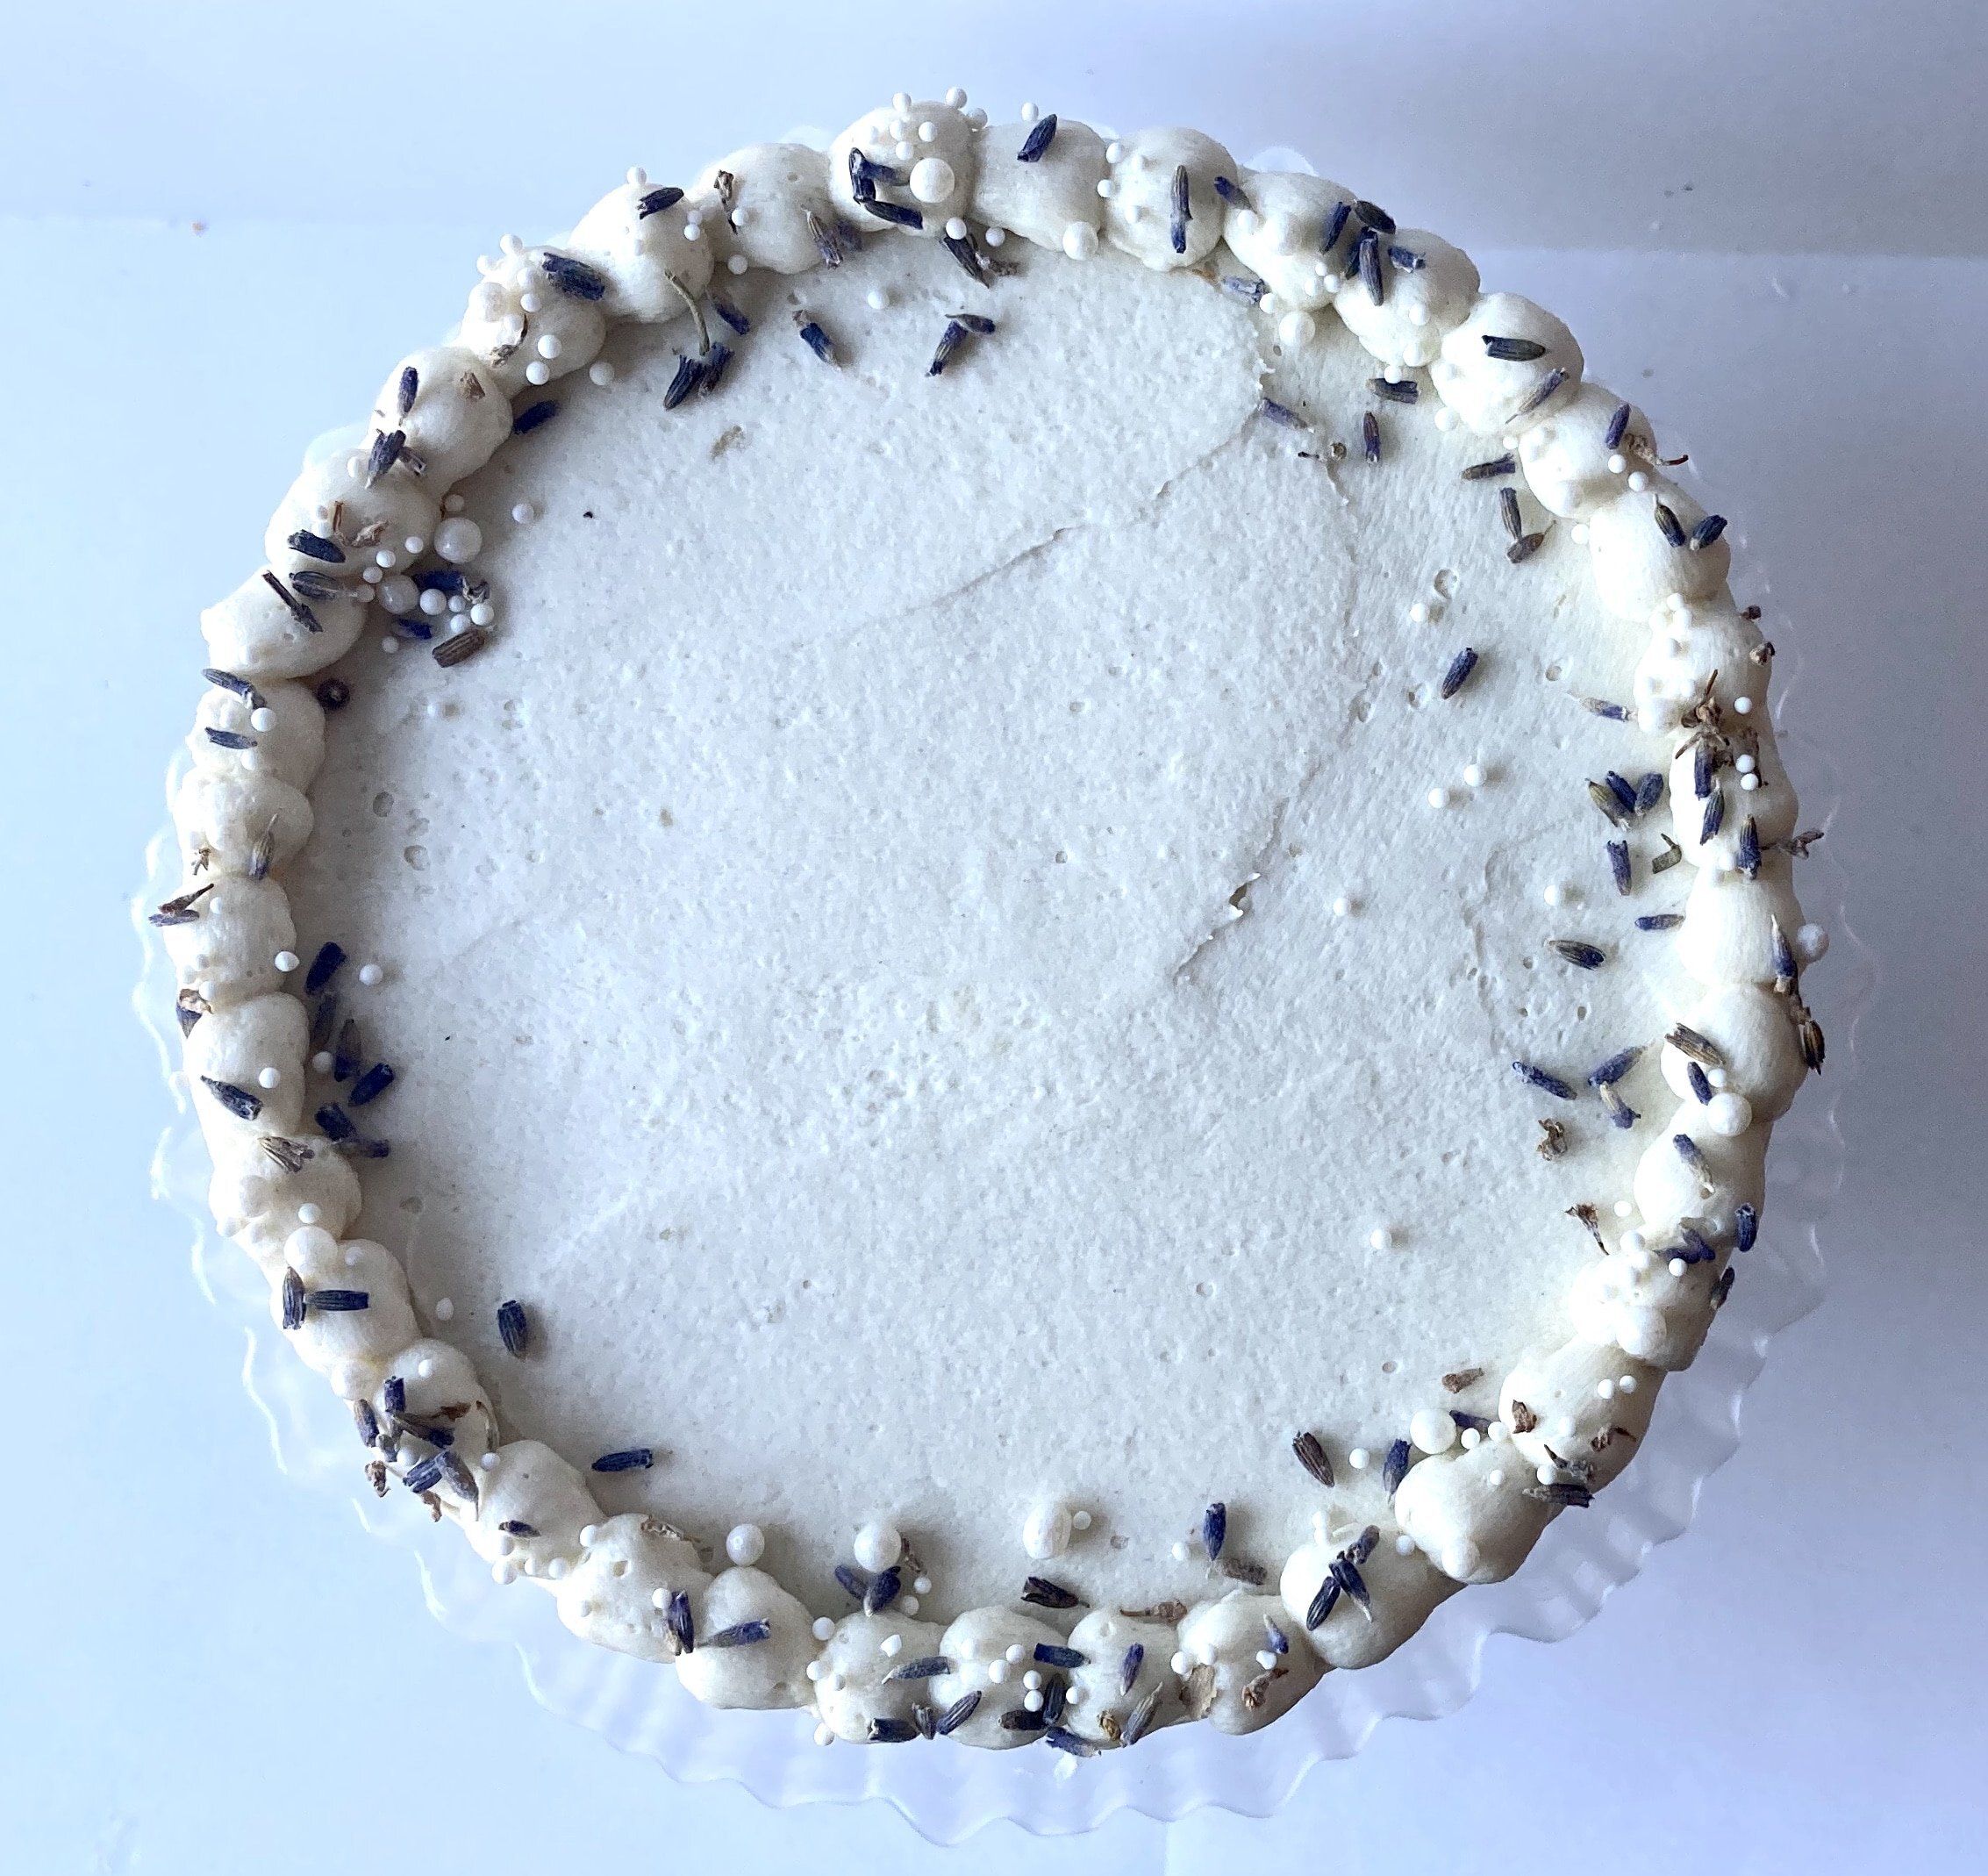
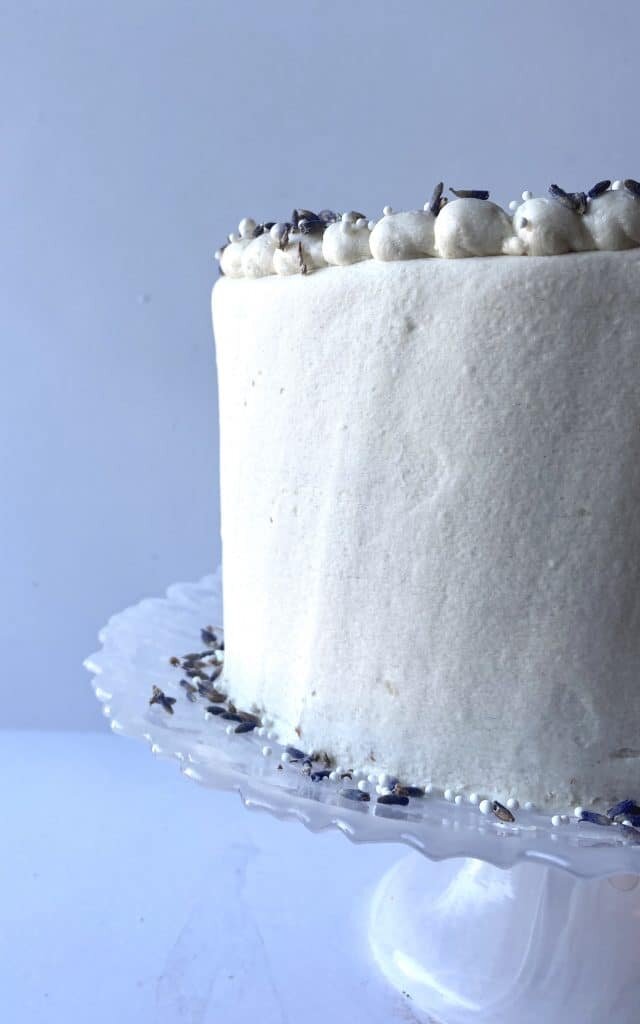
Lavender Vanilla Bean Cake

[wprm-recipe-jump]
*This post contains affiliate links. Please read disclosure to learn moreWhen I think of june I think of flowers blooming everywhere and people starting to really get into gardening for the summer. So why not enjoy a lovely lavender vanilla bean cake that is light, airy and coated in the most luscious buttercream you will ever have?The lavender in this cake is very subtle and not at all overpowering as it is only found in the buttercream and is nowhere in sight in the actual cake. It's perfect for a cute little tea party or picnic get together.Now if you don't have lavender than that is no problem at all! You can use dried rose petals, hibiscus or you can even use your favorite tea if you want to! Or you don't need to use any floral flavors at all and can just keep it simply vanilla. There is no wrong way to make a cake flavorful and everyone has different taste buds.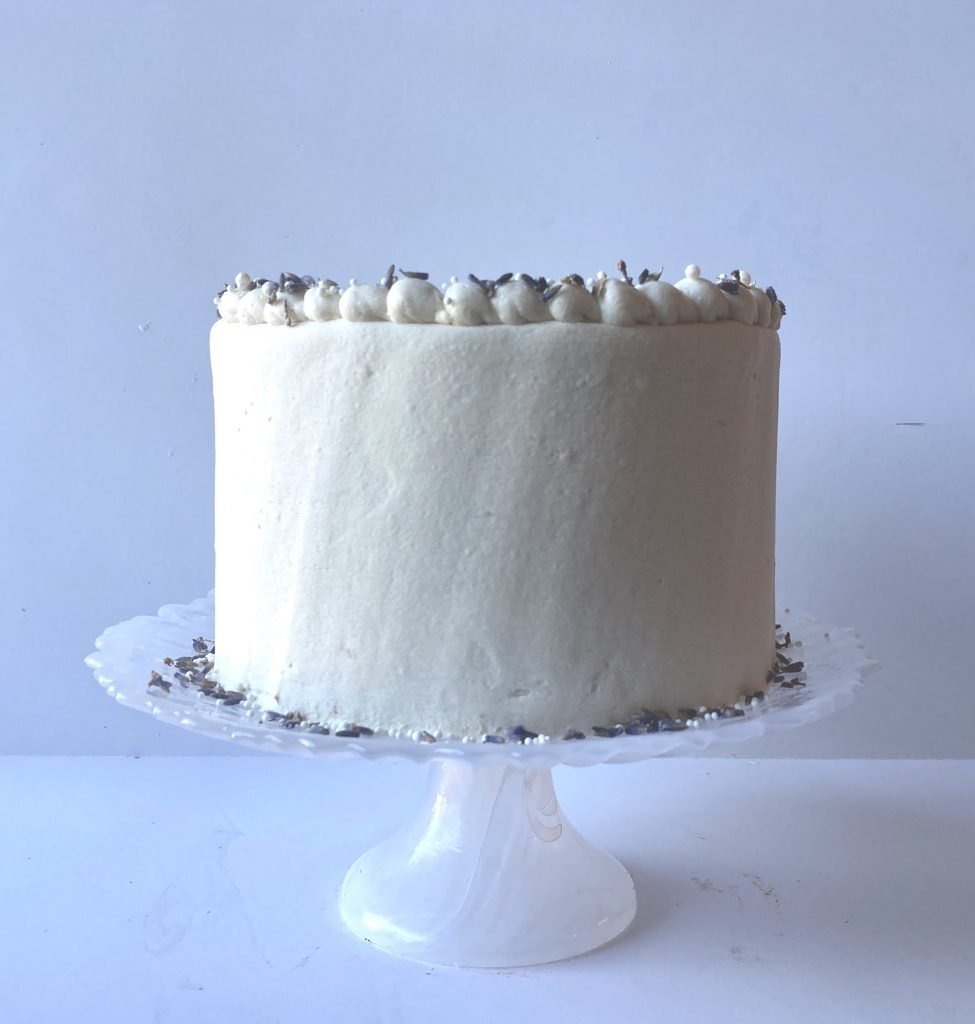
[mailerlite_form form_id=1]
Above are some products that I personally use and recommend for this recipe and to have for everyday use. When I make a cake, I will always use 6 inch cake pans. Now you don't have to use this cake pan size, but if you decide to use a different size than you will have to use some trial and error with the baking time. Baking is a science! So adjusting baking times will always be a given especially since not all ovens work the same way.
___________________________________________________________________________________________________
Lavender Vanilla Bean Cake
light vanilla bean cake with a lavender ermine buttercream.
makes one 3-layer, 6-inch cake
cake
- 2 cup cake flour
- 1 cup granulated sugar
- 1 1/2 tsp baking powder
- 1 1/2 tsp baking soda
- 1 tsp salt
- 2 eggs
- 4 egg whites
- 2/3 cup vegetable oil
- 1 tsp vanilla extract
- 1 vanilla bean (scraped)
- 1 1/4 cup milk
buttercream
- 1 cup milk
- 2 tbsp dried lavender
- 5 tbsp all-purpose flour
- 1 cup granulated sugar
- 1 1/2 tsp vanilla
- pinch salt
- 1 cup unsalted butter (room temp)
cake
- preheat the oven to 350 degrees F and line three 6-inch pans with parchment paper. in a large bowl, combine the cake flour, sugar, baking powder, baking soda and salt and whisk together. in another bowl, combine the oil, eggs, egg whites, vanilla bean, vanilla, and milk and whisk together. pour the wet ingredients into the dry and mix until fully combined. place the batter in the pan and bake for 20-25 minutes or until a toothpick comes out clean. let the cake cool for 10 minutes then carefully remove them from the pans to continue cooling. wrap in cling wrap until ready to use.
buttercream
-
in a saucepan combine the lavender and milk and place over medium-low heat and bring to a simmer. turn off the heat and cover with a lid and let stand for 30 minutes. strain out the lavender and place the pot with the milk back on the stove. whisk the sugar, flour and salt in a separate bowl and then slowly whisk into the milk. add the vanilla. turn the heat on to medium/high and whisk the mixture constantly until it starts to thicken, about 8-15 minutes. (this depends on if you have a gas or electric stove top.) once thick, remove from the heat. put the mixture into a bowl. place cling wrap directly over the mixture so a skin doesn’t form. let cool until room temp. once at room temp, place the butter into the bowl of an electric mixer fitted with a whisk attachment. whip until light and fluffy, about 5 minutes. add the flour mixture, a spoonful at a time, into the butter mixture. once the flour mixture is all added, whip on high for about a minute. the buttercream will resemble whipped cream.

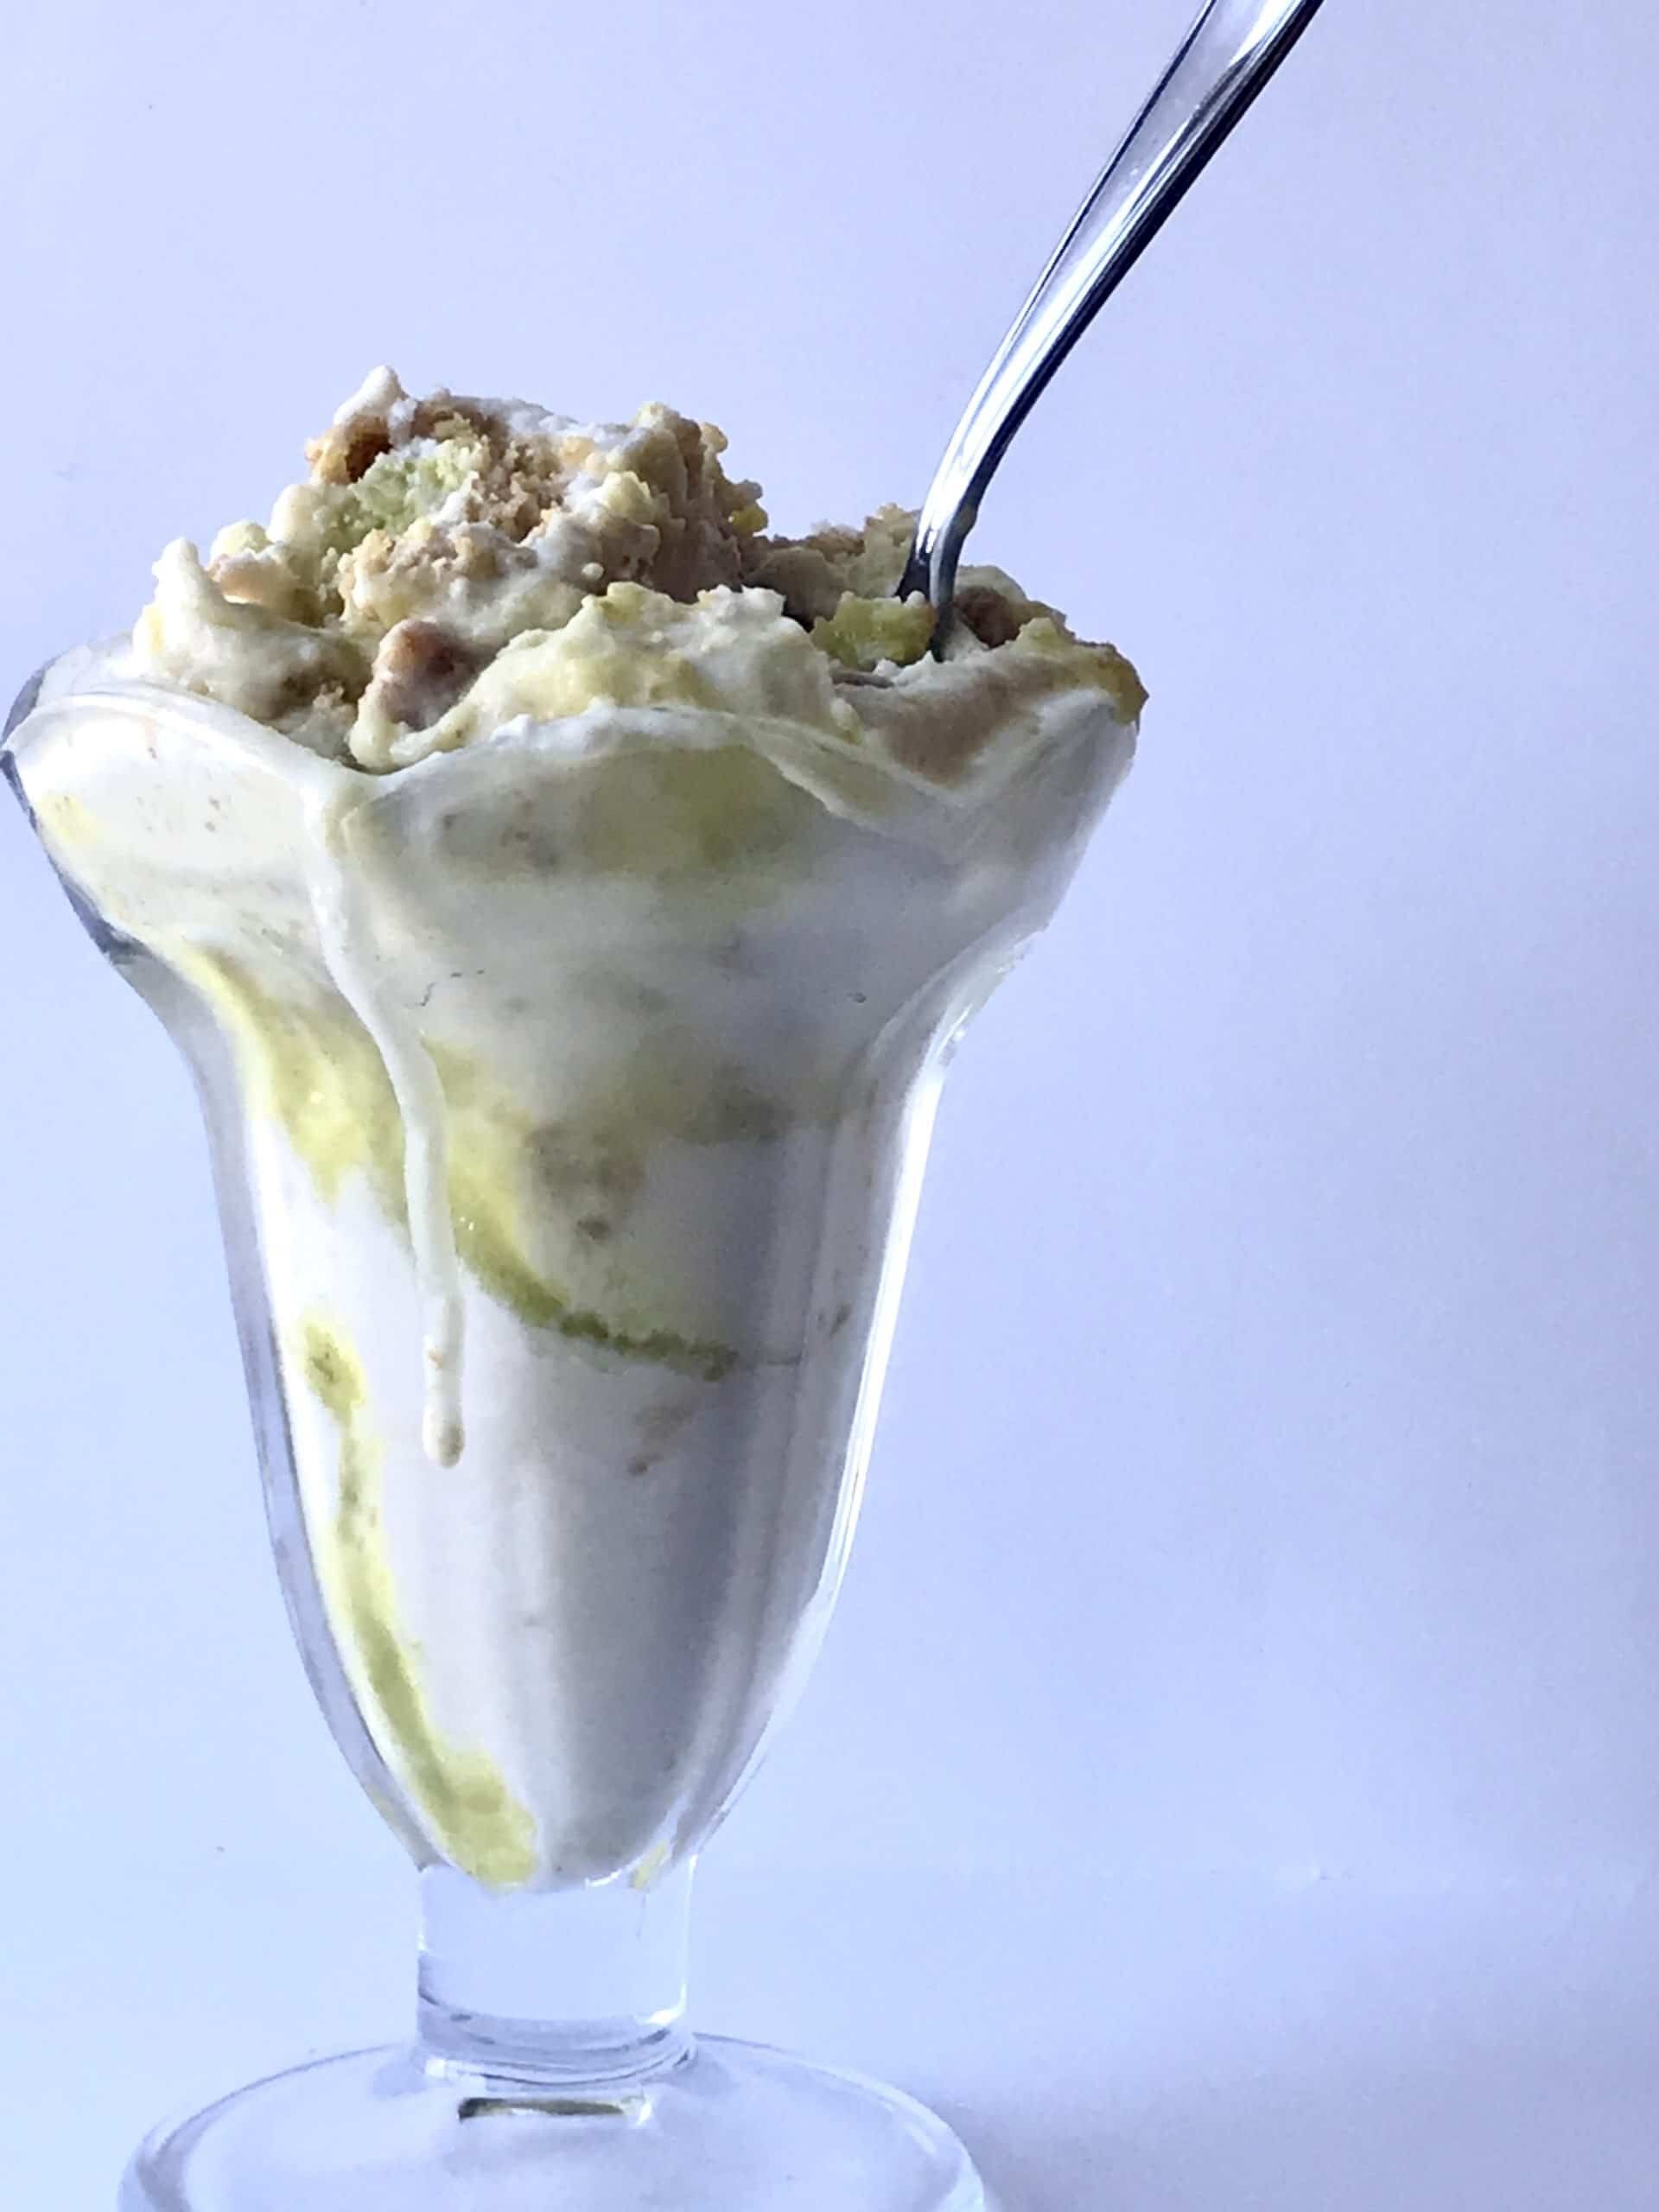
Key Lime Pie Ice Cream
[wprm-recipe-jump]
*This post contains affiliate links. Please read disclosure to learn moreThis key lime pie ice cream is super addicting. I couldn't get enough of the creamy ice cream that's layered with the tangy lime curd and the crunch from the graham crust. It's the perfect summer treat that every one will enjoy. Add it onto a ice cream cone (waffle cones are the best!) and that will make it absolute heaven! I love this key lime pie ice cream so much and I can't wait to make it again and devour every last morsel.The vanilla ice cream is sweet and contrasts perfectly with the key lime curd and balances it out perfectly! Then you get the texture and crunch from the graham crust. Add all three things together and you have one of the best ice creams you will ever have!Want to try it differently? Make the curd lemon or even strawberry and make it unique to you! It's super easy to puree some berries or juice a pineapple to make a curd. You don't even have to add in the graham crust! Make it your own and have fun with it! That's what baking is about. It's a science and science means experimenting.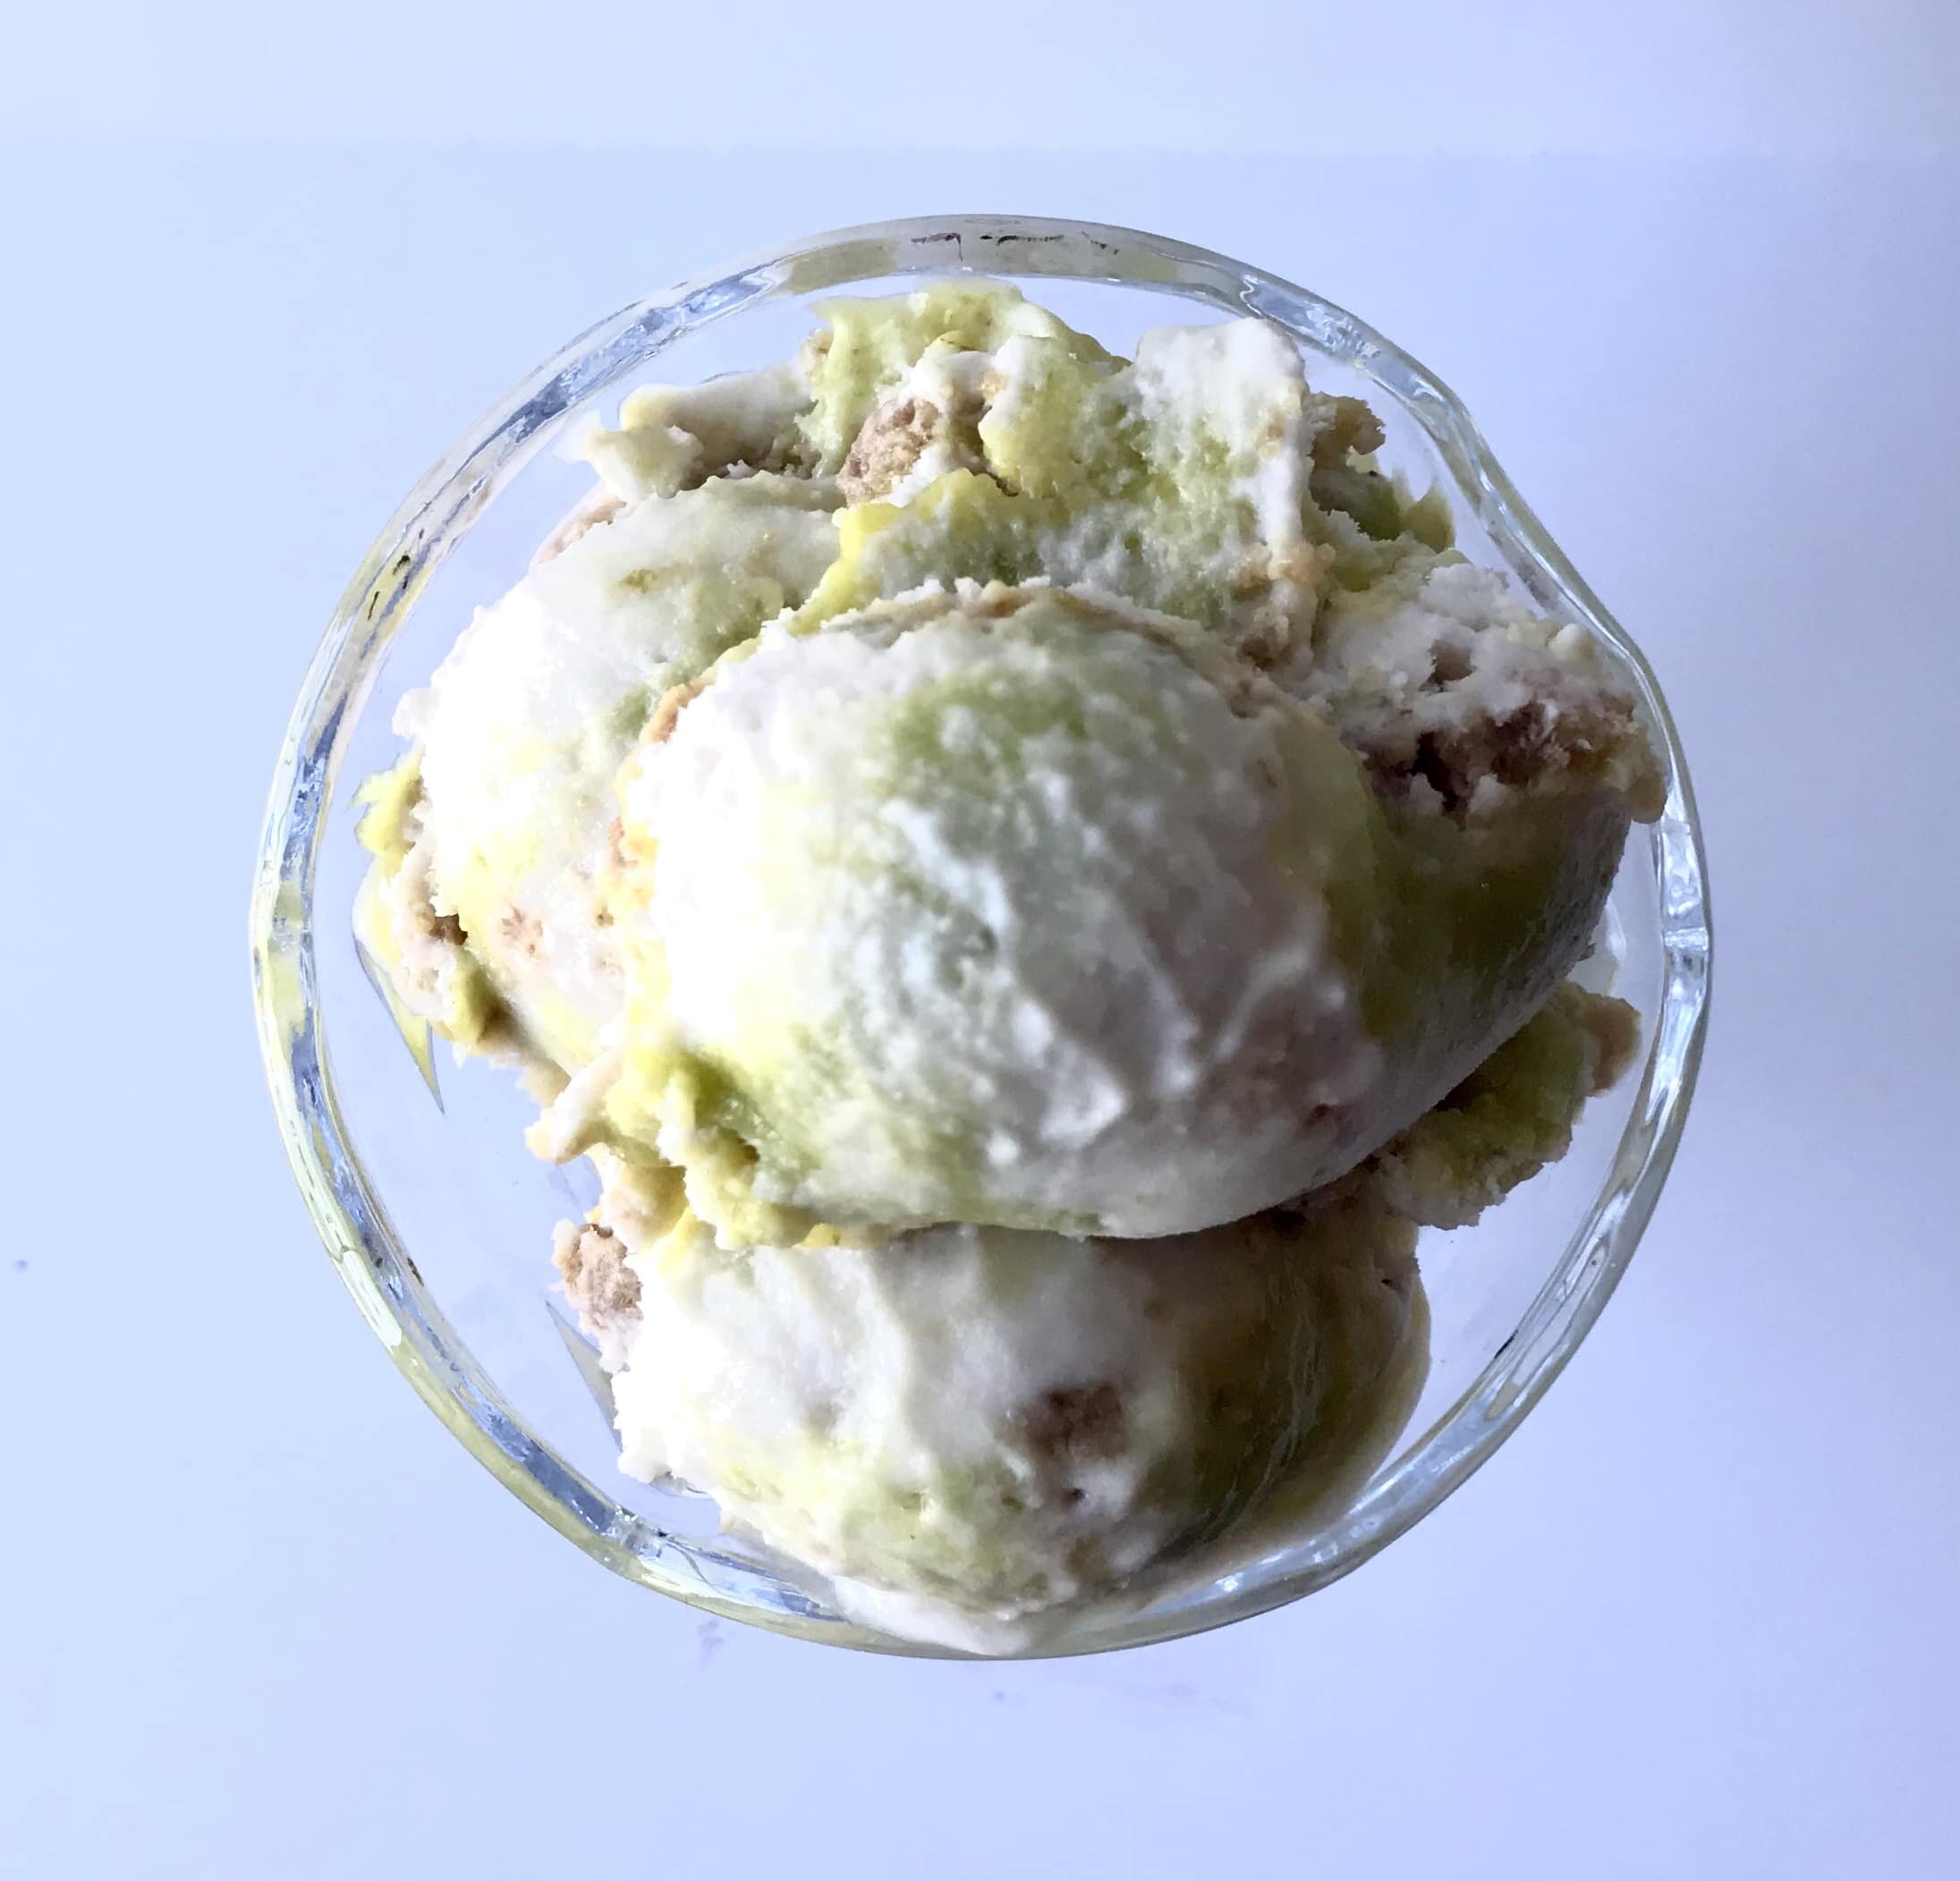
[mailerlite_form form_id=1]
[gallery size="medium" ids="4264,4265,4266"]
Above are some products that I personally use and recommend for this recipe and to have for everyday use. I highly recommend starting off with the cuisinart ice cream machine as your first ice cream maker. It's the cheapest one on amazon and I personally use it and love it! I also suggest getting a reusable ice cream container as well, it's dishwasher safe and you can use it over and over again!
______________________________________________________________________________________
Key Lime Pie Ice Cream

a sweet and creamy vanilla ice cream swirled with key lime curd and graham crumbs.
ice cream
- 1 1/2 cup heavy cream
- 2 cup milk
- 1 cup granulated sugar
- 1 1/2 tsp vanilla
- pinch salt
key lime curd
- 1/2 cup lime juice
- 2 tsp lime zest
- 1 egg
- 3 egg yolks
- 1/2 tsp vanilla extract
- 2 tbsp unsalted butter (room temp)
graham crust
- 1/2 cup graham crackers (crushed)
- 3 tbsp butter (melted)
- pinch salt
ice cream
-
place the cream, milk, sugar and vanilla into a pot and bring to a boil, whisking to make sure the sugar dissolves. place the ice cream base into the fridge overnight to cool and to let the flavor increase. following the manufacturer's instructions of your ice cream machine, turn the base for 20-25 minutes. layer the ice cream with the lime curd and graham crust: ice cream, swirl in some lime curd and the top with a sprinkle of the graham. repeat! freeze until set and then eat all of the yummy ice cream!
key lime curd
-
in a small pot, combine the lime juice, lime zest, egg yolks, egg, vanilla, salt and sugar and whisk constantly over medium heat. make sure to continuously whisk to prevent the eggs from curdling. continue whisking until it starts to thicken. remove from the heat and add in the butter. strain through a fine mesh sieve and place cling wrap directly on top of the curd to prevent a skin from forming. place in the fridge until cool.
graham crumbs
- mix all of the ingredients together and spread a thin layer onto a sheetpan. bake at 350 degrees F for about 10 minutes. let cool.

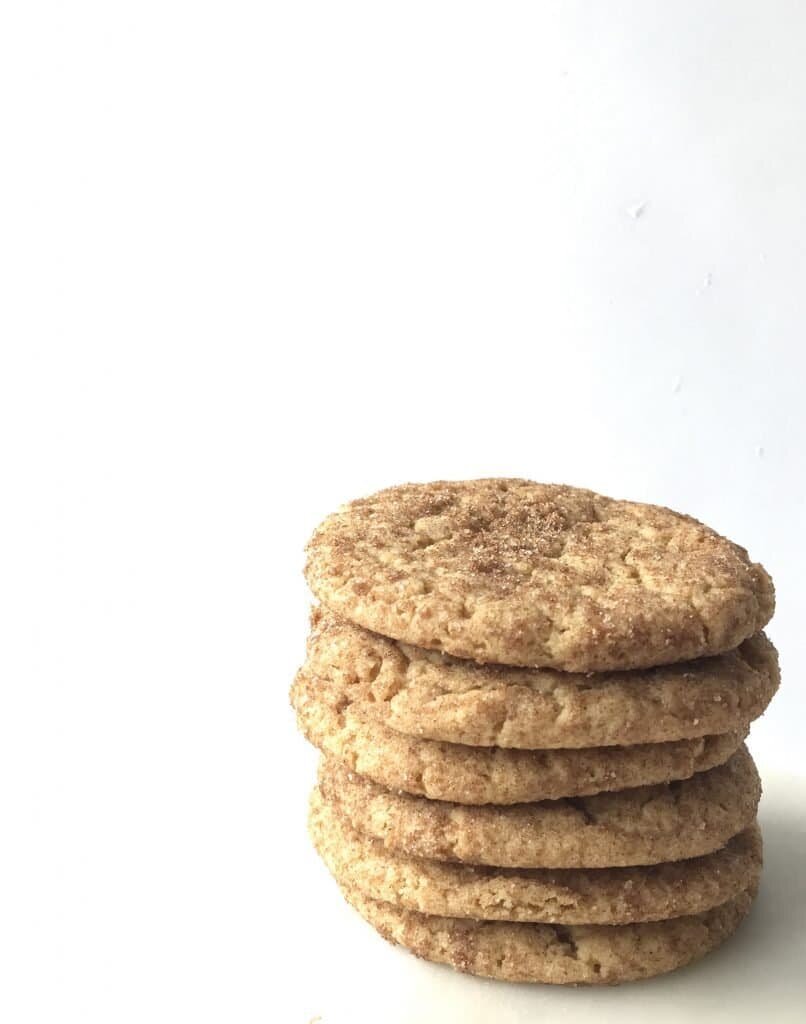
Snickerdoodles

[wprm-recipe-jump]
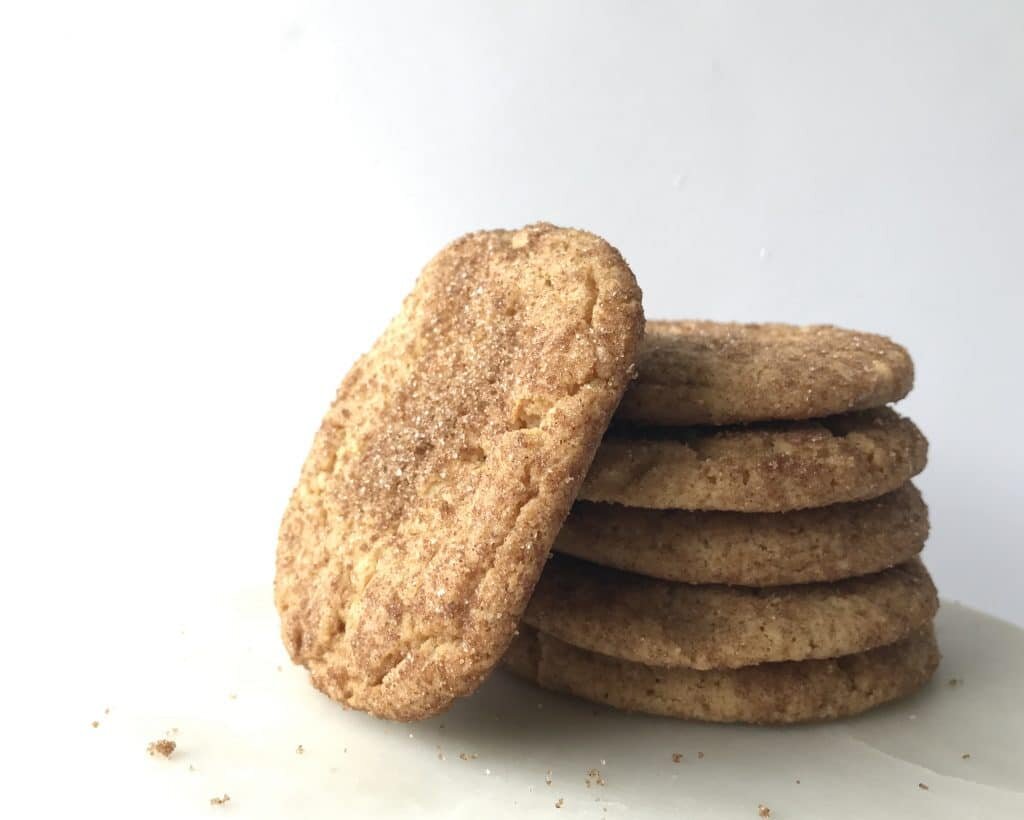
*Disclaimer: This post contains affiliate links. To learn more, please go here.These snickerdoodles are so good! They aren't the usual cinnamon spiced cookie you see though. I used brown sugar instead of granulated sugar to give it more depth in flavor and these do not disappoint! They are soft and not too sweet, but oh so good that it will satisfy your sweet tooth. These guys are a great treat to add to your cookie list for the holidays or even just to have something to snack on over the weekend. Kids will even love them in their lunch box.Now the reason these snickerdoodles are so good is because it's made with brown sugar! Brown sugar has molasses in it which adds so much flavor to whatever you make with it. I find that the brown sugar in these cookies elevates the cinnamon in them and just overall gives it a flavor boost. Plus I just love to bake with brown sugar!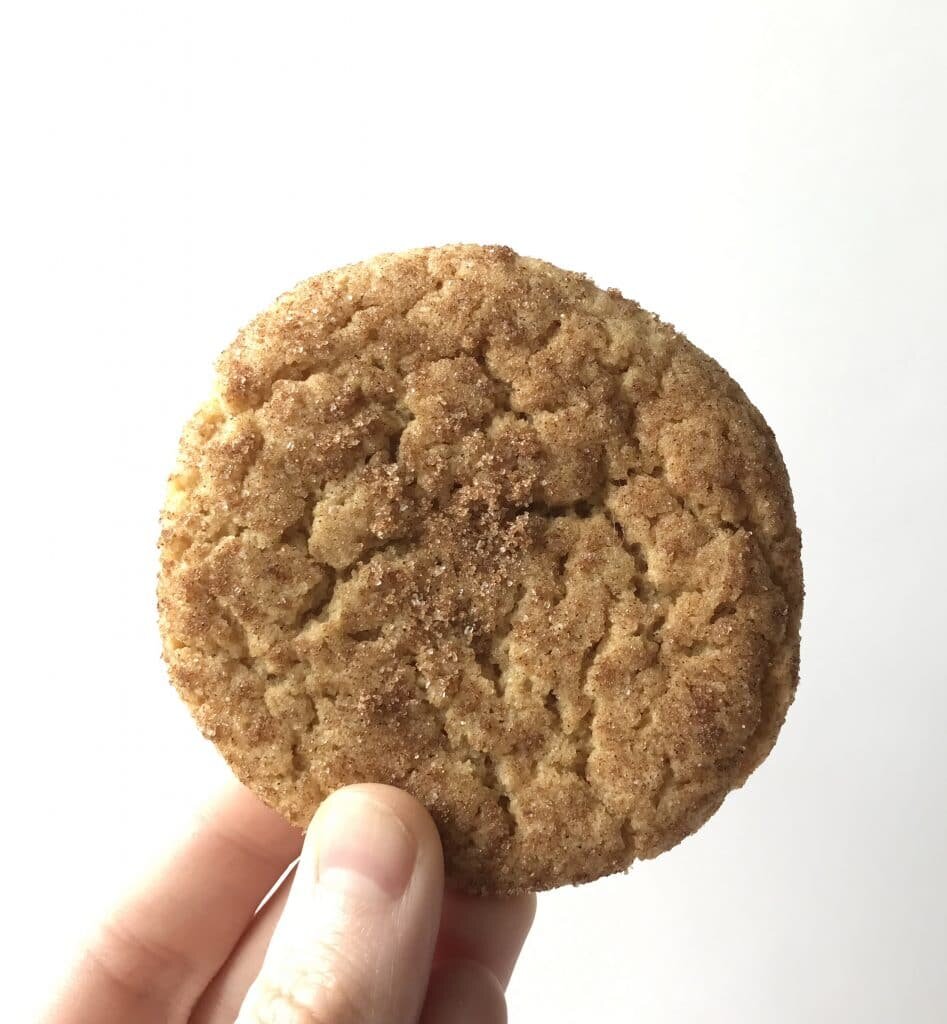
[mailerlite_form form_id=1]
Above are some products that I personally use and recommend for this recipe and to have for everyday use. My absolute favorite is the BlueQ oven mitts. I have a collection of them and I love them! They are great quality and it's nice to have a kitchen item with a sense of humor.
__________________________________________________________________________________
Snickerdoodles
these snickerdoodles are soft and chewy and the cinnamon flavor is enhanced with the brown sugar.
- 2 sticks unsalted butter (room temp)
- 1 cup brown sugar
- 1 1/2 tsp vanilla extract
- 1 egg
- 1 tsp baking soda
- 1/2 tsp salt
- 1 tsp cream of tar tar
- 2 cup all-purpose flour
for rolling
- 1/4 cup brown sugar
- 2 tbsp granulated sugar
- 1 1/2 tsp cinnamon
-
Preheat the oven to 350 degrees F. Line a pan with parchment paper. In the bowl of an electric mixer fitted with a paddle attachment cream the sugar and the butter until light and fluffy, about 1 minute. Scrape down the side of the bowl and then add in the egg and vanilla. In another bowl combine the flour, baking soda, cream of tar tar, and salt and whisk together. Scrape down the sides of the bowl then on low speed, gradually add in the dry ingredients. In a small bowl mix the brown sugar, granulated sugar and cinnamon together. Scoop the cookie dough and roll in the cinnamon sugar and then bake for 8-10 minutes.

Chunky Monkey Blondies

[wprm-recipe-jump]
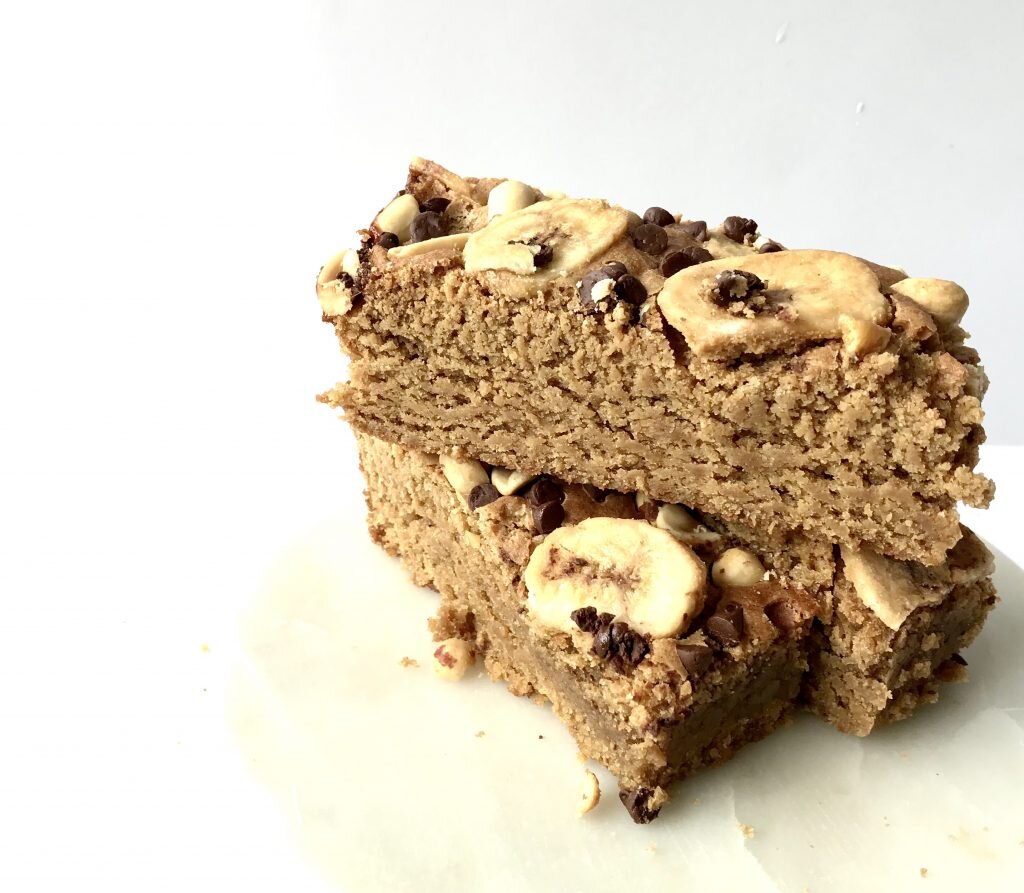
*This post contains affiliate links. To learn more please read the disclosure.These chunky monkey blondies are so much fun! A peanut butter blondie that is almost cake like but is dense and chewy at the same time is topped with chocolate, peanuts, and banana chips! What more could you need in a blondie???!! Now you don't need to get all fancy with the banana chips if you can't find them. I got mine at Target and I know that most grocery stores carry them. They can either be in the produce section with the nuts or in the baking aisle with all of the dried fruit. If you can't find them, than no worries! The blondies will be tasty either way since it's all peanut butter. Just add extra chocolate chips! Now these blondies are perfect for a back to school treat come fall and everyone will love them at the next bake sale!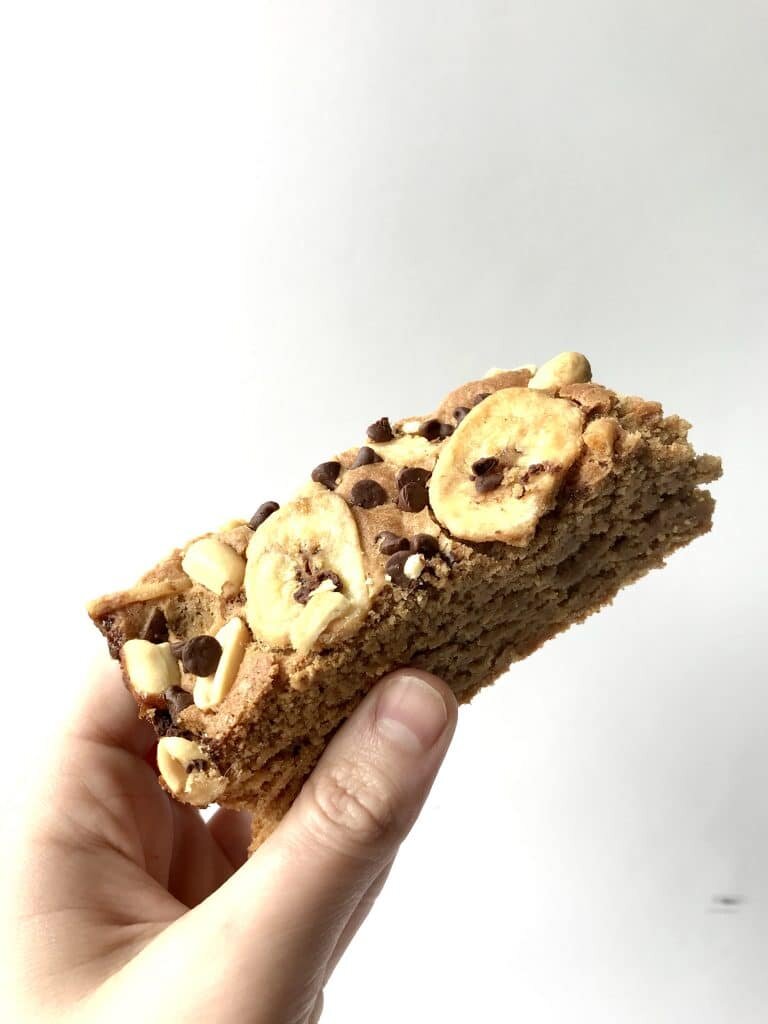
[mailerlite_form form_id=1]
Above are some products that I personally used to make these chunky monkey blondies. I recommend having a square 8x8 inch cake pan to make these but you can always use a casserole dish too. If you want the banana chips but can't find them at your local grocery store, so I provided a link!
_______________________________________________________________________________________
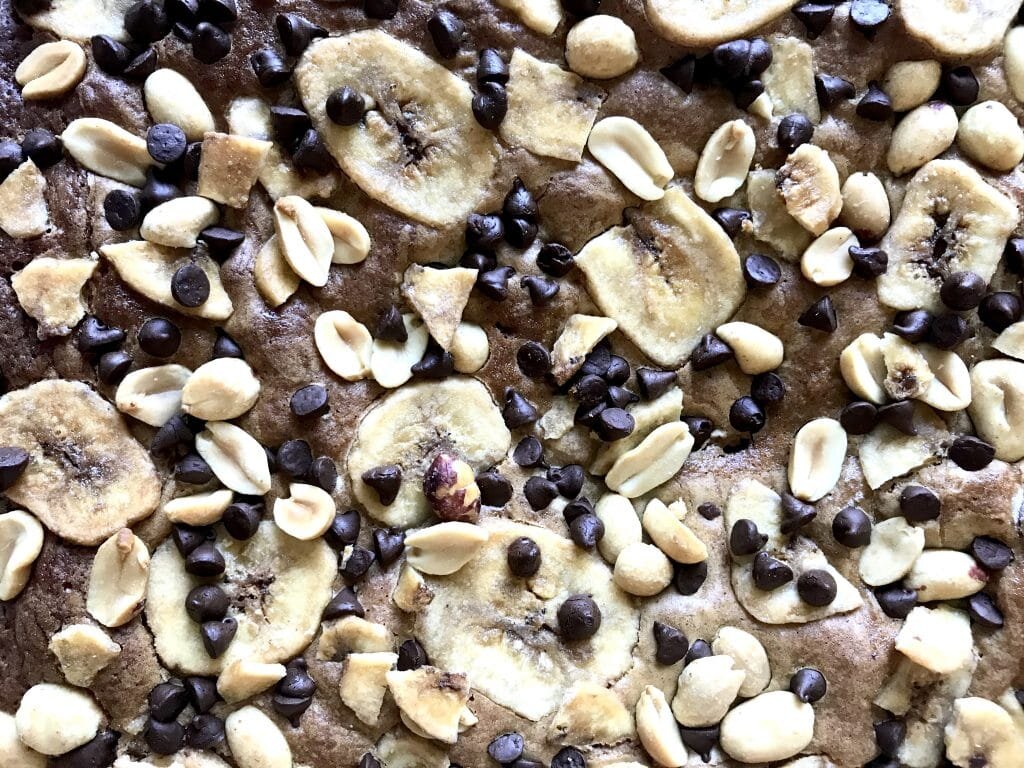
Chunky Monkey Blondies
A peanut butter blondie that is topped with chocolate, peanuts and banana chips.
- 1 stick unsalted butter
- 1 cup creamy peanut butter
- 1 1/2 cup brown sugar
- 3 eggs
- 1 tbsp vanilla extract
- 1/2 tsp salt
- 1 1/2 tsp baking powder
- 1 1/2 cup all-purpose flour
- 1/4 cup chocolate chips (for topping)
- 1/4 cup peanuts (for topping)
- 1/4 cup banana chips (for topping)
-
Preheat the oven to 375 degrees F. Spray a 8 x8 inch cake pan and line with parchment. In a bowl, melt the butter and peanut butter in the microwave for 30 second bursts until melted and fully combined. Add in the brown sugar and vanilla extract and mix until fully combined. Slowly add in the eggs, mixing after each egg is added to prevent them from cooking. Whisk in the flour, baking powder and salt until there are no lumps. Pour the batter into the cake pan and sprinkle the chocolate chips, peanuts, and banana chips on top and bake for 30-35 minutes, or until a toothpick comes out clean. Let cool.
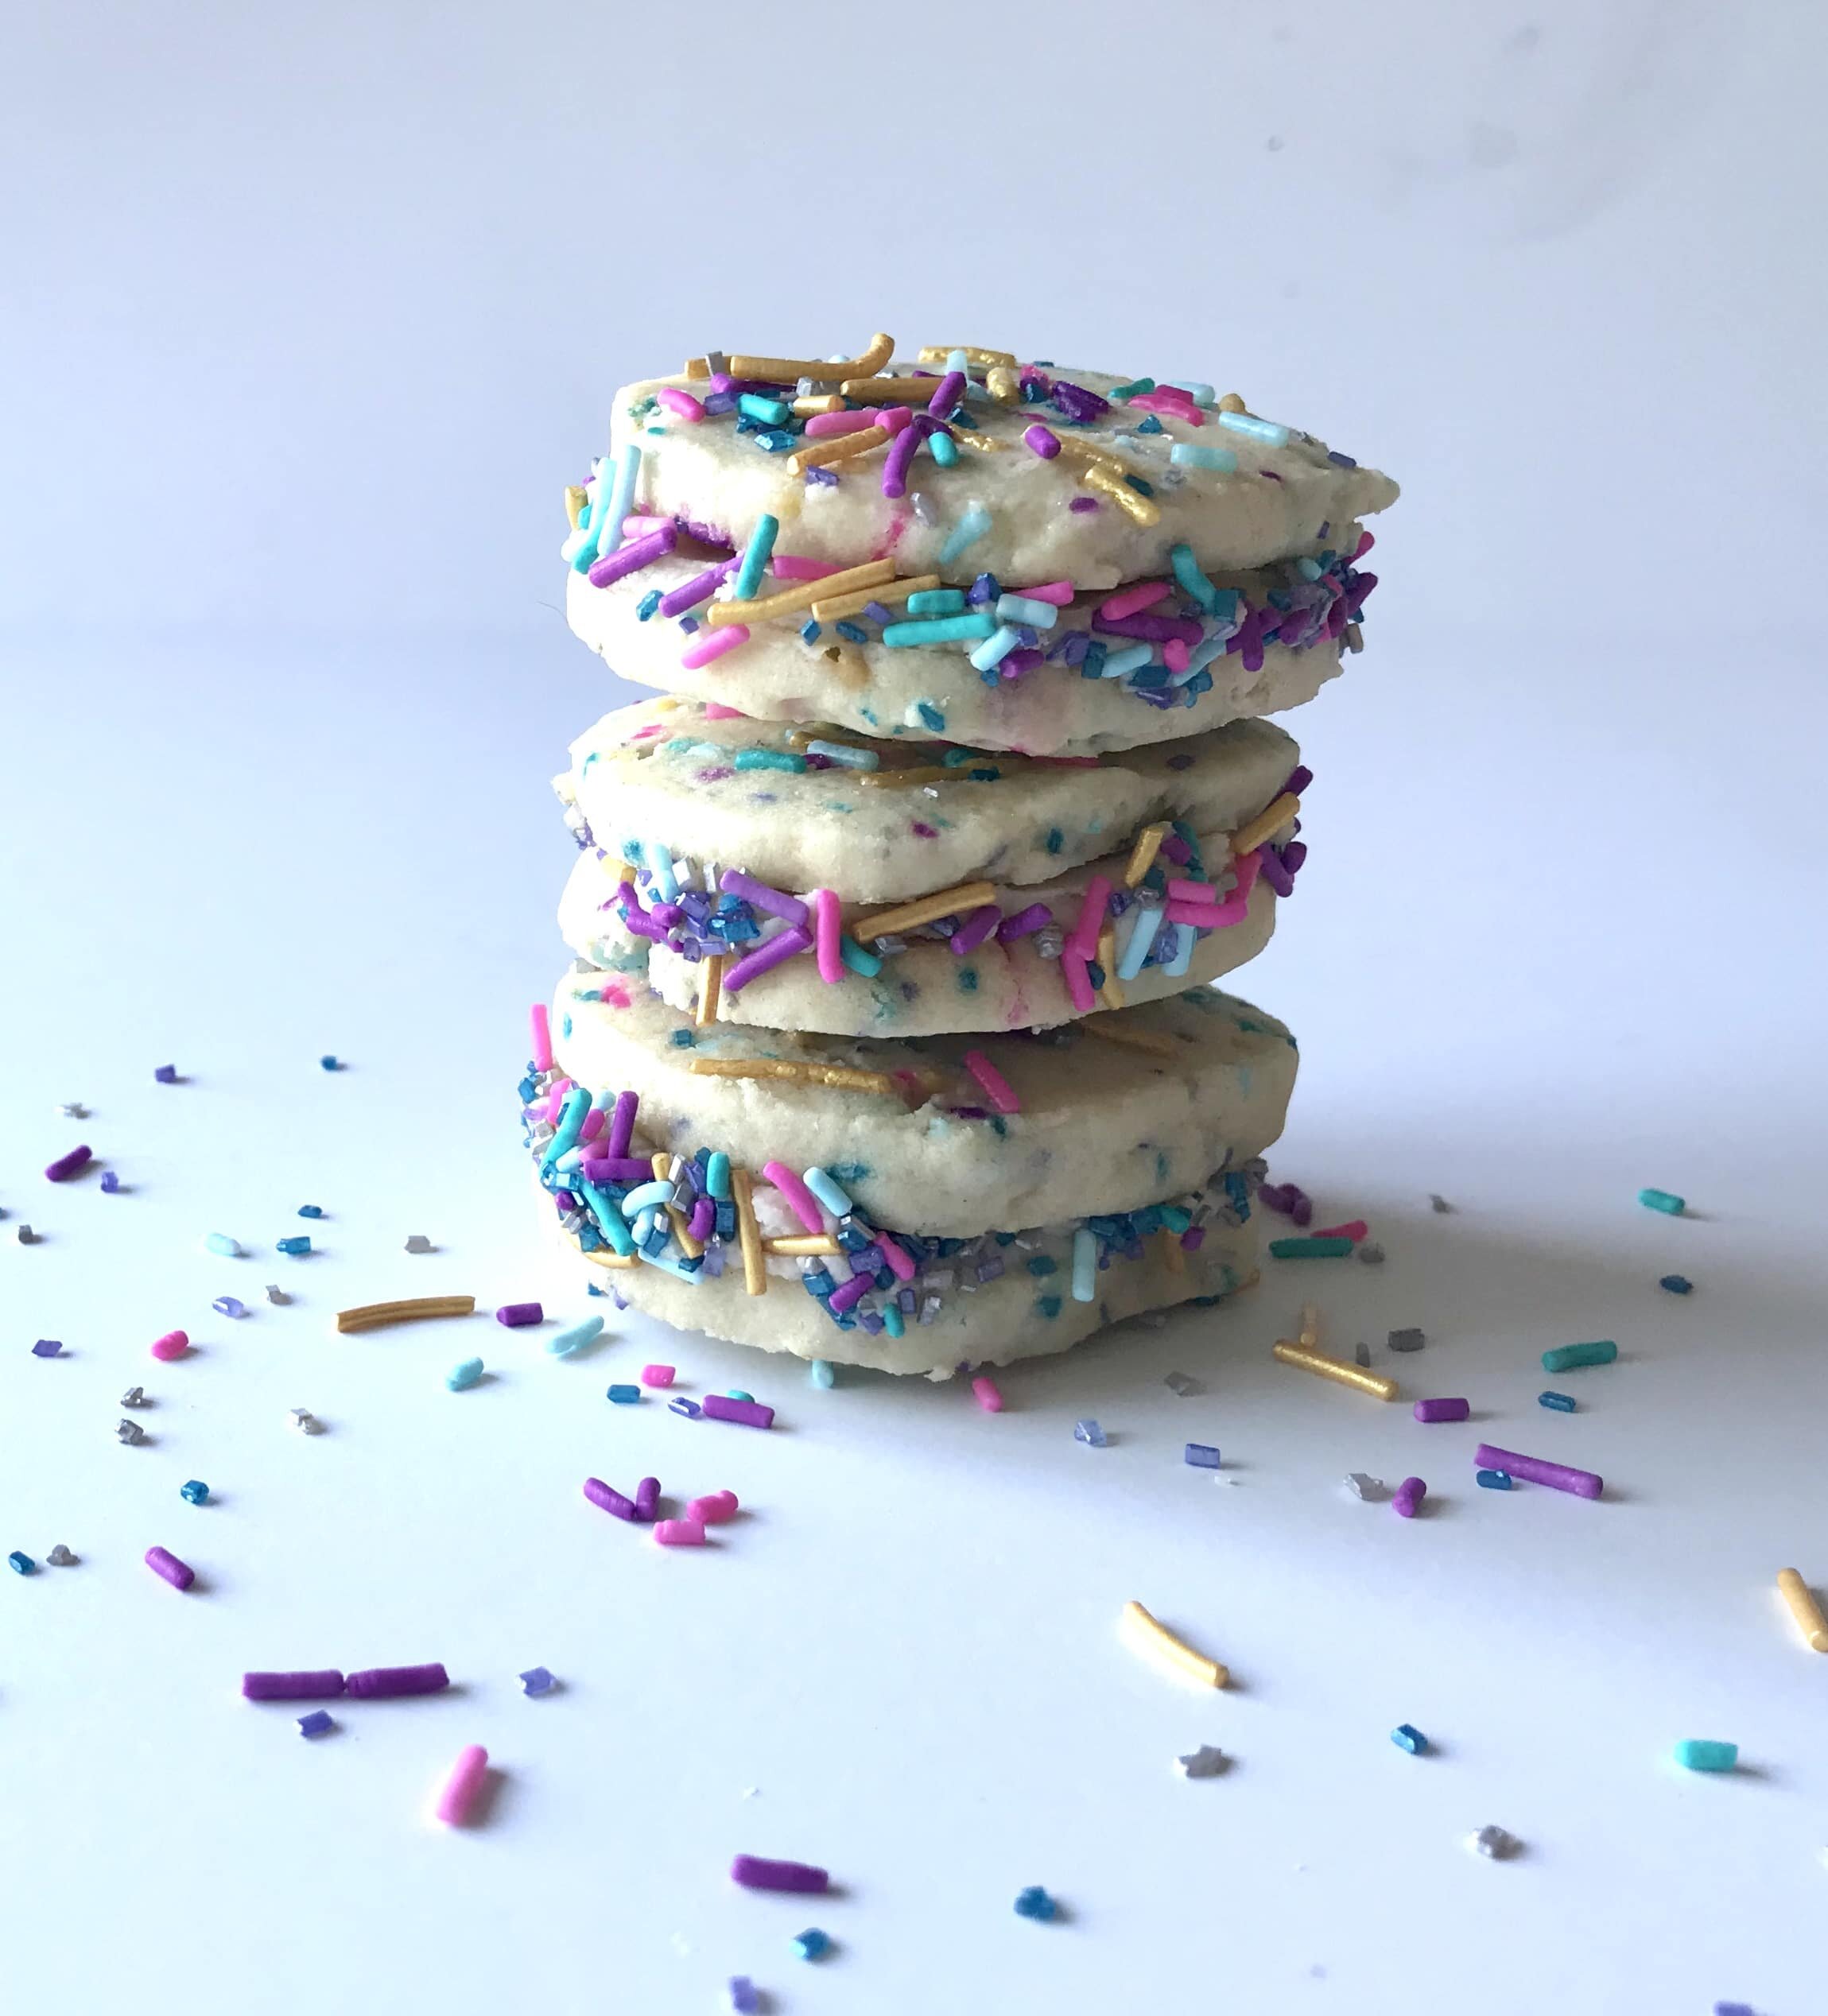
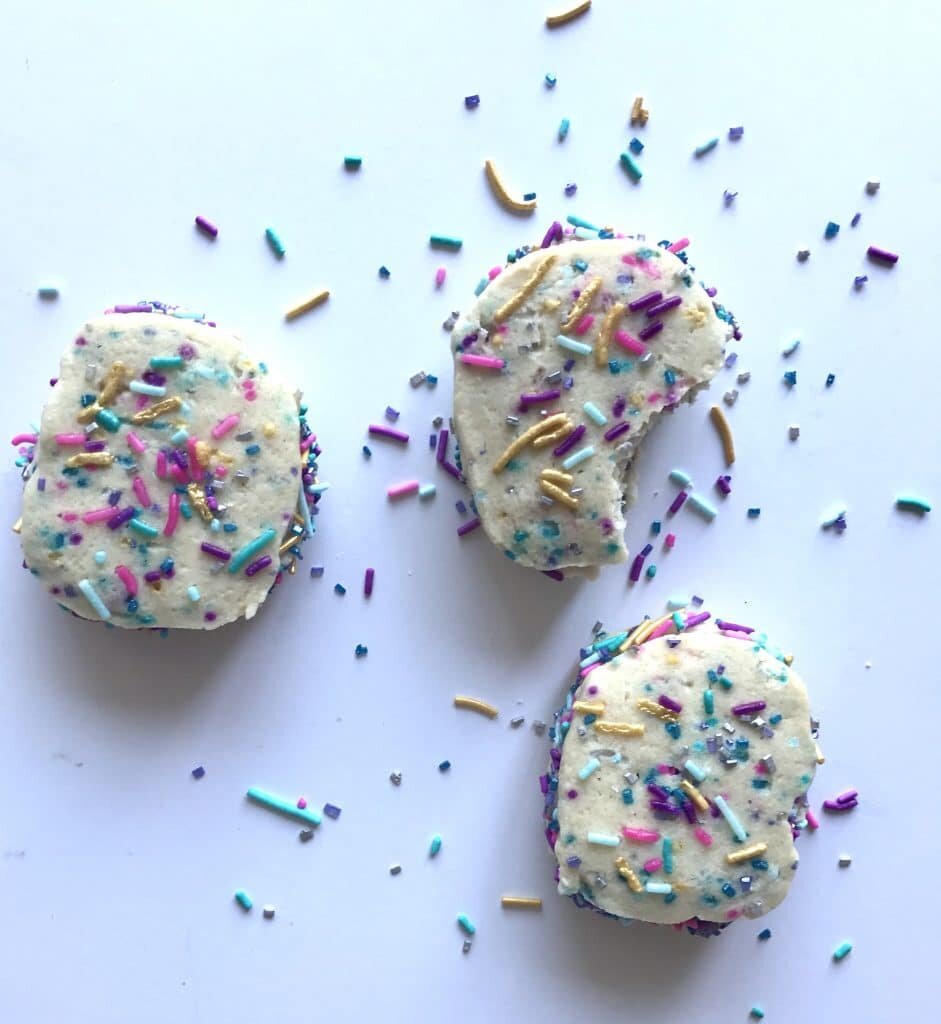
Funfetti Cookie Sandwiches

[wprm-recipe-jump]
*Disclaimer: This post contains affiliate links. To learn more, please go here.What's more fun than a cookie? A funfetti cookie sandwiches yummy cookie dough decorated with sprinkles and flavored with princess extract. Couldn't be any better than that! But then there is also the buttercream that is in between those cookies so that makes it so much better! Oh, and kids will absolutely love them too!These funfetti cookie sandwiches are made with princess extract, which is a delicious emulsion that I have in my kitchen at all times. (More about this down below.) If you don't want to buy the princess extract than that is completely up to you. You can use almond extract instead or just stick to plain vanilla. The flavor isn't what really matters with these cookies, it's the fun of the sprinkles that are mixed in them!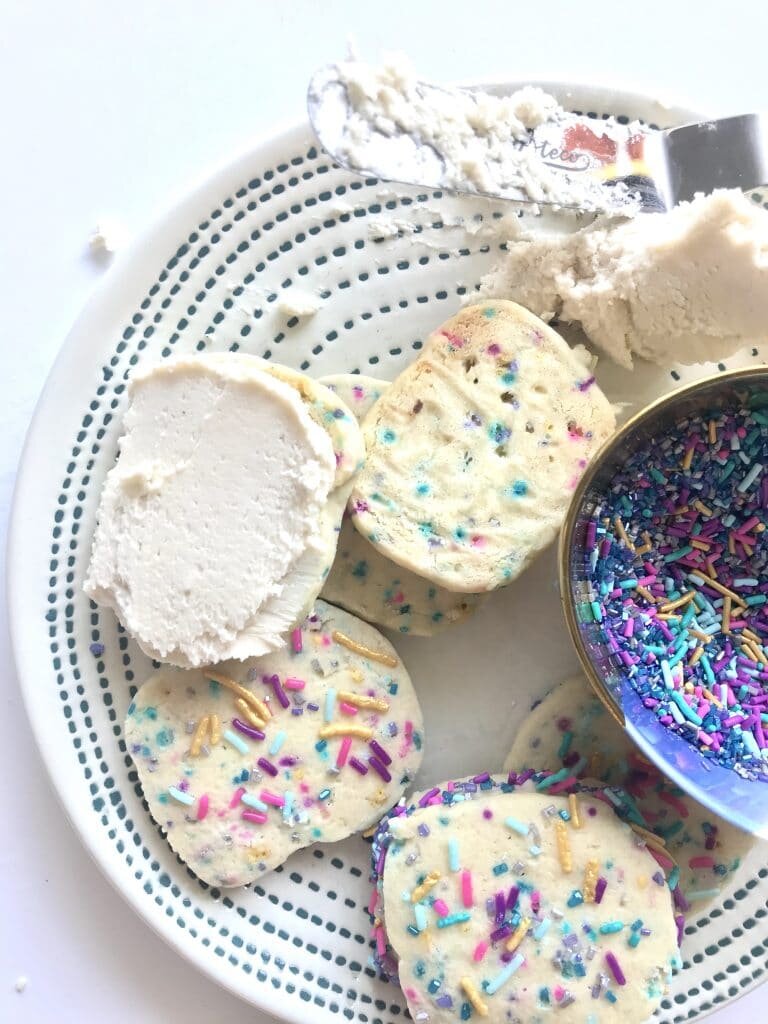
[mailerlite_form form_id=1]
Above are some products that I personally use and recommend for this recipe and to have for everyday use. One thing these cookies have in them is princess extract. Now this extract is delicious and is one of my favorite things to have in my kitchen at all times. It's a mix of vanilla, lemon and almond extracts and when they are all combined they make an addicting concoction.
_______________________________________________________________________________________
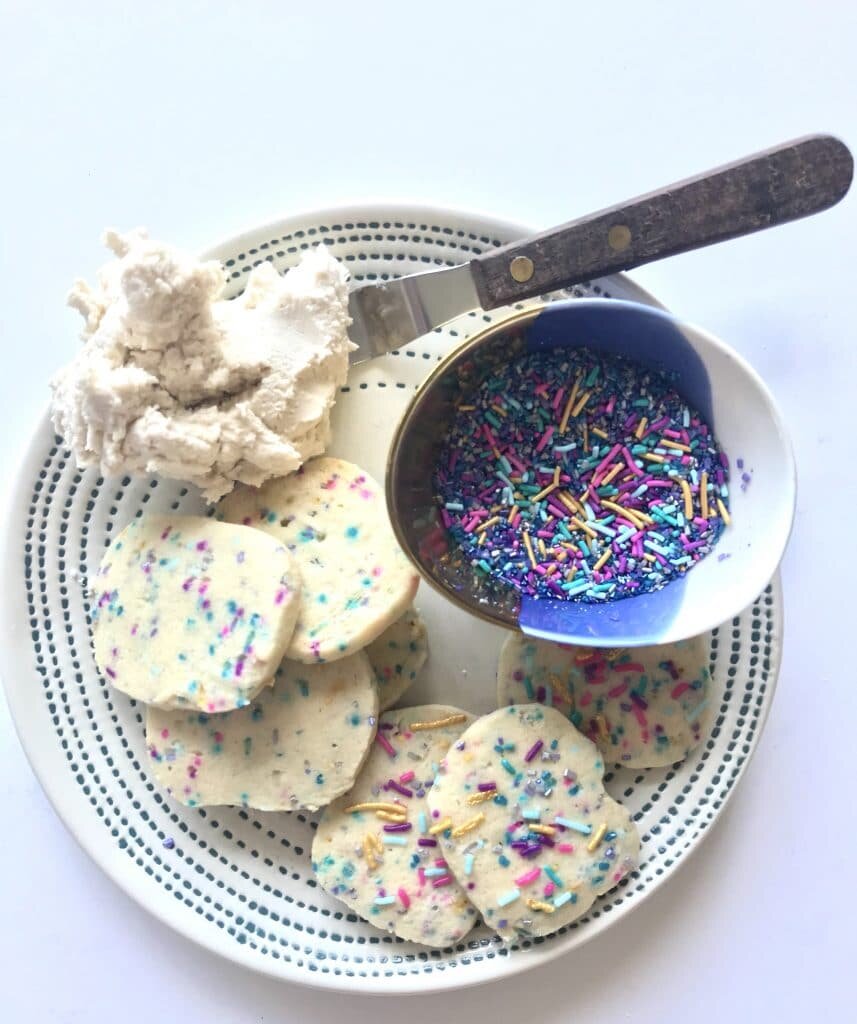
funfetti cookie sandwiches

shortbread cookies with a buttercream filling. flavored with princess extract and loaded with sprinkles!
cookies
- 1 1/2 sticks unsalted butter (room temp)
- 2/3 cup granulated sugar
- 1 egg
- 1 1/2 tsp princess extract
- 1/4 tsp salt
- 1 tsp baking powder
- 1/4 cup cornstarch
- 1 1/2 cup all-purpose flour
- 1/4 cup sprinkles (don't add in any sixlets chocolates if using a sprinkle blend)
buttercream
- 2 stick unsalted butter (room temp)
- 1 tsp princess extract
- 3 cup powdered sugar
- 1 tbsp water
cookies
- preheat the oven to 350 degrees F. in a bowl, combine the salt, baking powder, cornstarch, and flour; set aside. in another bowl, combine the butter and sugar and cream together with a paddle attachment until fluffy, about 1 minute. scrape down the sides of the bowl then add in the egg and princess extract. mix until incorporated, about 1 minute. scrape down the sides of the bowl again and then gradually add in the dry ingredients. fold in the sprinkles. roll the dough out into a log and wrap in cling wrap. place into the fridge for about 30 minutes. carefully cut the cookies with a sharp knife into 1/4 inch thick pieces and sprinkle a little more sprinkles on top of each cookie. place on a lined sheet pan and bake for 10-12 minutes. let cool. (you can roll them out and use cookie cutters too)
buttercream
- put all of the ingredients into the bowl of an electric mixer fitted with a whisk attachment. start slow and then gradually increase the speed. whip on high until light and fluffy, about 3 minutes. frost the cookies.

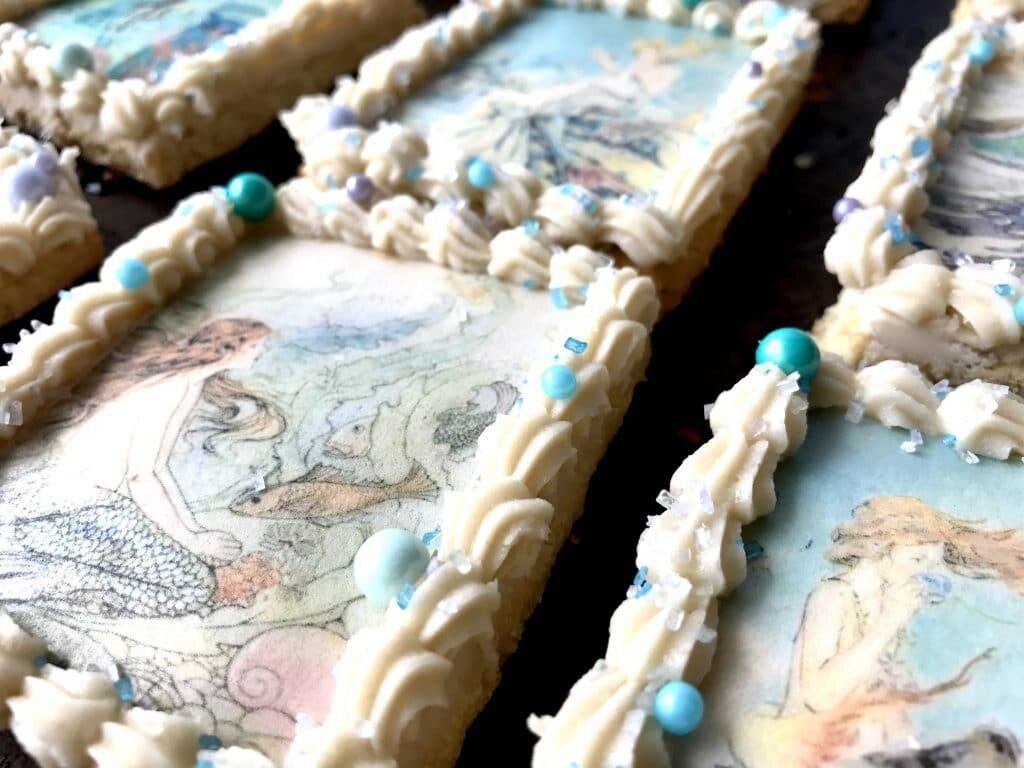
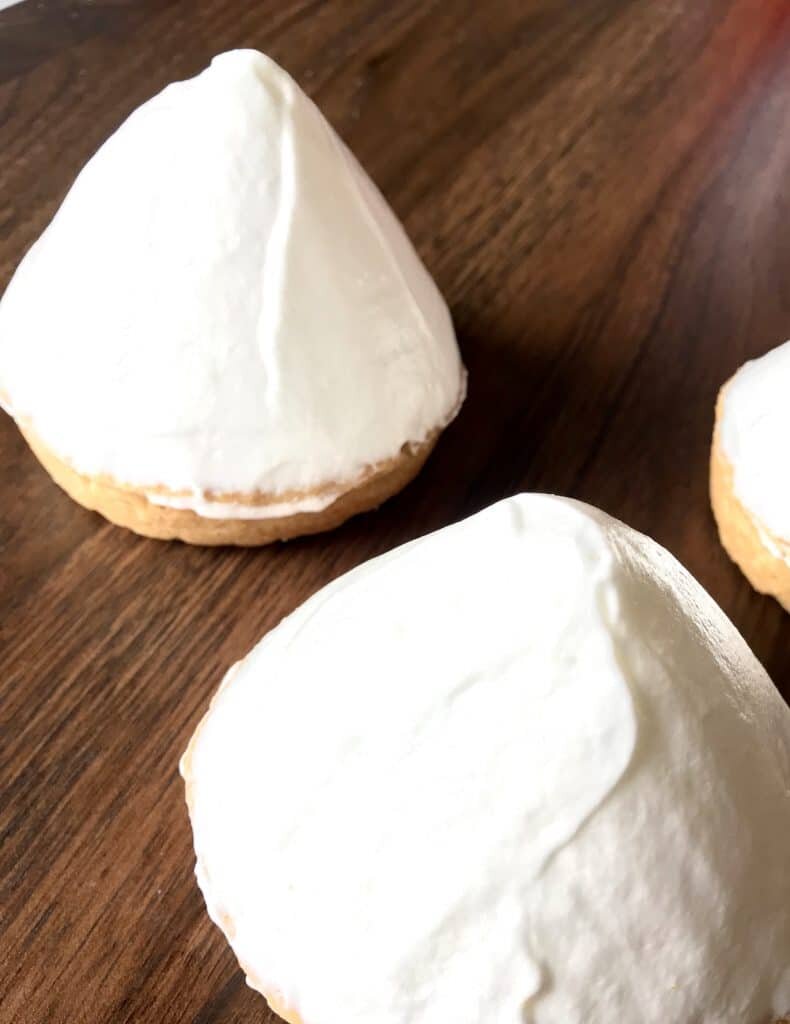
Coconut Sugar Cookies


[wprm-recipe-jump]
*Disclaimer: This post contains affiliate links. To learn more, please go here.These coconut sugar cookies are so simple and easy. Just like a regular cookie but with a little extra with coconut flour added into the mix. Coconut flour adds a nice flavor that way you don't need to add any of that fake coconut extract. You can firm the dough up in the fridge and cut out into desired shapes and even add on these super cute mermaid edible images or use whatever cookie cutter you like!Want to learn how to get images onto cookies and even cakes and chocolates? Then check out my new online edible printing course that will guide you through everything you need to know about edible printing, from start to finish! You won't regret it! Not too sure if you want to buy something so pricey if you aren't sure you'd like it? Ten you can certainly check out my array of edible paper images you buy and try out before making such a huge purchase. You can even buy these images here in my shop!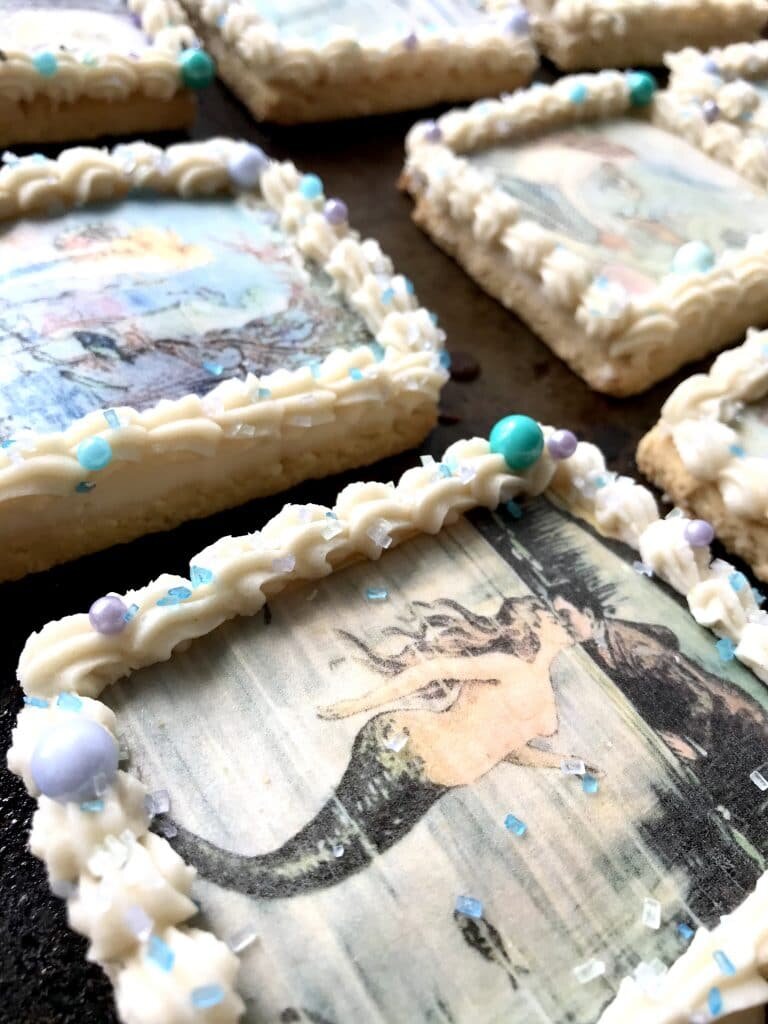
[mailerlite_form form_id=1]
[gallery columns="2" size="large" ids="4325,4329"]
Above are some products that I personally use and recommend for this recipe and to have for everyday use. When making these coconut sugar cookies you absolutely, no exception, have to use coconut flour! If you try to sub it out for regular flour or almond flour than they will not turn out the way they are supposed to. So please stick to the recipe or else it won't turn out for you. Coconut flour should be available at your local grocery store, otherwise I have provided a link for you to get it from amazon.
_________________________________________________________________________________
coconut sugar cookies

these cookies are made with coconut flour which gives it a natural coconut flavor. iced with a simple buttercream makes these sugar cookies complete and perfect for a summer treat.
- 2 sticks unsalted butter (room temp)
- 2/3 cup granulated sugar
- 1 1/2 tsp vanilla extract
- 1 egg
- 1/2 tsp salt
- 1 tsp baking soda
- 3/4 cup coconut flour
- 1 cup all-purpose flour
- 1/3 cup shredded coconut
-
preheat the oven to 350 degrees F. line a pan with parchment paper. in the bowl of an electric mixer fitted with a paddle attachment cream the sugar and the butter until light and fluffy, about 1 minute. scrape down the side of the bowl and then add in the egg and vanilla. in another bowl combine the coconut flour, flour, baking soda, and salt and whisk together. scrape down the sides of the bowl then on low speed, gradually add in the dry ingredients. add in the shredded coconut. wrap the dough into cling-wrap and refrigerate for 30 minutes. roll to 1/4 inch thickness and cut out with desired shapes and bake for 8-10 minutes. enjoy as is or ice with your favorite royal icing or simple buttercream.

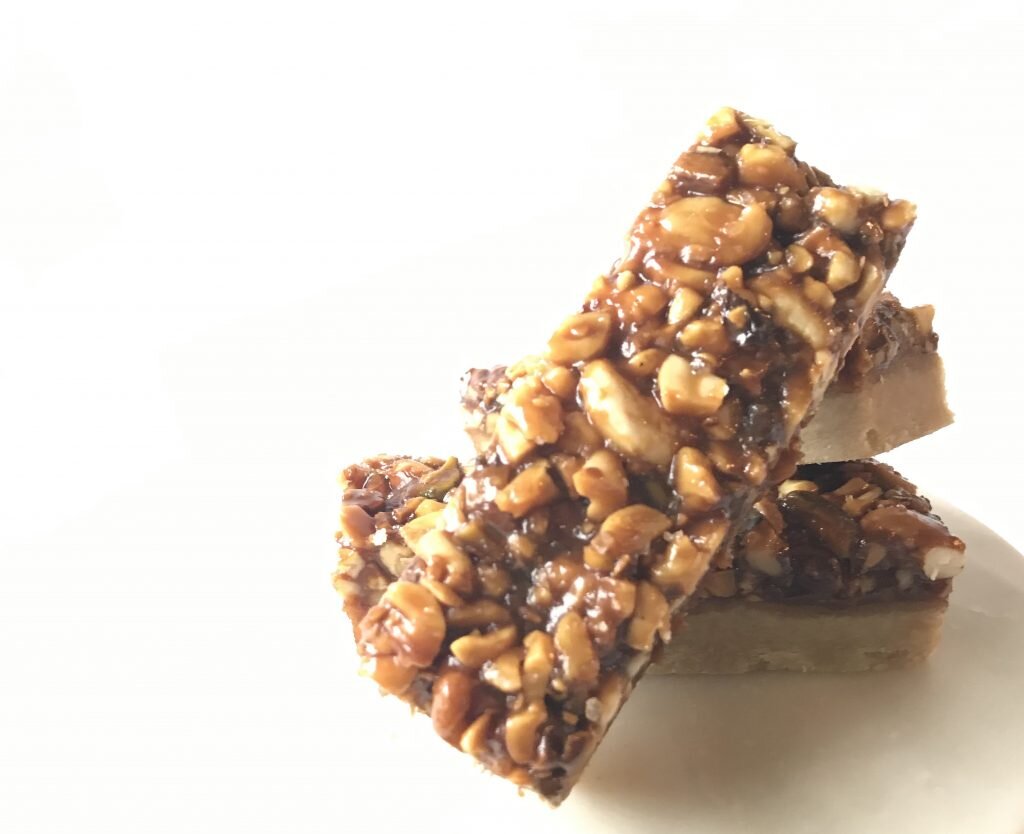
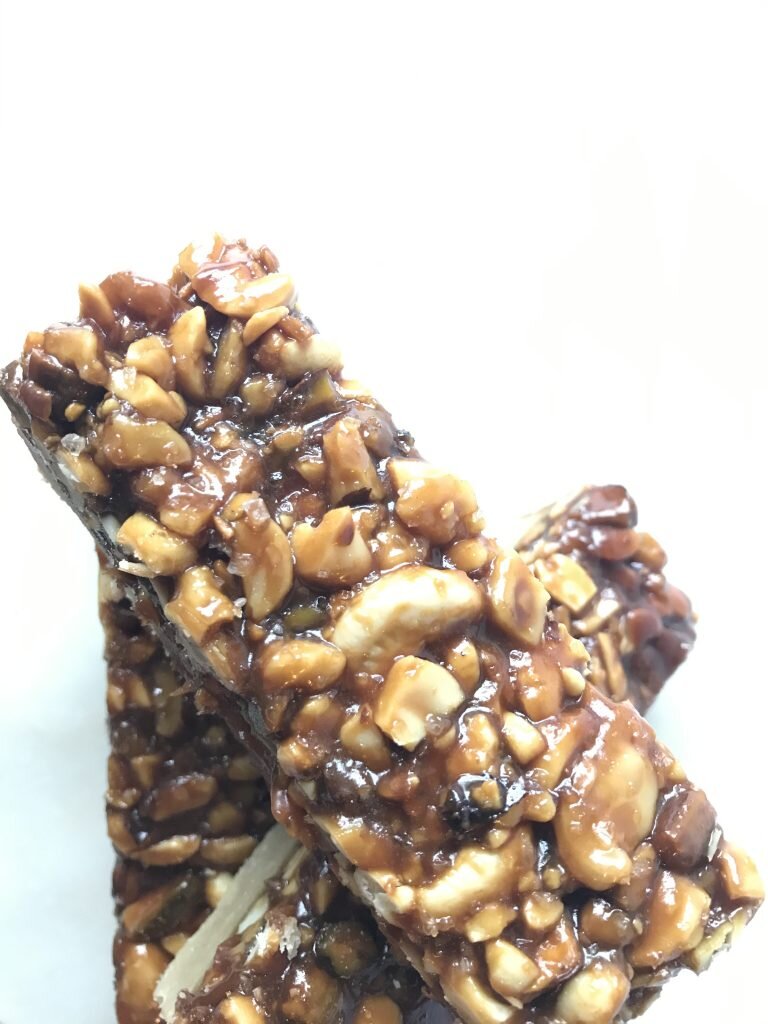
Caramel Nut Bars

[wprm-recipe-jump]
*Disclaimer: This post contains affiliate links. To learn more, please go here.These caramel nut bars are soft, gooey and overall delicious! The caramel nut bars recipe starts off with a buttery shortbread crust which then gets topped with a gooey caramel that's mixed with an array of nuts. It then gets baked so the caramel sets and topped with a sprinkling of sea salt. These bars can be dangerous!You can mix it up a little with this recipe too, which is nice if you have a certain nut allergy. You can use any type of nut or mix it really doesn't matter. Use all peanuts if you'd like and make it a caramel peanut bar and then drizzle some chocolate over the top after it cools down. This recipe requires honey, but if you aren't a fan of honey than you can easily substitute it. Just use light corn syrup instead of the honey. Overall these caramel nut bars are a great treat for an afternoon snack
[mailerlite_form form_id=1]
Above are some products that I personally use and recommend for this recipe and to have for everyday use. One of my favorite things that I have many of are the BlueQ oven mitts. They aren't just really funny and a great statement piece for your kitchen, but they are great quality too!
____________________________________________________________________________________
caramel nut bars
a buttery shortbread crust that is topped with mixed nuts and lots of gooey caramel and sea salt
shortbread
- 1 stick unsalted butter (room temp)
- 1 1/3 cup all-purpose flour
- 1/2 cup granulated sugar
- 1 egg
- pinch salt
- 1 tsp vanilla extract
caramel
- 1/4 cup water
- 1/4 cup honey (you can use light corn syrup if you don't like honey)
- 1 cup granulated sugar
- pinch salt
- 2 tbsp unsalted butter
- 1/2 cup + 2 tbsp heavy cream
- 1 tbsp vanilla extract
- 2 cup mixed nuts; walnuts (cashews, peanuts, pistachios)
- sea salt (for topping)
shortbread
- preheat the oven to 350 degrees F. line a pan with parchment paper. in the bowl of an electric mixer fitted with a paddle attachment cream the sugars and the butter until light and fluffy, about 1 minute. scrape down the side of the bowl and then add in the egg and vanilla. add in the salt and flour and mix until combined. press the dough onto the bottom of the pan and bake for 18 minutes.
caramel
- place the water, honey and sugar into a pot and place over medium high heat. let boil until it becomes a light caramel color, this will take about 15 minutes. once it's a nice light caramel color, remove from heat and slowly stir in the butter and heavy cream. mix in the vanilla and nuts. pour the caramel mixture on top of the shortbread crust and put back into the oven for 8-10 minutes. let cool until the caramel is set, you can put it into the fridge to further the process. cut into 12 pieces and sprinkle with sea salt on top.

Vegan Cranberry Almond Chai Cookies

[wprm-recipe-jump]
*Disclaimer: This post contains affiliate links. To learn more, please go here.These vegan cranberry almond chai cookies are one of my favorites. We make a version of these cookies at work and I fell in love with them. They are so addicting that you can't have just one. The original recipe calls for different ingredients, like chai concentrate and hazelnuts plus a whole lot more things to also make it gluten free (which my recipe is not). But just because these guys aren't gluten free doesn't mean that they are mouthwatering and delicious!Not a fan of almonds? You can substitute them out for the hazelnuts like in the original recipe as I've stated above or you could even use cashews or macadamia nuts! Want to add in some white chocolate chips? That would be amazing in these cookies too! Cookies are so easy to make your own by adding in the mix-ins that you want and love into them. Use dried apricots or cherries instead of cranberries, instead of chai spice use just simple cinnamon or don't even add it in if that's something you'd prefer! Overall these vegan cranberry almond chai spice cookies are delicious and I personally wouldn't change the recipe in either way.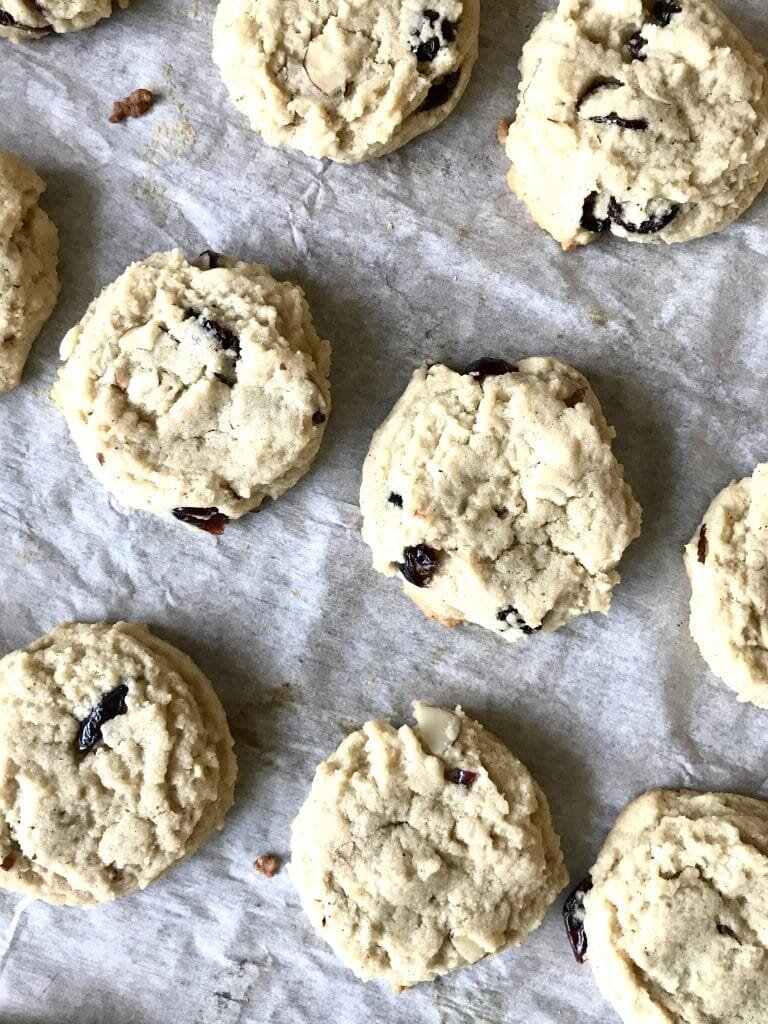
[mailerlite_form form_id=1]
Above are some products that I personally use and recommend for this recipe and to have for everyday use. I highly suggest getting this chai spice from King Arthur Flour for this recipe. Otherwise another really great option is to make your own chai spice! It's super easy and you can find a recipe easily online.
_________________________________________________________________________________________________
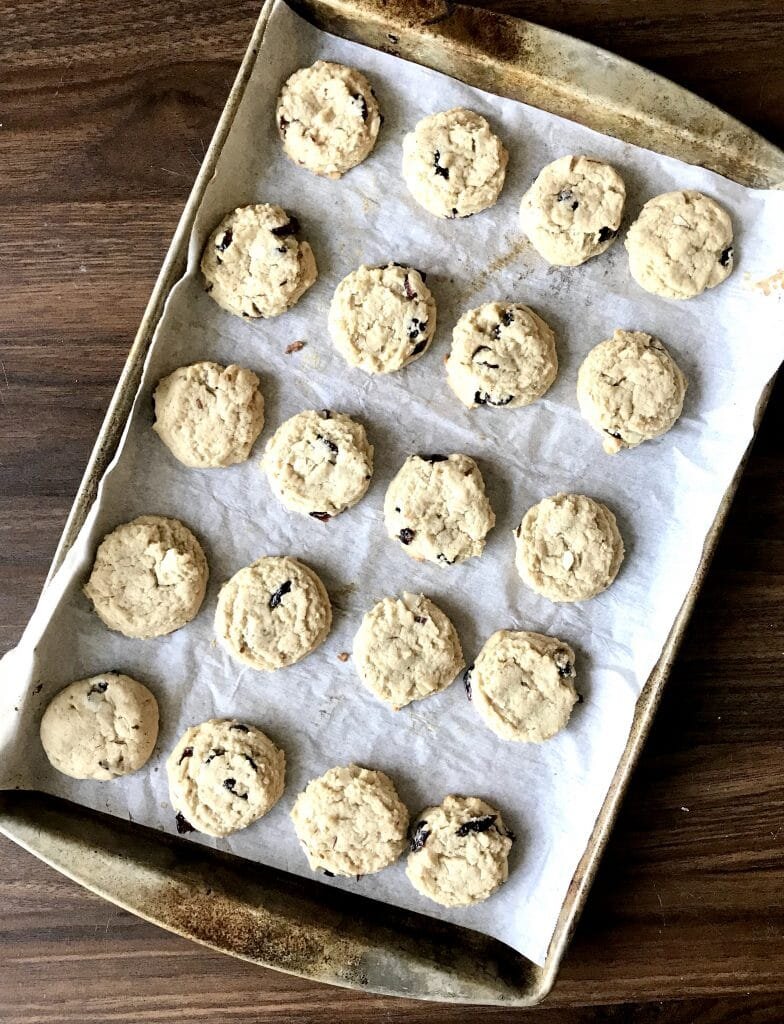
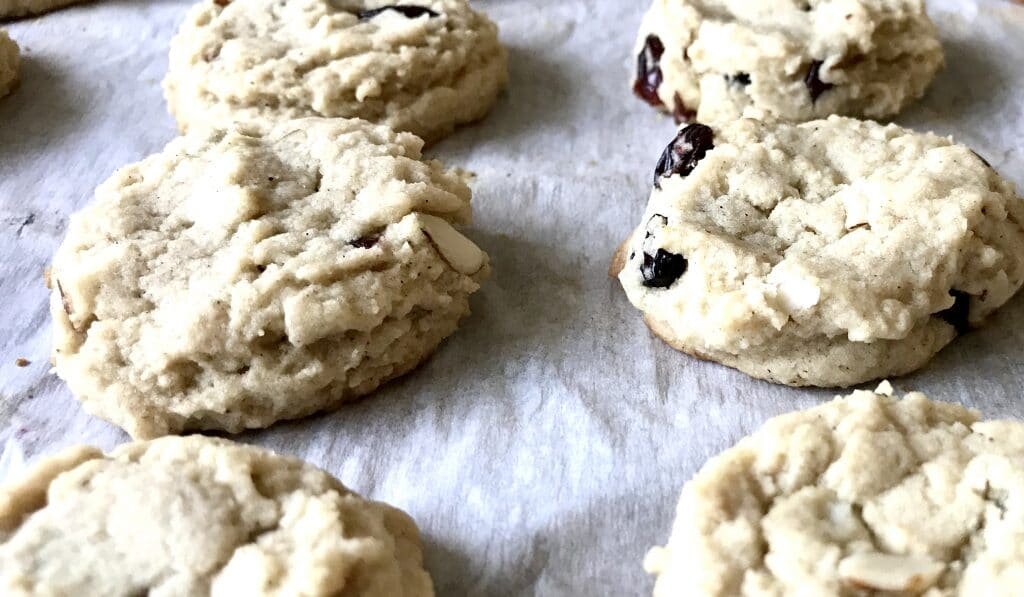
vegan cranberry almond chia cookies
vegan cookies packed with flavor! contains chai spice, dried cranberries and a bit of crunch from some slivered almonds.
- 1 1/2 sticks vegan butter (room temp (i used country crock almond oil butter))
- 1/2 cup granulated sugar
- 2/3 cup brown sugar
- 1 tsp vanilla extract
- 1/3 cup almond milk
- 1/2 tsp salt
- 1/2 tsp baking soda
- 2 tsp chai spice
- 2 cup almond flour
- 1 cup all-purpose flour
- 1/2 cup almond slivers
- 1/2 cup dried cranberries
- preheat the oven to 350 degrees F. line a sheet pan with parchment paper. place the vegan butter and the sugars into a bowl of an electric mixer fitted with a paddle attachment, and cream until light and fluffy, about 1 minute. scrape the sides of the bowl and add in the almond milk and vanilla and mix until incorporated. place the almond flour, flour, salt, baking soda, and chai spice in another bowl and whisk together. gradually add the flour mixture to the butter mixture. fold in the almonds and cranberries and scoop the cookies out on the sheet pan and bake for 8-10 minutes.

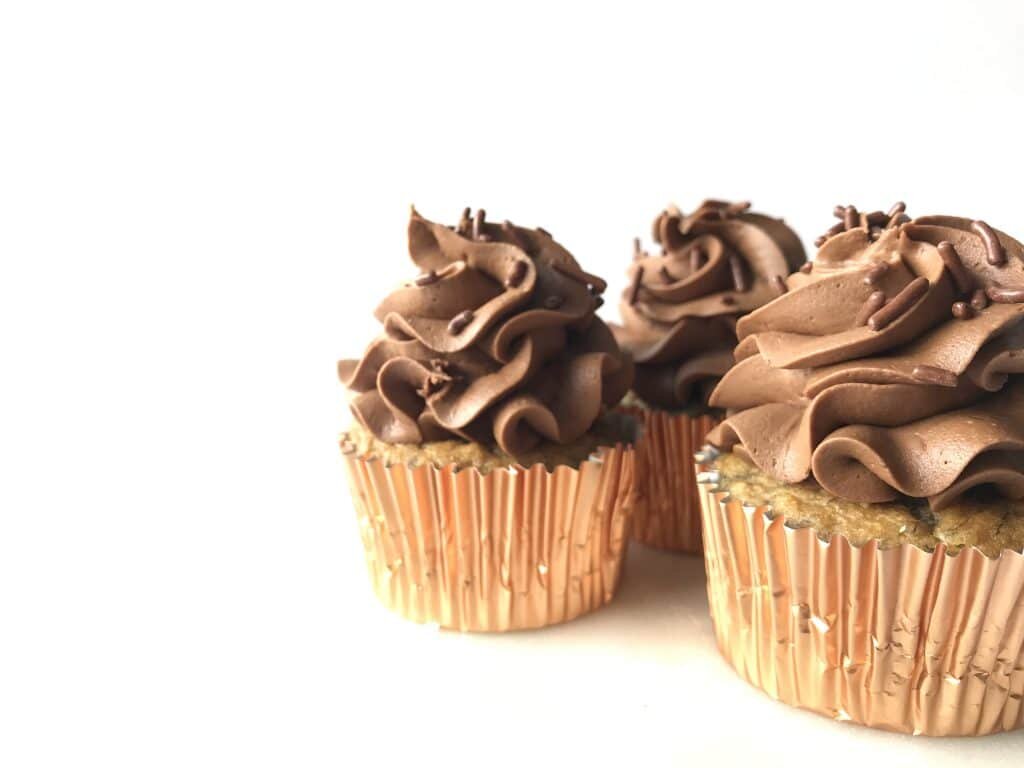
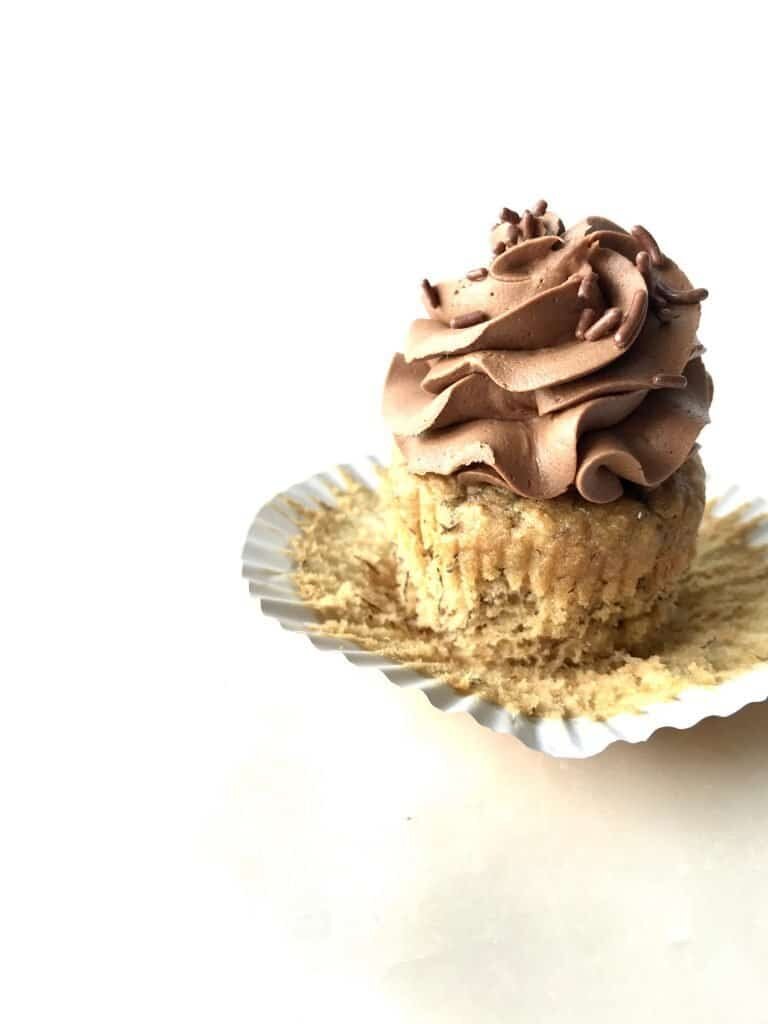
Banana Chocolate Cupcakes


[wprm-recipe-jump]
*This post contains affiliate links. Please read disclosure to learn moreSitting at home bored out of your mind with nothing to do because of the virus? How about making some banana chocolate cupcakes to snack on? These little guys aren't too sweet and the chocolate buttercream on top is delicious thanks to the black cocoa powder I had on hand. All's you need is some overripe bananas and some good tunes.Not sure you want banana chocolate cupcakes but would prefer to mix it up a bit instead? You can certainly add in some chopped walnuts or pecans into the cake batter. Add in some chocolate chips too while you're at it! And then instead of using chocolate buttercream, then I suggest either a good cream cheese buttercream or even a peanut butter buttercream to pair with the banana cupcakes. Anything goes well with bananas, you just need to find the right kind of mix-ins that you want to add to them.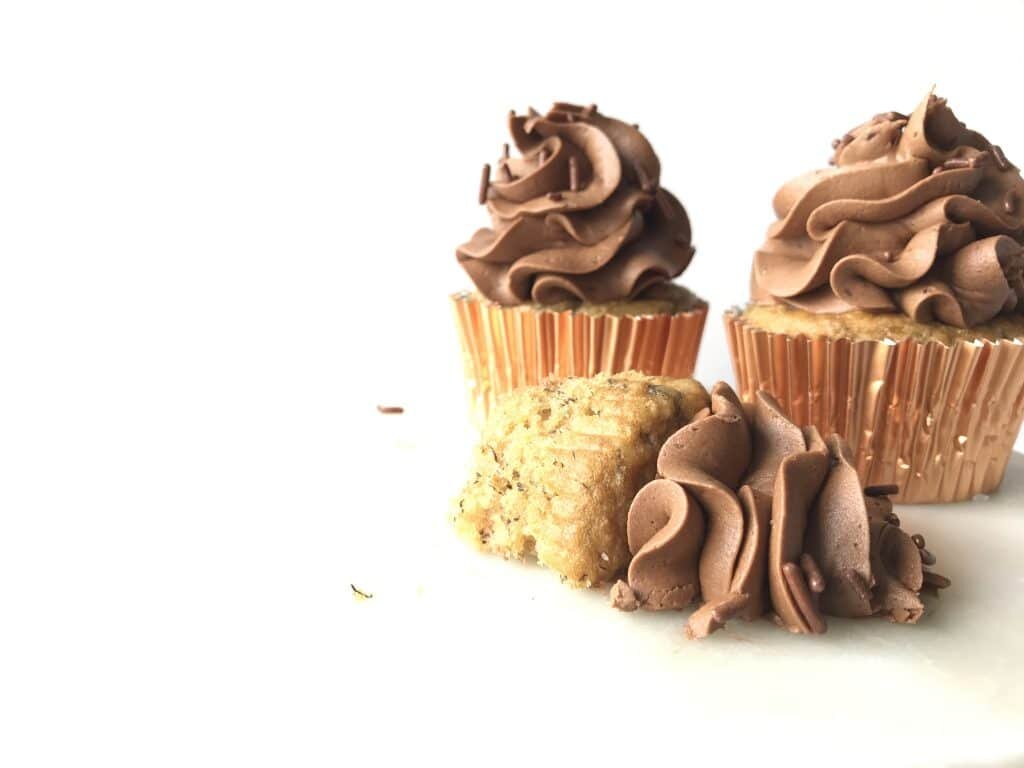
[mailerlite_form form_id=1]
Above are some products that I personally use and recommend for this recipe and to have for everyday use. For the buttercream I highly suggest using the King Arthur Flour black cocoa. It gives any baked good this beautiful dark chocolate color to it and it's not overly sweet. It's perfect for these banana cupcakes as it pairs so well together.
________________________________________________________________________________________
banana chocolate cupcakes
these soft banana cupcakes wouldn't be complete without the mound of chocolate buttercream swirled on top.
cake
- 1 2/3 cup all-purpose flour
- 1/2 cup granulated sugar
- 1/2 tsp salt
- 1 1/2 tsp baking soda
- 1 egg
- 1/3 cup vegetable oil
- 1/3 cup greek yogurt
- 2 tsp vanilla extract
- 3/4 cup almond milk
- 3 ripe bananas (i use frozen bananas, thawed)
buttercream
- 3 sticks salted butter
- 4 cup powdered sugar
- 1/3 cup cocoa powder
- 2 tsp vanilla extract
- 1-3 tbsp heavy cream
cake
- preheat the oven to 350 degrees F and place cupcake liners into the cupcake tins. in a large bowl combine the flour, sugar, salt, and baking soda and whisk to combine. in another bowl, mix together the egg, oil, yogurt, bananas, milk and vanilla. add the wet into the dry and mix until everything is fully incorporated. using an cookie scoop, distribute the batter into the cupcake tins and bake for 14-16 minutes or until a toothpick comes out clean. let cool.
buttercream
- put all of the ingredients into the bowl of an electric mixer fitted with a whisk attachment. start slow and then gradually increase the speed. whip on high until light and fluffy, about 3 minutes.
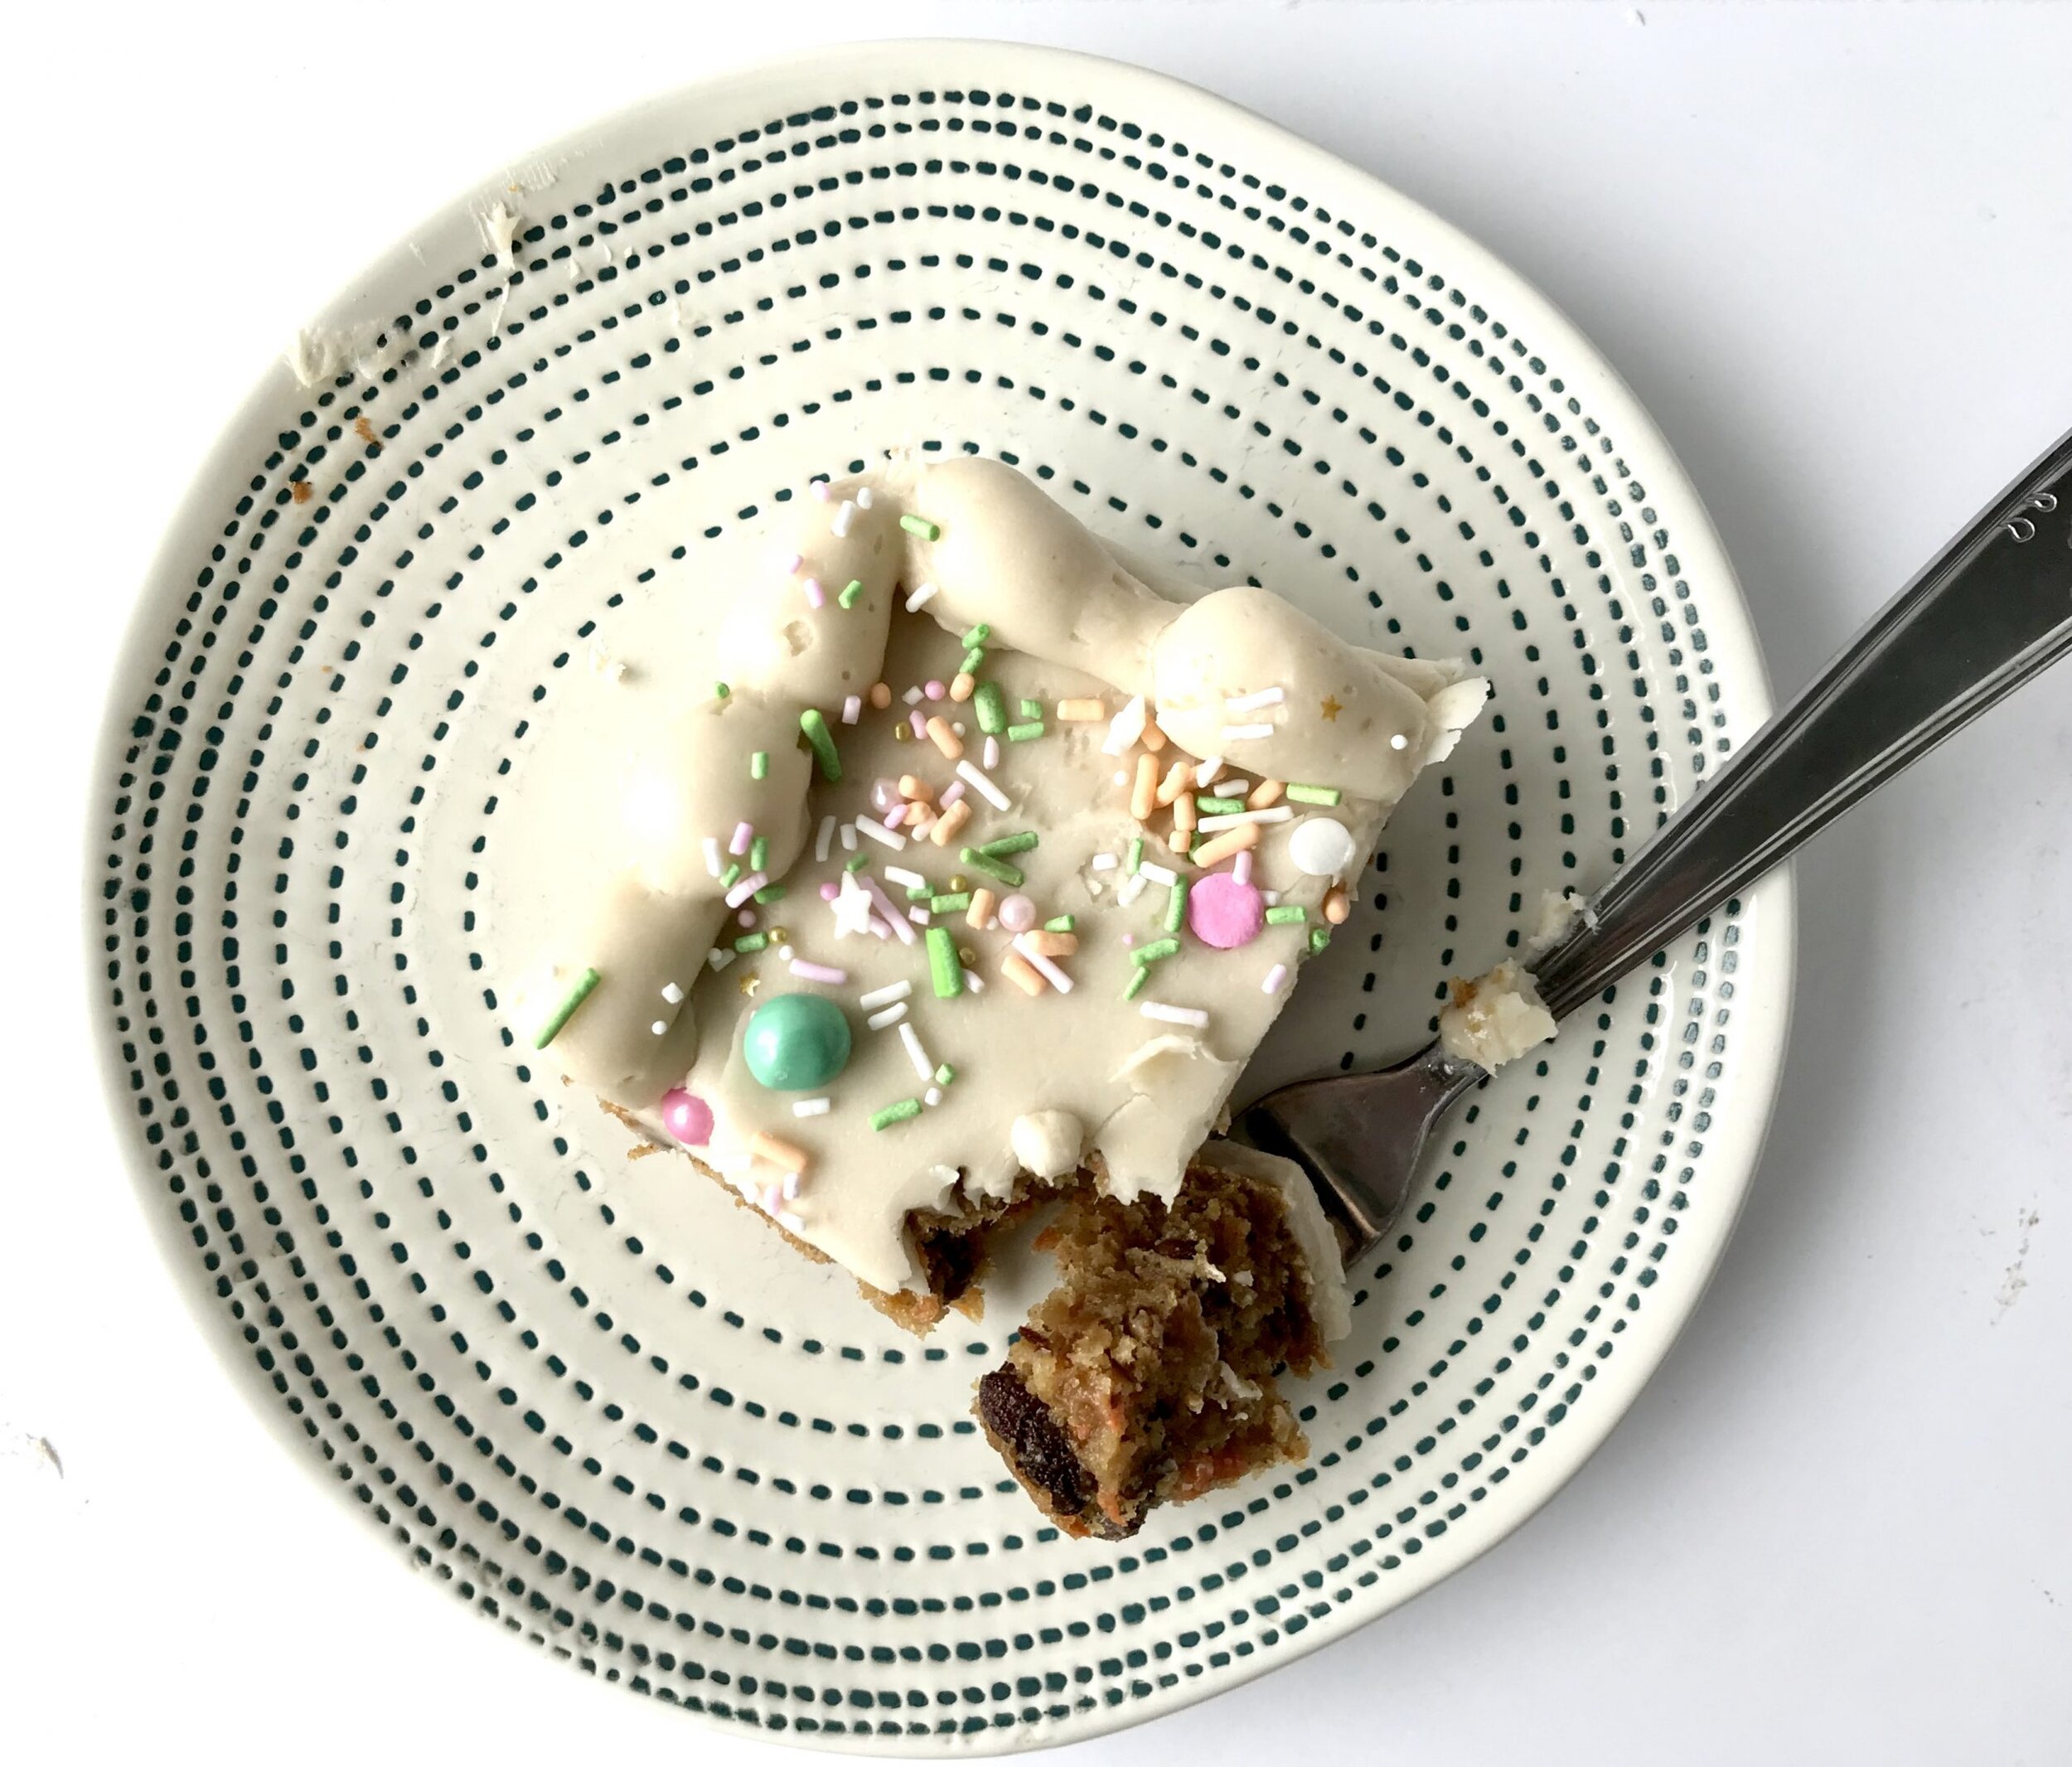
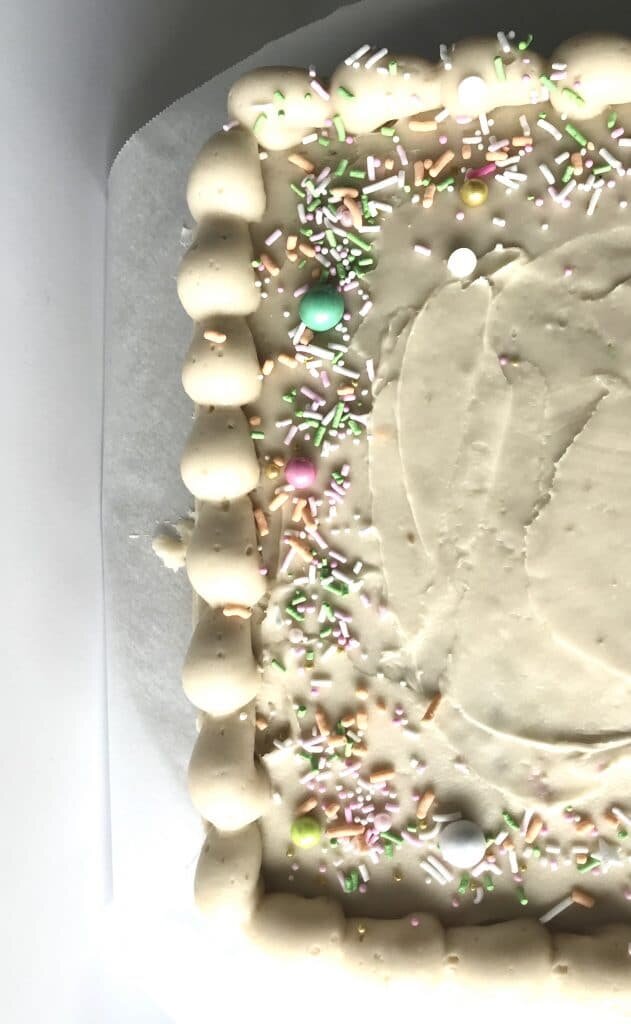
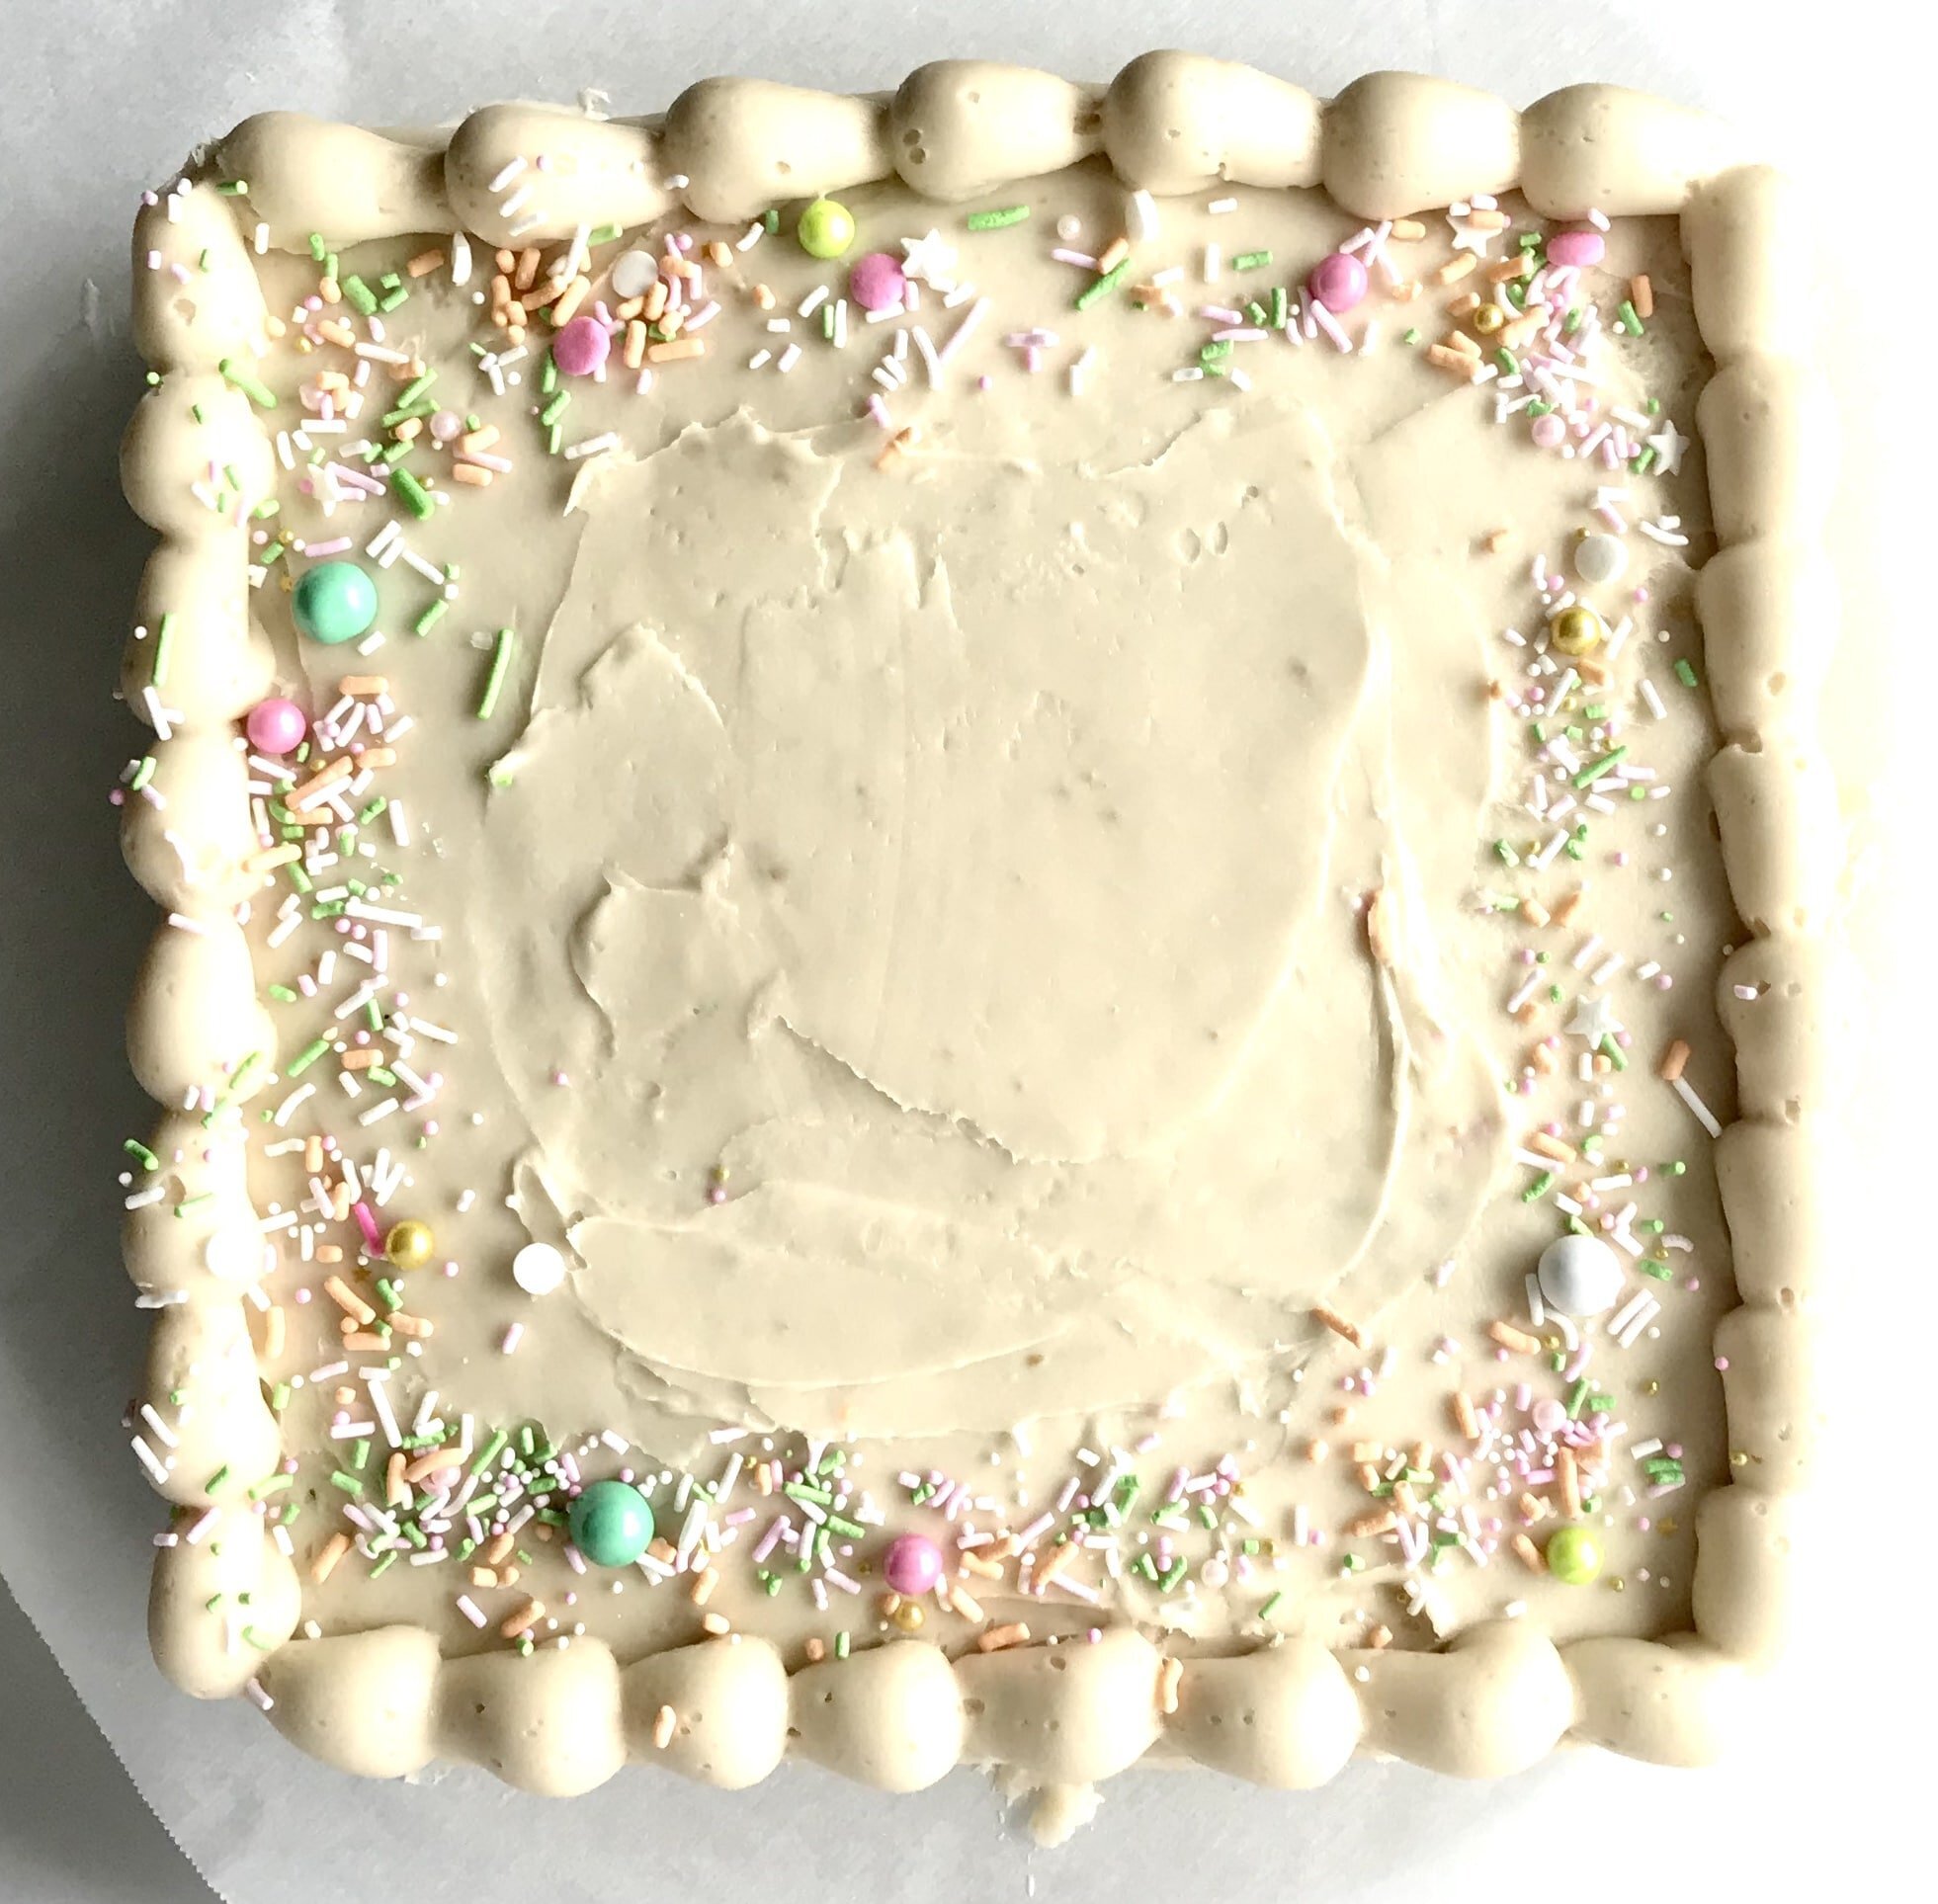
Ginger Carrot Cake

[wprm-recipe-jump]
*Disclaimer: This post contains affiliate links. To learn more, please go here.This ginger carrot cake is perfect for a quick easter dessert. It's so simple and straight forward and all of the mix-ins can be substituted or even omitted if you aren't a fan of raisins. Use walnuts instead of pecans, try dried cherries or apricots instead of raisins. You can't go wrong with a good carrot cake and since we are all stuck at home for easter why not try something new and mix up the classic carrot cake a bit?Want to make this carrot cake even more unique for your holiday? Instead of carrots, you could use zucchini or even parsnips! Both vegetables pair perfectly with these ingredients in the ginger carrot cake and you wouldn't even notice the difference. Or you can always go check out my brown butter coconut carrot cake too if that's something you'd like to try instead!

[mailerlite_form form_id=1]
Above are some products that I personally use and recommend for this recipe and to have for everyday use. One thing that I collect are cake stands. I love a good cake stand that is not only adorable, but is also a good quality too. This little easter bunny cake stand is perfect for the holiday but also as a fun spring cake stand to have around the house for all your treats!
______________________________________________________________________________
ginger carrot cake

carrot cake made with fresh ginger, raisins and a cream cheese buttercream to top it off
cake
- 1 1/2 cup all-purpose flour
- 1/3 cup granulated sugar
- 1/3 cup brown sugar
- 1 tsp baking soda
- 1 tsp baking powder
- 1 tsp salt
- 1 tsp cinnamon
- 1/3 cup greek yogurt
- 1/3 cup vegetable oil
- 1 egg
- 1 1/2 tsp vanilla extract
- 3/4 cup coconut milk (or regular milk)
- 1 tbsp freshly grated ginger root
- 2 cup shredded carrot
- 1/2 cup pecans
- 1/2 cup raisins
buttercream
- 8 oz cream cheese (room temp)
- 1 stick unsalted butter (room temp)
- 5 cups powdered sugar
- 1 tsp vanilla extract
- pinch salt
cake
- preheat the oven to 350 degrees F and line a 8 x 8 inch cake pan with parchment paper. in a large bowl, combine the flour, sugars, baking soda and powder, salt and cinnamon and whisk together. in another bowl, combine the oil, eggs, greek yogurt, vanilla, grated ginger, and coconut milk and whisk together. pour the wet ingredients into the dry and mix until fully combined. add in the carrots, pecans and raisins and fold in until everything is evenly distributed. place the batter in the pan and bake for 30-35 minutes or until a toothpick comes out clean. let the cake cool for 10 minutes then carefully remove them from the pans to continue cooling. wrap in cling wrap until ready to use.
buttercream
- place the butter and cream cheese into a bowl of an electric mixer fitted with a paddle attachment. mix until smooth. scrape down the sides of the bowl and add in the rest of the ingredients. mix on slow speed and gradually increase the speed. let mix until fluffy and lighter in color, about 3 minutes.

Mango Orange Peeps
[wprm-recipe-jump]
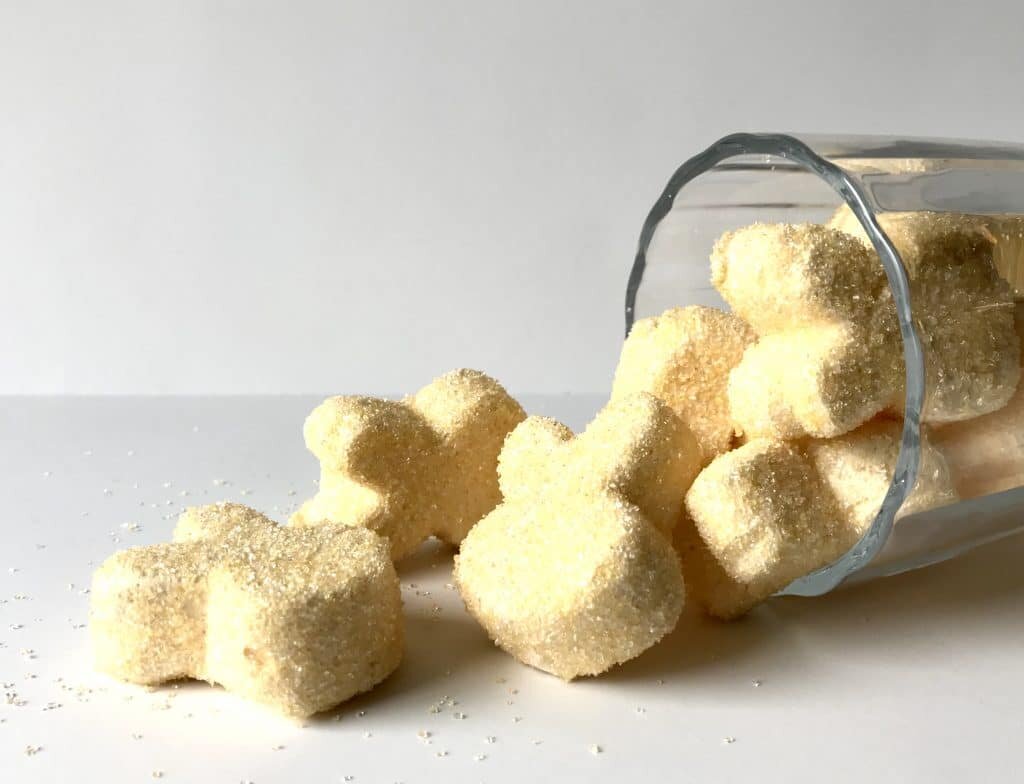
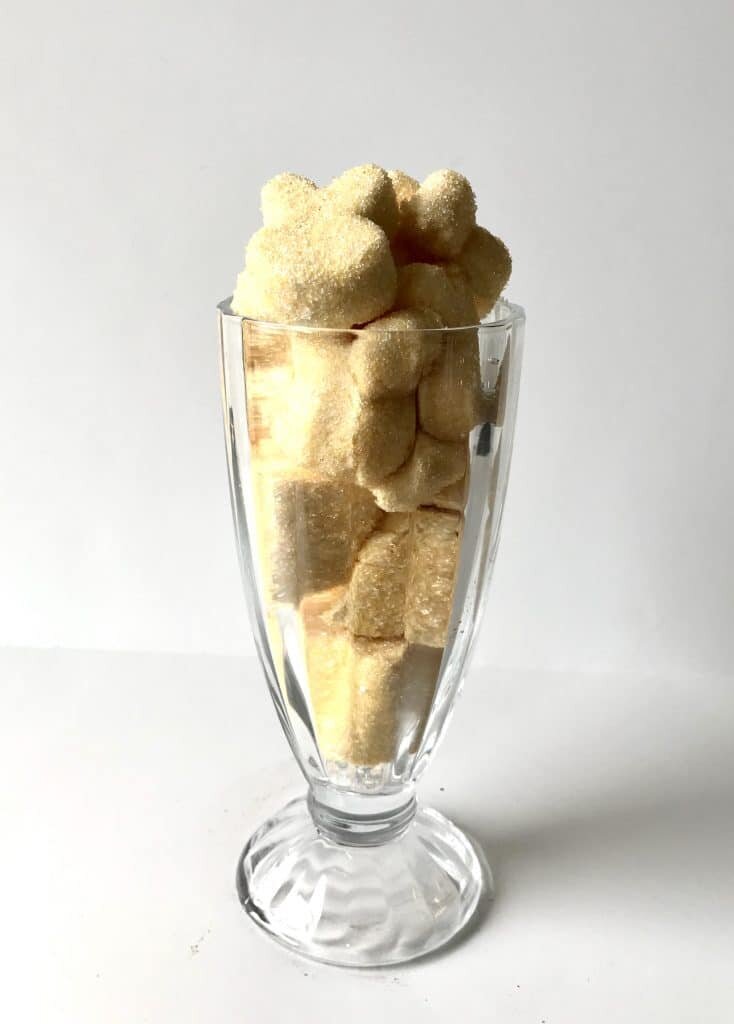
*Disclaimer: This post contains affiliate links. To learn more, please go here.Easter is just around the corner and with these trying times being stuck at home, these homemade mango orange peeps are just what the doctor ordered. Making homemade marshmallows is super easy and most will have all of the ingredients already in their pantry. Only calling for some simple ingredients like sugar, water, gelatin, and corn syrup and the flavor is completely versatile too! You don't have to make them mango and orange, but can do strawberry or just plain lemon. The possibilities are endless!To make the peeps, you'll need either to get a bunny shaped silicone mold to get the cute shapes. The mold will also help to create less waste. Or you can pour the marshmallows directly into a pan and use a cookie cutter and cut out little bunny shapes. This all depends on you and what you are willing to do to get the desired peep shape. You can make these mango orange peeps any way and form you like.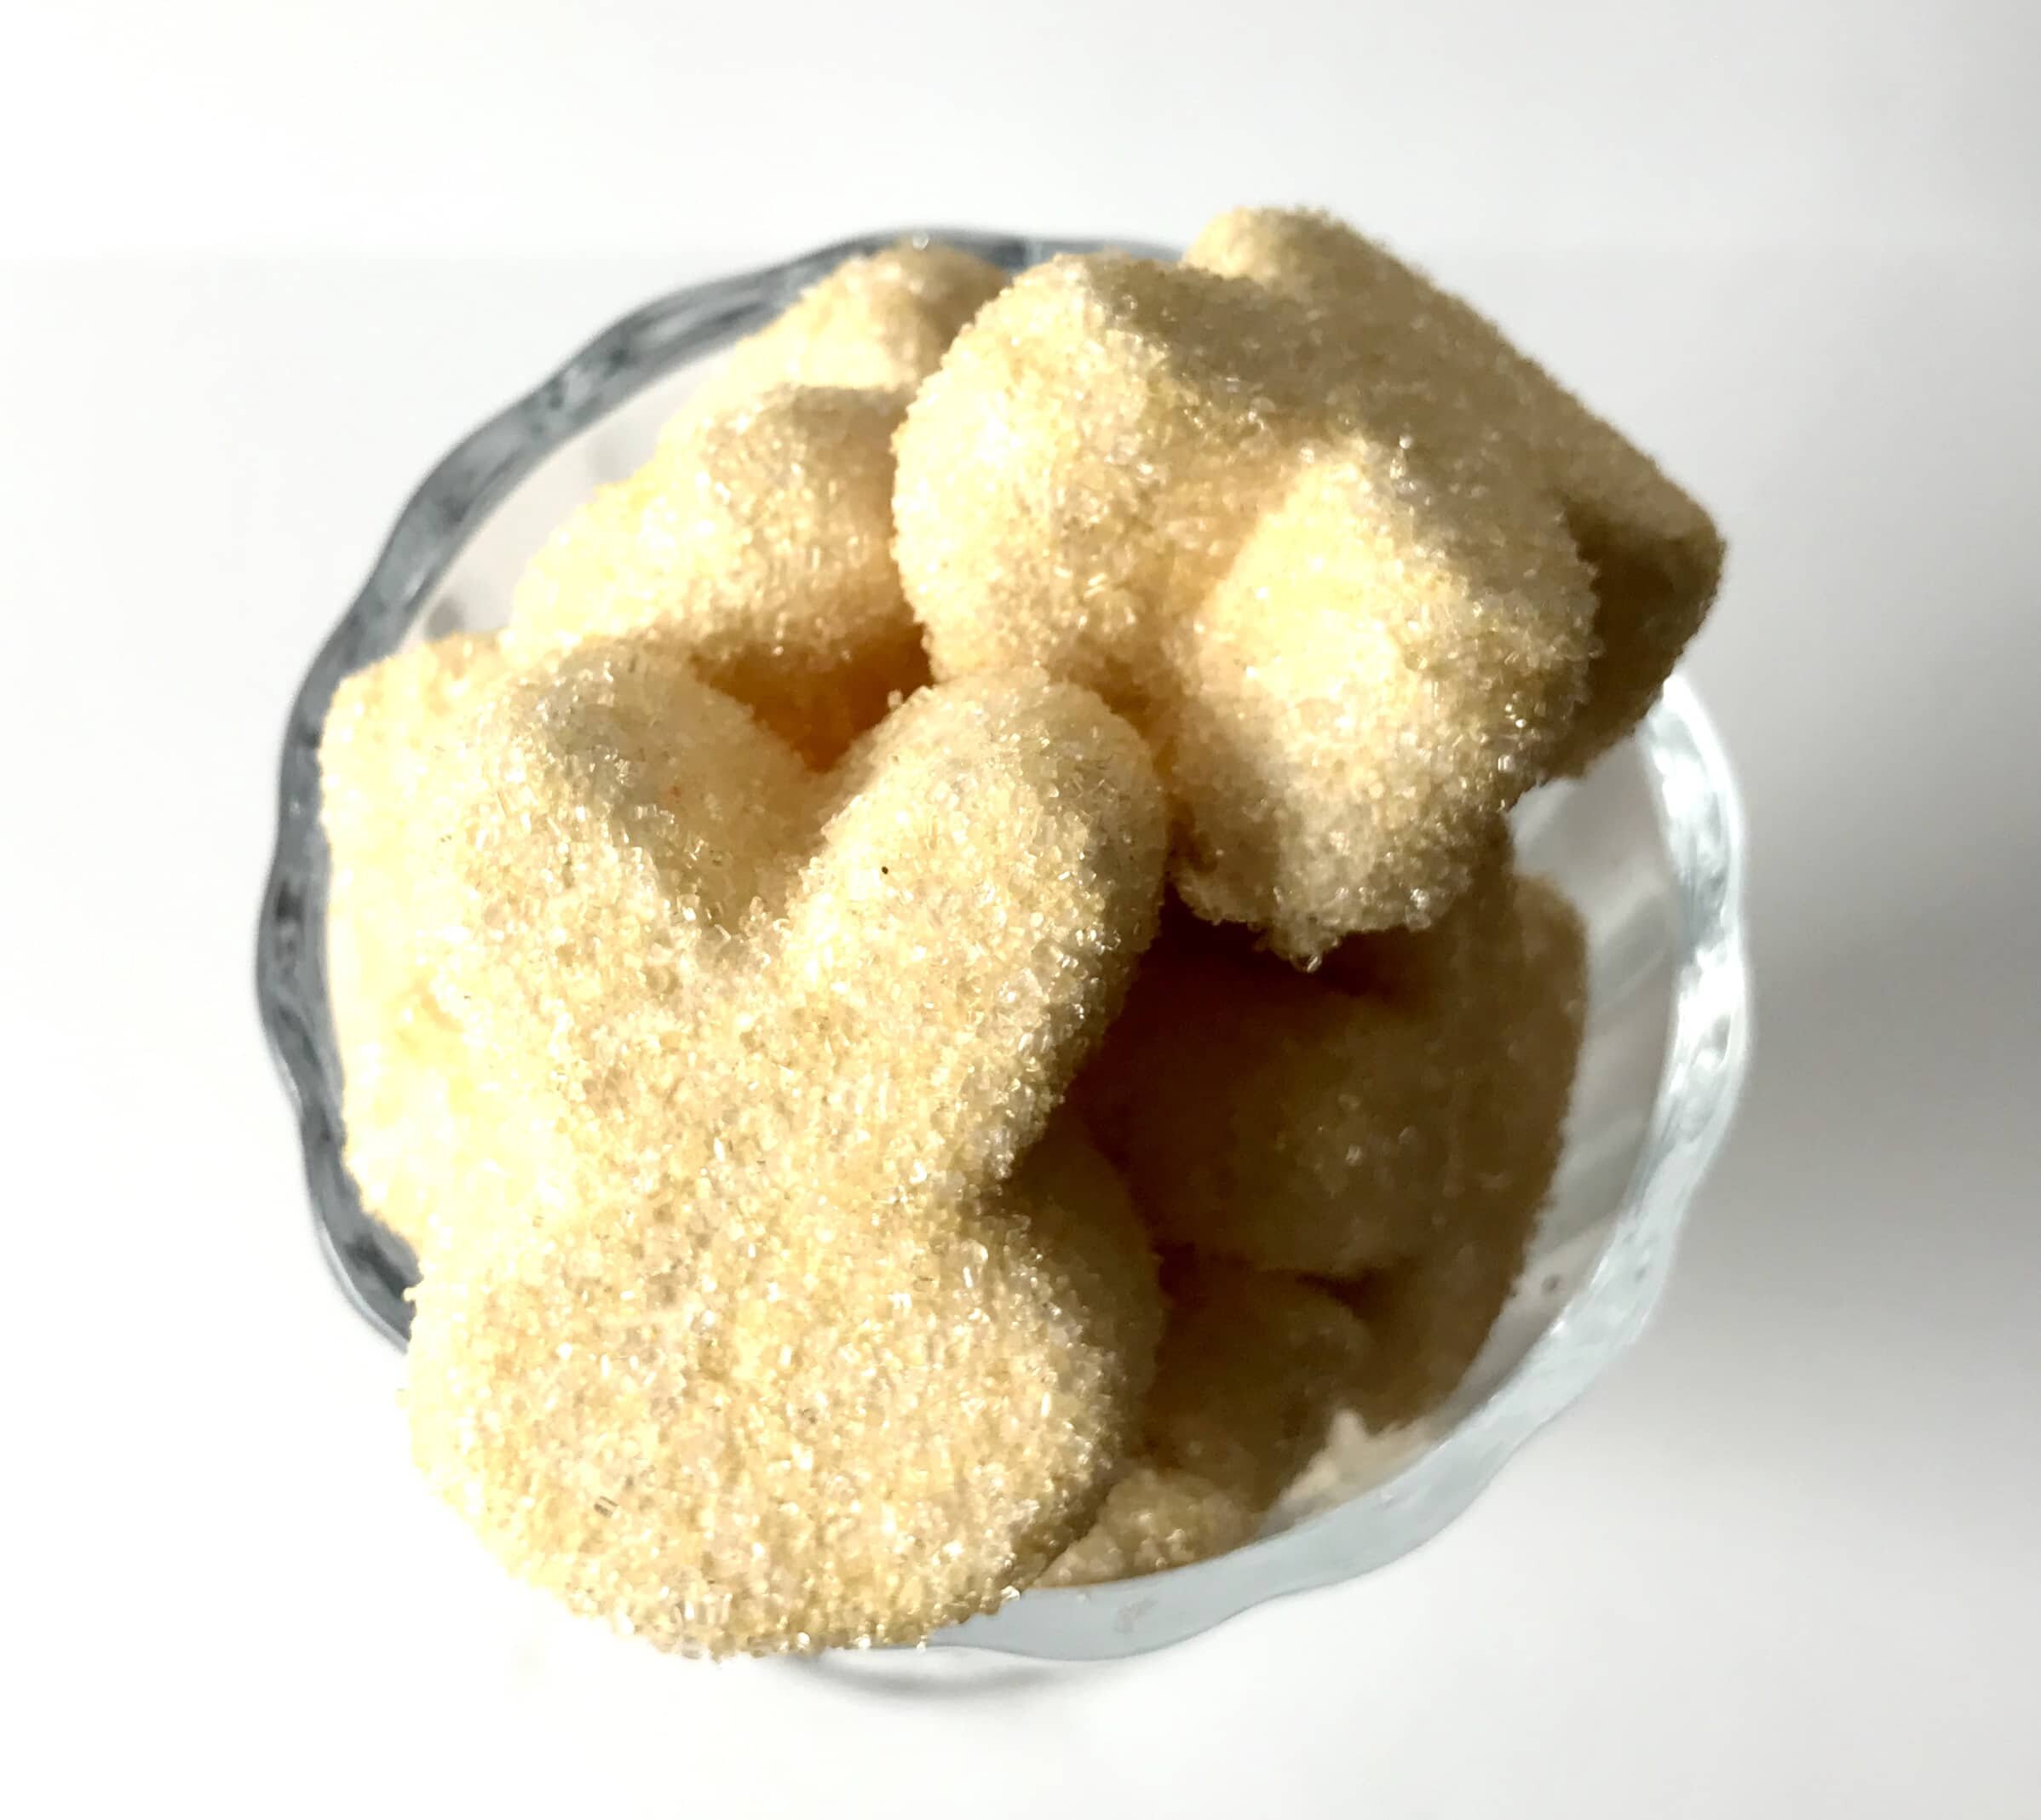
[mailerlite_form form_id=1]
Above are some products that I personally use and recommend for this recipe and to have for everyday use. One thing that you 100% need when making marshmallows is a candy thermometer. It won't be accurate if you use a meat thermometer, plus a candy thermometer is nice since you can just clip it to the side of your pot and not have to hold it over the blistering heat while the sugar cooks. It also tells you what the sugar stage is which is helpful when making marshmallows or any other form of candy.
__________________________________________________________________________
mango orange peeps
a chewy sugary treat that's made with mangoes and fresh orange juice.
- 1 cup mango (fresh or frozen)
- 1 large lemon or orange (zested and juiced)
- 2 tbsp powdered gelatin
- 1/2 cup mango orange puree
- 1 tsp vanilla
- 1 cup granulated sugar
- 1/2 cup corn syrup
- 1/4 cup mango orange puree (add water if it doesn't equal a 1/4 cup)
- pinch salt
- food color (optional)
- colored sanding sugar for decoration
- place the mango, zest and juice into a blender and blend until smooth. strain through a fine mesh sieve.
- place the 1/2 cup puree, vanilla and gelatin in the bowl of an electric mixer fitted with a whisk attachment and let sit until the gelatin blooms. in the mean time place the sugar, corn syrup, salt and remaining 1/4 cup puree into a small pot with a candy thermometer. put over high heat and bring to a boil until it reaches 240 degrees, or softball stage. turn the mixer on low speed and slowly pour the hot sugar into the gelatin mixture. increase the speed and whip until the bottom of the bowl is cool to the touch and the mixture is light and fluffy, about 10 minutes. spray the bottom of a pan with non-stick spray and then pour the marshmallow into the pan. (i used this cute bunny mold and piped the marshmallow in) sprinkle with the colored sanding sugar and let sit until the marshmallow is set, preferably overnight. cut into pieces and sprinkle with more colored sugar around the sides and enjoy.
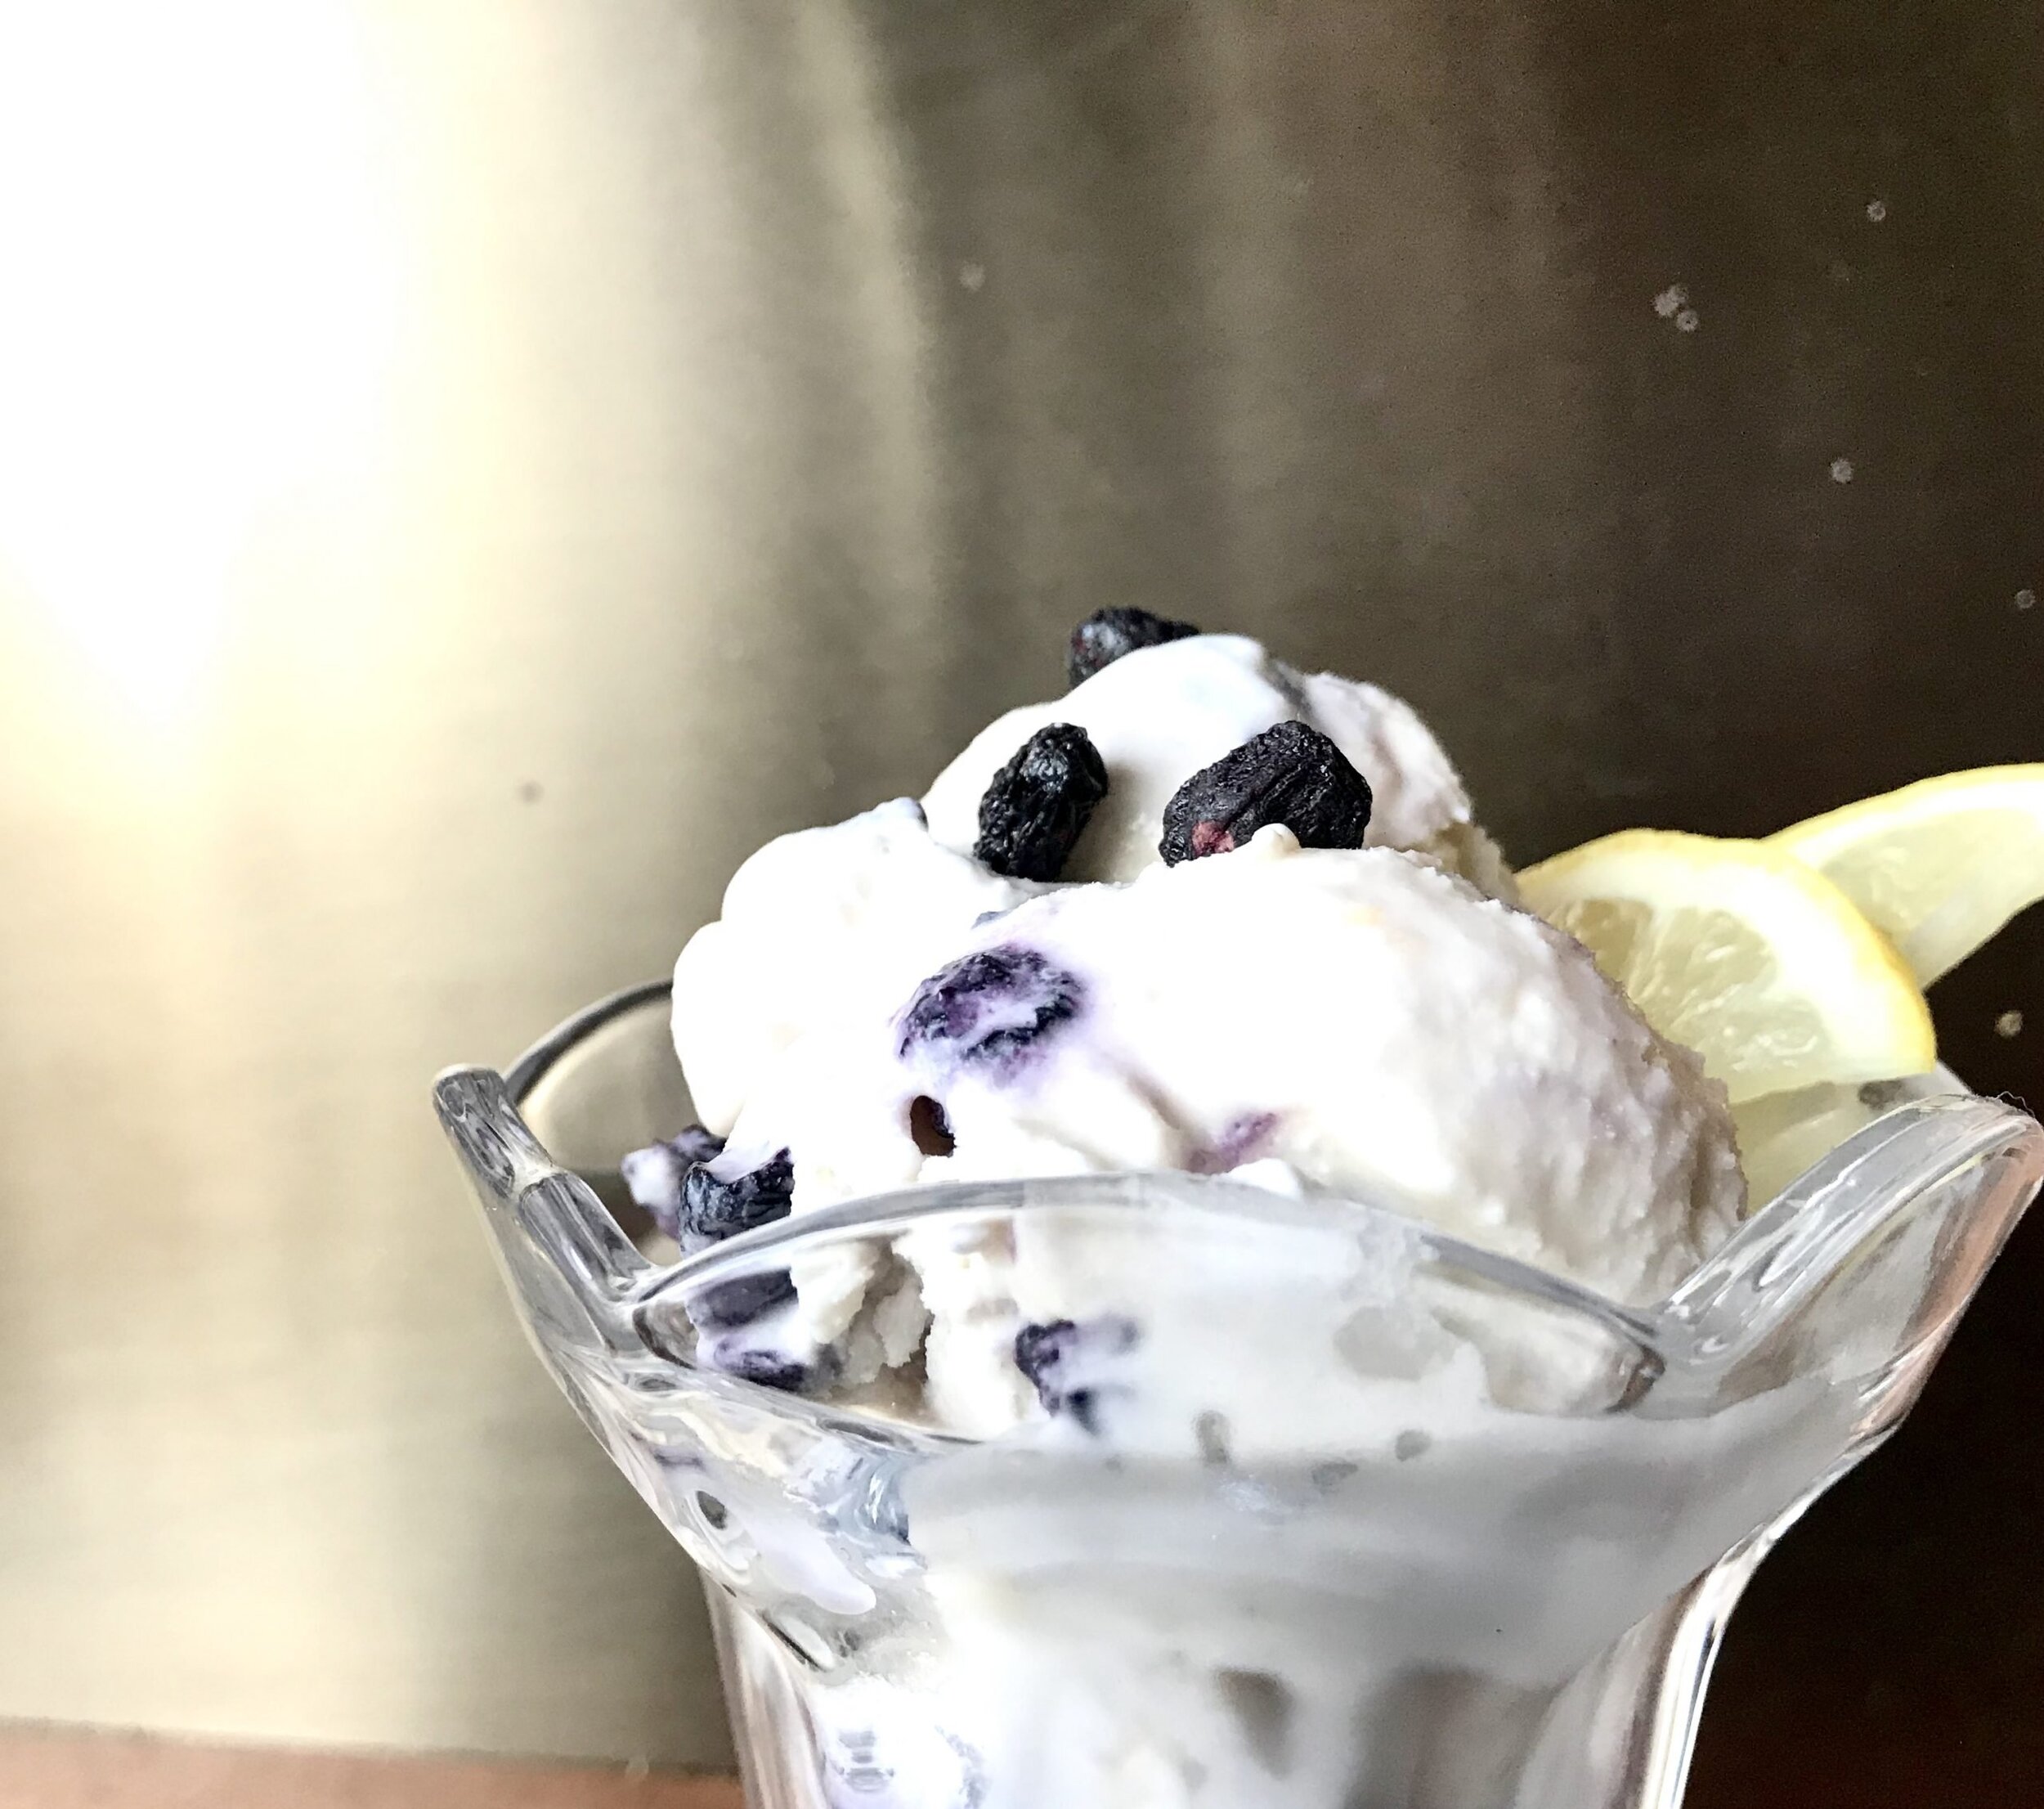
Lemon Blueberry Cheesecake Ice Cream


[wprm-recipe-jump]
*Disclaimer: This post contains affiliate links. To learn more, please go here.This lemon blueberry cheesecake ice cream is addicting. I couldn't stop eating it. Literally. I ate all of it, it was that good. Add an ice cream cone? That would be delicious. Throw it into a milkshake, even better!Don't want to make it a lemon blueberry cheesecake ice cream? You can make always replace the blueberries with dried raspberries or even strawberries if you'd like! Have a favorite cheesecake recipe? Use that instead of the one I listed for you below! It doesn't need to be lemon blueberry, it can be a plain and simple strawberry cheesecake ice cream instead. Either way it will be a delicious treat!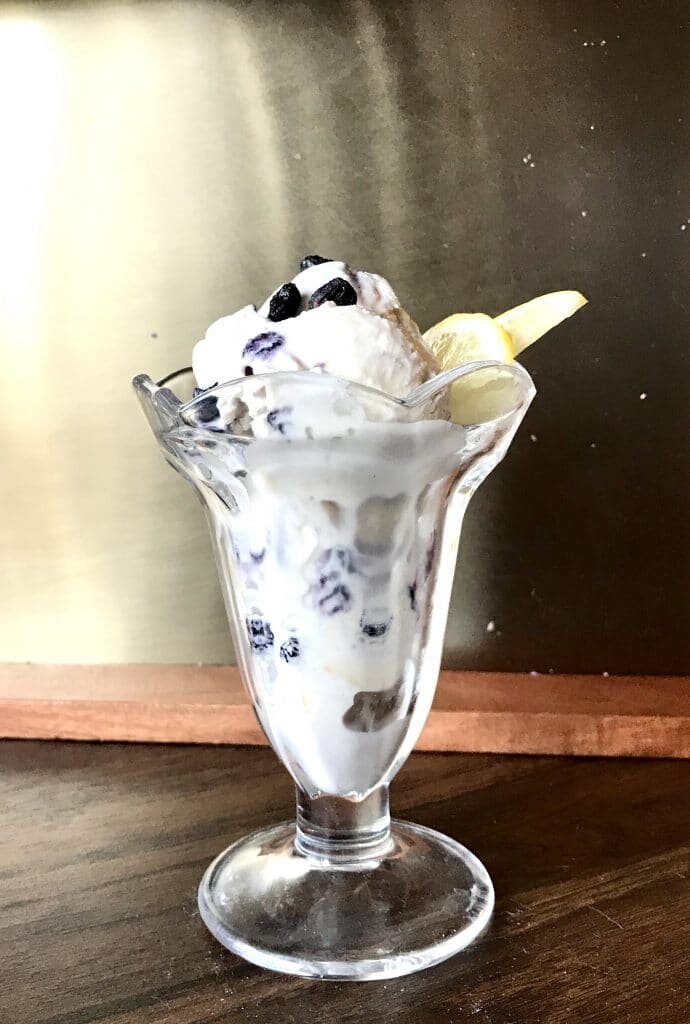
[mailerlite_form form_id=1]
Above are some products that I personally use and recommend for this recipe and to have for everyday use. I cannot recommend this ice cream machine enough! It's such a great price and it's so easy to use. The directions are so simple and it's easy to clean. I use it for all of my ice cream recipes, whether it's sorbet, sherbet or just a simple vanilla ice cream this is the tool that I will always go back to.
__________________________________________________________________________________________
lemon cheesecake recipe is here from amy in the kitchen.
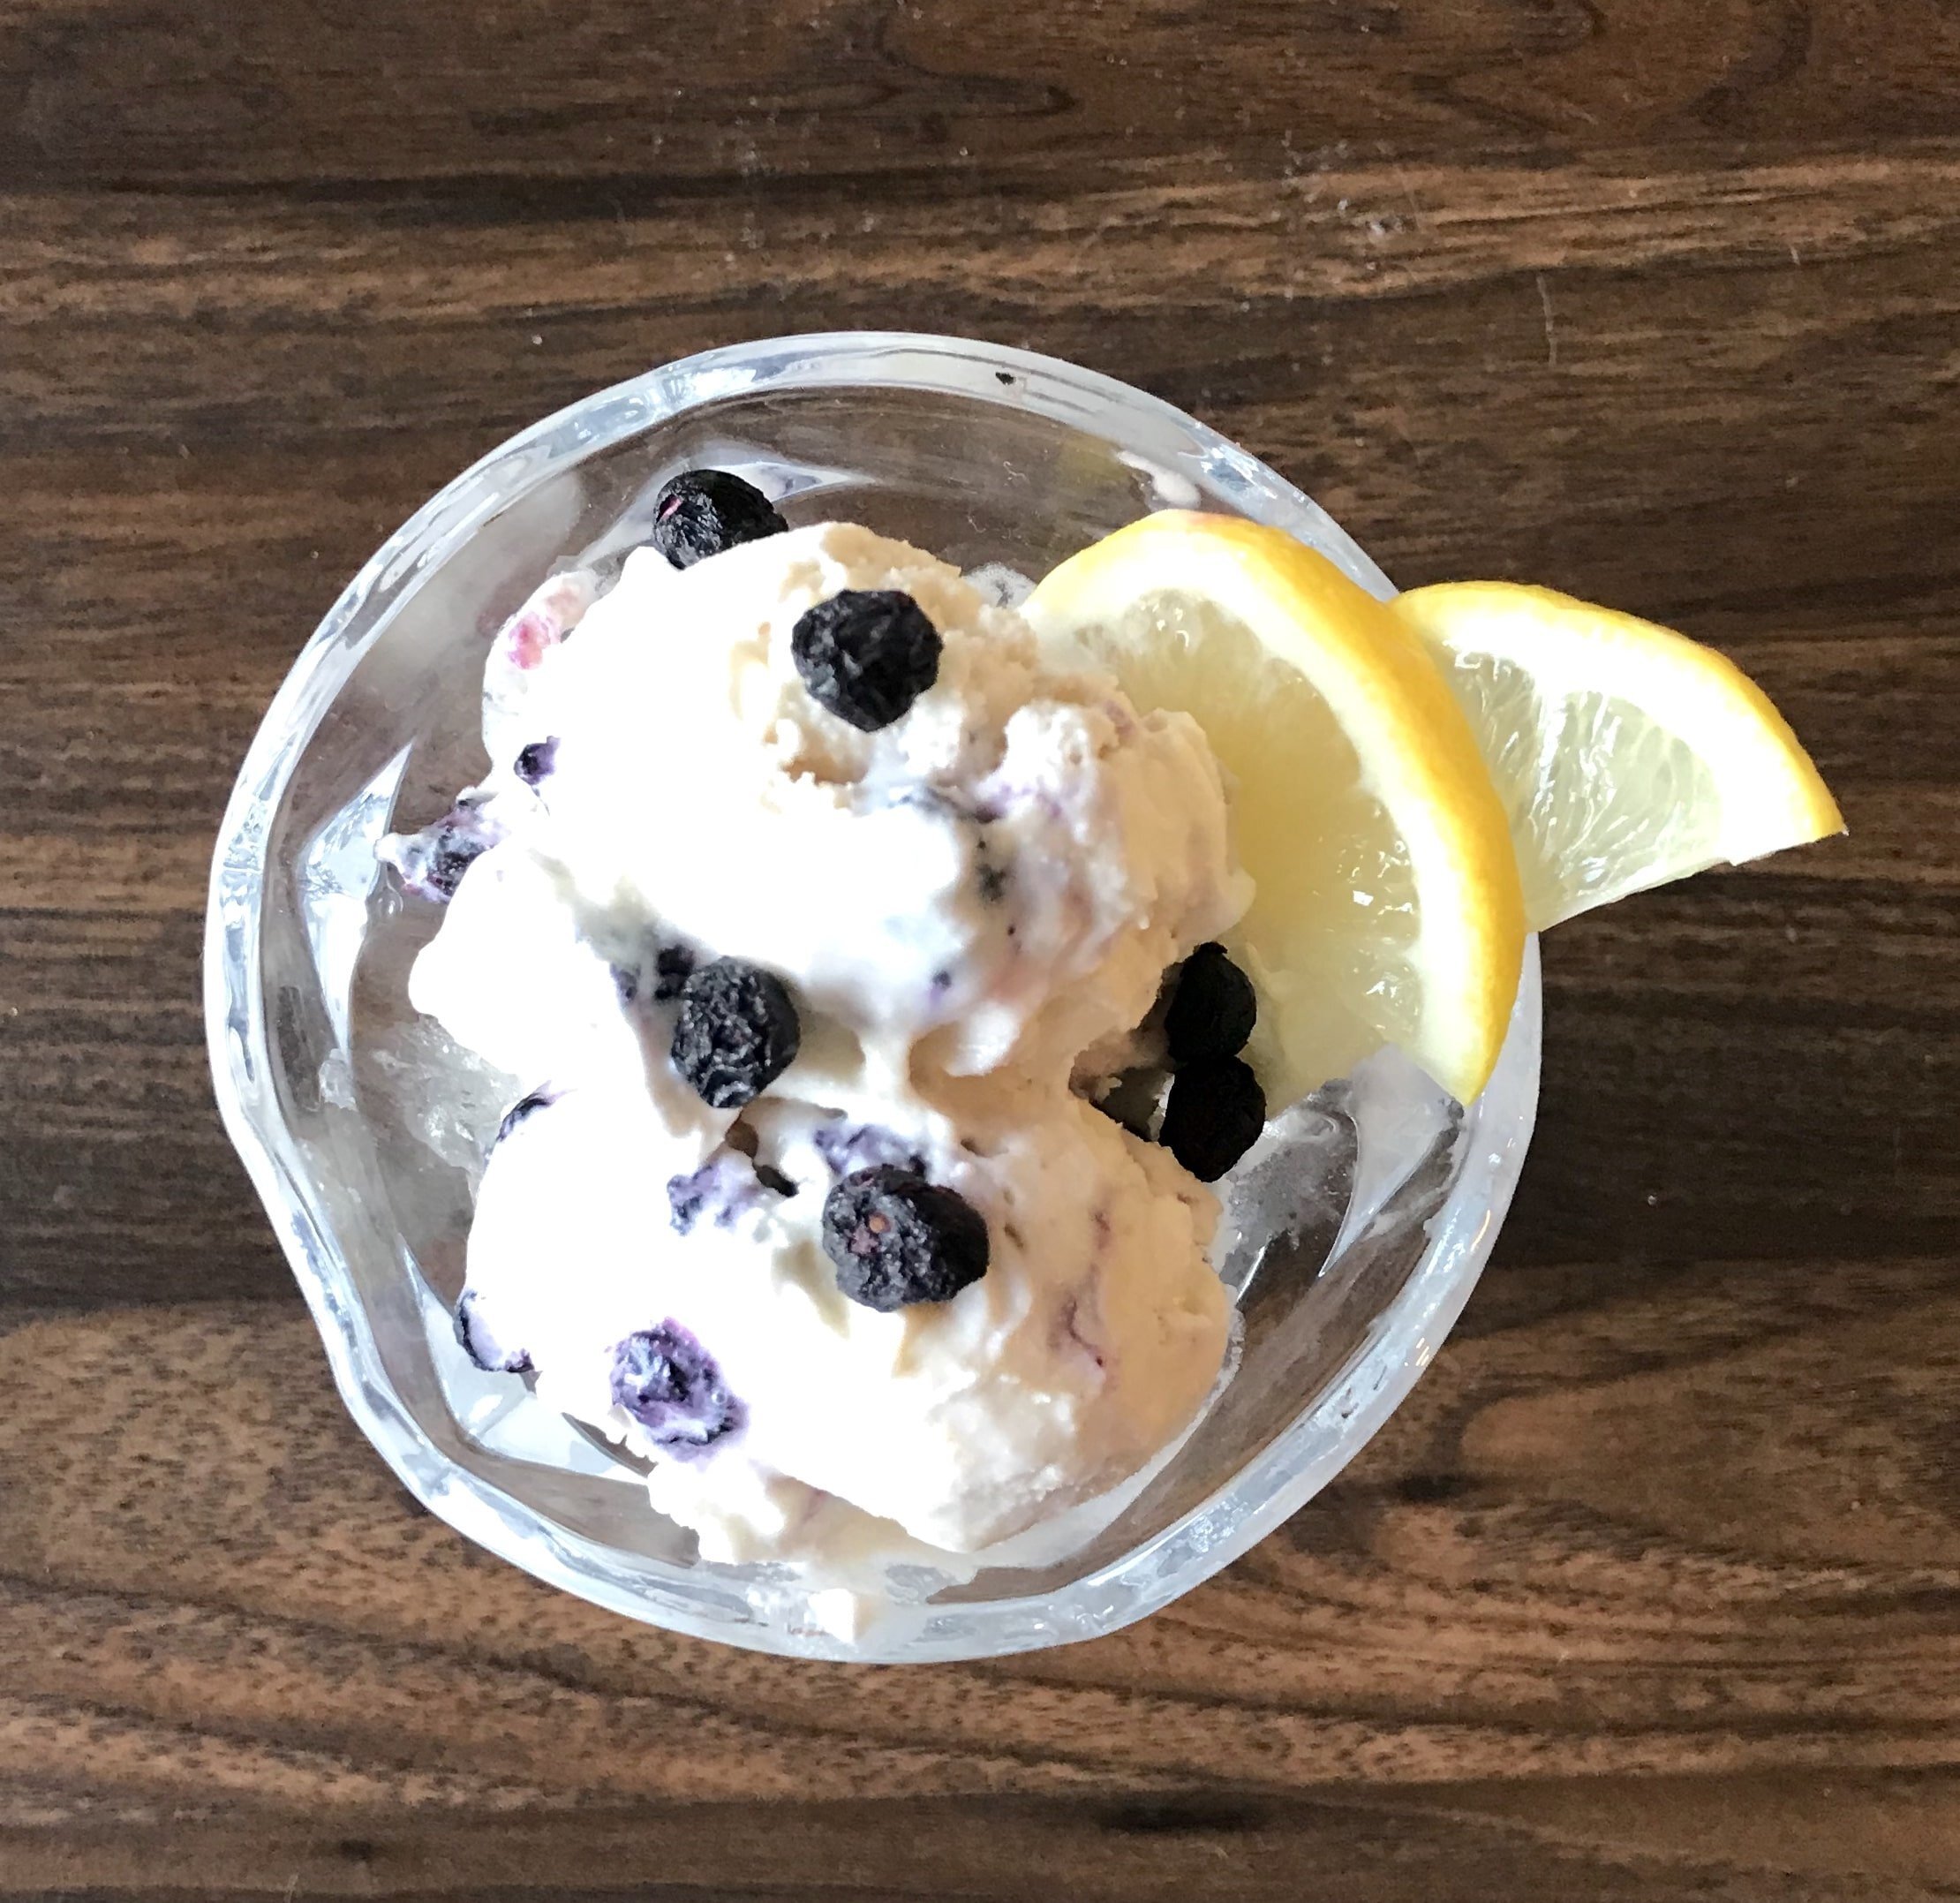
lemon blueberry cheesecake ice cream

a sweet vanilla ice cream that's mixed with dried blueberries and lemon cheesecake pieces.
- 2 cup heavy cream
- 1 1/4 milk
- 3/4 cup granulated sugar
- 2 tsp vanilla extract
- 1/3 cup freeze dried blueberries
- lemon cheesecake pieces i used this recipe here (from amy in the kitchen. just make a 1/4 of the recipe and bake it in a small casserole dish. you don't need the crust, just the cheesecake base. after it's baked, let cool and then cut into small little bite sized pieces.)
- place the cream, milk, sugar and vanilla into a pot and bring to a boil, whisking to make sure the sugar dissolves. place the ice cream base into the fridge overnight to cool and to let the flavor increase. following the manufacturer's instructions of your ice cream machine, turn the base for 20-25 minutes. fold in the freeze dried blueberries and the cheesecake pieces. place the ice cream into a freezer safe container and freeze overnight to firm up.

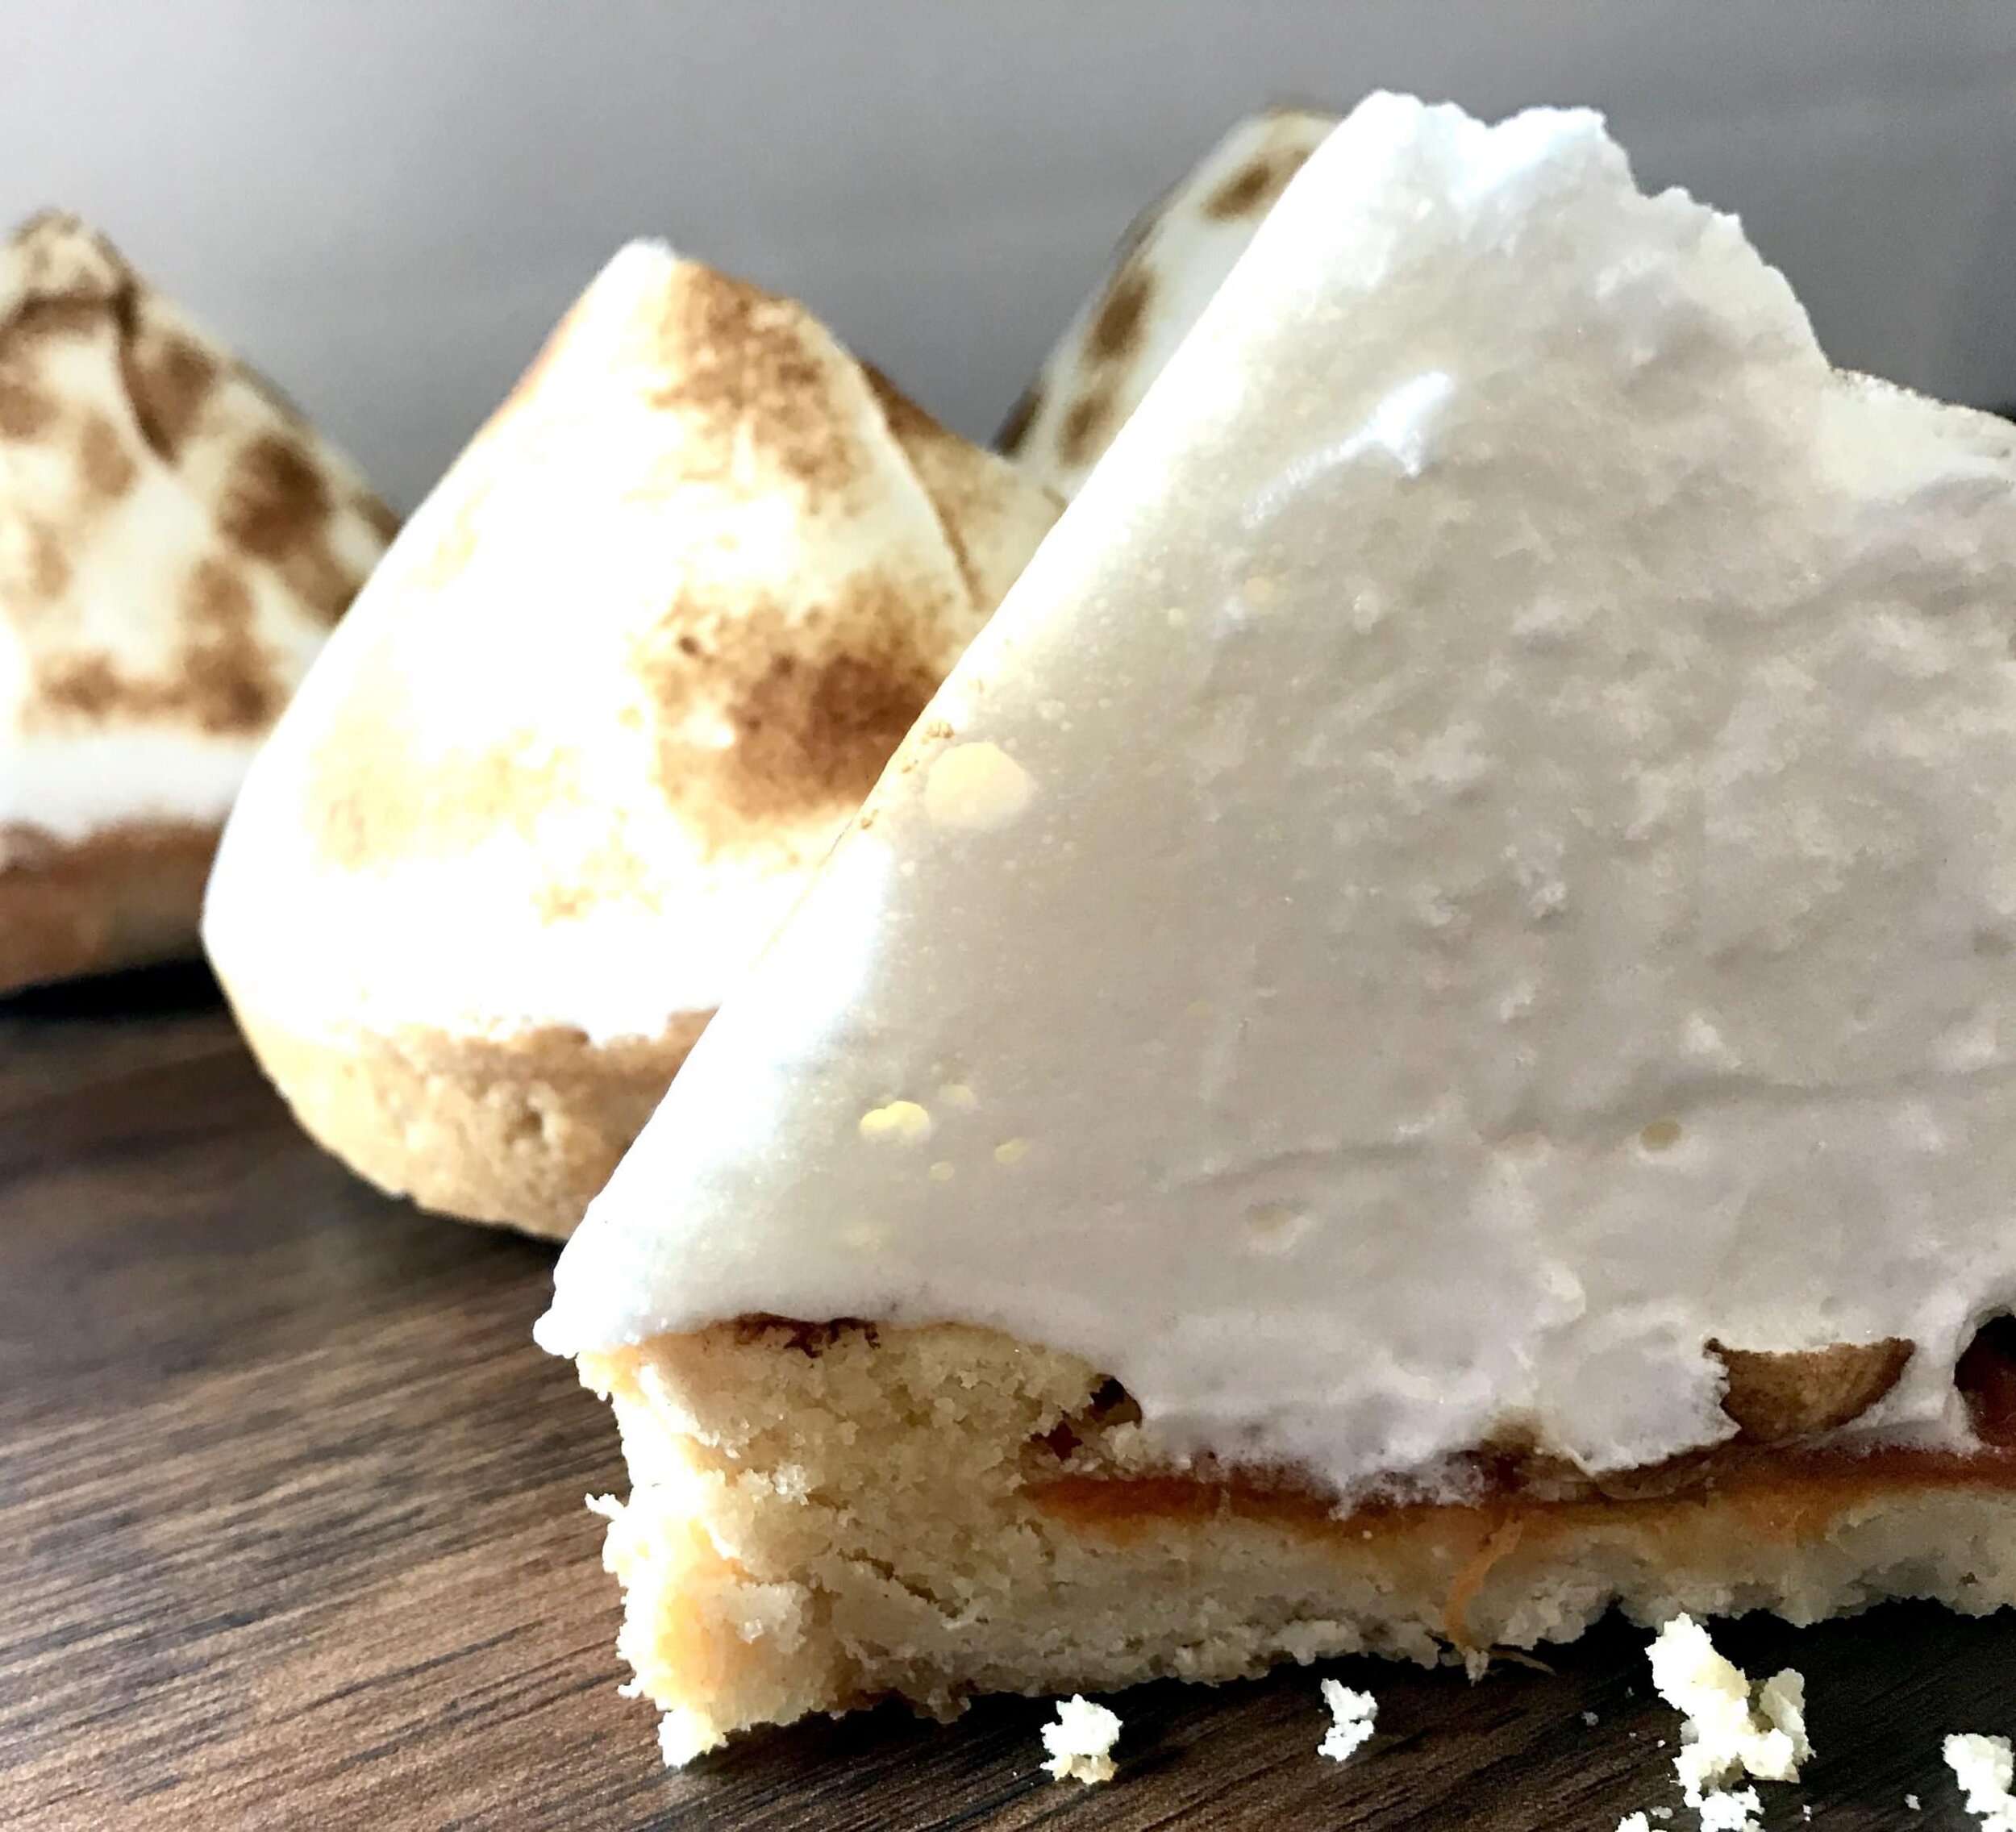
Apricot Almond Tart
[wprm-recipe-jump]
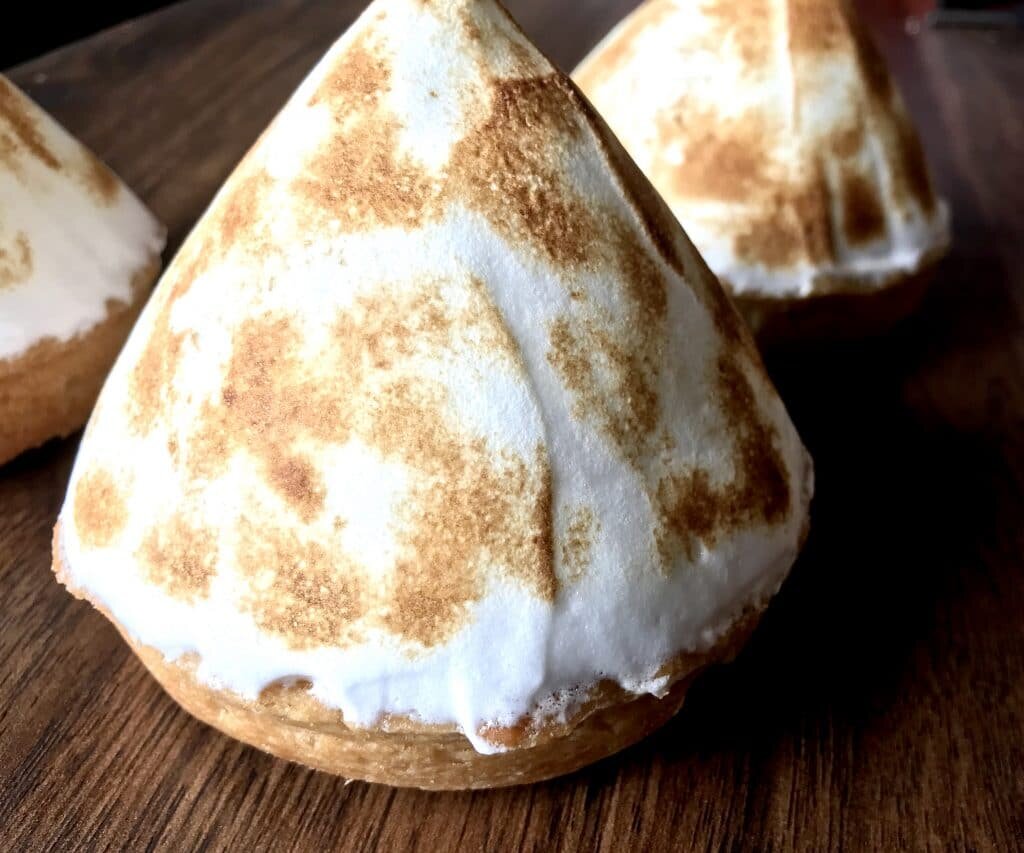
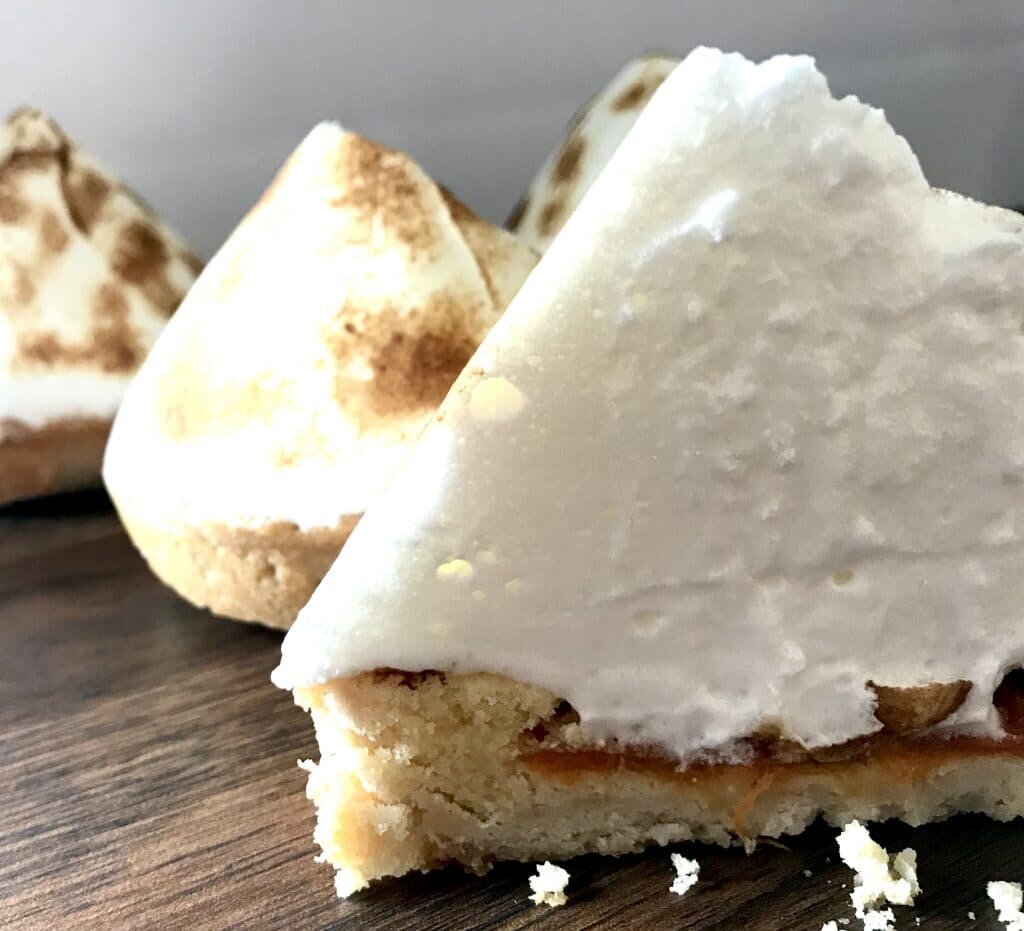
*Disclaimer: This post contains affiliate links. To learn more, please go here.This apricot almond tart is luscious and creamy. It's filled with an almond frangipane and freshly picked apricots that have been cut in half that's topped with a fluffy meringue topping that is lightly torched to perfection. This tart is perfect for a late summer dessert. It's incredibly simple to make too! It may require a few steps to get the end result but it's worth it! You of course have to start off with a crust, so these guys are made with a shortbread crust. Then come the best part; the almond frangipane! This filling is a go to of mine because it's soft and full of flavor! And it's so easy to pair it with so many different things, like fruit or even chocolate! These tarts obviously have fresh apricot halves in them, which is perfect as a late summer/early fall treat when apricots are at their highest peak in season. And finally, you top these little tarts with a mound of fluffy meringue on top that you toast to perfection. so why not enjoy yourself one of these apricot almond tart this year?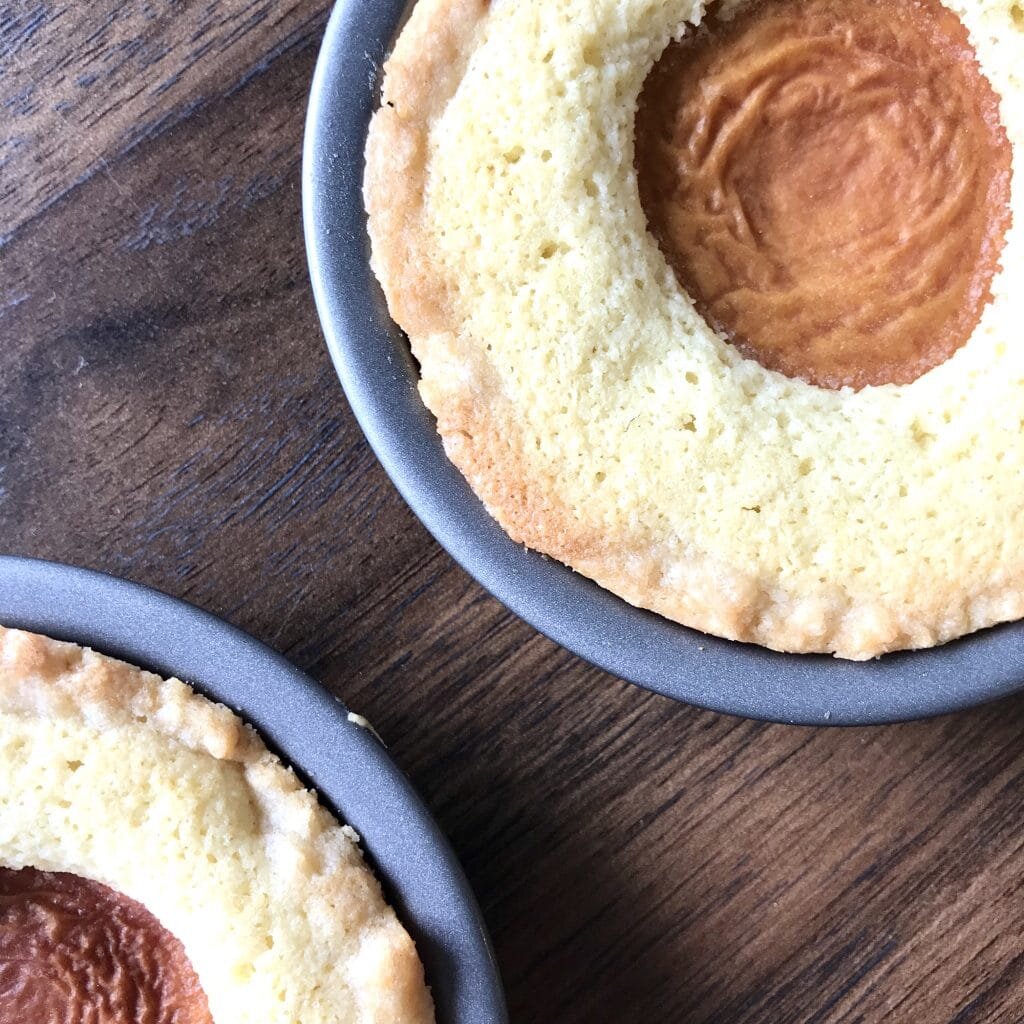
[mailerlite_form form_id=1]
Here are a list of the main tools you will need to make these apricot almond tarts. You will need some tart pans, of course, as well as a torch. Above are some amazon links to a few options that i recommend.
_________________________________________________________________________________
apricot almond tart
a shortbread crust filled with a frangipane filling and a fresh apricot that is topped with a mound of toasted meringue
crust
- 1 cup all-purpose flour
- 1/2 cup granulated sugar
- 1/2 cup unsalted butter (room temp)
almond cream
- 4 tbsp unsalted butter (room temp)
- 1/4 cup granulated sugar
- 1 egg
- 1/3 cup almond flour
- 1 tbsp all-purpose flour
- 1 tsp vanilla extract
- 1 tsp almond extract
- 2 whole apricots (pitted and cut in half)
meringue
- 2 egg whites
- 1/2 cup granulated sugar
- pinch cream of tartar
crust
-
for the crust, mix all of the flour, sugar and butter together in a mixer fitted with a paddle attachment. press into 4 mini tart pans or 1 large pan.
almond cream
-
preheat the oven to 350 degrees F. cream the butter and sugar until fluffy, about 1 minute. add in the egg and extracts and continue mixing. mix in the almond flour and flour until everything comes together. portion evenly into the unbaked tart shells. place the apricot halves into the center of the tarts. bake for 20-25 minutes or until the almond cream is set. let cool.
meringue
-
in the bowl of an electric mixer, whip the egg whites until foamy and then add the cream of tartar. continue whipping on high until soft peaks start to form and then gradually add in the sugar and whip until stiff peaks form and the meringue is nice and glossy. swirl or pipe on top of the apricot tarts and torch the meringue until golden brown.


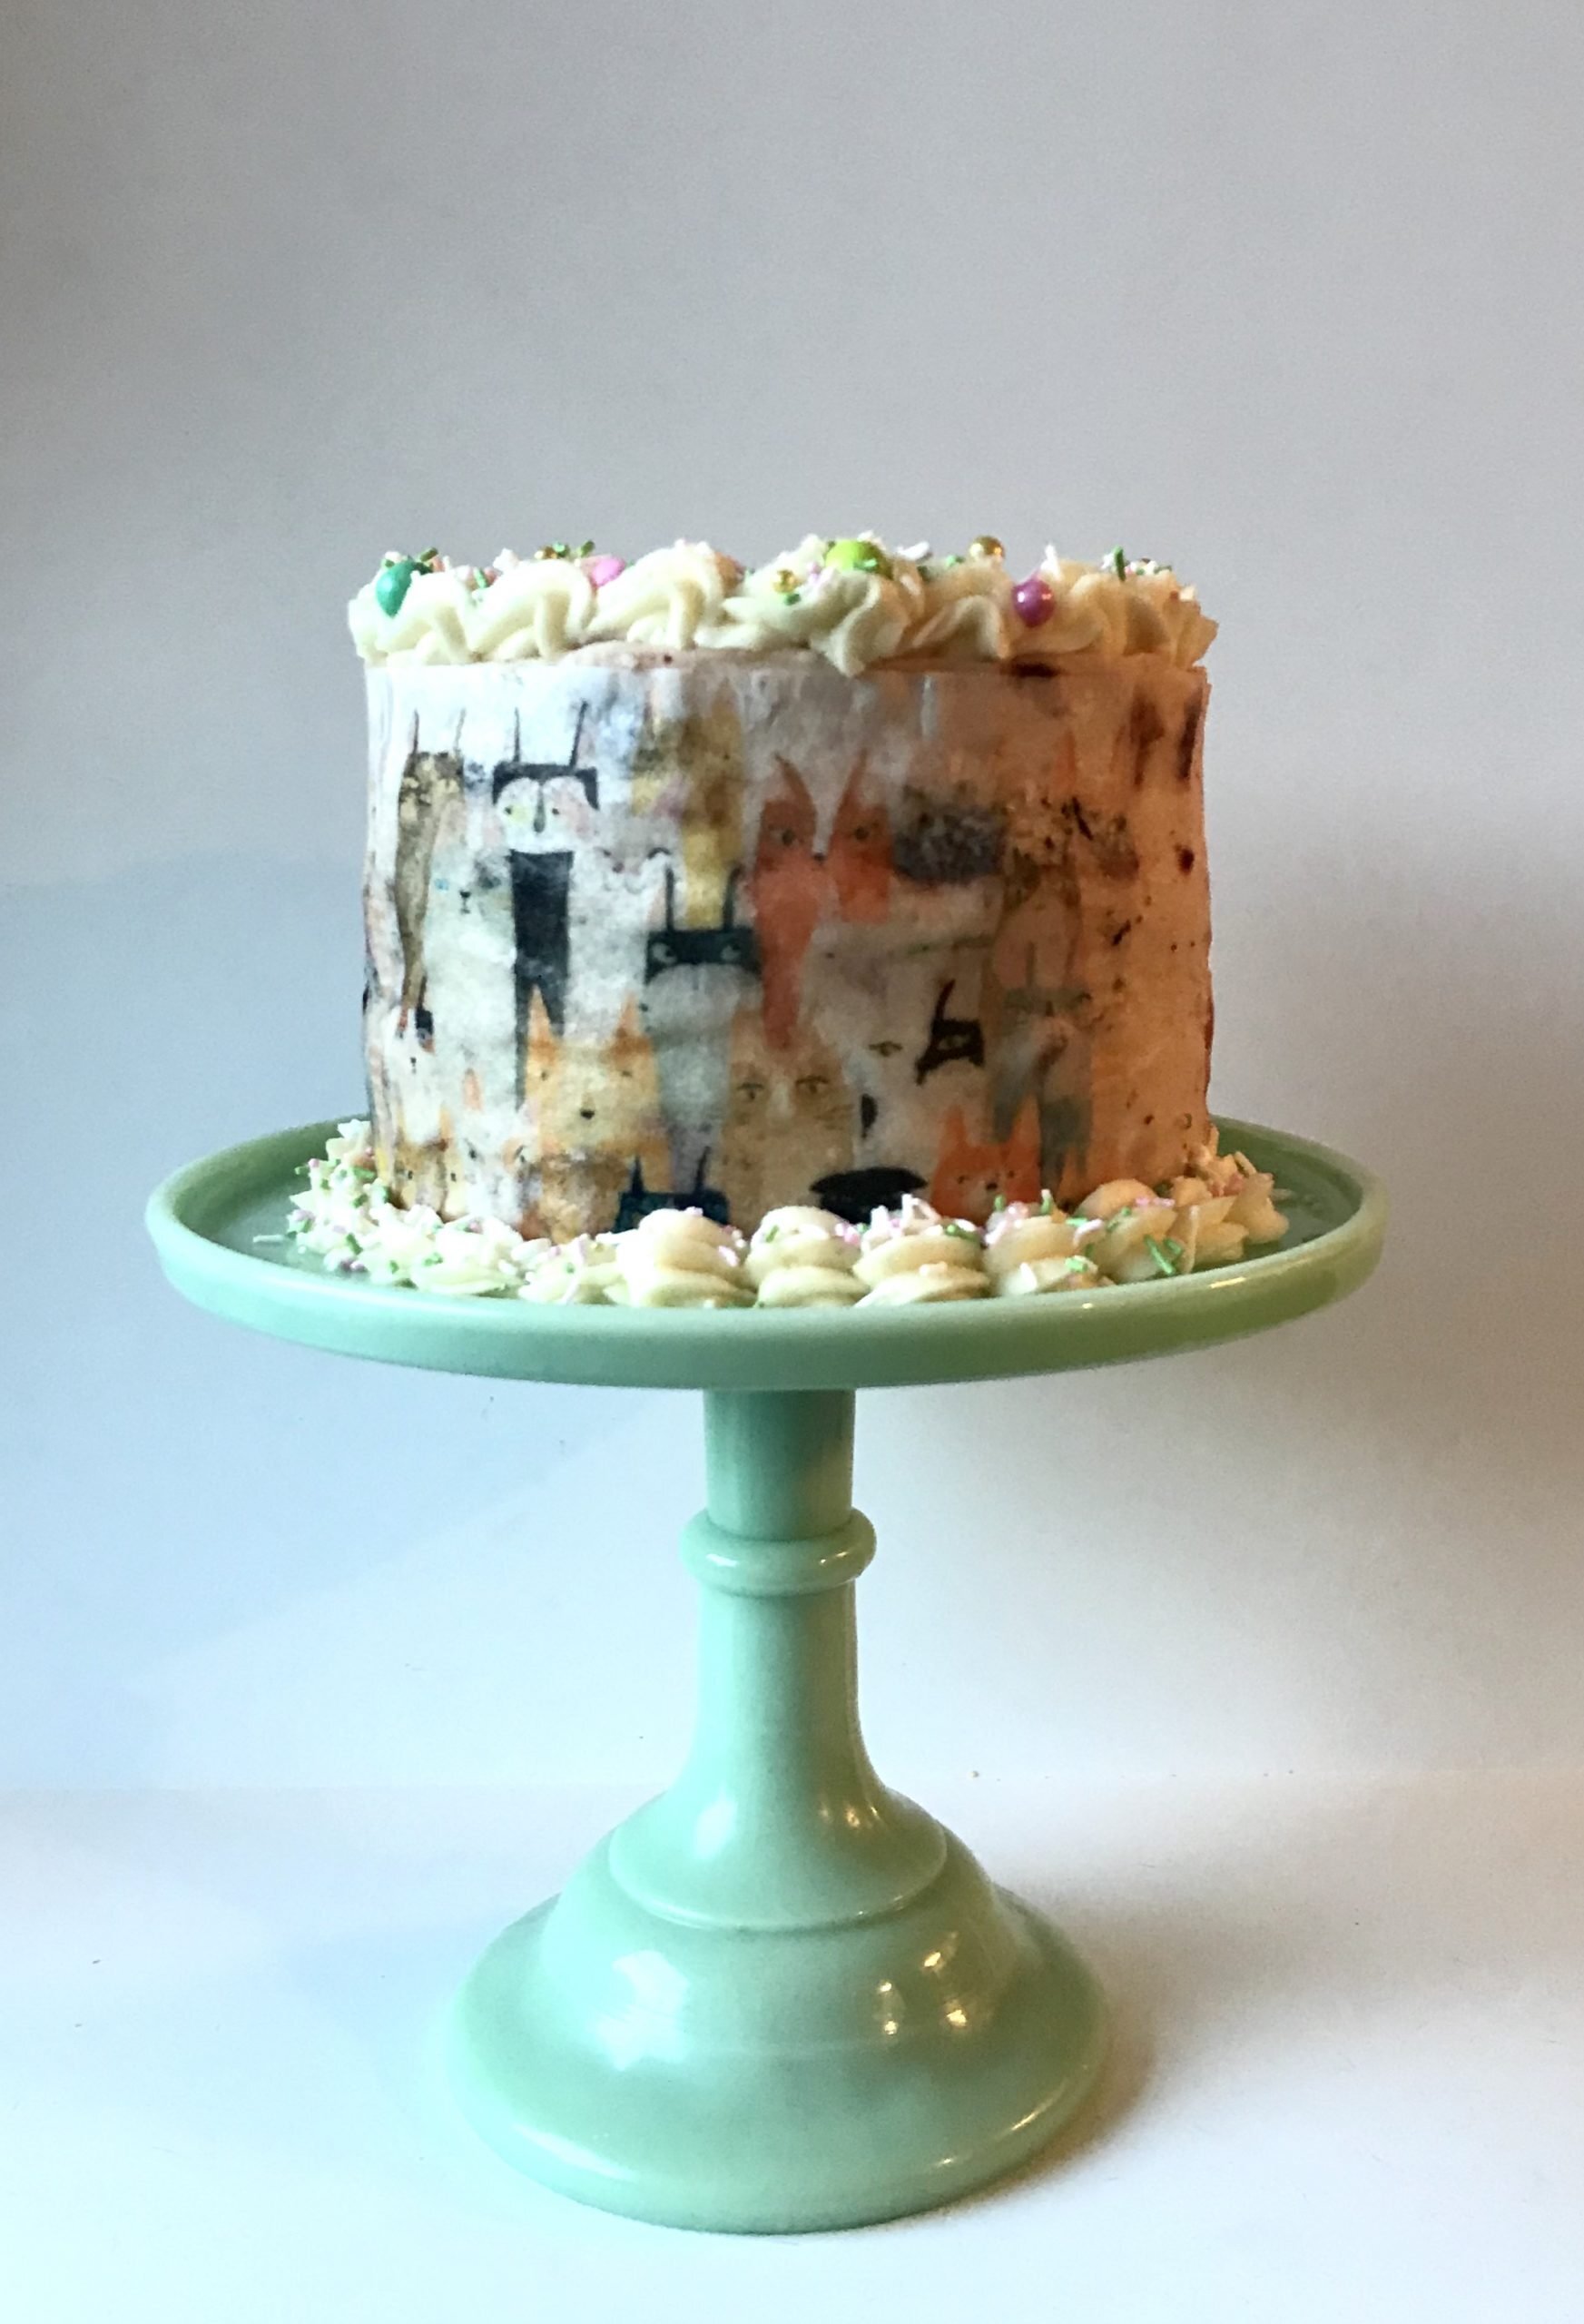
Neapolitan Cake

meet pancake + neapolitan cake
[wprm-recipe-jump]

meet pancake + neapolitan cake

meet pancake + neapolitan cake
*Disclaimer: This post contains affiliate links. To learn more, please go here.I got a cat a few weeks ago. He's the cutest, cuddliest, and most vocal kitten I've ever met and I don't know what I'd do without him. His name is pancake! To welcome him to his new home, all the way from Dallas! I wanted to make a special cake with cute little cats all over it. It's a basic neapolitan cake. Vanilla cake. Chocolate ganache. Strawberry buttercream. Nuff said.Want to make this neapolitan cake a little differently? You could skip the ganache and do fresh strawberries in the middle and a chocolate buttercream. Now doesn't that sound like heaven!?!?Want to learn how to get images onto cookies and even cakes and chocolates? Then check out my new online edible printing course that will guide you through everything you need to know about edible printing, from start to finish! You won't regret it! not too sure if you want to buy something so pricey if you aren't sure you'd like it? Then you can certainly check out my array of edible paper images you buy and try out before making such a huge purchase.
[mailerlite_form form_id=1]

meet pancake + neapolitan cake

vanilla cake that's filled with a chocolate ganache and cloaked in a strawberry buttercream
cake
2 1/2 cup all-purpose flour
2/3 cup granulated sugar
2 tsp baking soda
1 tsp salt
2 eggs
1/2 cup vegetable oil
1/2 cup plain greek yogurt
1 tbsp vanilla extract
1 1/2 cup buttermilk
ganache
3/4 cup dark chocolate
1/2 cup heavy cream
buttercream
3 sticks unsalted butter
1/2 cup freeze dried strawberries
1 tsp vanilla extract
5 cup powdered sugar
2-3 tbsp heavy cream
cake
preheat the oven to 350 degrees F. and line three 6-inch cake pans. in a large bowl combine the eggs, oil, yogurt, vanilla, and buttermilk. in a separate bowl, combine the flour, sugar, baking soda, and salt. Add the wet mixture into the dry mixture and whisk until fully incorporated. divide the batter evenly among the cake pans and bake for 20-25 minutes or until a toothpick comes out clean. let cool and then remove from the pans.
ganache
combine the heavy cream and chocolate in a small bowl and microwave for 1 minute until the chocolate has melted. mix until fully incorporated and let chill until cool.
buttercream
put all of the ingredients into the bowl of an electric mixer fitted with a whisk attachment. start slow and then gradually increase the speed. whip on high until light and fluffy, about 3 minutes.

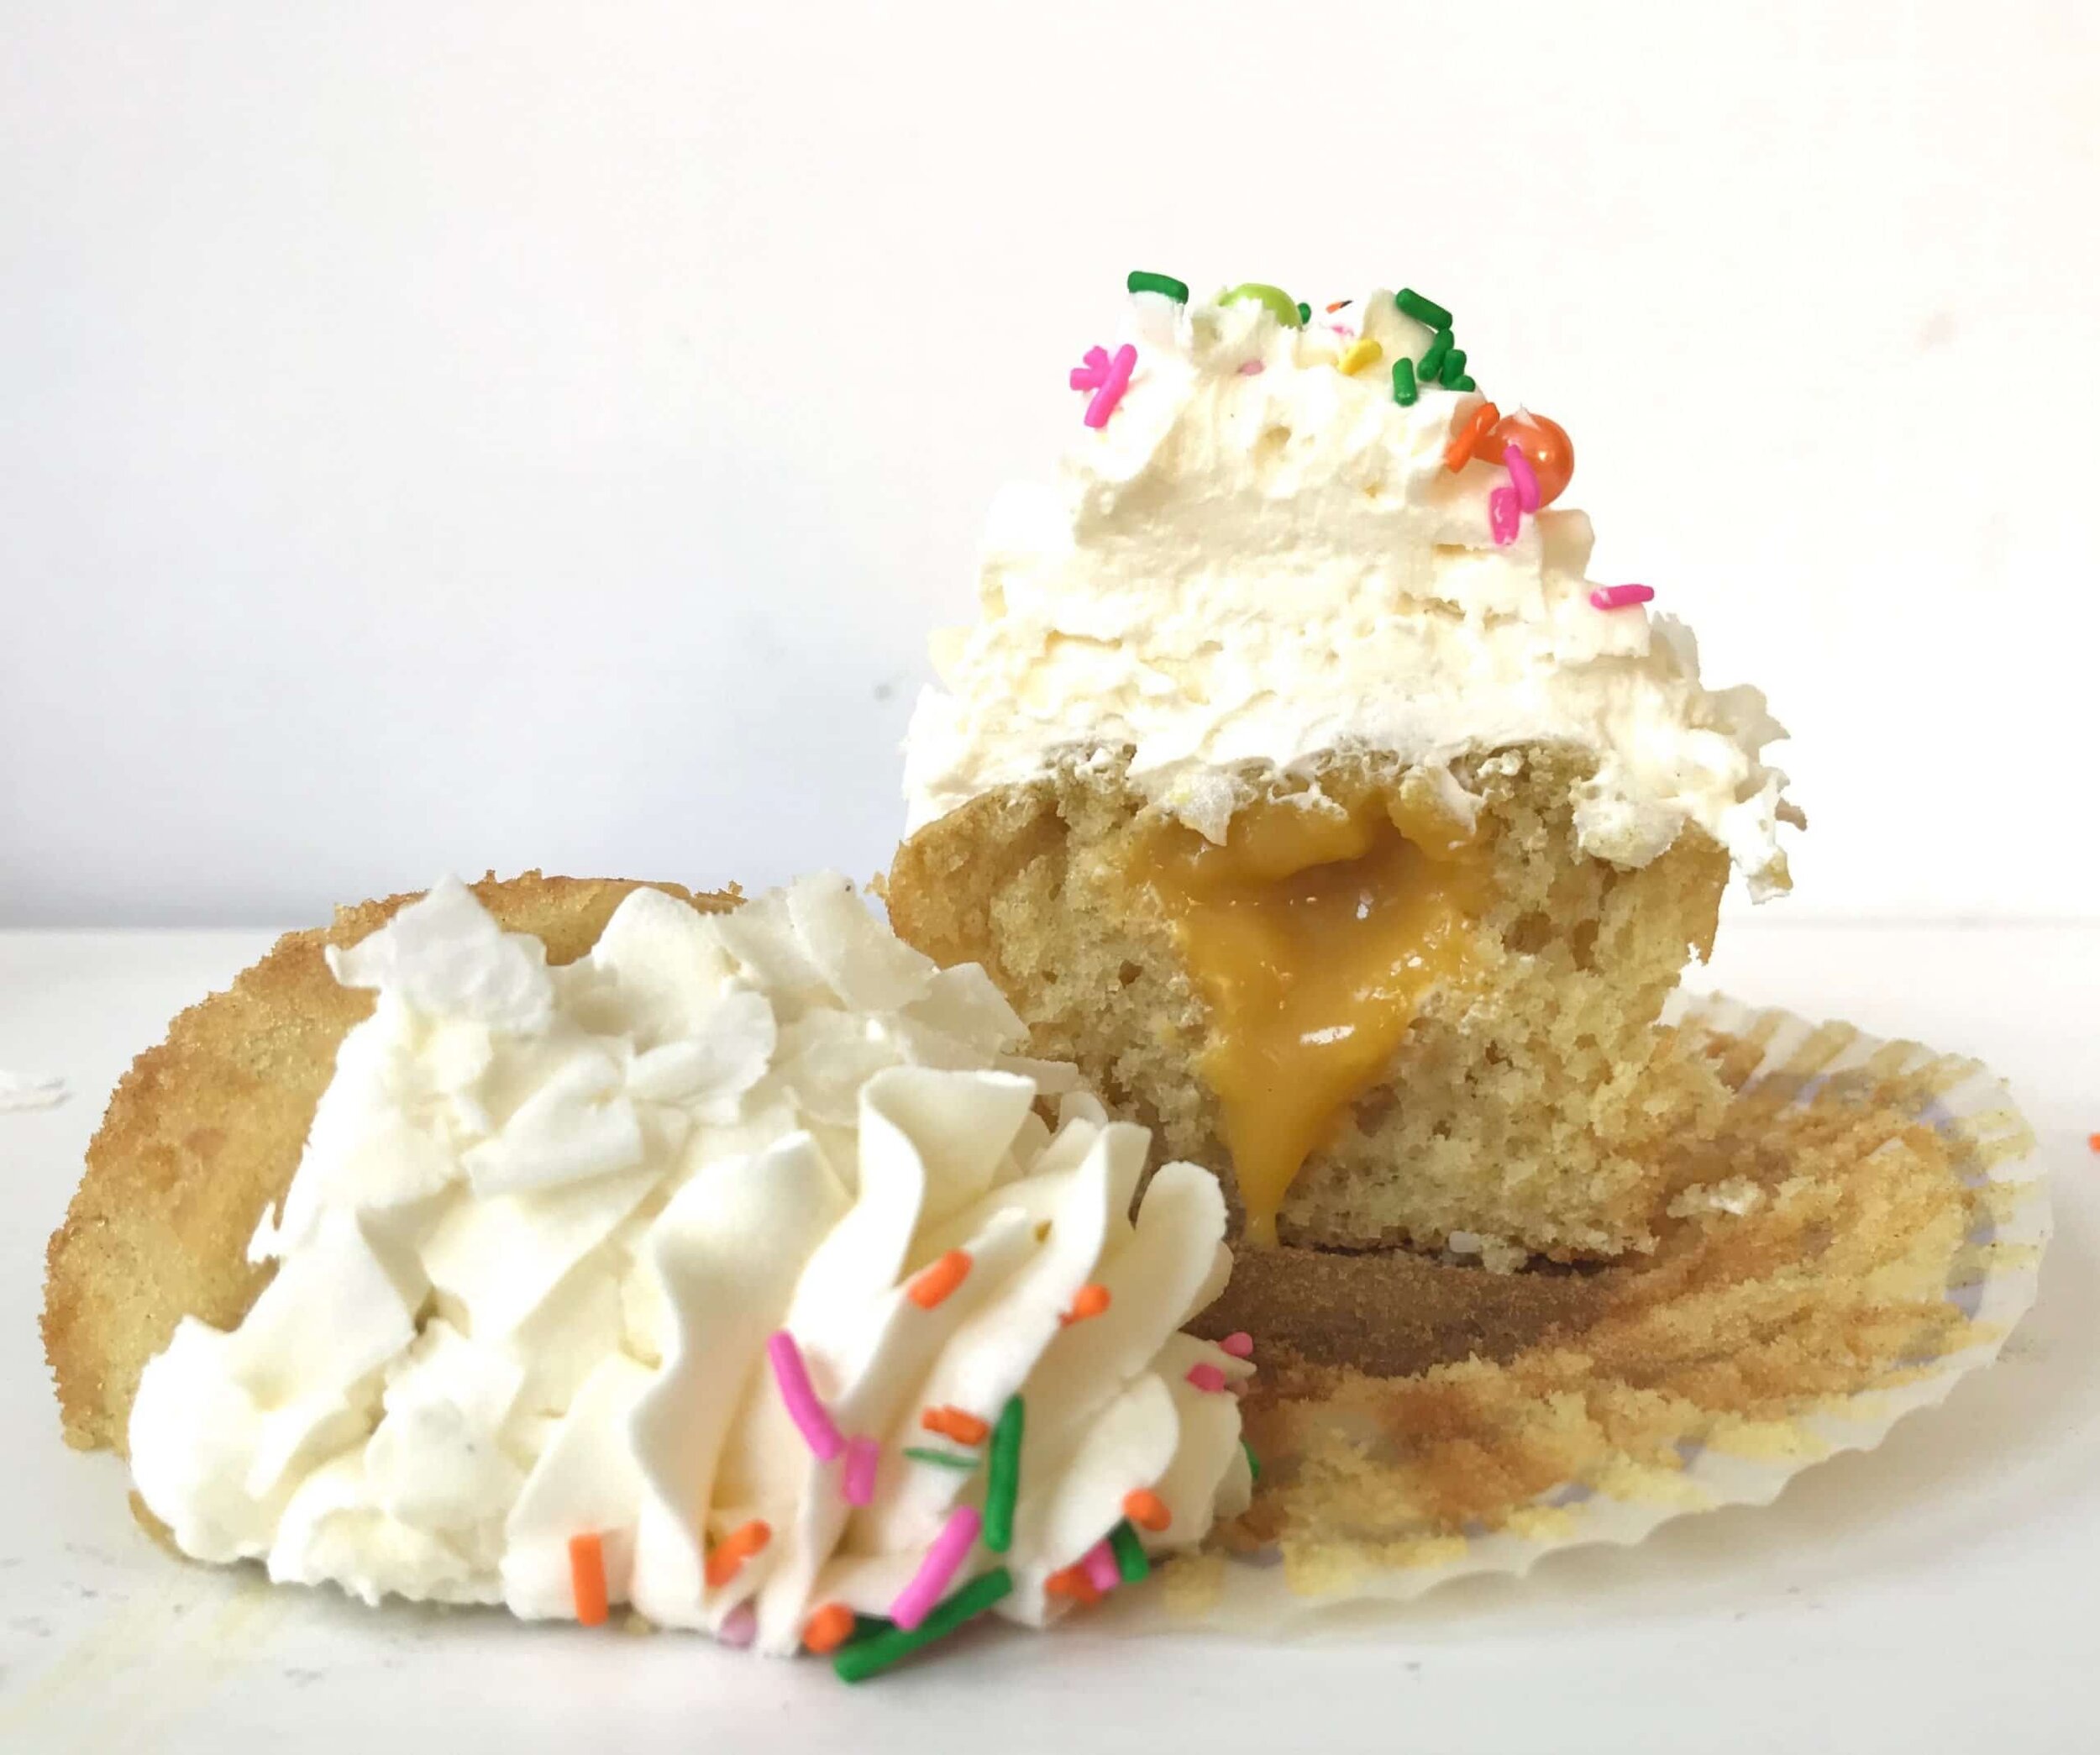
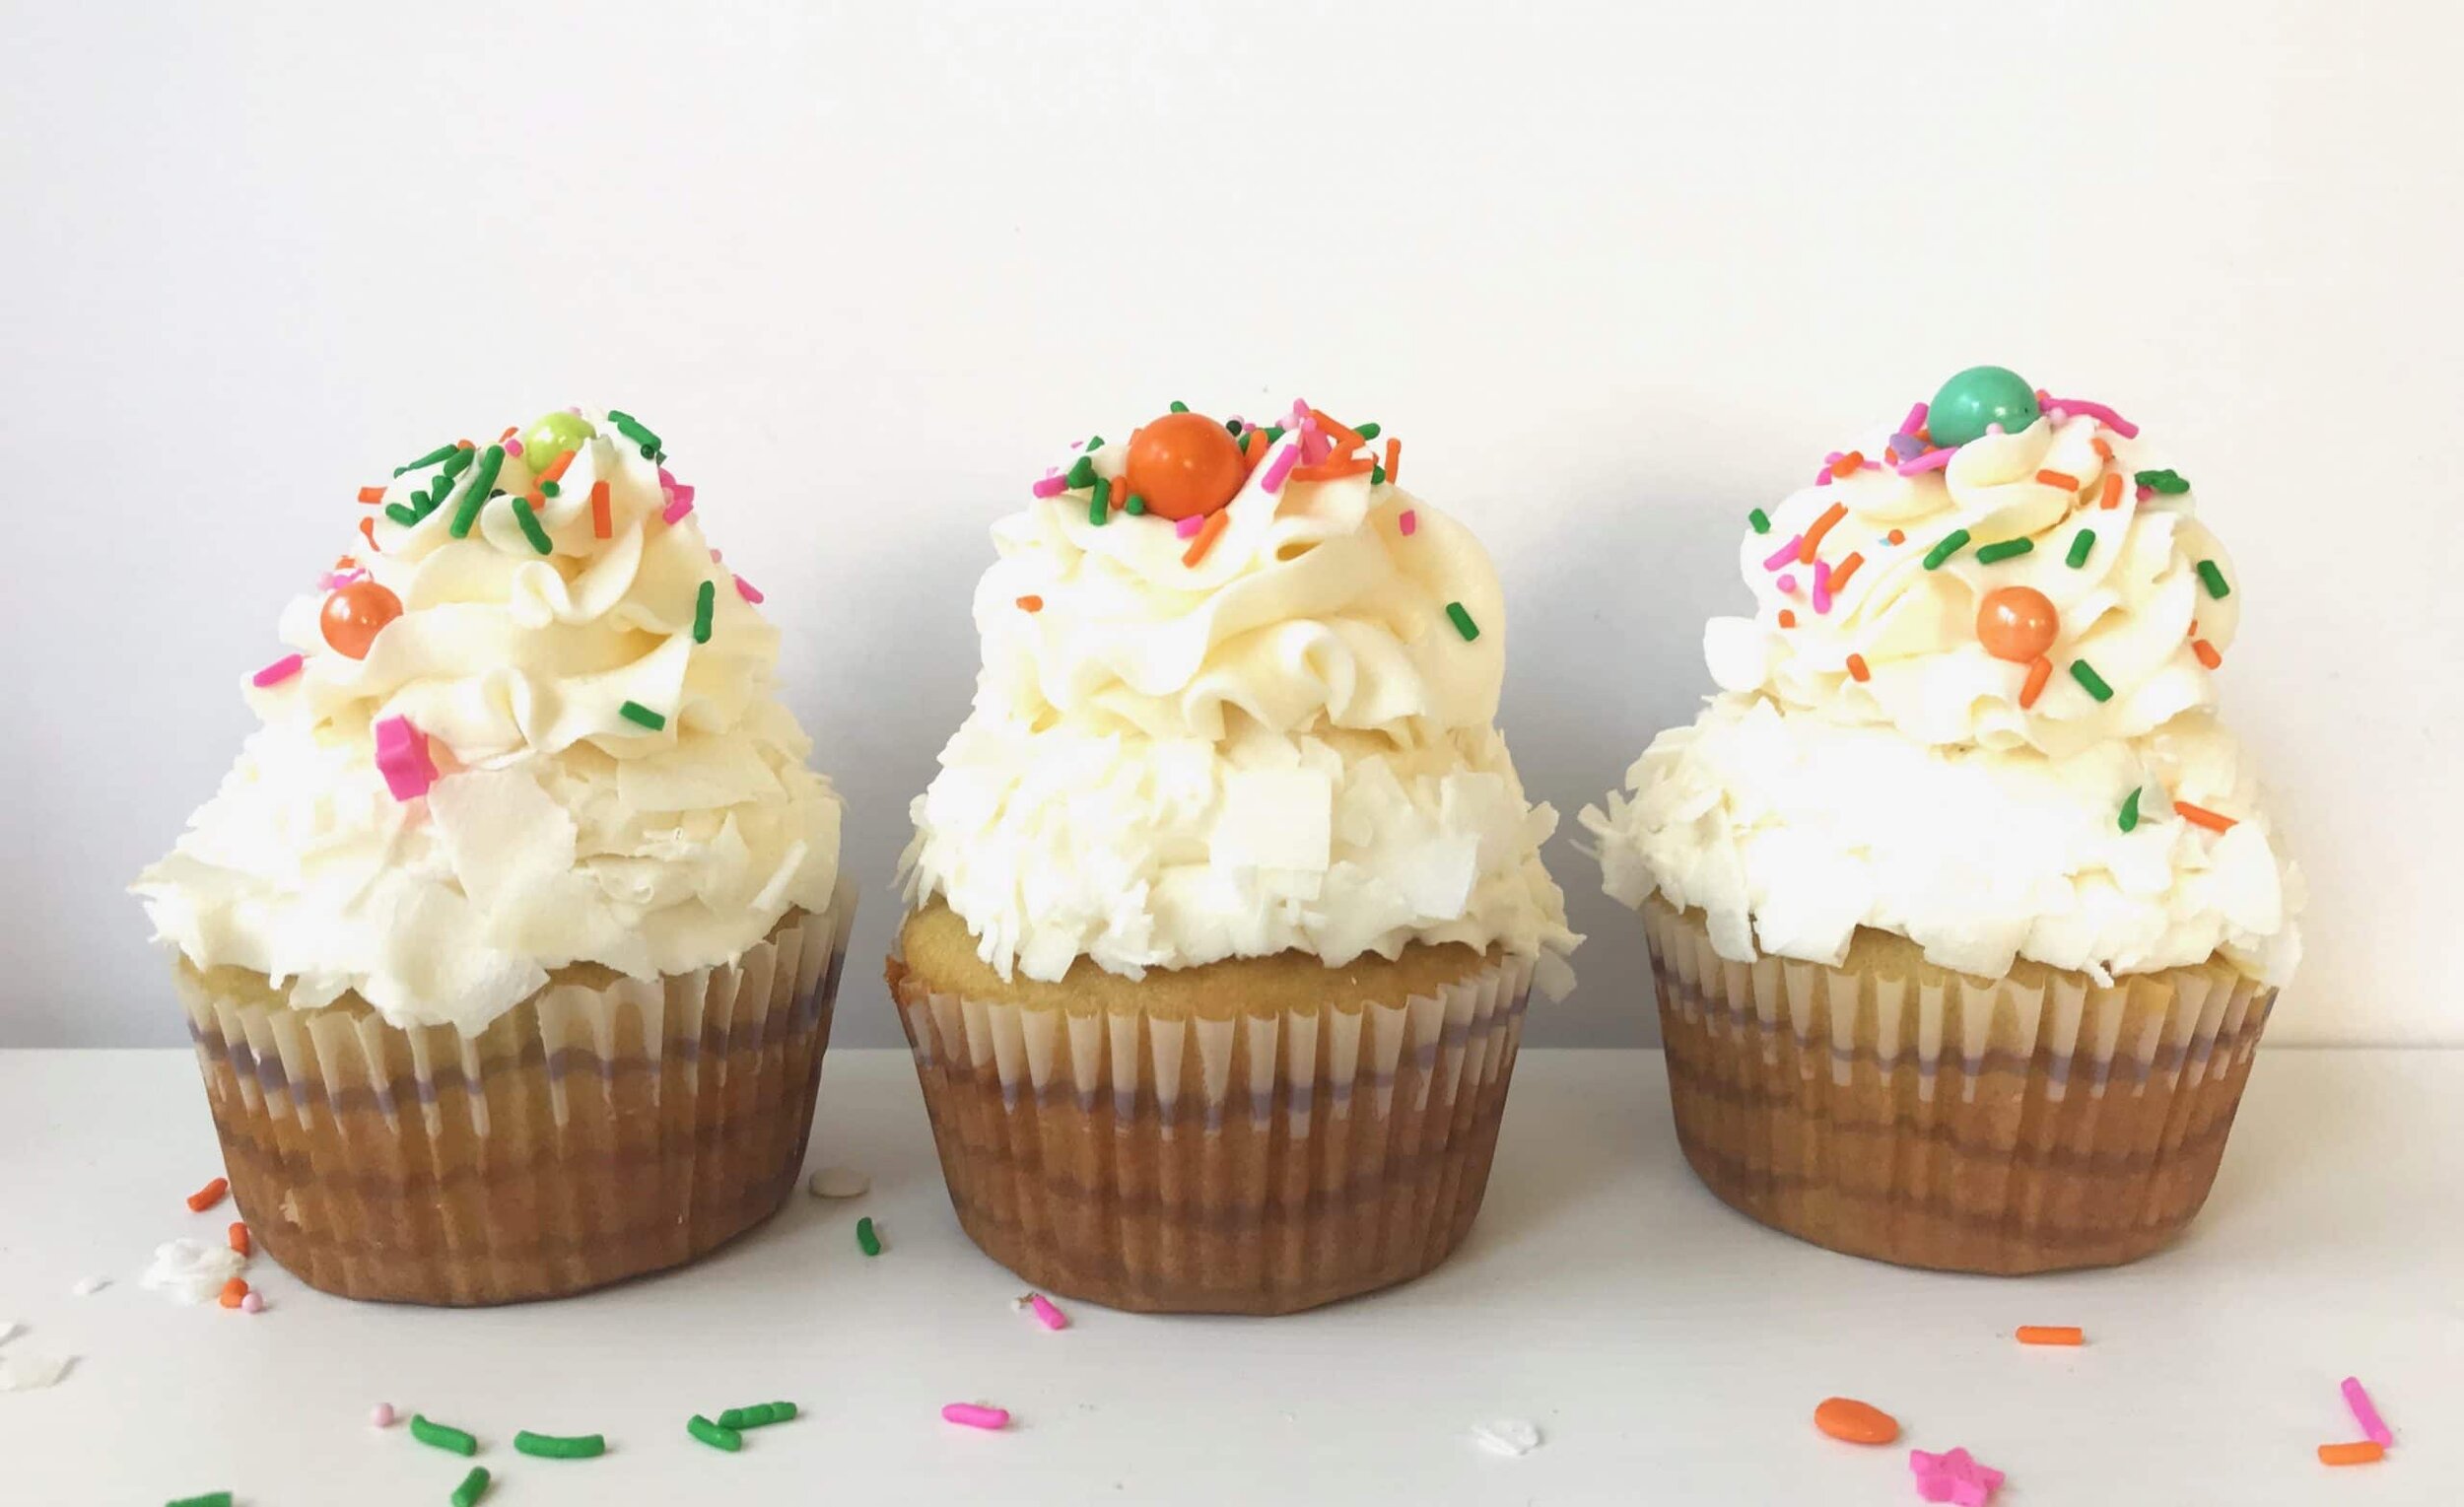
Coconut Passion Fruit Cupcakes
[wprm-recipe-jump]
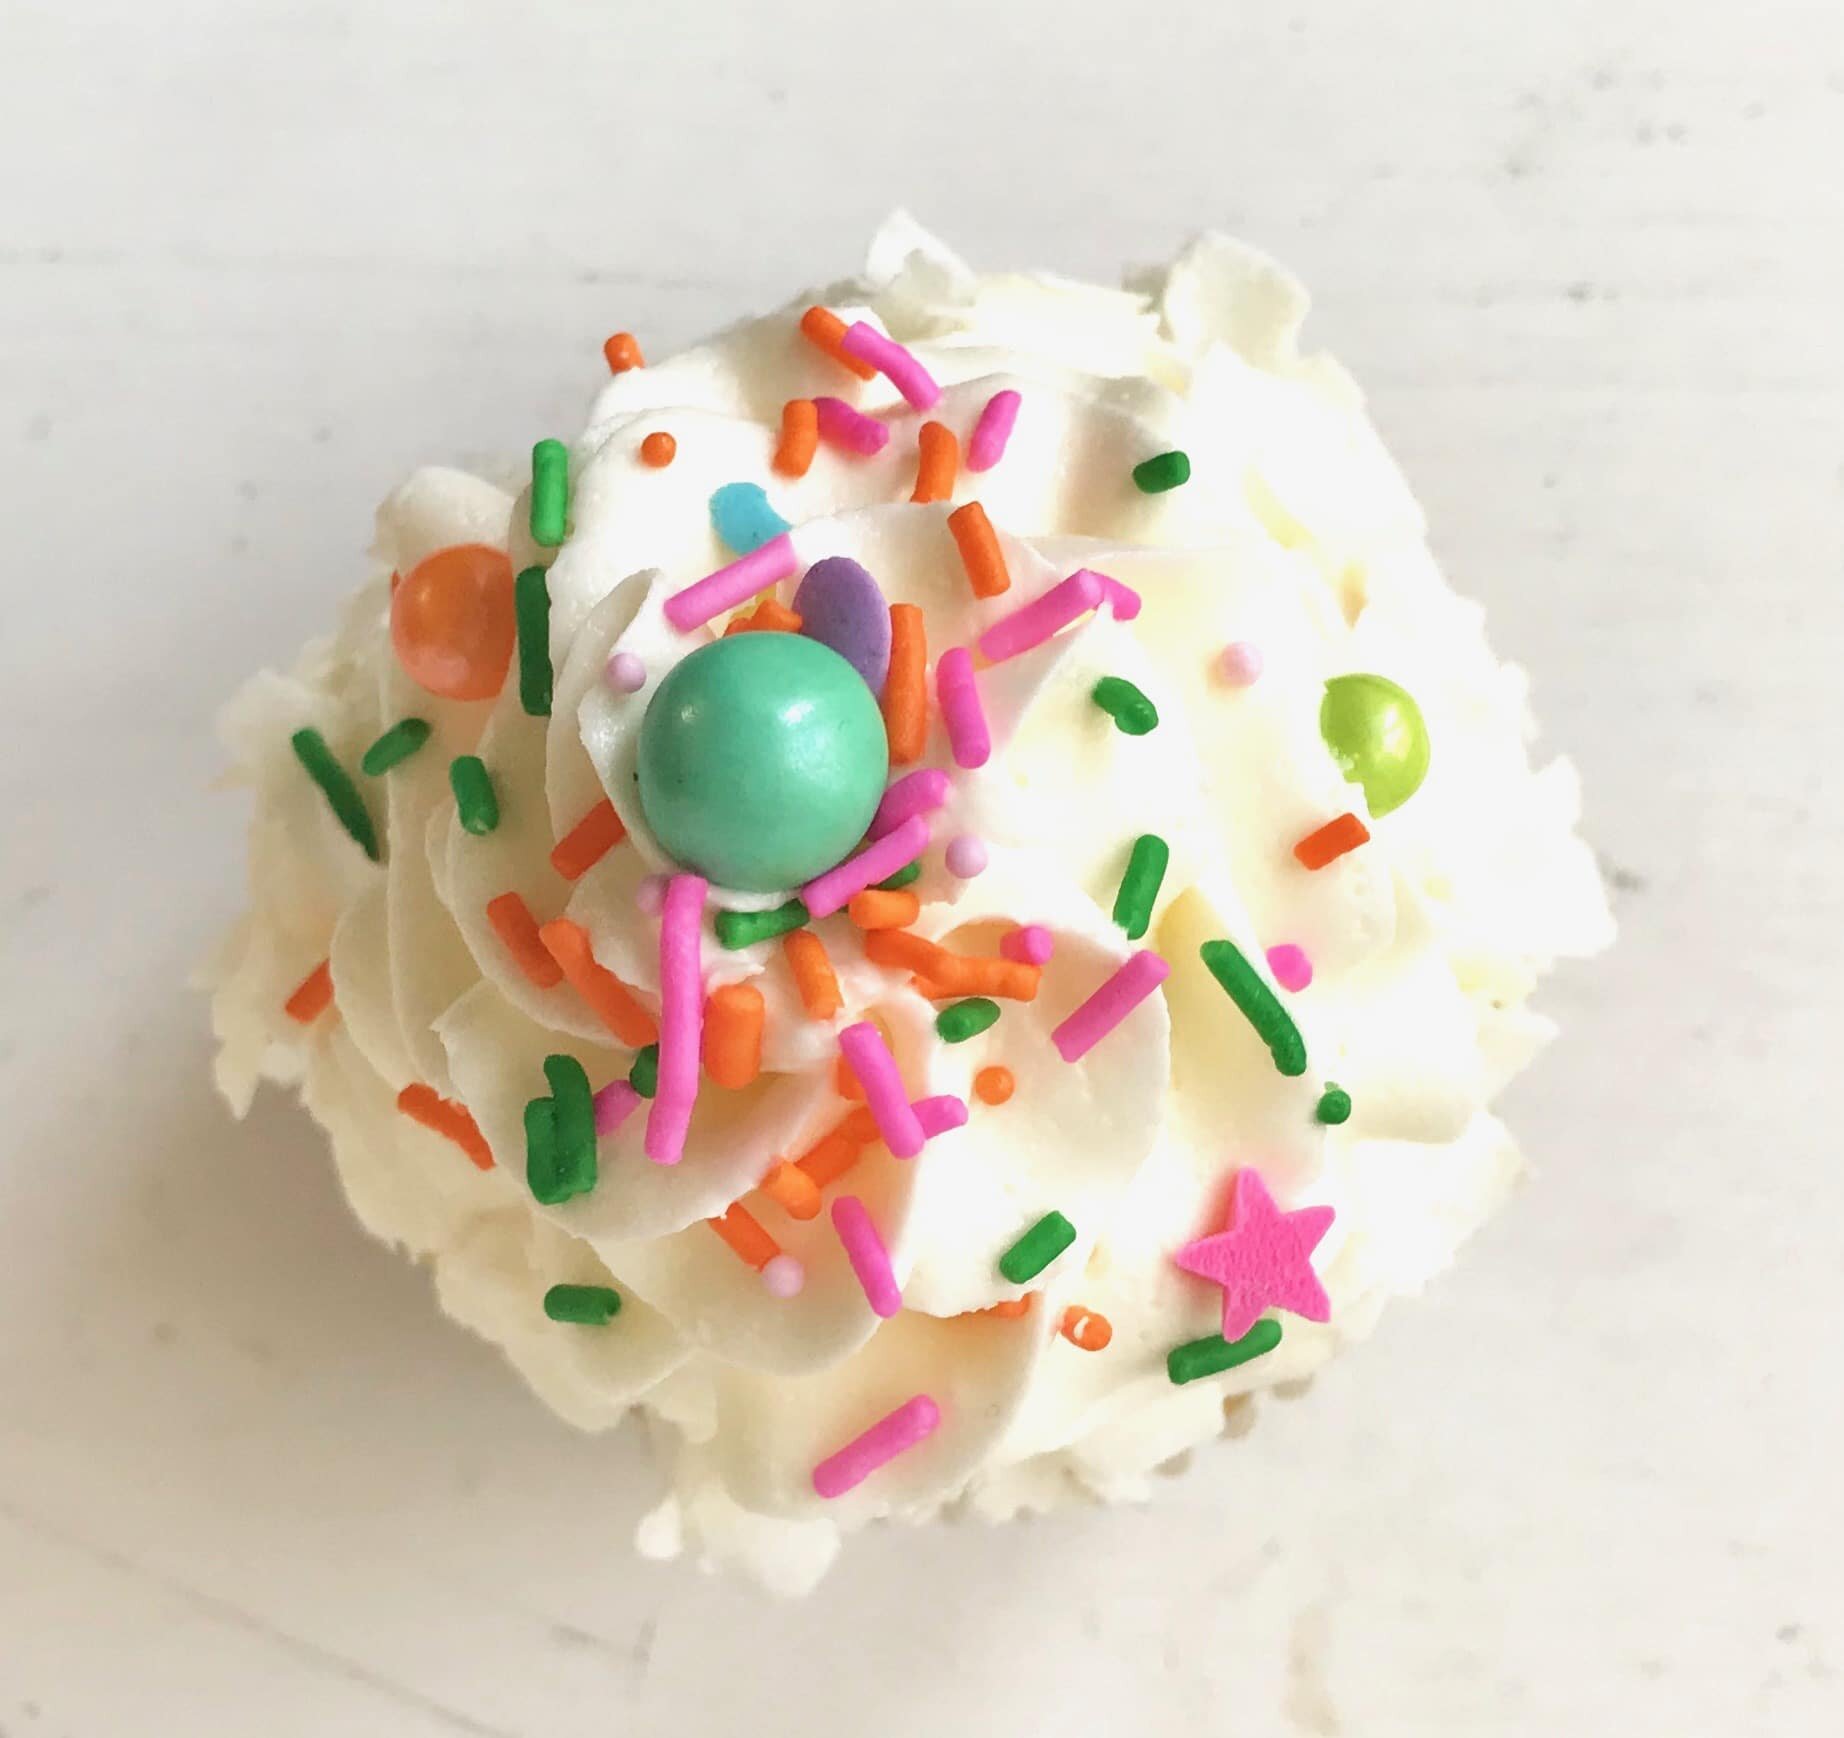
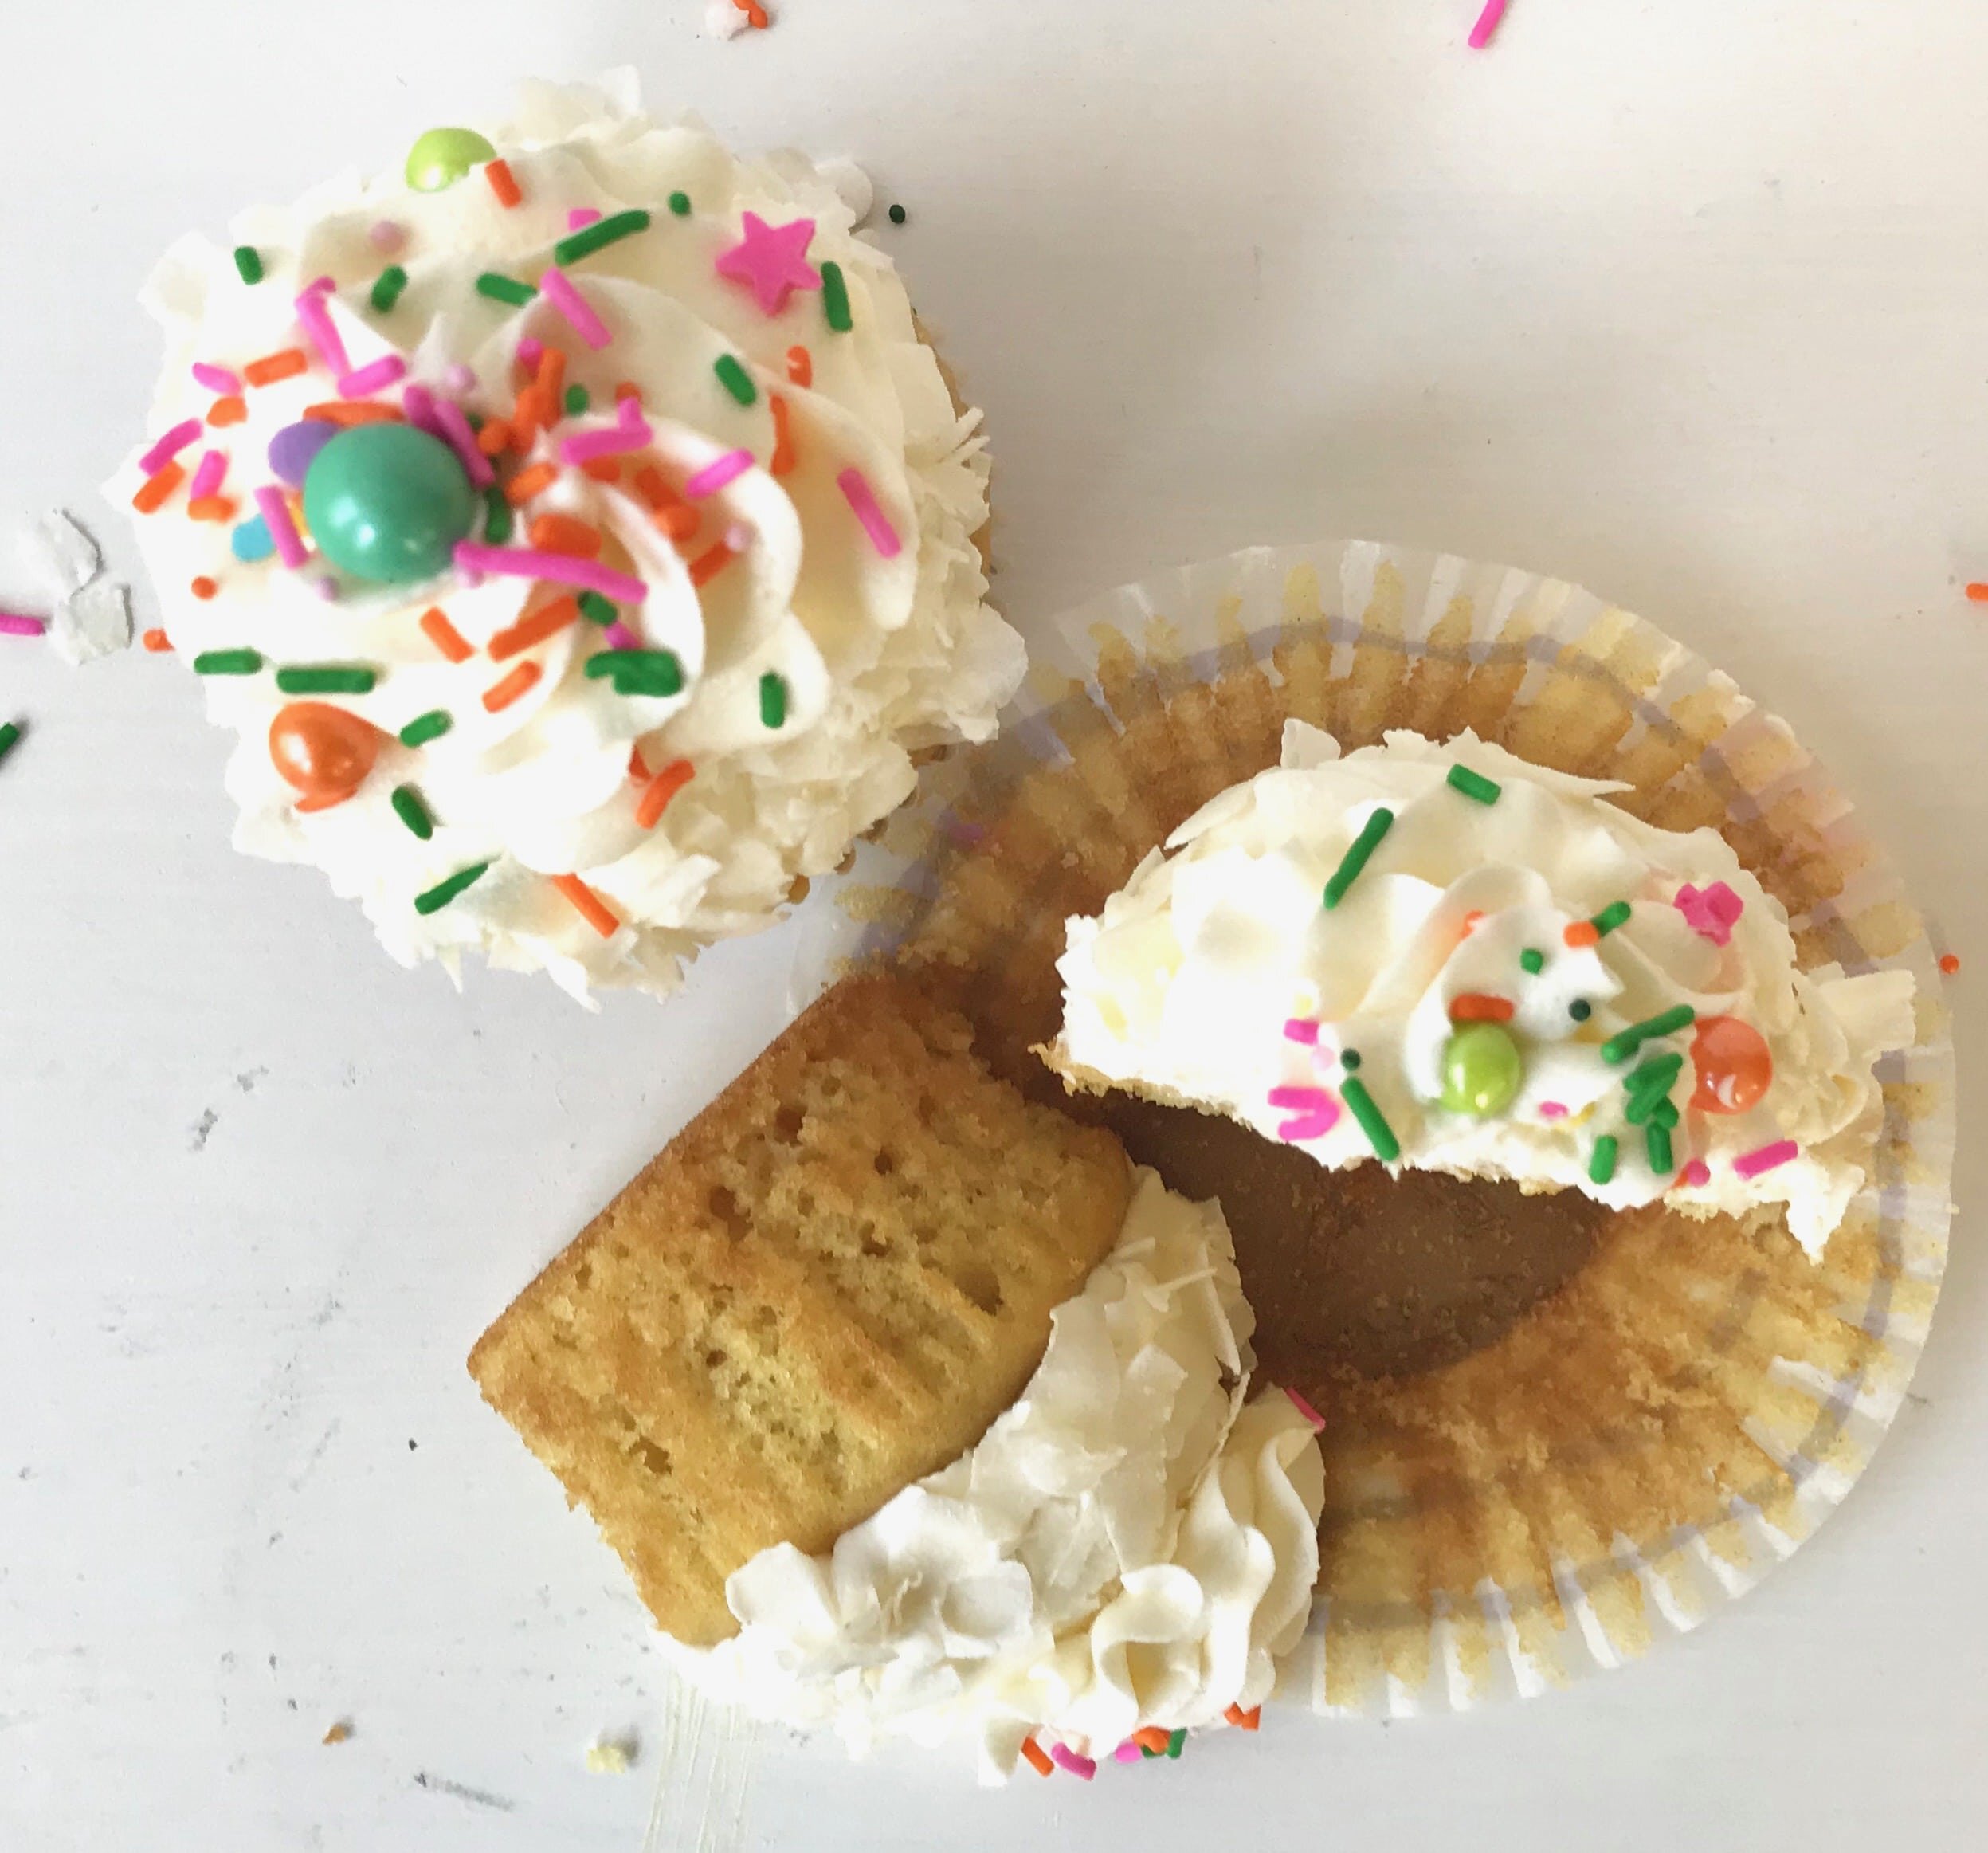
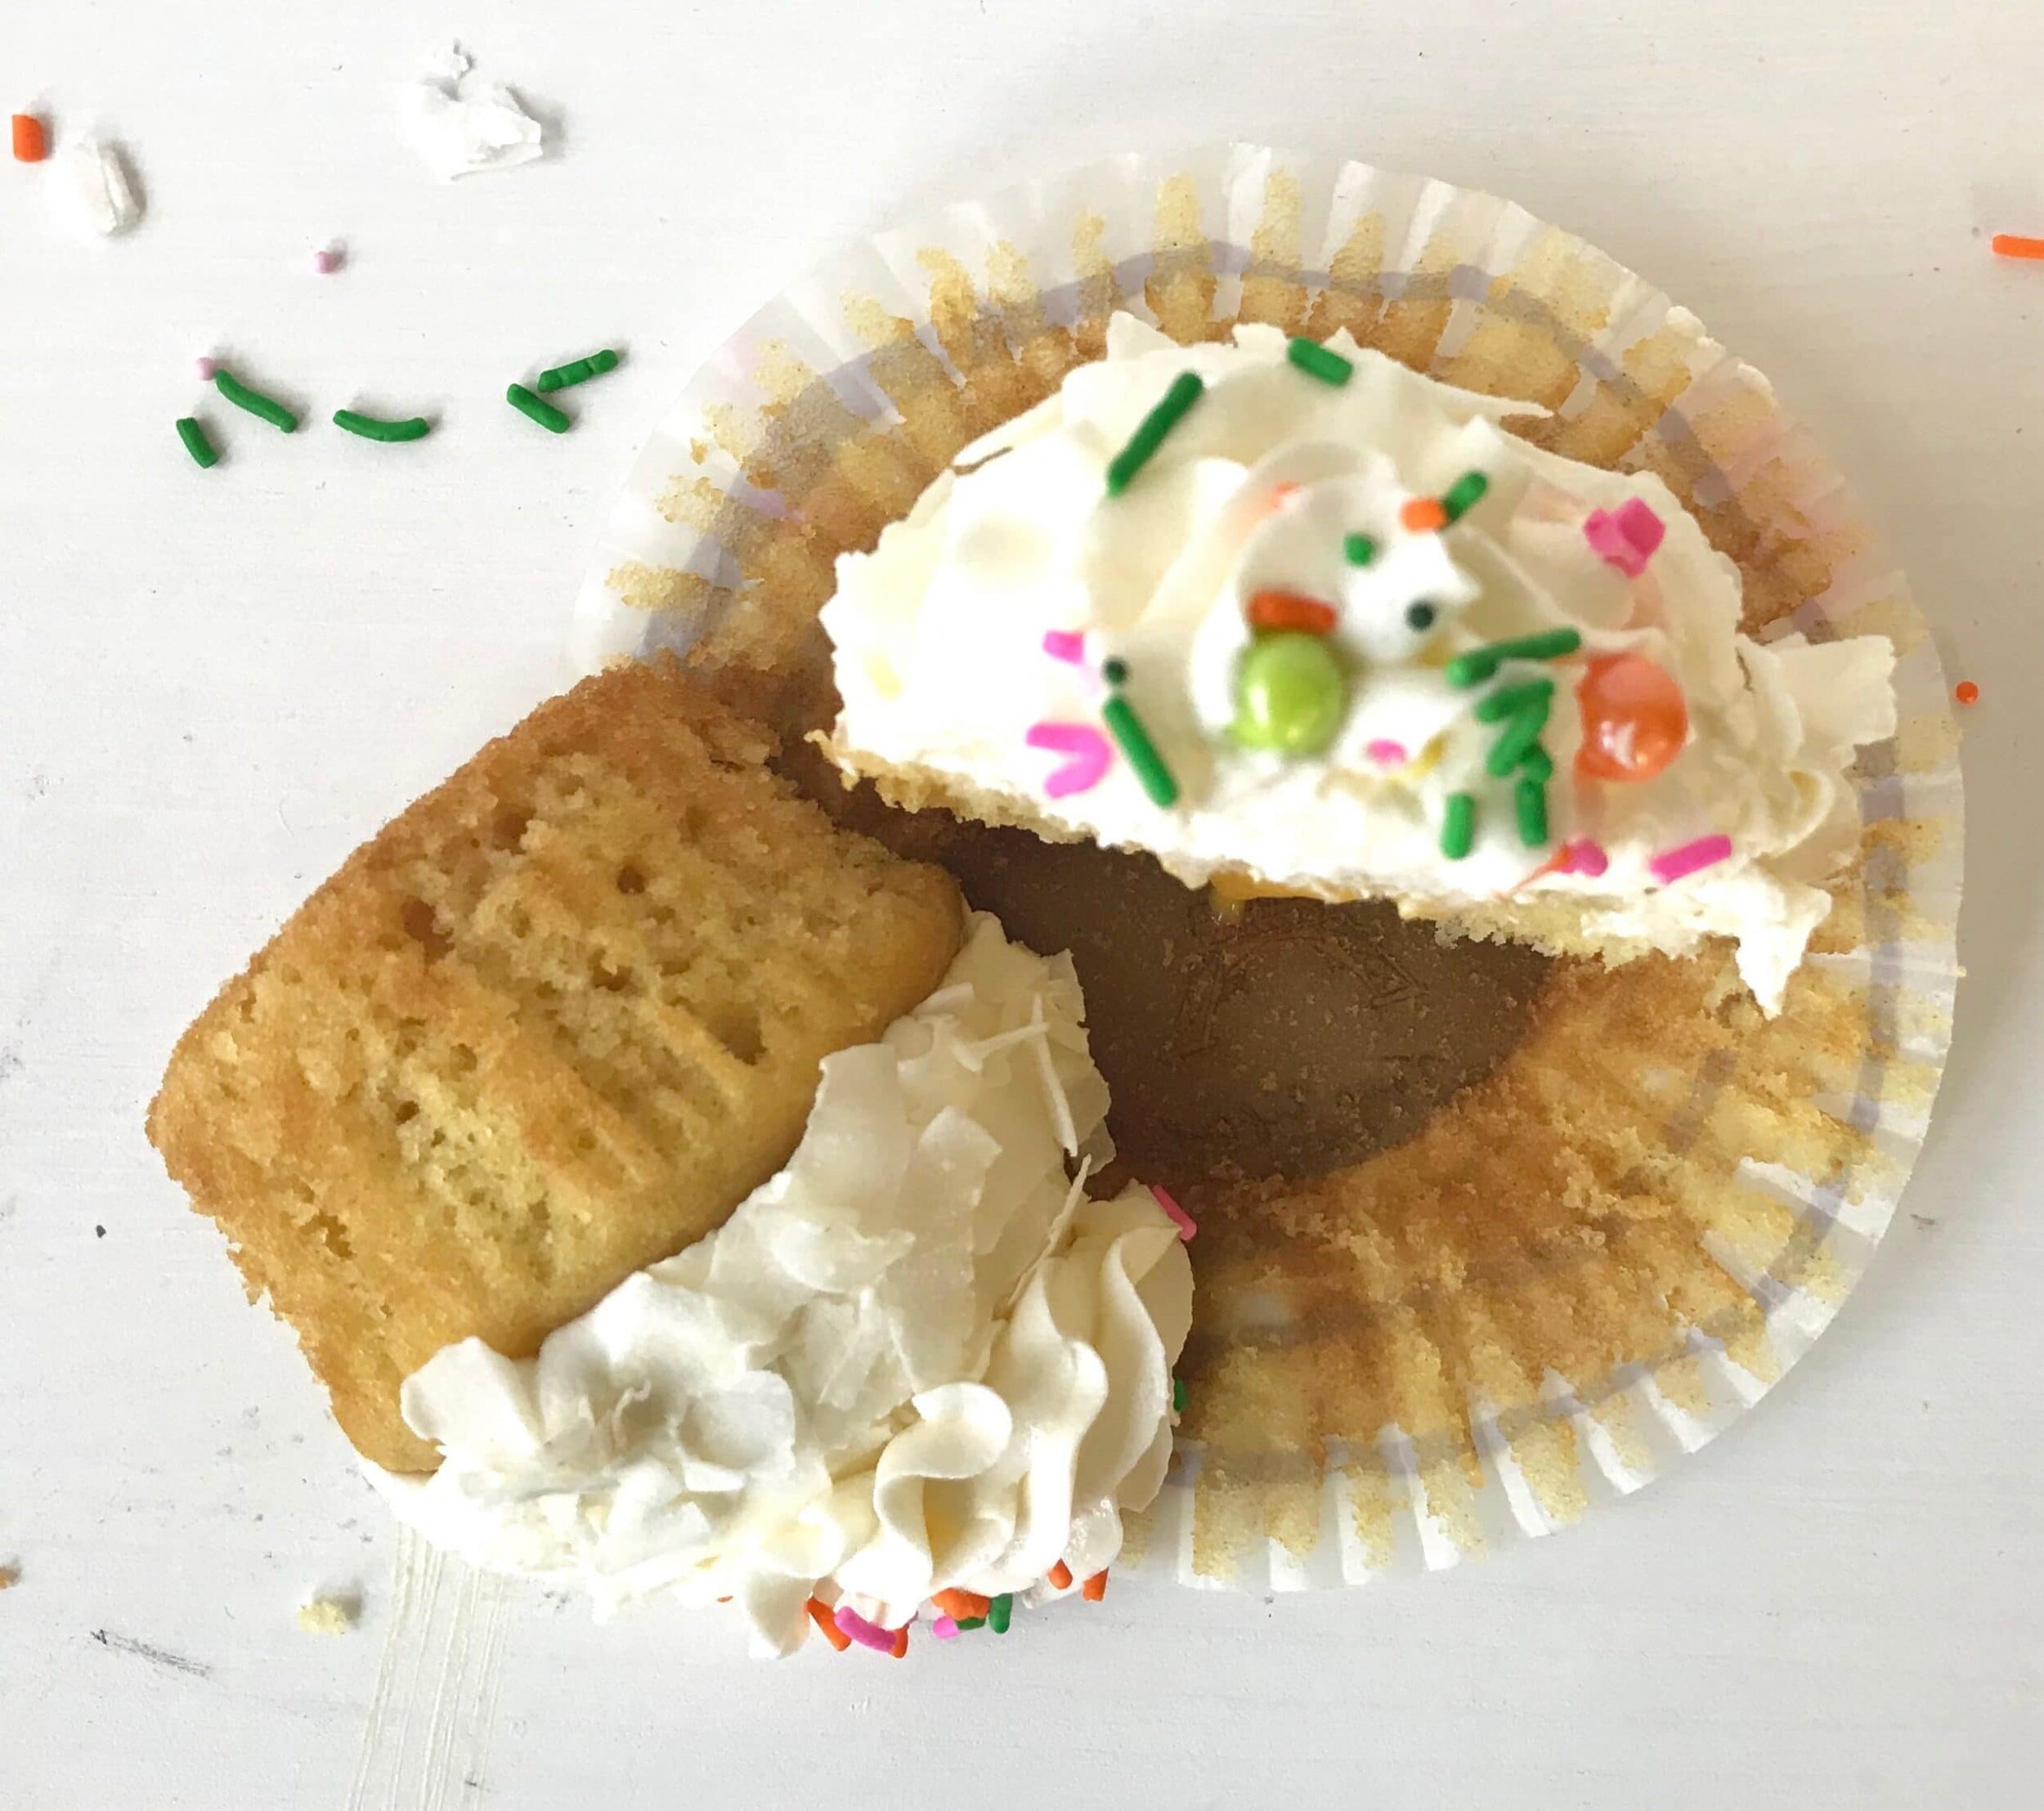
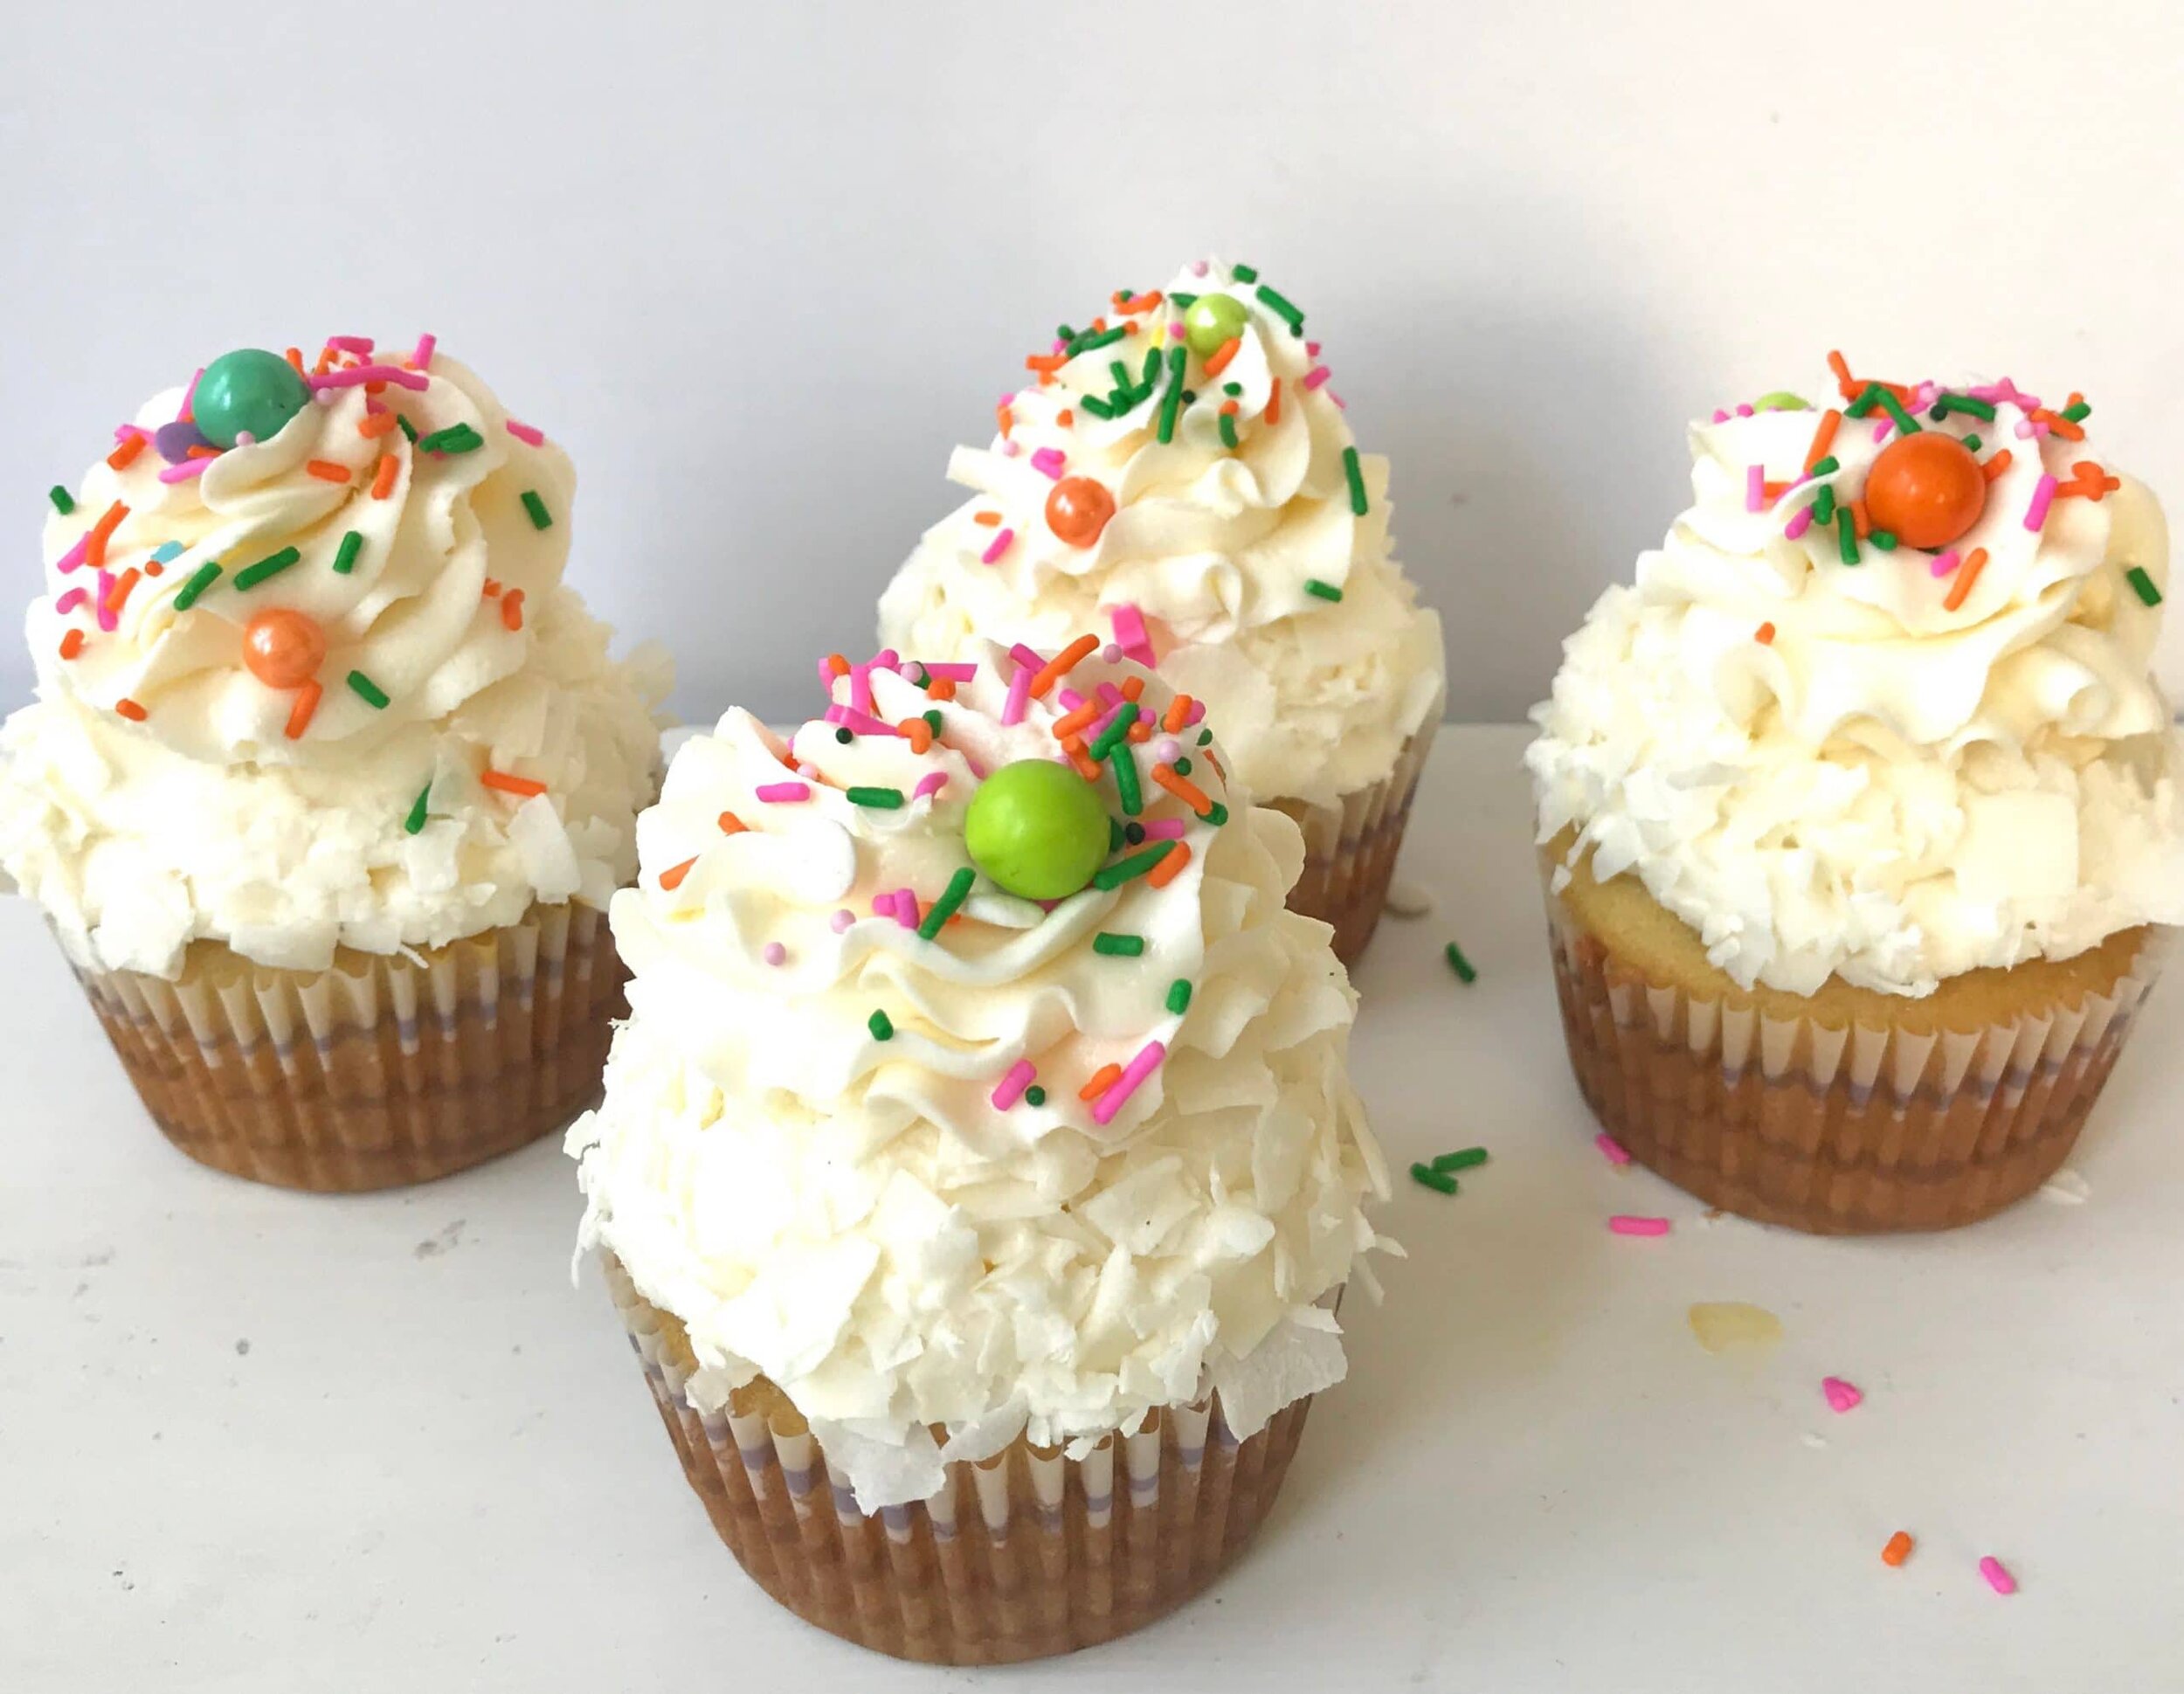
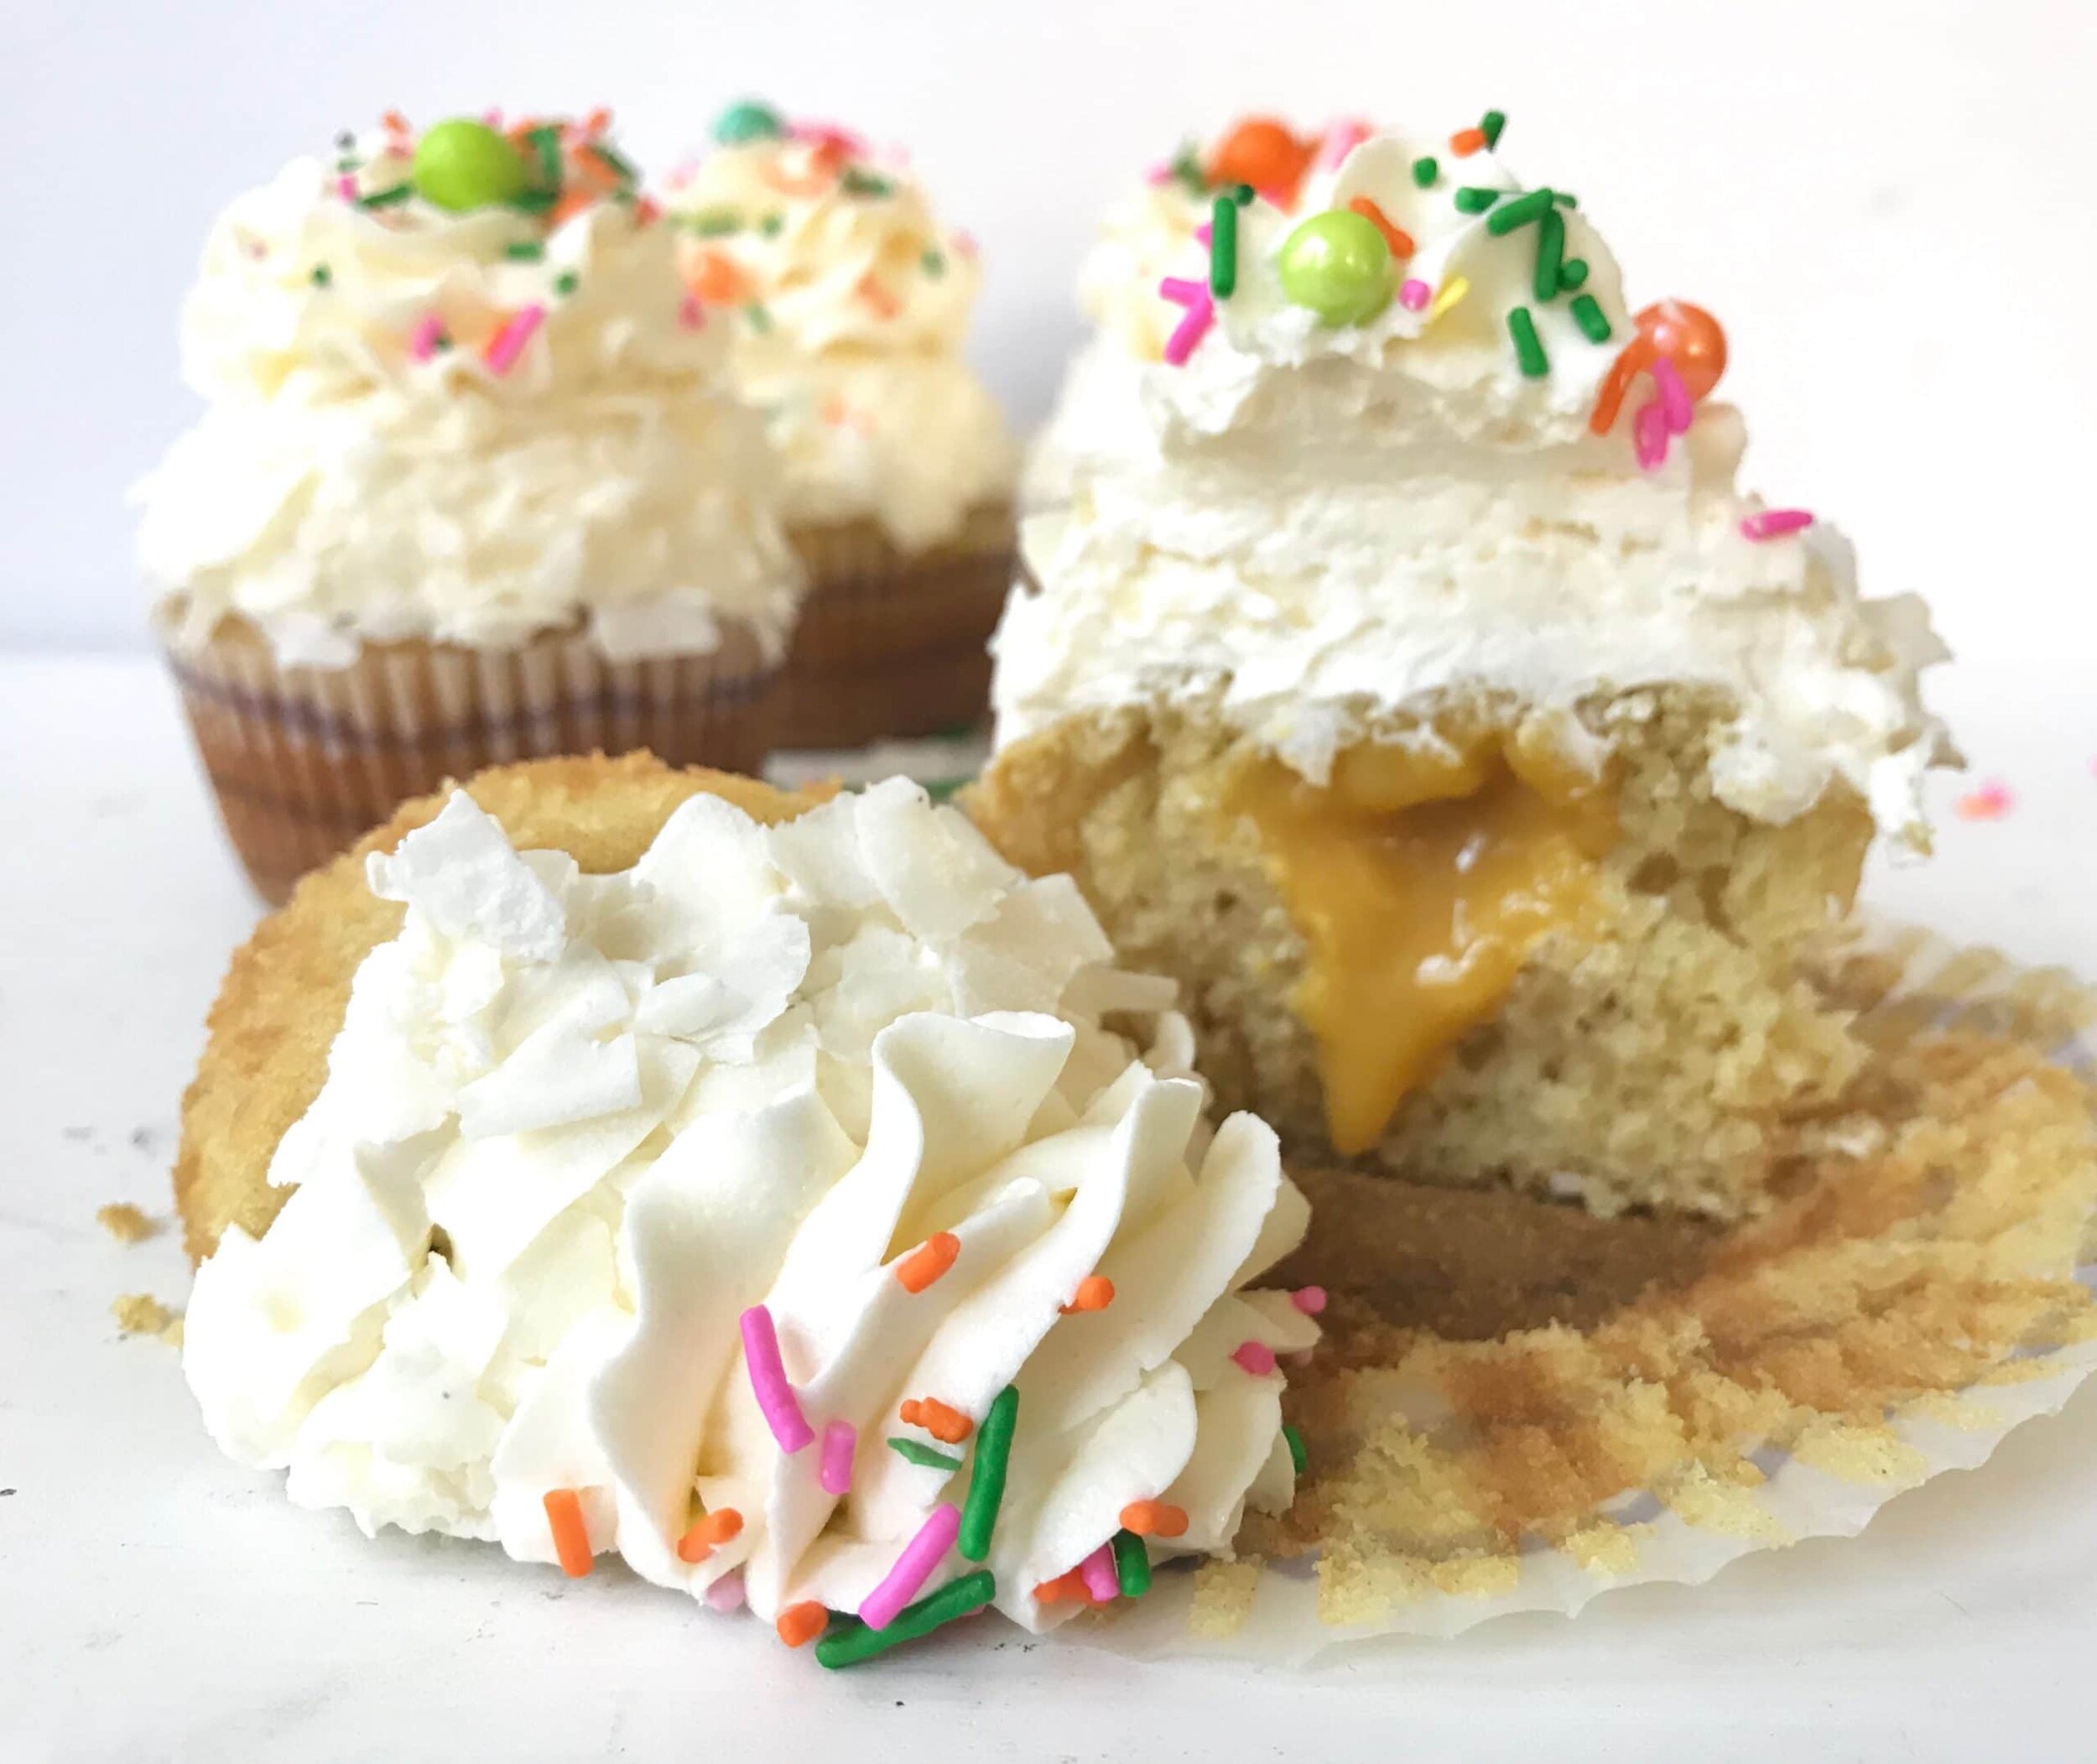
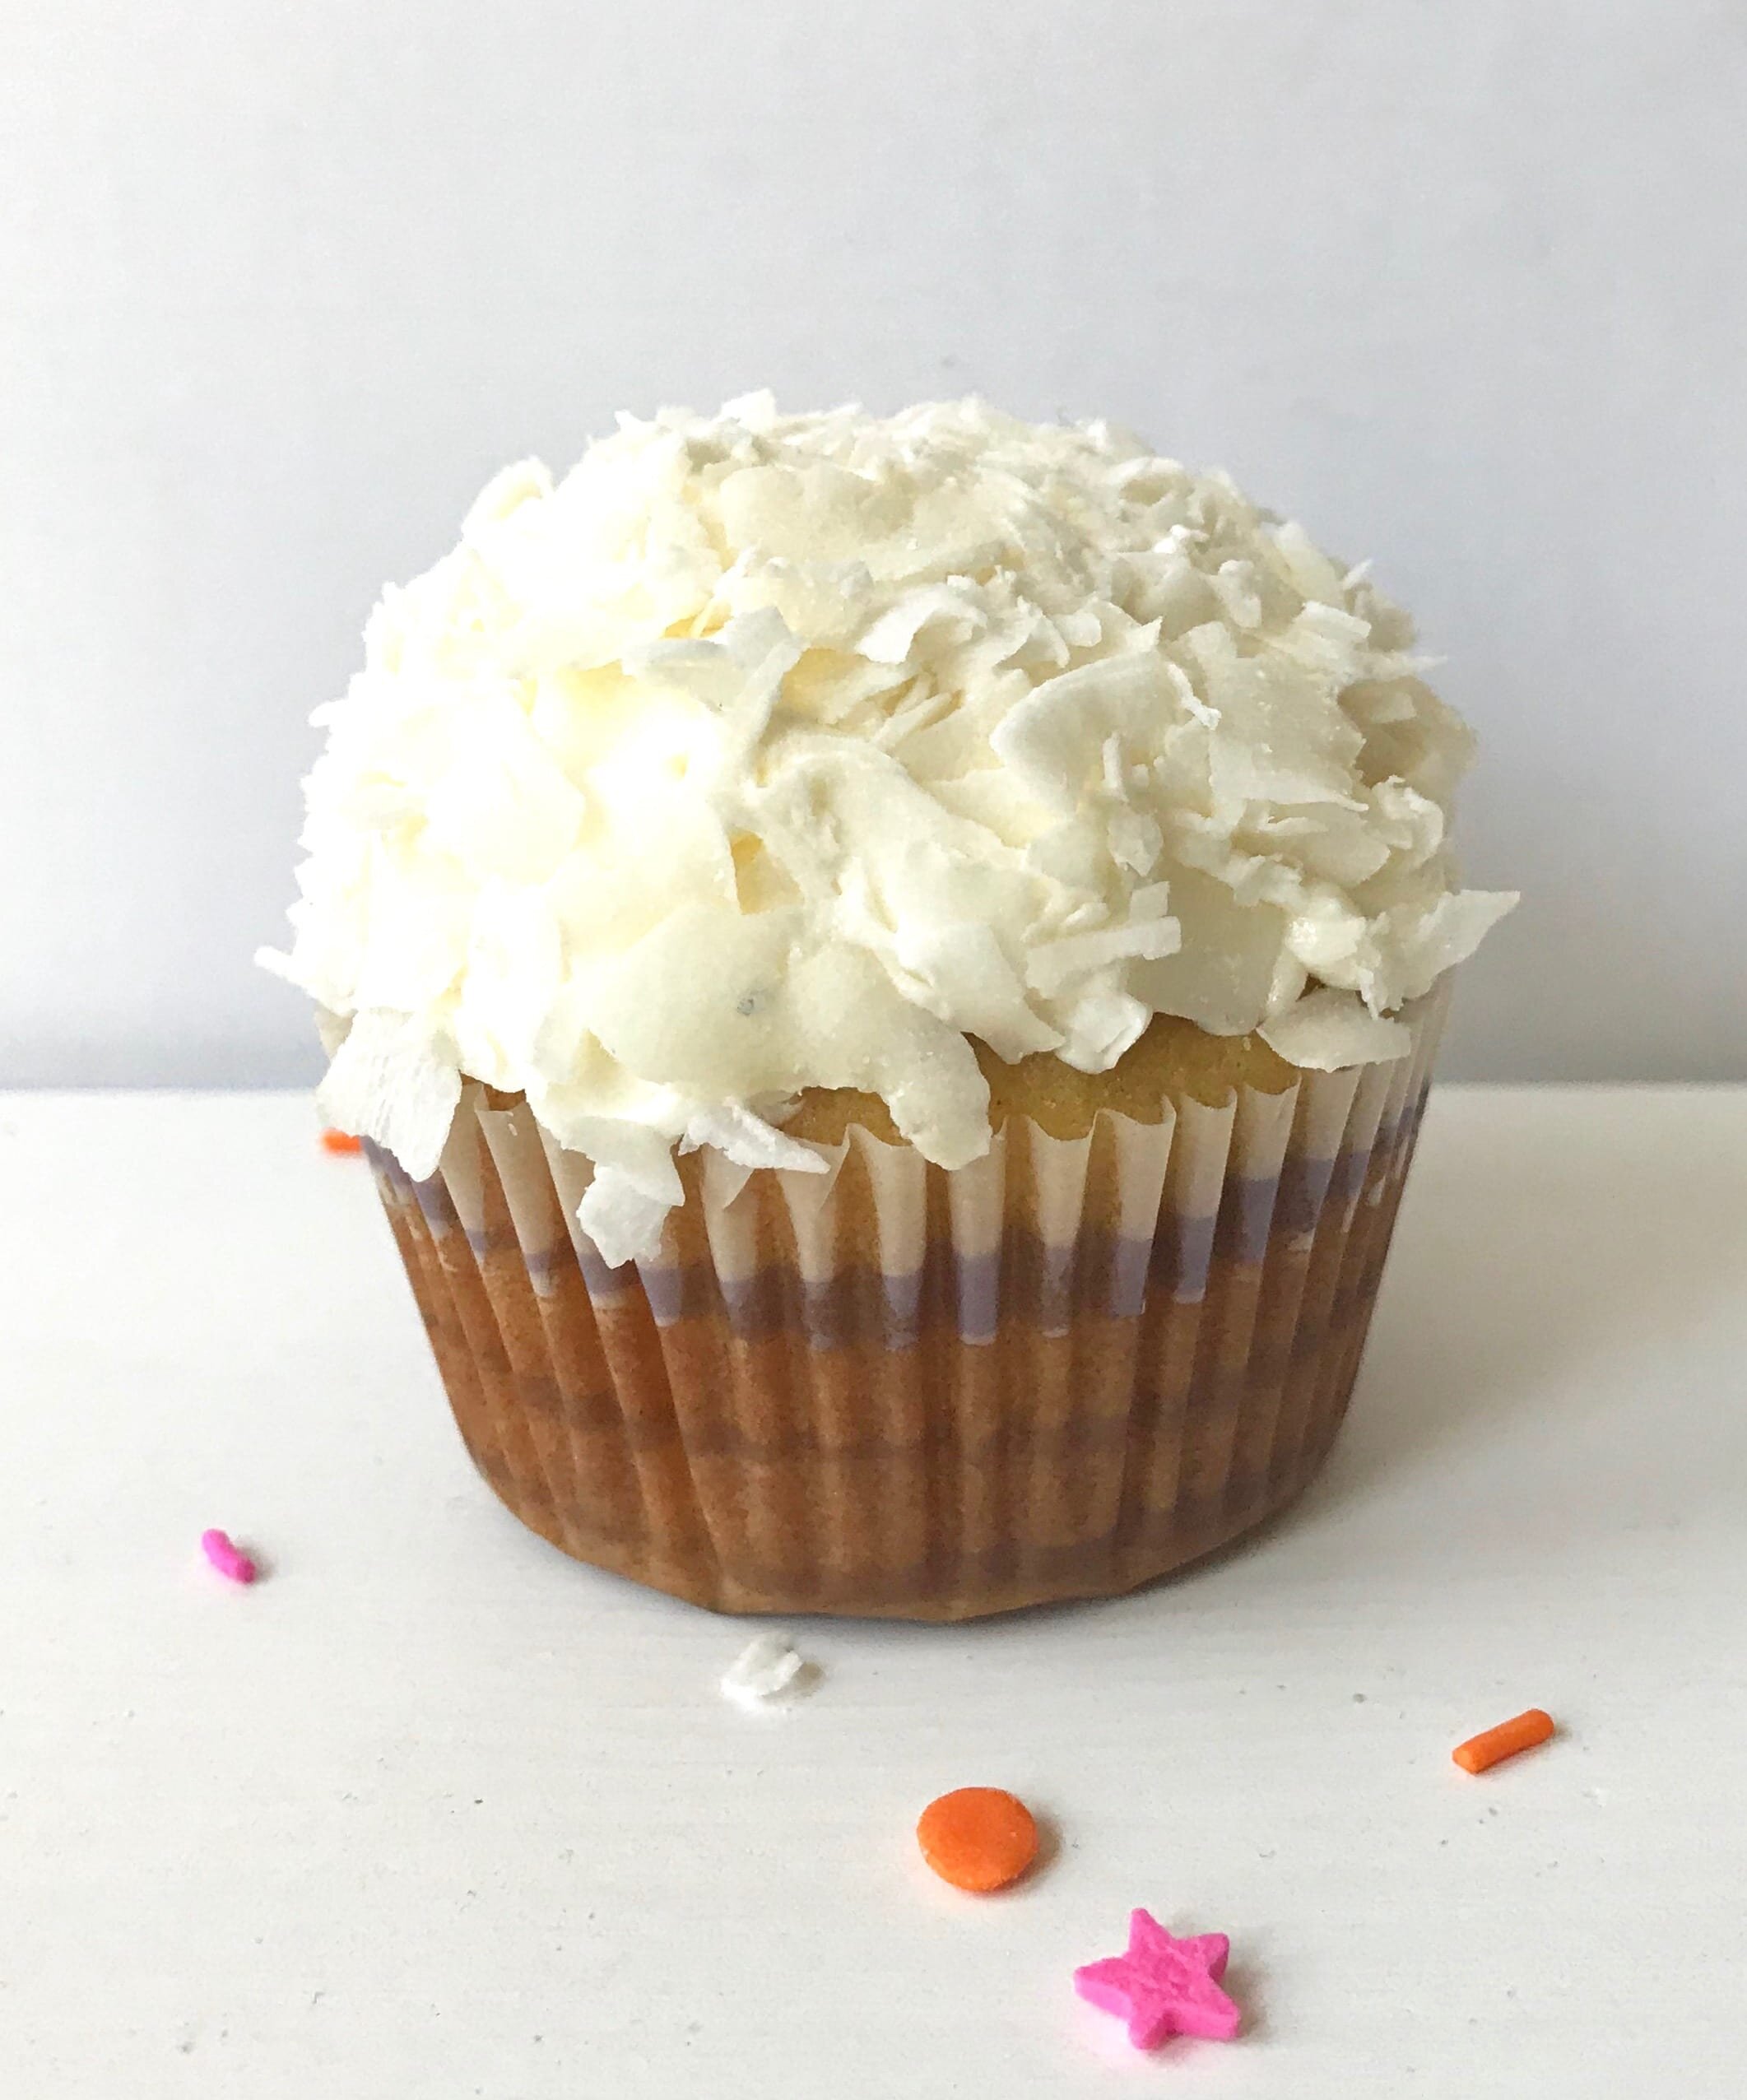
*Disclaimer: This post contains affiliate links. To learn more, please go here.These coconut passion fruit cupcakes are as good as they are pretty. It's a coconut cupcake that is filled with a tart passion fruit curd. They give the feeling of being on a sandy beach in the tropics. So this coconut cupcake is light and fluffy but it's also got the artificial coconut extract in it. I know, I know it's not the best thing to use artificial coconut extract. It's got that weird flavor to it but how else can you get that actual coconut flavor? That's where I added some shredded coconut on some of the buttercream so you get the coconut but not a whole lot of artificial flavor or overpowered from the passion fruit.Now you don't have to use passion fruit for the curd. You could use pineapple, lemon, lime, or any other kind of fruit that you love to pair with coconut. I personally would love to try it with pineapple, I think that sounds absolutely delicious!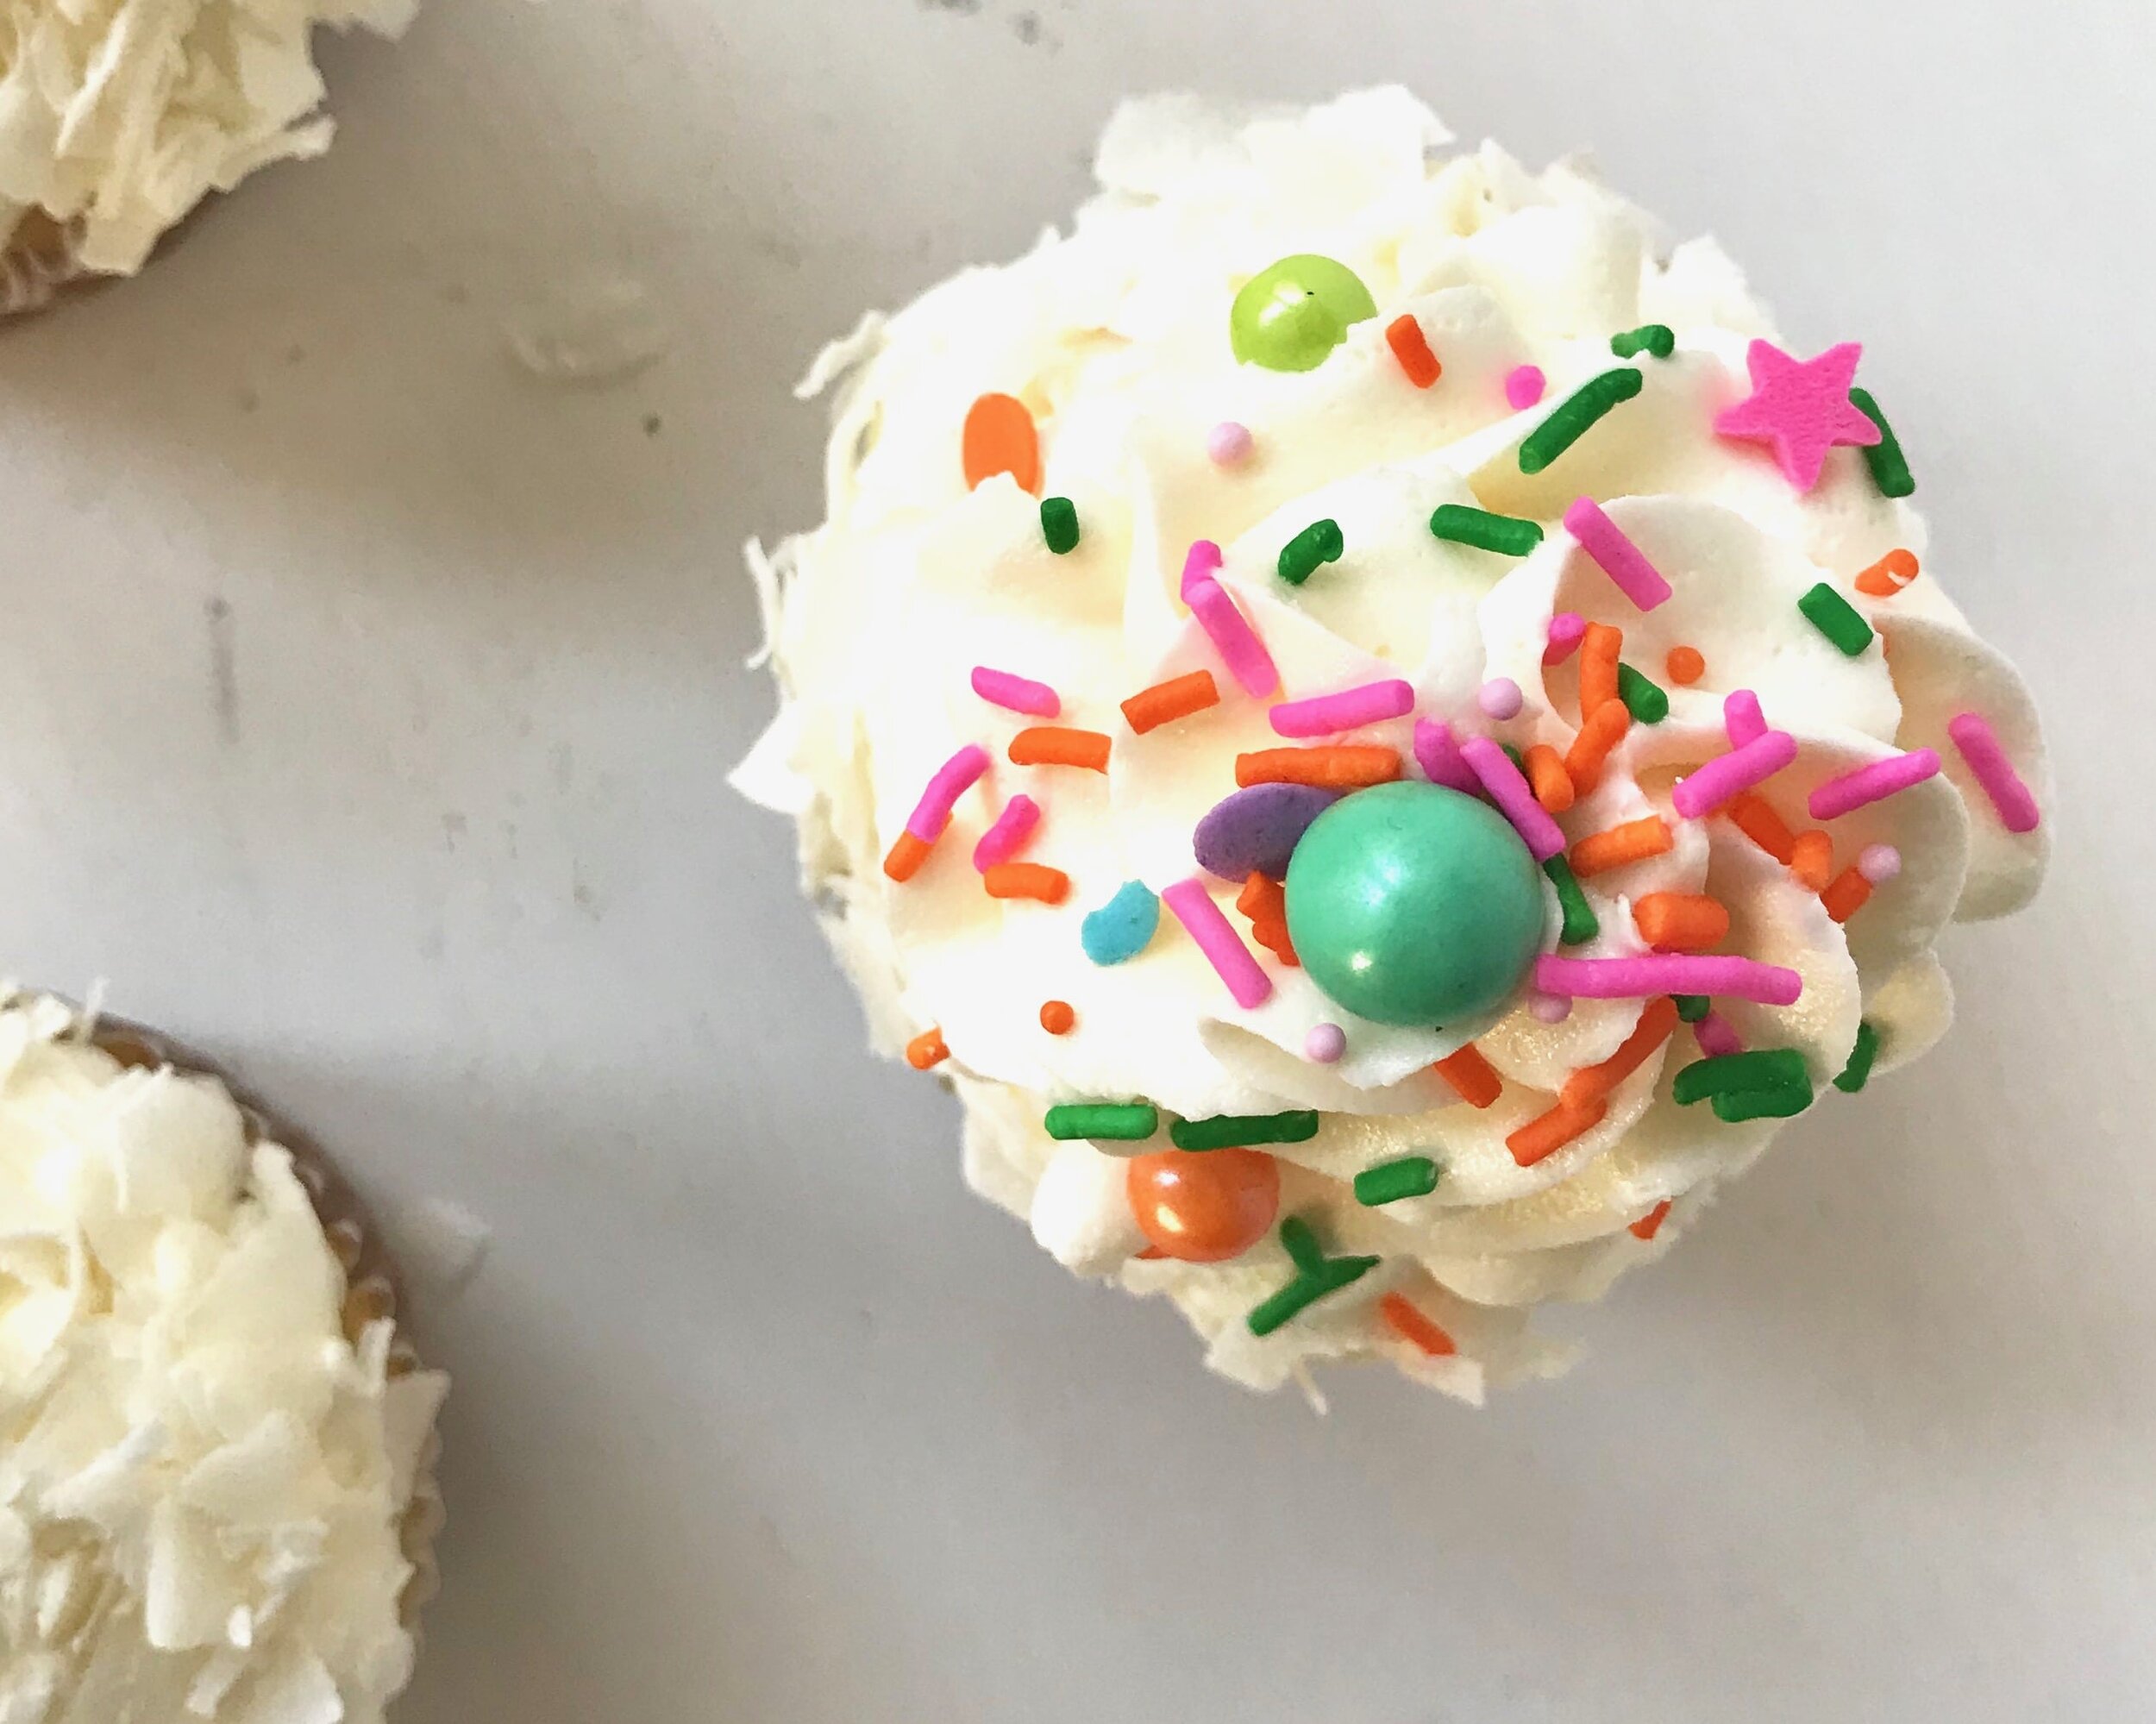
[mailerlite_form form_id=1]


Above are some products that I personally use and recommend for this recipe and to have for everyday use. One of my favorite things that I have many of are the BlueQ oven mitts. They aren't just really funny and a great statement piece for your kitchen, but they are great quality too!
__________________________________________________________________________
coconut passion fruit cupcakes
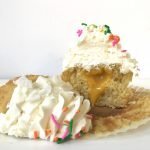
these fluffy coconut cupcakes are filled with a tart passion fruit curd and topped with a creamy buttercream
cupcakes
- 1 1/3 cup all-purpose flour
- 1/2 cup granulated sugar
- 1/2 tsp baking powder
- 1 tsp baking soda
- 1/2 tsp salt
- 2 eggs
- 1/2 cup vegetable oil
- 1 tsp coconut extract
- 3/4 cup milk
curd
- 1/2 cup passion fruit puree
- 1 tbsp lemon zest
- 4 egg yolks
- 1 egg
- 1/2 cup sugar
- 4 tbsp butter
buttercream
- 3 sticks salted butter
- 4 cup powdered sugar
- 2 tsp vanilla extract
- 1-3 tbsp heavy cream
cupcakes
- preheat the oven to 350 degrees F and line cupcake pans with liners. in a large bowl, combine the flour, sugar, baking powder, baking soda, and salt and mix until incorporated. in another bowl, combine the oil, eggs, coconut extract, and milk and whisk together. pour the wet ingredients into the dry and mix until fully combined. scoop the batter in the cupcake pan and bake for 12-15 minutes or until a toothpick comes out clean. let the cake cool for 10 minutes before frosting.
curd
- in a small pot, combine the passion fruit puree, lemon zest, egg yolks, egg, and sugar and whisk constantly over medium heat. make sure to continuously whisk to prevent the eggs from curdling. continue whisking until it starts to thicken. remove from the heat and add in the butter. strain through a fine mesh sieve and place cling wrap directly on top of the curd to prevent a skin from forming. place in the fridge until cool.
buttercream
- put all of the ingredients into the bowl of an electric mixer fitted with a whisk attachment. start slow and then gradually increase the speed. whip on high until light and fluffy, about 3 minutes.

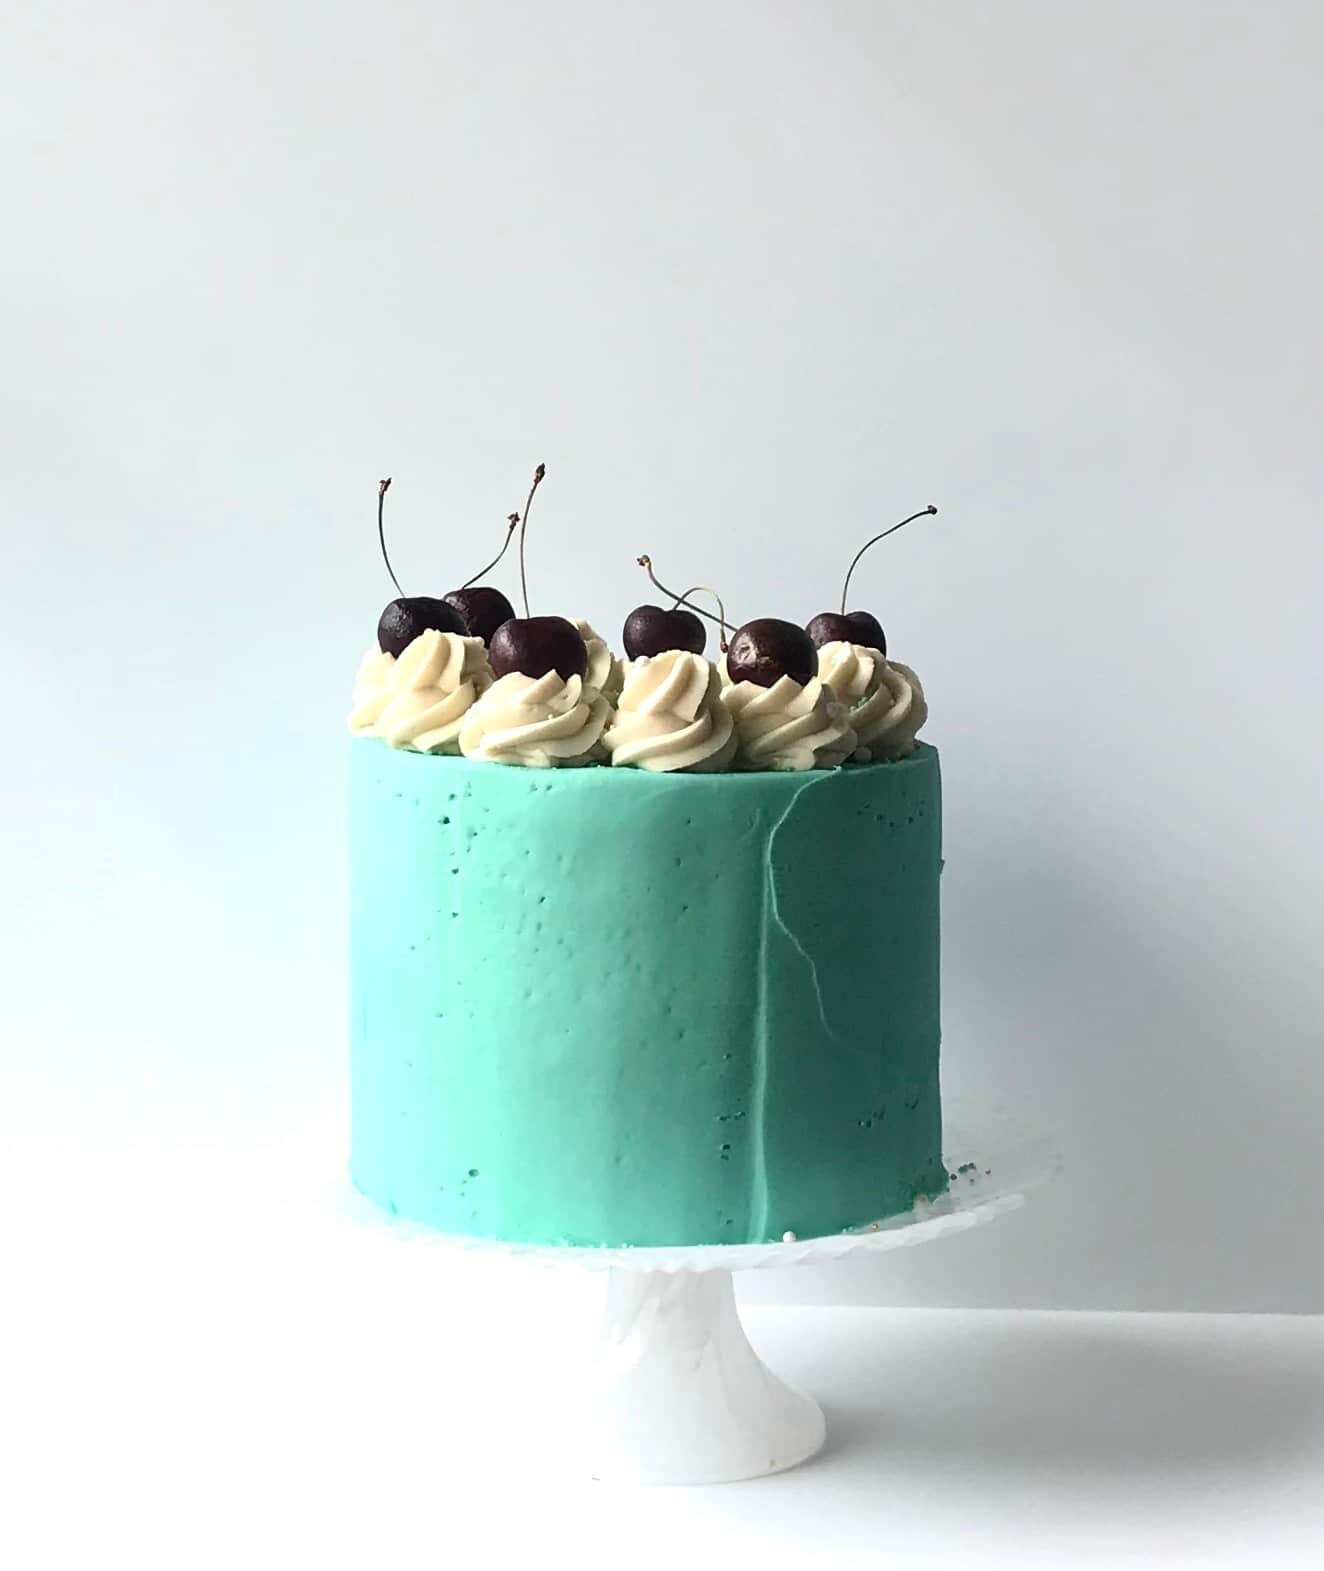
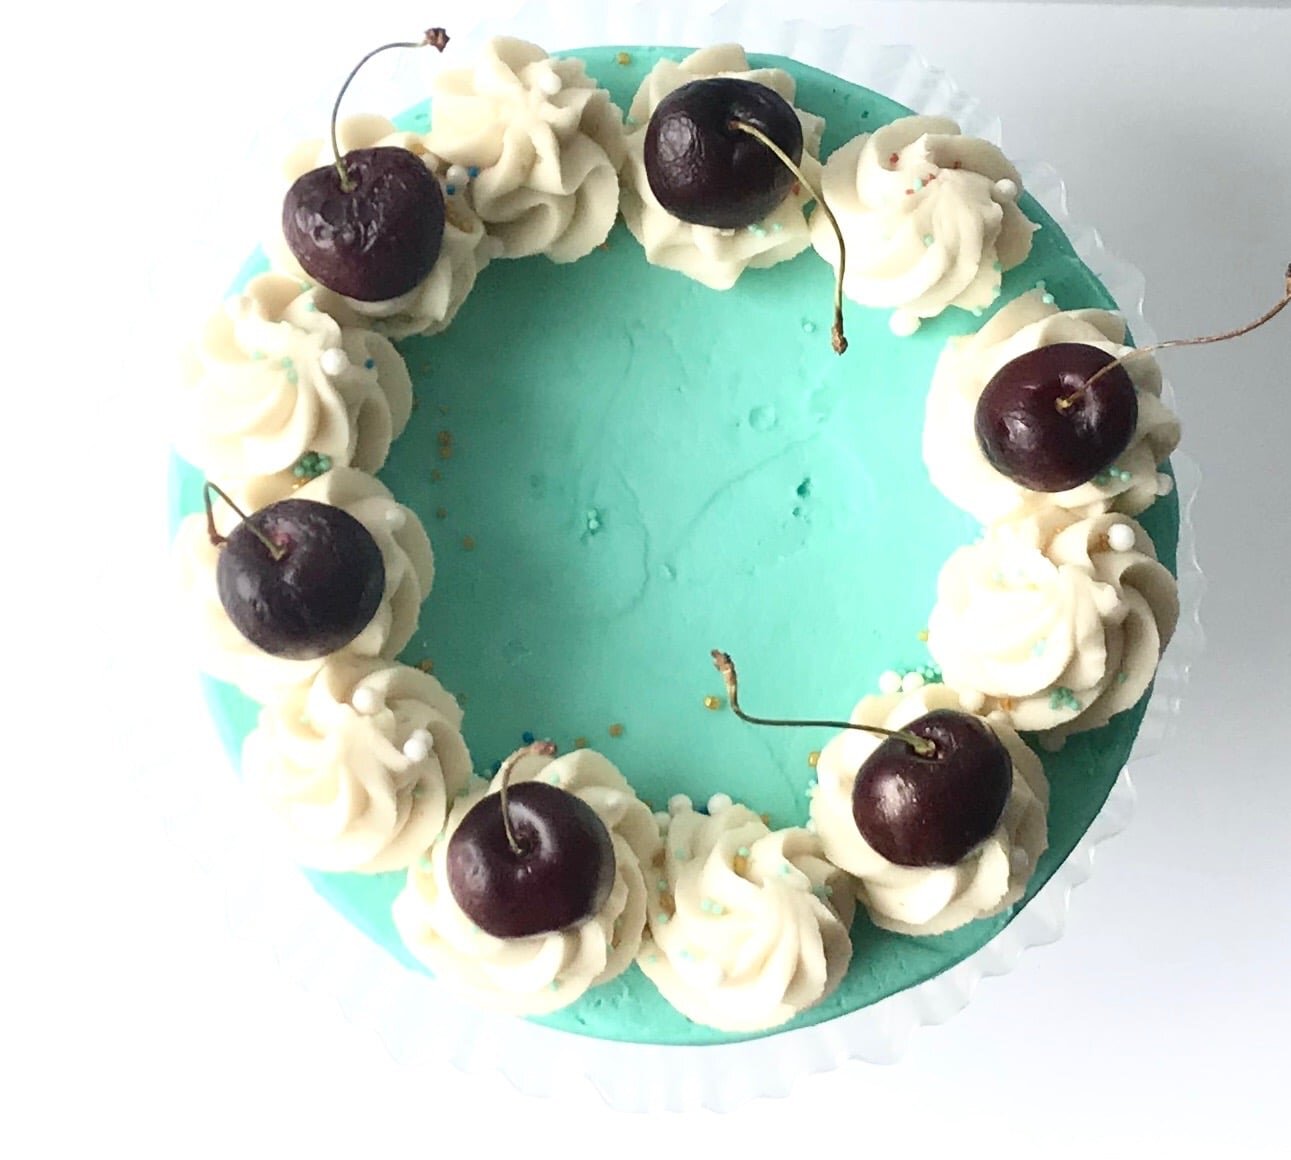
Cherry Lime Cake

[wprm-recipe-jump]
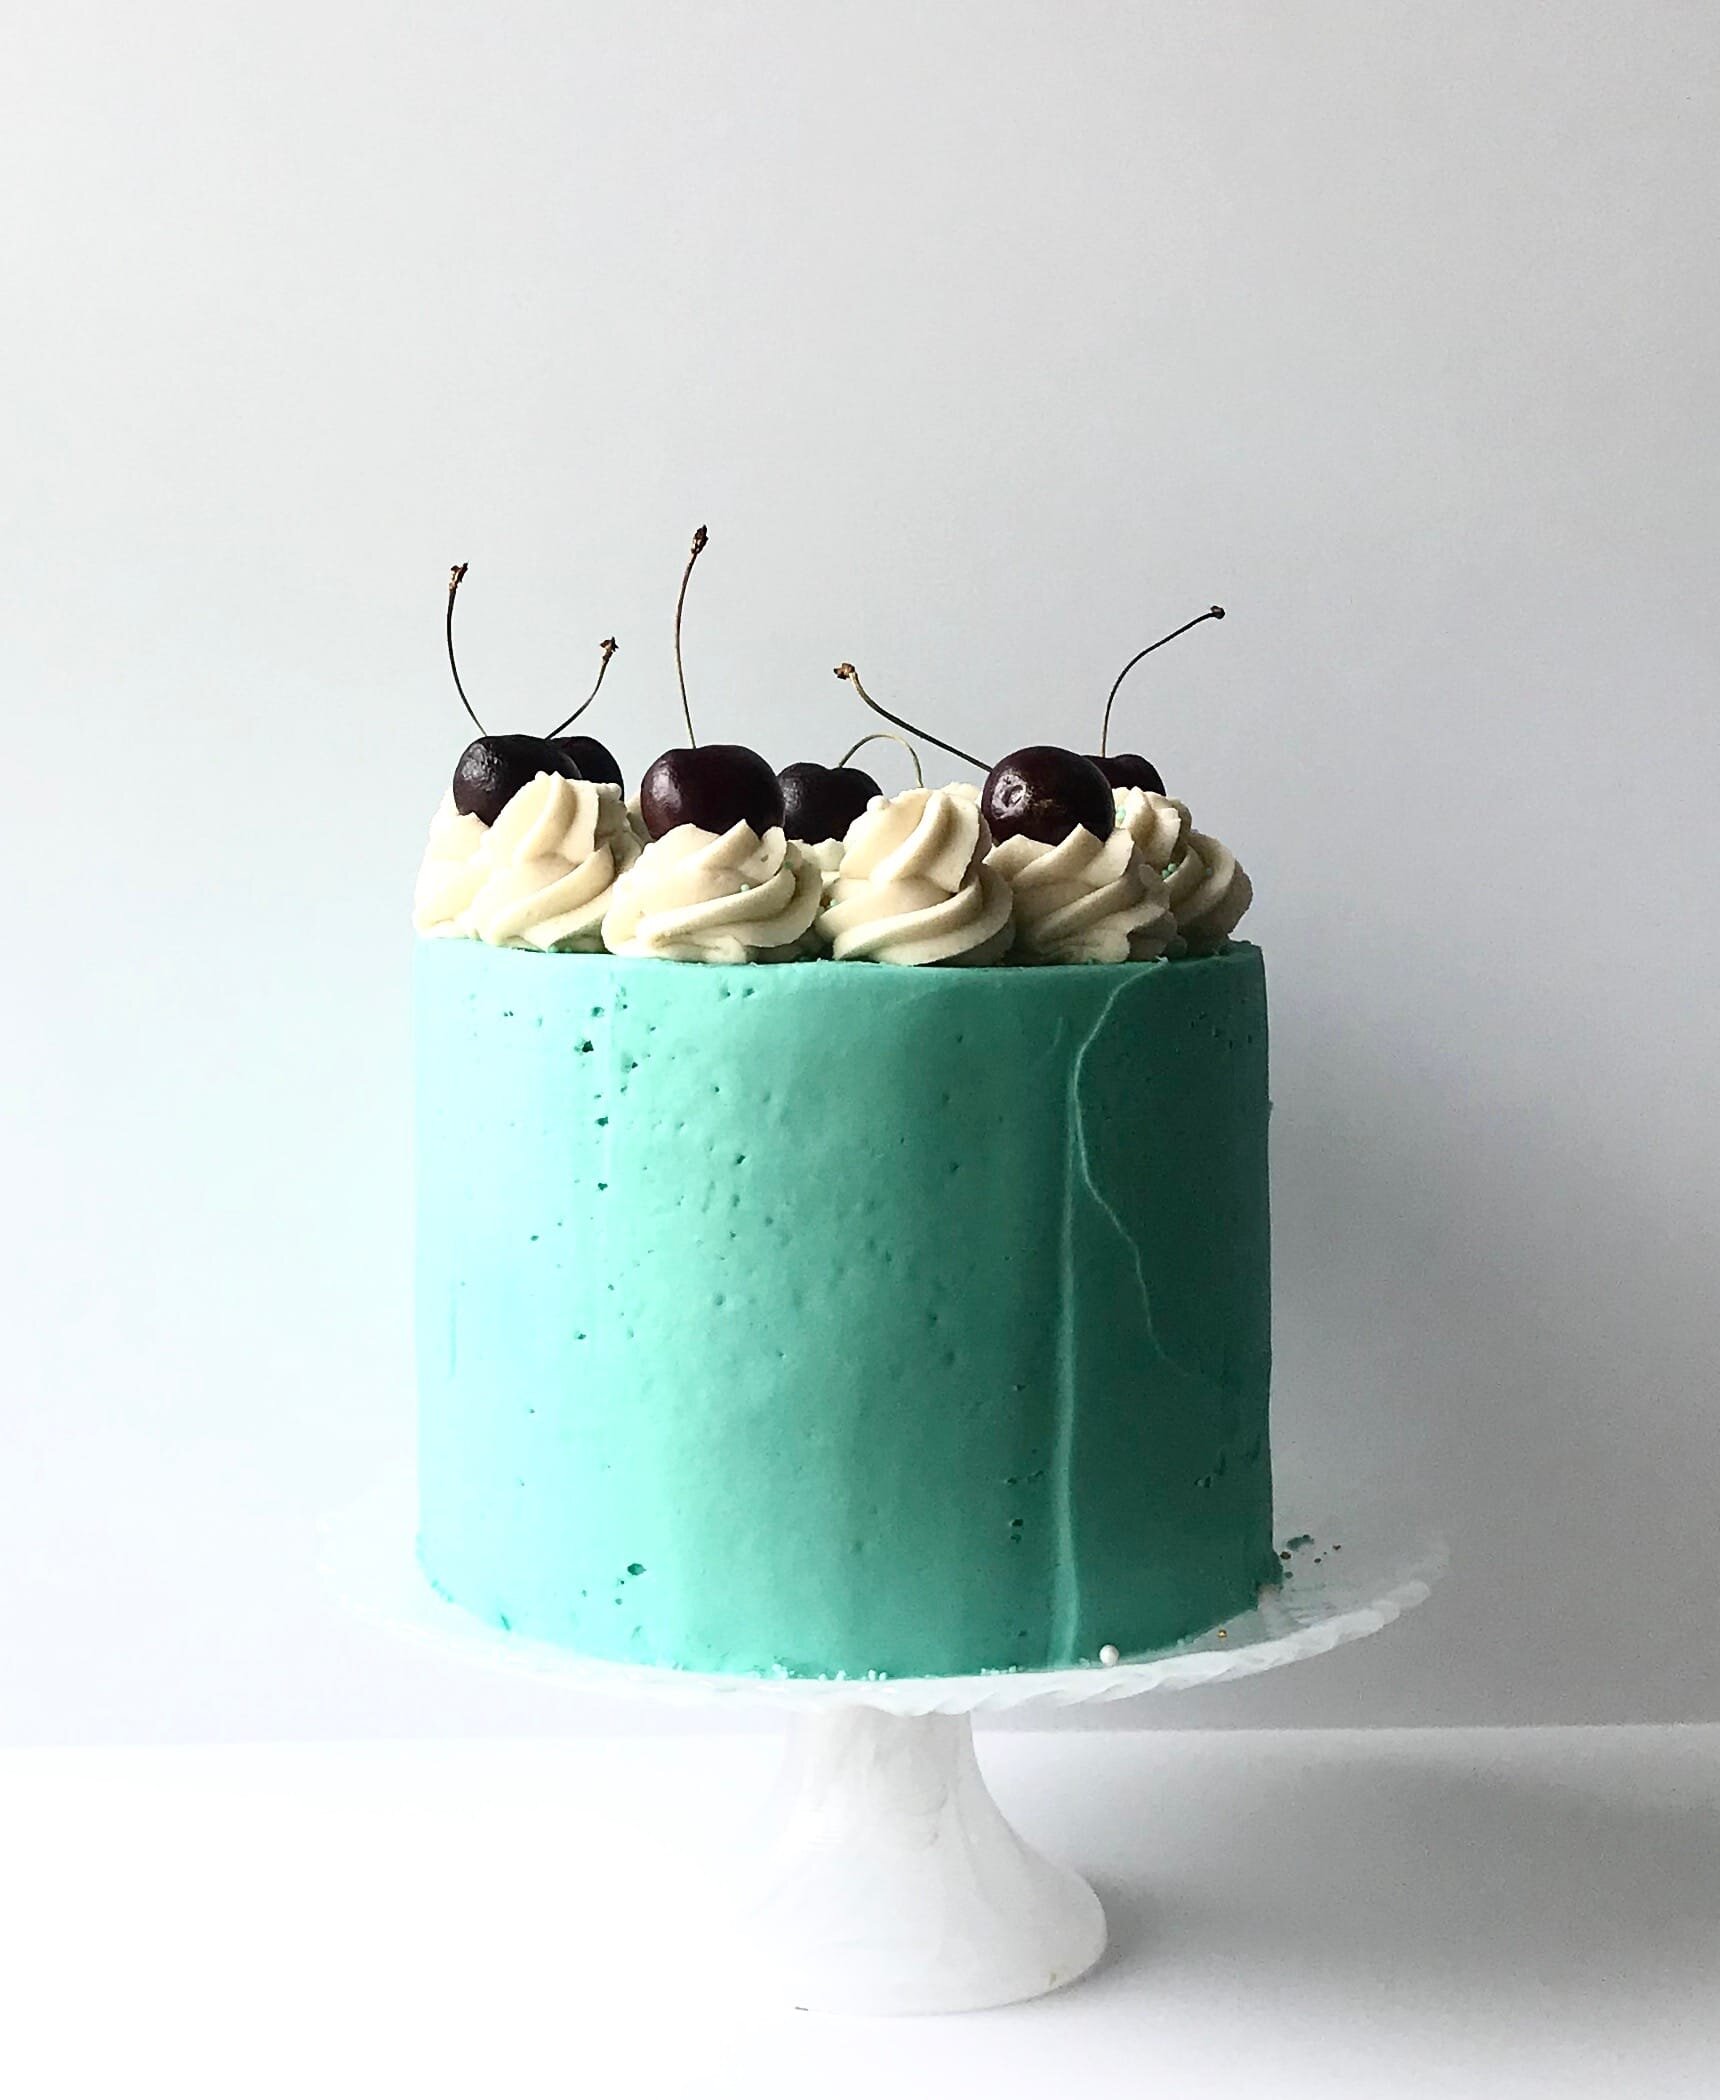
*Disclaimer: This post contains affiliate links. To learn more, please go here.A very pretty cherry lime cake that is so simple to make and is incredibly delicious! This cake is moist cake filled with lime juice and stuffed with a fresh black cherry filling. I will say when i finished removing the pits from the cherries it looked like I murdered someone with the red stains all over my hands and counter. But it beats using the cherry pie filling from the can!What I love about this cake is that it's nice and fresh! I'm honestly not a big cherry person. But this cake is delicious with the lime! It's beyond amazing! Some of you may not like cherries at all, so you could use cranberries, strawberries, blueberries. A lot of fruit go perfectly well with lime so there is no wrong way to go about the filling.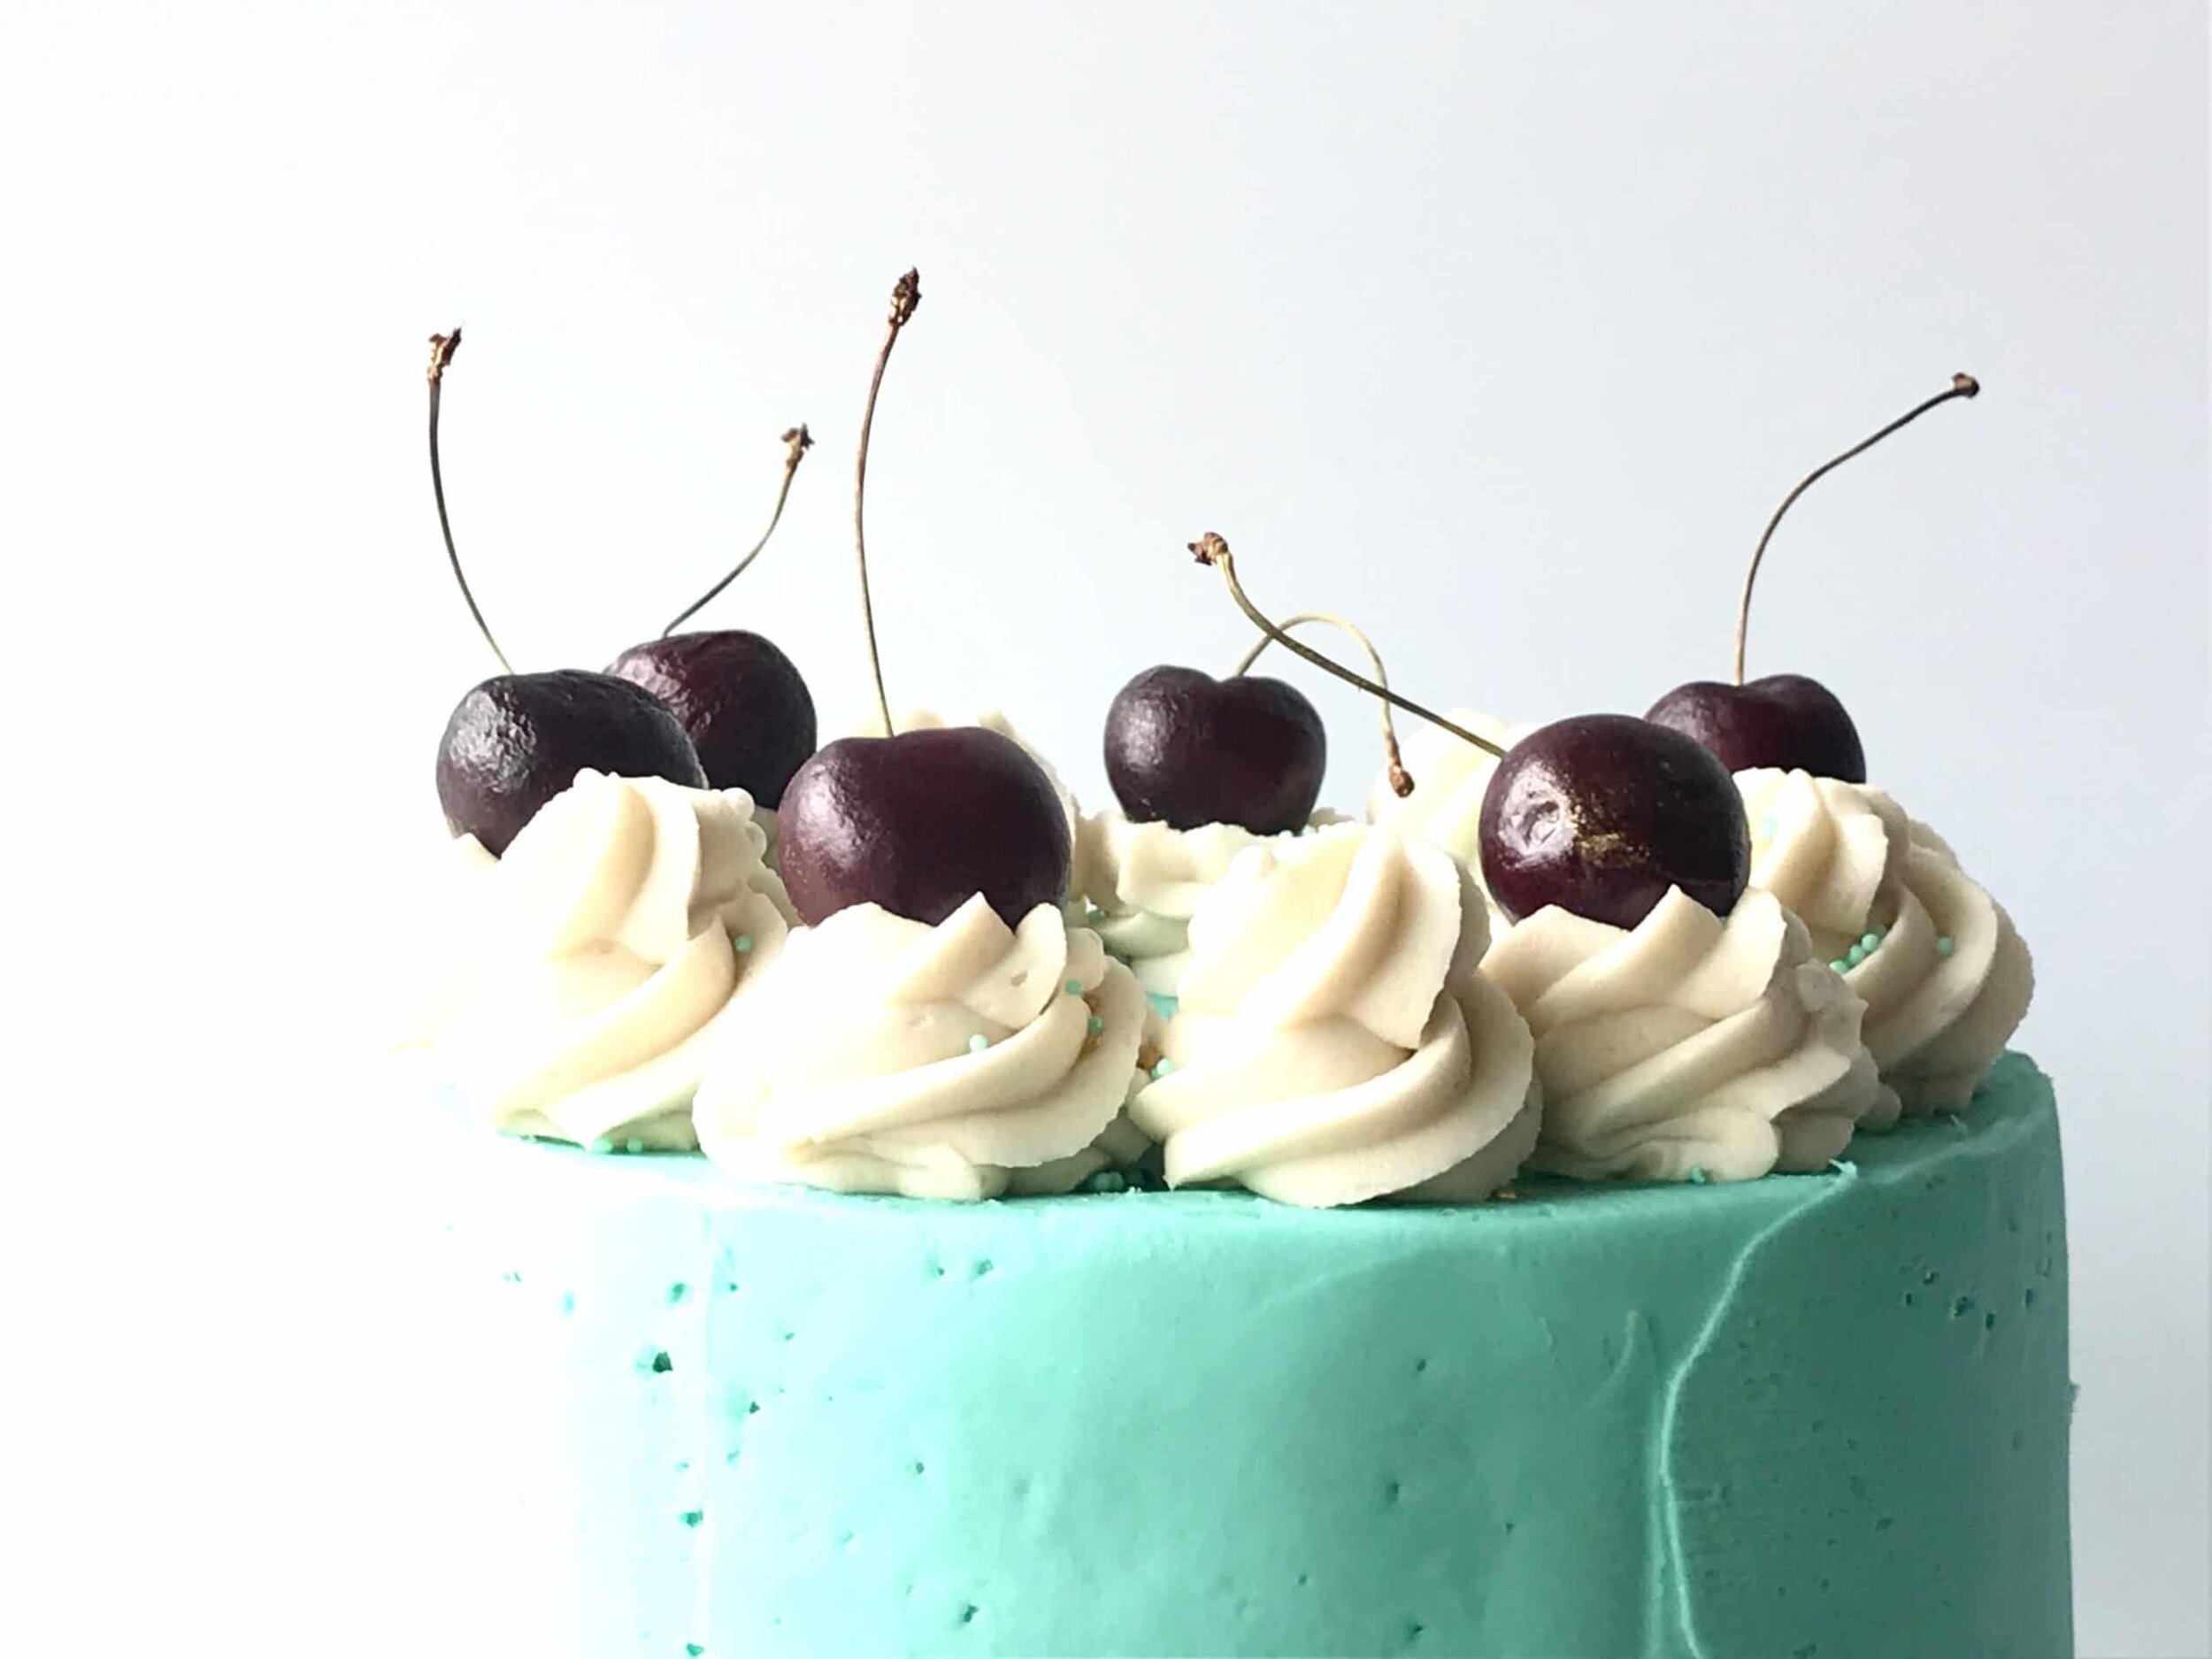
[mailerlite_form form_id=1]

Above are some products that I personally use and recommend for this recipe and to have for everyday use. One thing that is my absolute favorite thing in my kitchen is my little bottle of key lime oil. This oil is so potent that a little goes a long way but it enhances the lime flavor so perfectly that it makes everything so much better.
go to my youtube channel to see this cake being made!
__________________________________________________________________________
cherry lime cake

this lime cake is filled with a cherry filling and a sweet vanilla buttercream
cake
- 2 1/3 cup all-purpose flour
- 1 cup granulated sugar
- 1 1/2 tsp baking soda
- 1 1/2 tsp baking powder
- 1 tsp salt
- 2 eggs
- 1/2 cup vegetable oil
- 1/2 cup greek yogurt
- 1 tsp vanilla extract
- 1 tbsp lime zest
- 1/4 cup lime juice
- 1/2 tsp lime oil (optional)
- 1 cup buttermilk
filling
- 2 cup black cherries (pitted)
- 1/4 cup lime juice
- zest of 1 lime
- 1/3 cup granulated sugar
buttercream
- 3 sticks salted butter
- 5 cup powdered sugar
- 2 tsp vanilla extract
- 1-3 tbsp heavy cream
- food color
cake
- preheat the oven to 350 degrees F. spray and line three 6-inch cake pans. in a large bowl combine the eggs, oil, yogurt, vanilla, lime zest, lime juice, lime oil, and buttermilk and mix to combine. in a separate bowl, combine the flour, baking powder, baking soda, and salt. Add the dry mixture into the wet mixture and mix until incorporated. divide the batter evenly among the cake pans and bake for 30-35 minutes or until a toothpick comes out clean. let cool 10 minutes then carefully remove from the pans and continue cooling.
filling
- combine all ingredients into a pot and bring to a boil, reduce the heat and let simmer until it's nice and thick. let cool.
buttercream
- put all of the ingredients into the bowl of an electric mixer fitted with a whisk attachment. start slow and then gradually increase the speed. whip on high until light and fluffy, about 3 minutes.