
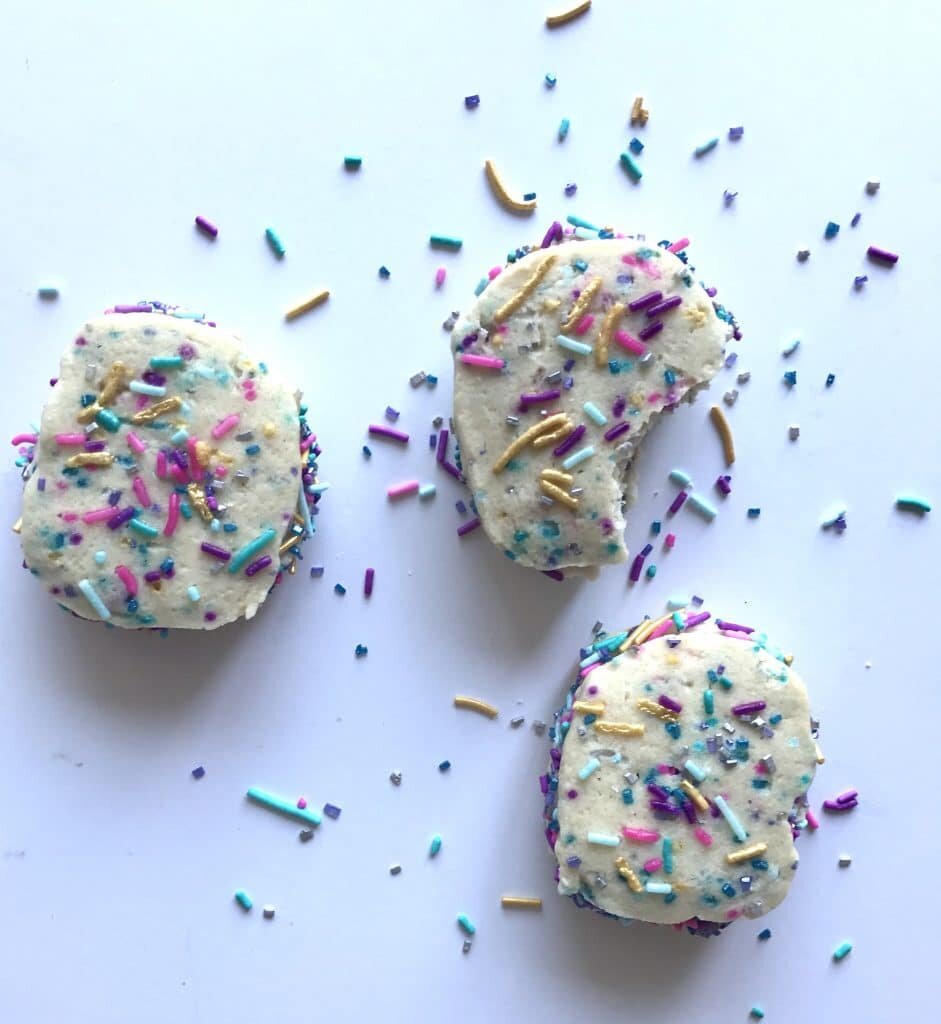
Birthday Cake Ice Cream Sandwich


*Disclaimer: This post contains affiliate links. To learn more, please go here.
Birthday cake ice cream sandwiches. May I need say more? I think not. These ice cream sandwiches are so good by the way. The ice cream is a basic vanilla base with some birthday cake extract mixed in. But what makes it fun, is the swirls of pink buttercream in it and the French macaron cookies holding it all together.
The buttercream gives it that actual birthday cake feel and adds in a little texture and flavor. While the French macaron cookies gives it more of a fancy twist, with the chewy yet delicate cookie, it makes this ice cream sandwich complete. Go here to get the French macaron recipe!
Change it up!
Not wanting to go all fancy with the French macarons? Don't worry about it, those little cookies may be delicious but they can be a handful to make with the outcome being 50/50 success.
Instead use whatever cookie you'd like! Make some sugar coated sugar cookies and use those! Or just go to the grocery store and get those addicting soft frosted cookies in the bakery and use those instead of swirling buttercream in the actual ice cream. Makes it a little easier for the busy folk! I won't judge either, because now I'm tempted to do that myself!


Products I recommend


Above are some products that I personally use and recommend for this recipe and to have for everyday use. I highly suggest the ice cream maker that I listed above. It's cheaper than others and it does it's job just like the other's. It's also easy to clean and super easy to use!
birthday cake ice cream
a sweet treat for those who love birthday cake!
- 1 3/4 cup heavy cream
- 2 cup milk
- 3/4 cup granulated sugar
- 1 tbsp birthday cake flavor (i used amoretti brand)
- 1/4 tsp vanilla
- pinch salt
- 1/4 cup buttercream (optional)
-
place the heavy cream, milk, sugar, salt, birthday cake extract, and vanilla into a pot and mix together. put over medium-high heat and bring to a simmer. remove from the heat and cover with cling wrap and place the ice cream base into the fridge overnight to cool and to let the flavor increase.
-
following the manufacturer's instructions of your ice cream machine, turn the base for 20-25 minutes. place the ice cream into a freezer safe container. swirl with the buttercream and top with sprinkles and freeze overnight to firm up.
assembly
-
take your choice of cookies and take a scoop of the birthday cake ice cream and place on top. add another cookie and freeze until ready to serve.


Star Shaker Cookies


*Disclaimer: This post contains affiliate links. To learn more, please go here.
It's almost the 4th of July which means lots of BBQ's and fireworks! But you need a showstopper treat for these fun festivities, like these star shaker cookies! They may be a little time consuming, but the kids will love them! They are interactive with the little treats you can fill them with and will have everyone asking how you made them.
Amplify it!
Want to make these star shaker cookies extra fun? Here is a fun list of things that you can fill them with!
- Sprinkles
- Pop rocks candy
- Mini chocolate candies
How to assemble
It's super easy to make these cookies! There are a lot of steps, but anyone can make them. Here's how!
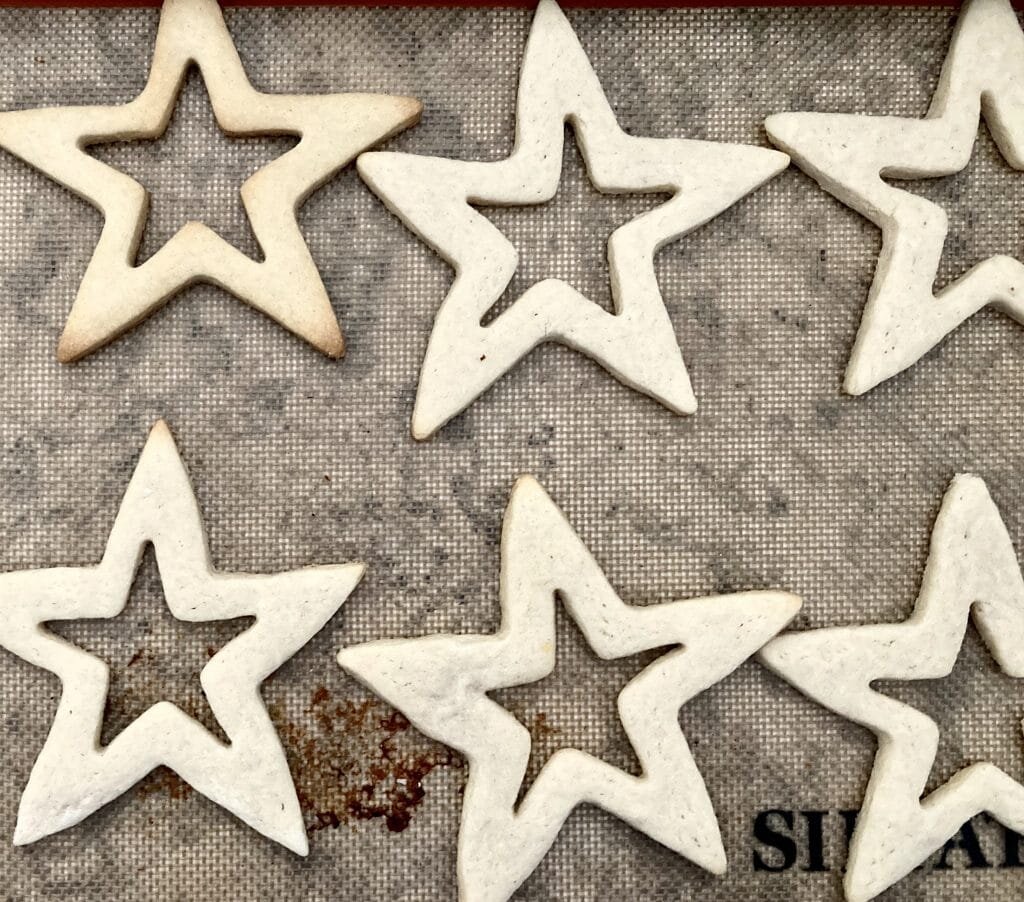
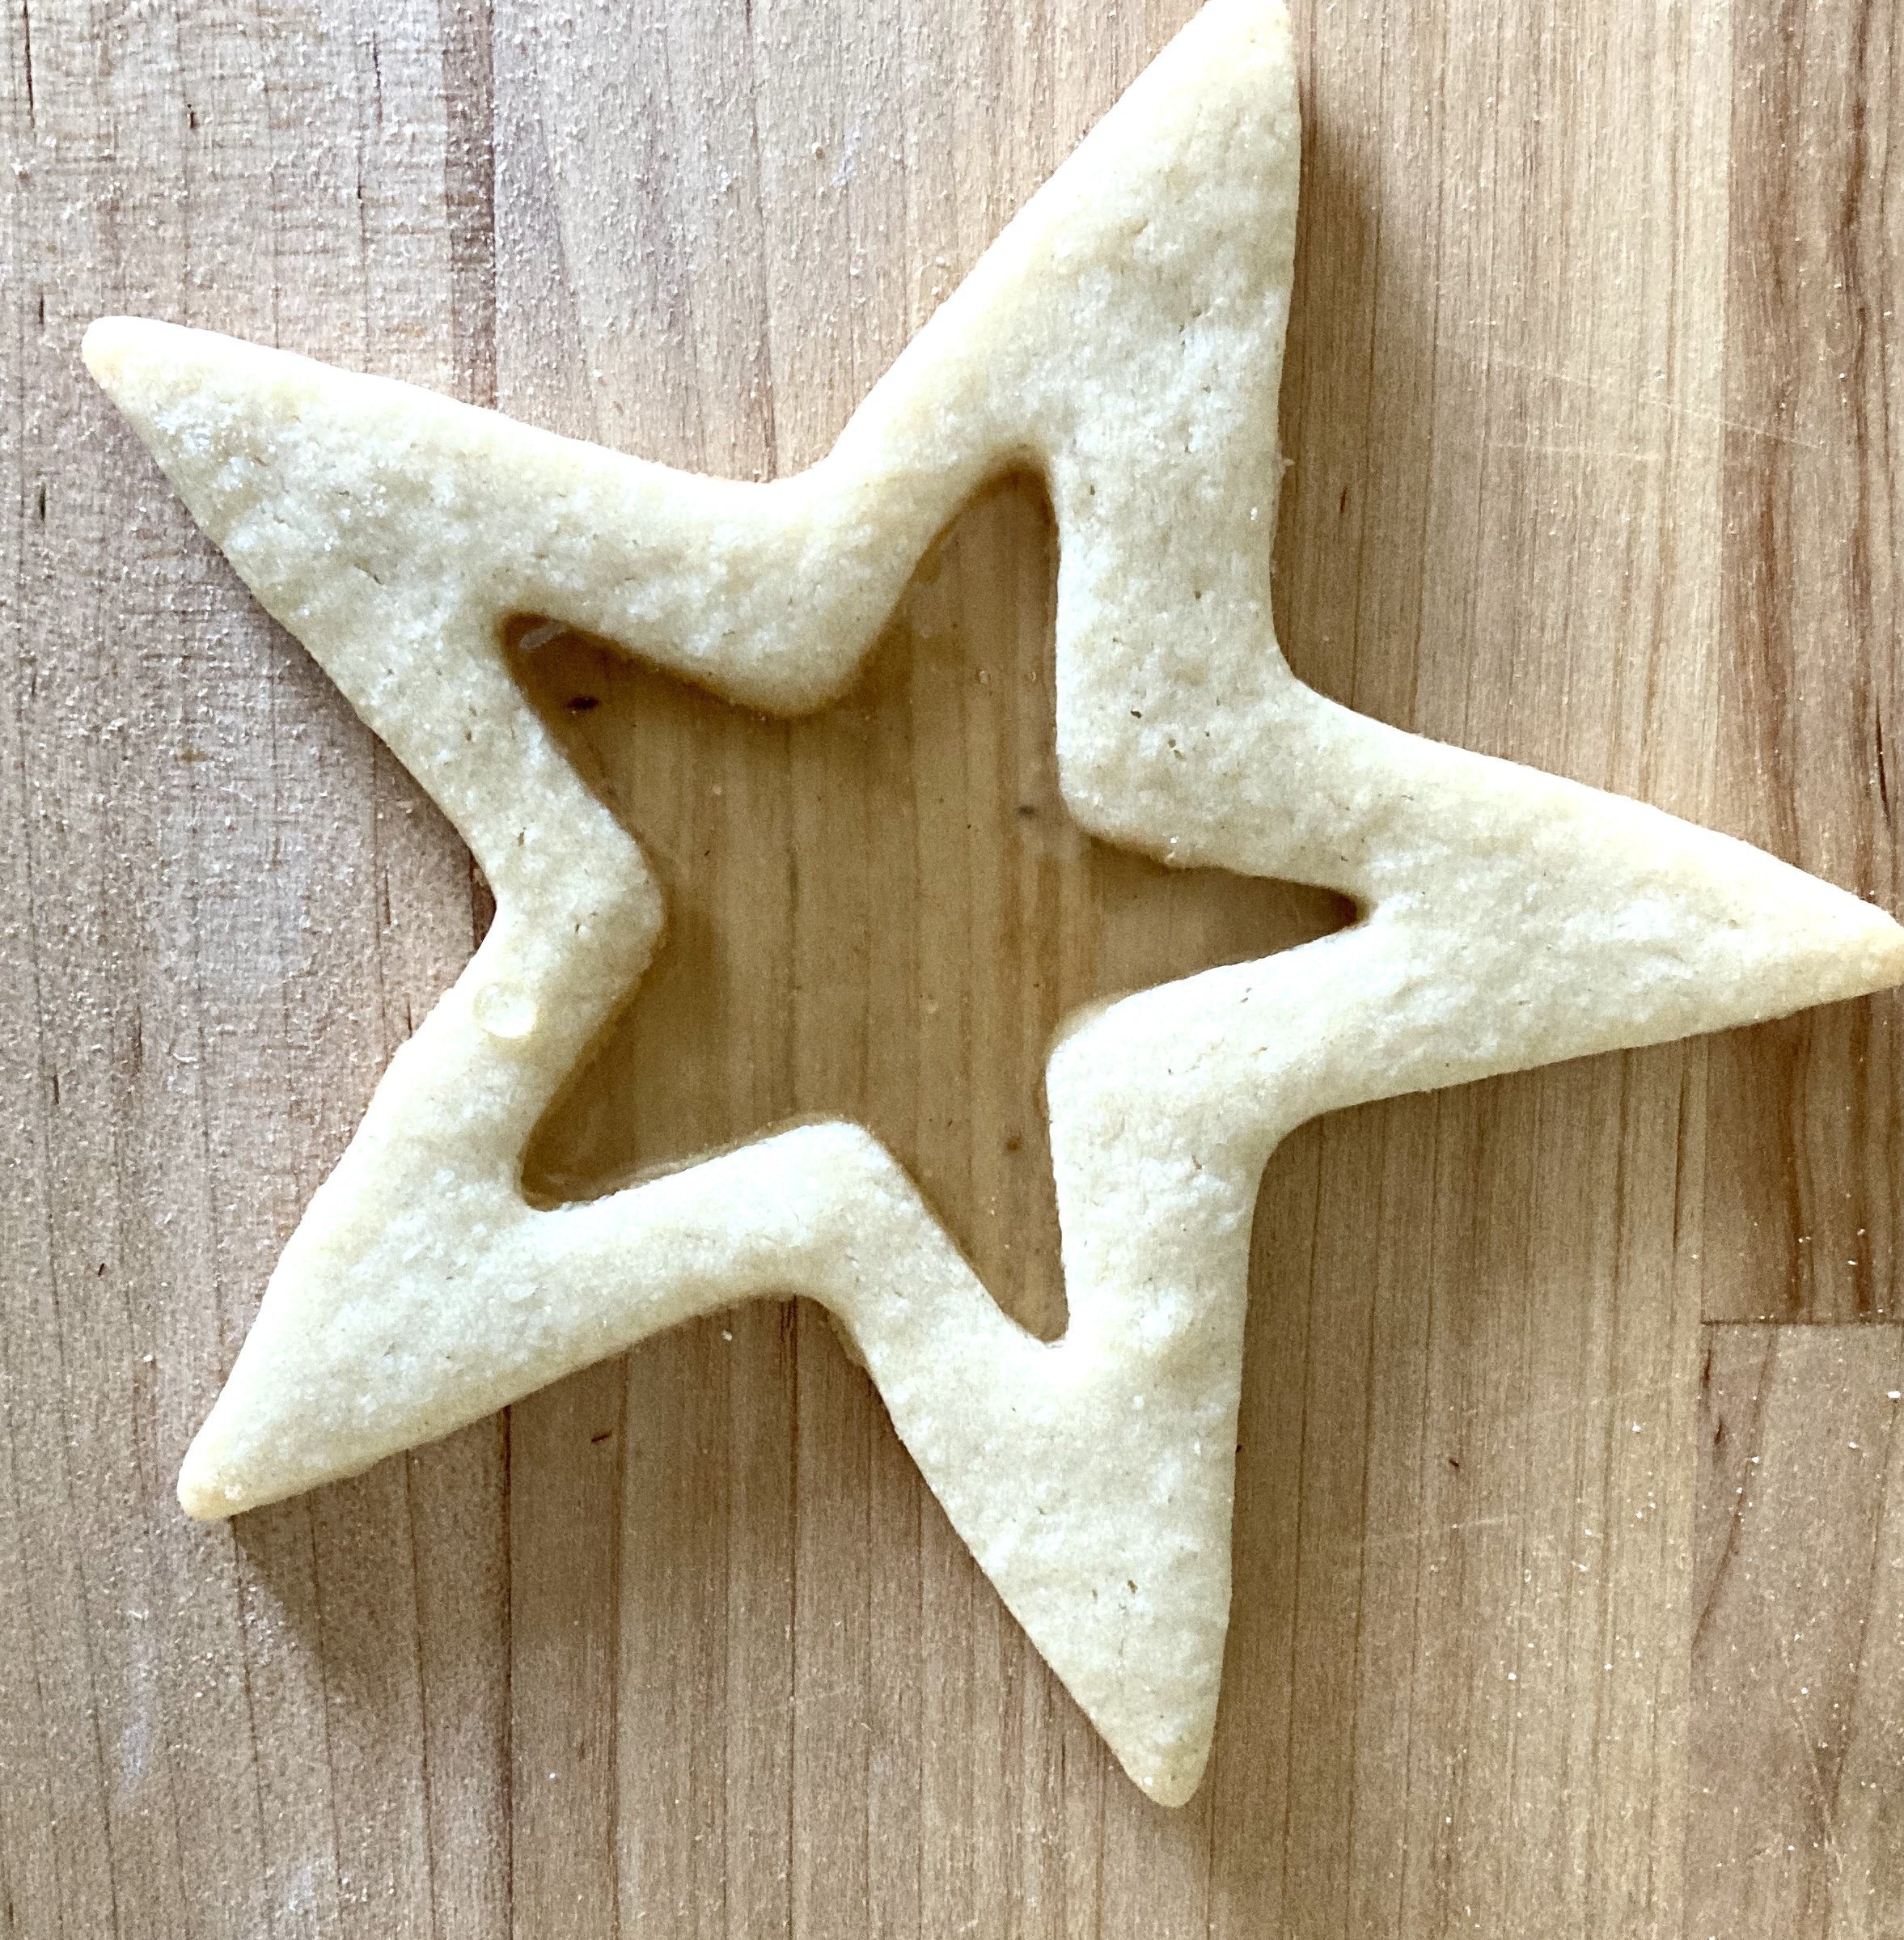
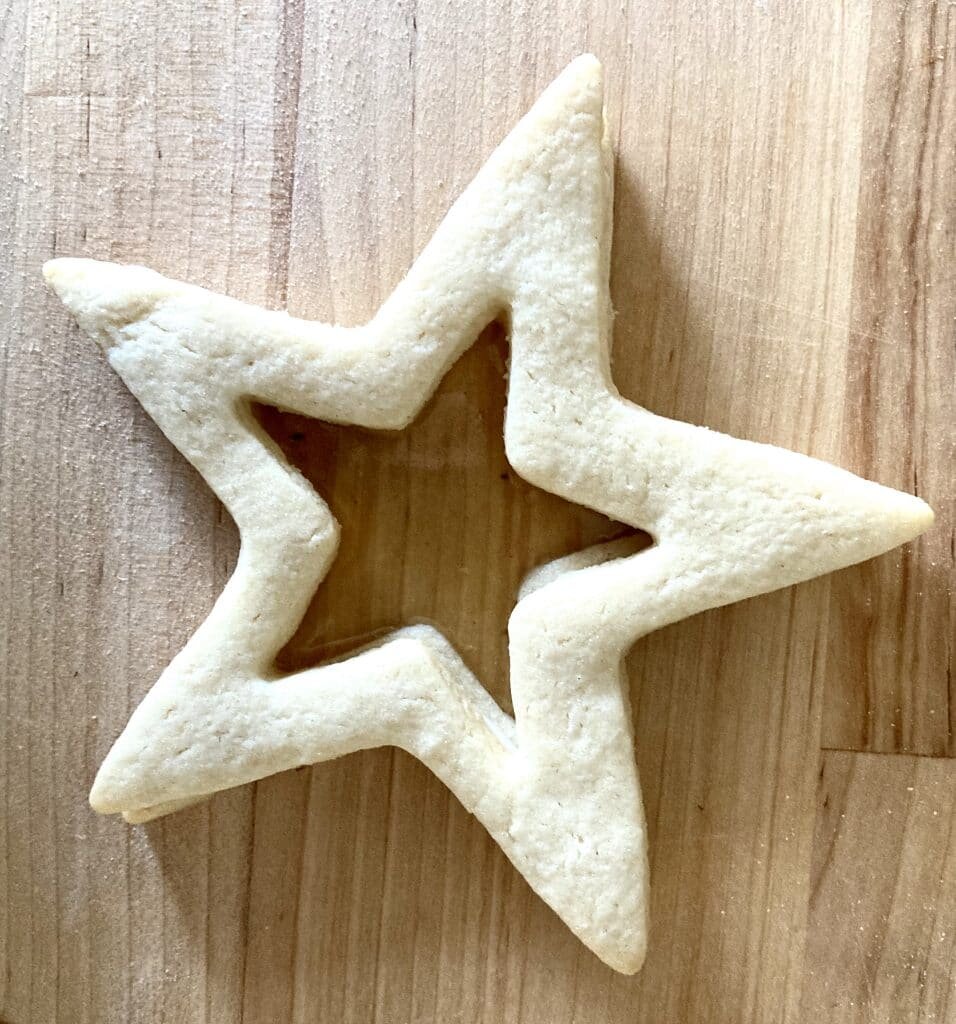
- Start by making a batch of sugar cookies. I used my sugar cookie recipe. You will need 2 cookie cutters; 1 that is larger and a smaller one to remove the middle portion of the cookie. Bake the cookies and let cool.
- After the cookie are cooled, you'll want to take 2/3 of the cookies and leave the other 1/3 of the cookies to the side.
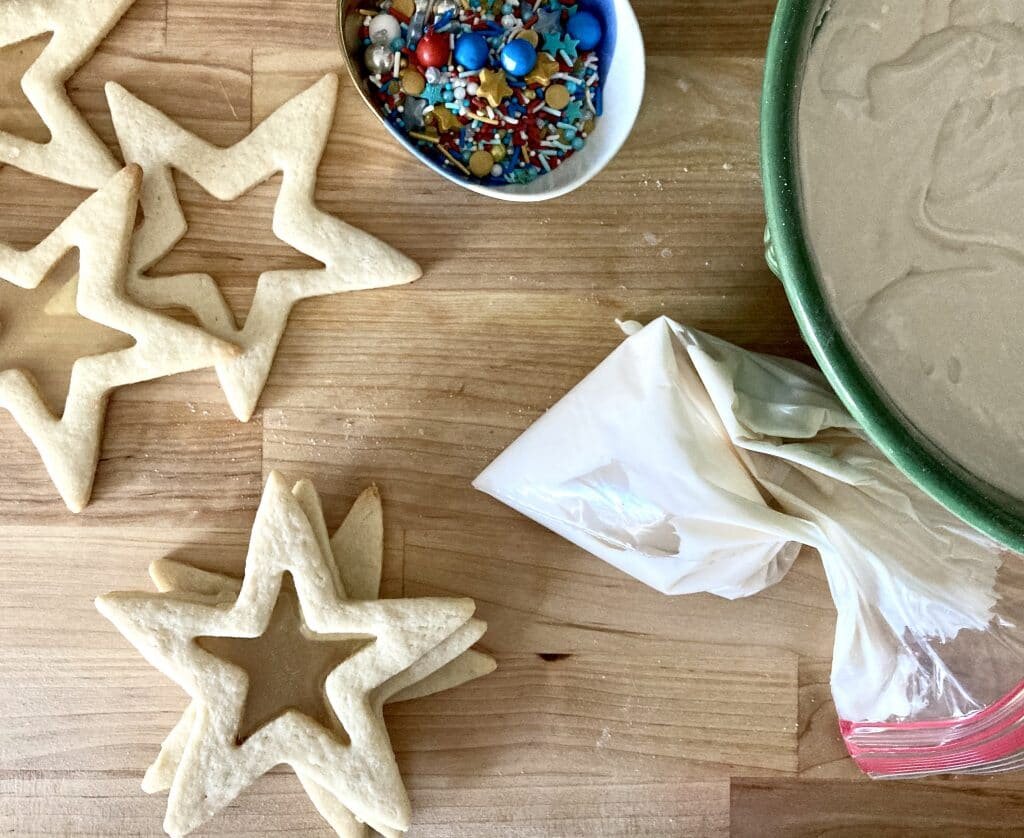
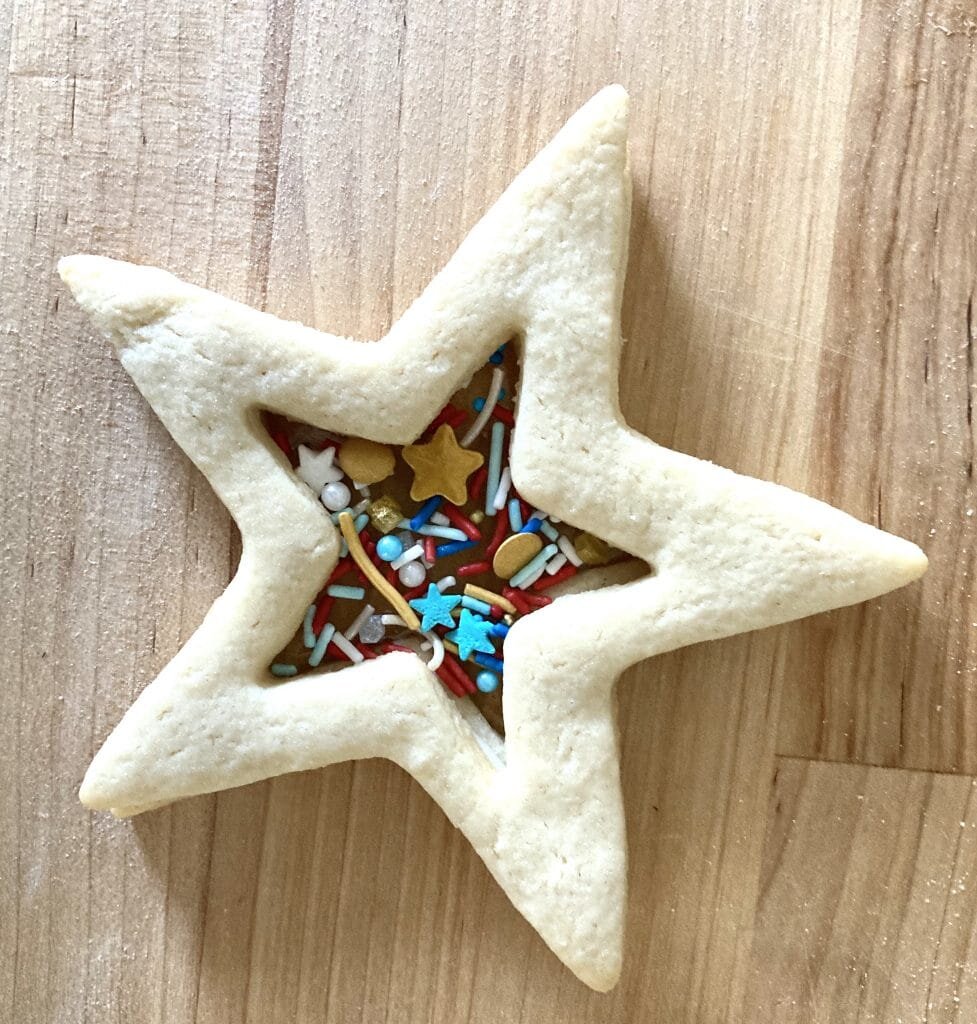
- Take the 2/3 of the cookies and lay them out on a silpat. You will then make a hard sugar candy with some isomalt (just follow the directions on the bag) and poor about a tablespoon of the hard sugar into the center of the cookies.
- Once the sugar has cooled and hardened you will then want to make a stiff royal icing.
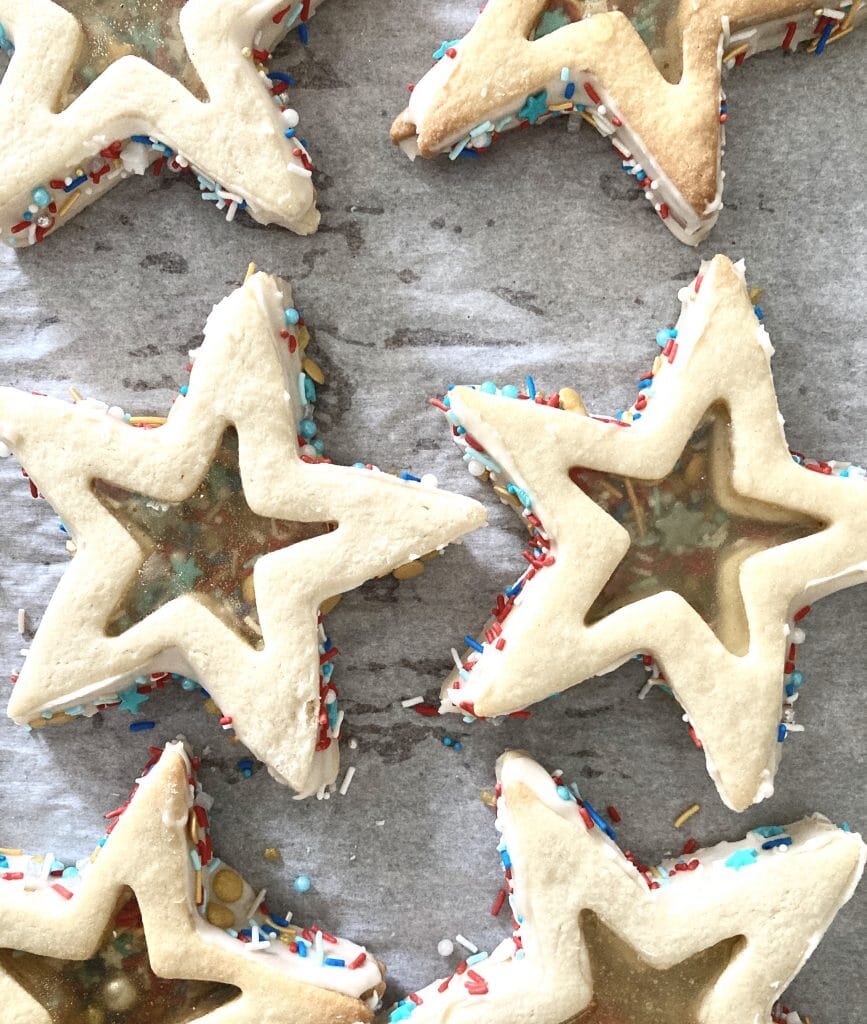
- Lay one of the cookies with the candy center on the counter. Take the royal icing and pipe a thin layer along the edges. Place the next cookie, one that doesn't have the candy center, on top. Next place some sprinkles and candies in the center.
- Repeat the process of the royal icing and the last candy centered cookie.
- Decorate the cookies as desired!


Products I recommend


Above are some products that I personally use and recommend for this recipe and to have for everyday use. I highly suggest getting the isomalt for these cookies. It may not taste very good since it's a sugar free type of hard candy, but it gives it a super clear, non-cloudy look. You can always add in a little bit of clear flavor oil to give it more appeal. (Don't do what I did and use a candy oil that's colored, I used key lime with a green tint to it and it turned a bit murky.)
shaker cookies

create a fun cookie treat using isomalt and candies!
- 1 batch sugar cookie dough (link in post)
- 1 batch stiff royal icing (link in post)
- isomalt
- sprinkles and candies
- Start by making a batch of sugar cookies. I used my sugar cookie recipe. You will need 2 cookie cutters; 1 that is larger and a smaller one to remove the middle portion of the cookie. Bake the cookies and let cool.
- After the cookie are cooled, you'll want to take 2/3 of the cookies and leave the other 1/3 of the cookies to the side.
- Take the 2/3 of the cookies and lay them out on a silpat. You will then make a hard sugar candy with some isomalt (just follow the directions on the bag) and poor about a tablespoon of the hard sugar into the center of the cookies.
- Once the sugar has cooled and hardened you will then want to make a stiff royal icing.
- Lay one of the cookies with the candy center on the counter. Take the royal icing and pipe a thin layer along the edges.
- Place the next cookie, one that doesn't have the candy center, on top. Next place some sprinkles and candies in the center.
- Repeat the process of the royal icing and the last candy centered cookie.
- Decorate the cookies as desired!


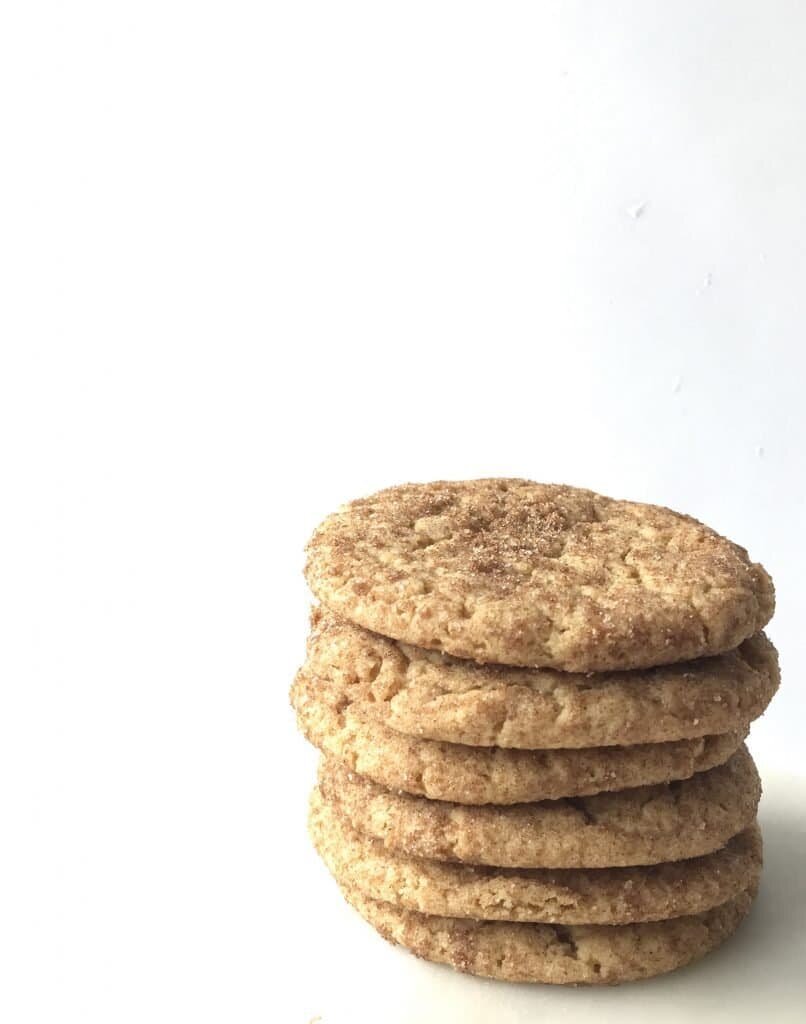
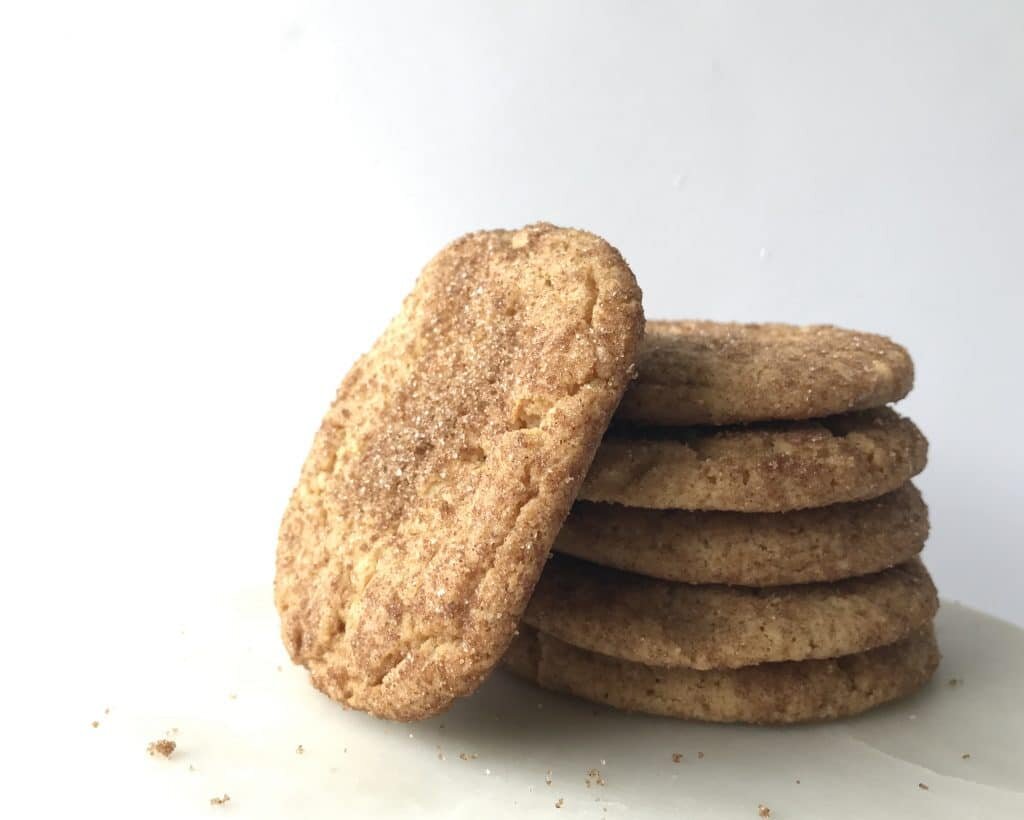
Snickerdoodles

[wprm-recipe-jump]
*Disclaimer: This post contains affiliate links. To learn more, please go here.These snickerdoodles are so good! They aren't the usual cinnamon spiced cookie you see though. I used brown sugar instead of granulated sugar to give it more depth in flavor and these do not disappoint! They are soft and not too sweet, but oh so good that it will satisfy your sweet tooth. These guys are a great treat to add to your cookie list for the holidays or even just to have something to snack on over the weekend. Kids will even love them in their lunch box.Now the reason these snickerdoodles are so good is because it's made with brown sugar! Brown sugar has molasses in it which adds so much flavor to whatever you make with it. I find that the brown sugar in these cookies elevates the cinnamon in them and just overall gives it a flavor boost. Plus I just love to bake with brown sugar!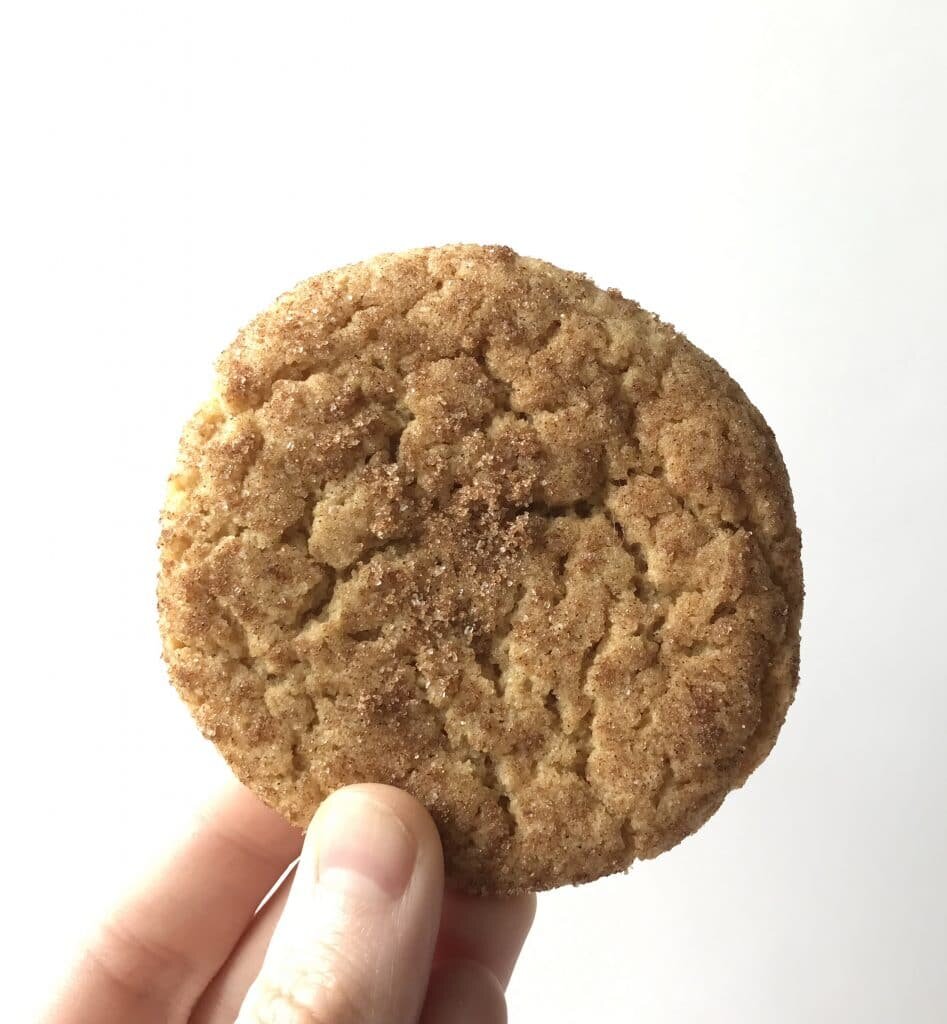
[mailerlite_form form_id=1]
Above are some products that I personally use and recommend for this recipe and to have for everyday use. My absolute favorite is the BlueQ oven mitts. I have a collection of them and I love them! They are great quality and it's nice to have a kitchen item with a sense of humor.
__________________________________________________________________________________
Snickerdoodles
these snickerdoodles are soft and chewy and the cinnamon flavor is enhanced with the brown sugar.
- 2 sticks unsalted butter (room temp)
- 1 cup brown sugar
- 1 1/2 tsp vanilla extract
- 1 egg
- 1 tsp baking soda
- 1/2 tsp salt
- 1 tsp cream of tar tar
- 2 cup all-purpose flour
for rolling
- 1/4 cup brown sugar
- 2 tbsp granulated sugar
- 1 1/2 tsp cinnamon
-
Preheat the oven to 350 degrees F. Line a pan with parchment paper. In the bowl of an electric mixer fitted with a paddle attachment cream the sugar and the butter until light and fluffy, about 1 minute. Scrape down the side of the bowl and then add in the egg and vanilla. In another bowl combine the flour, baking soda, cream of tar tar, and salt and whisk together. Scrape down the sides of the bowl then on low speed, gradually add in the dry ingredients. In a small bowl mix the brown sugar, granulated sugar and cinnamon together. Scoop the cookie dough and roll in the cinnamon sugar and then bake for 8-10 minutes.
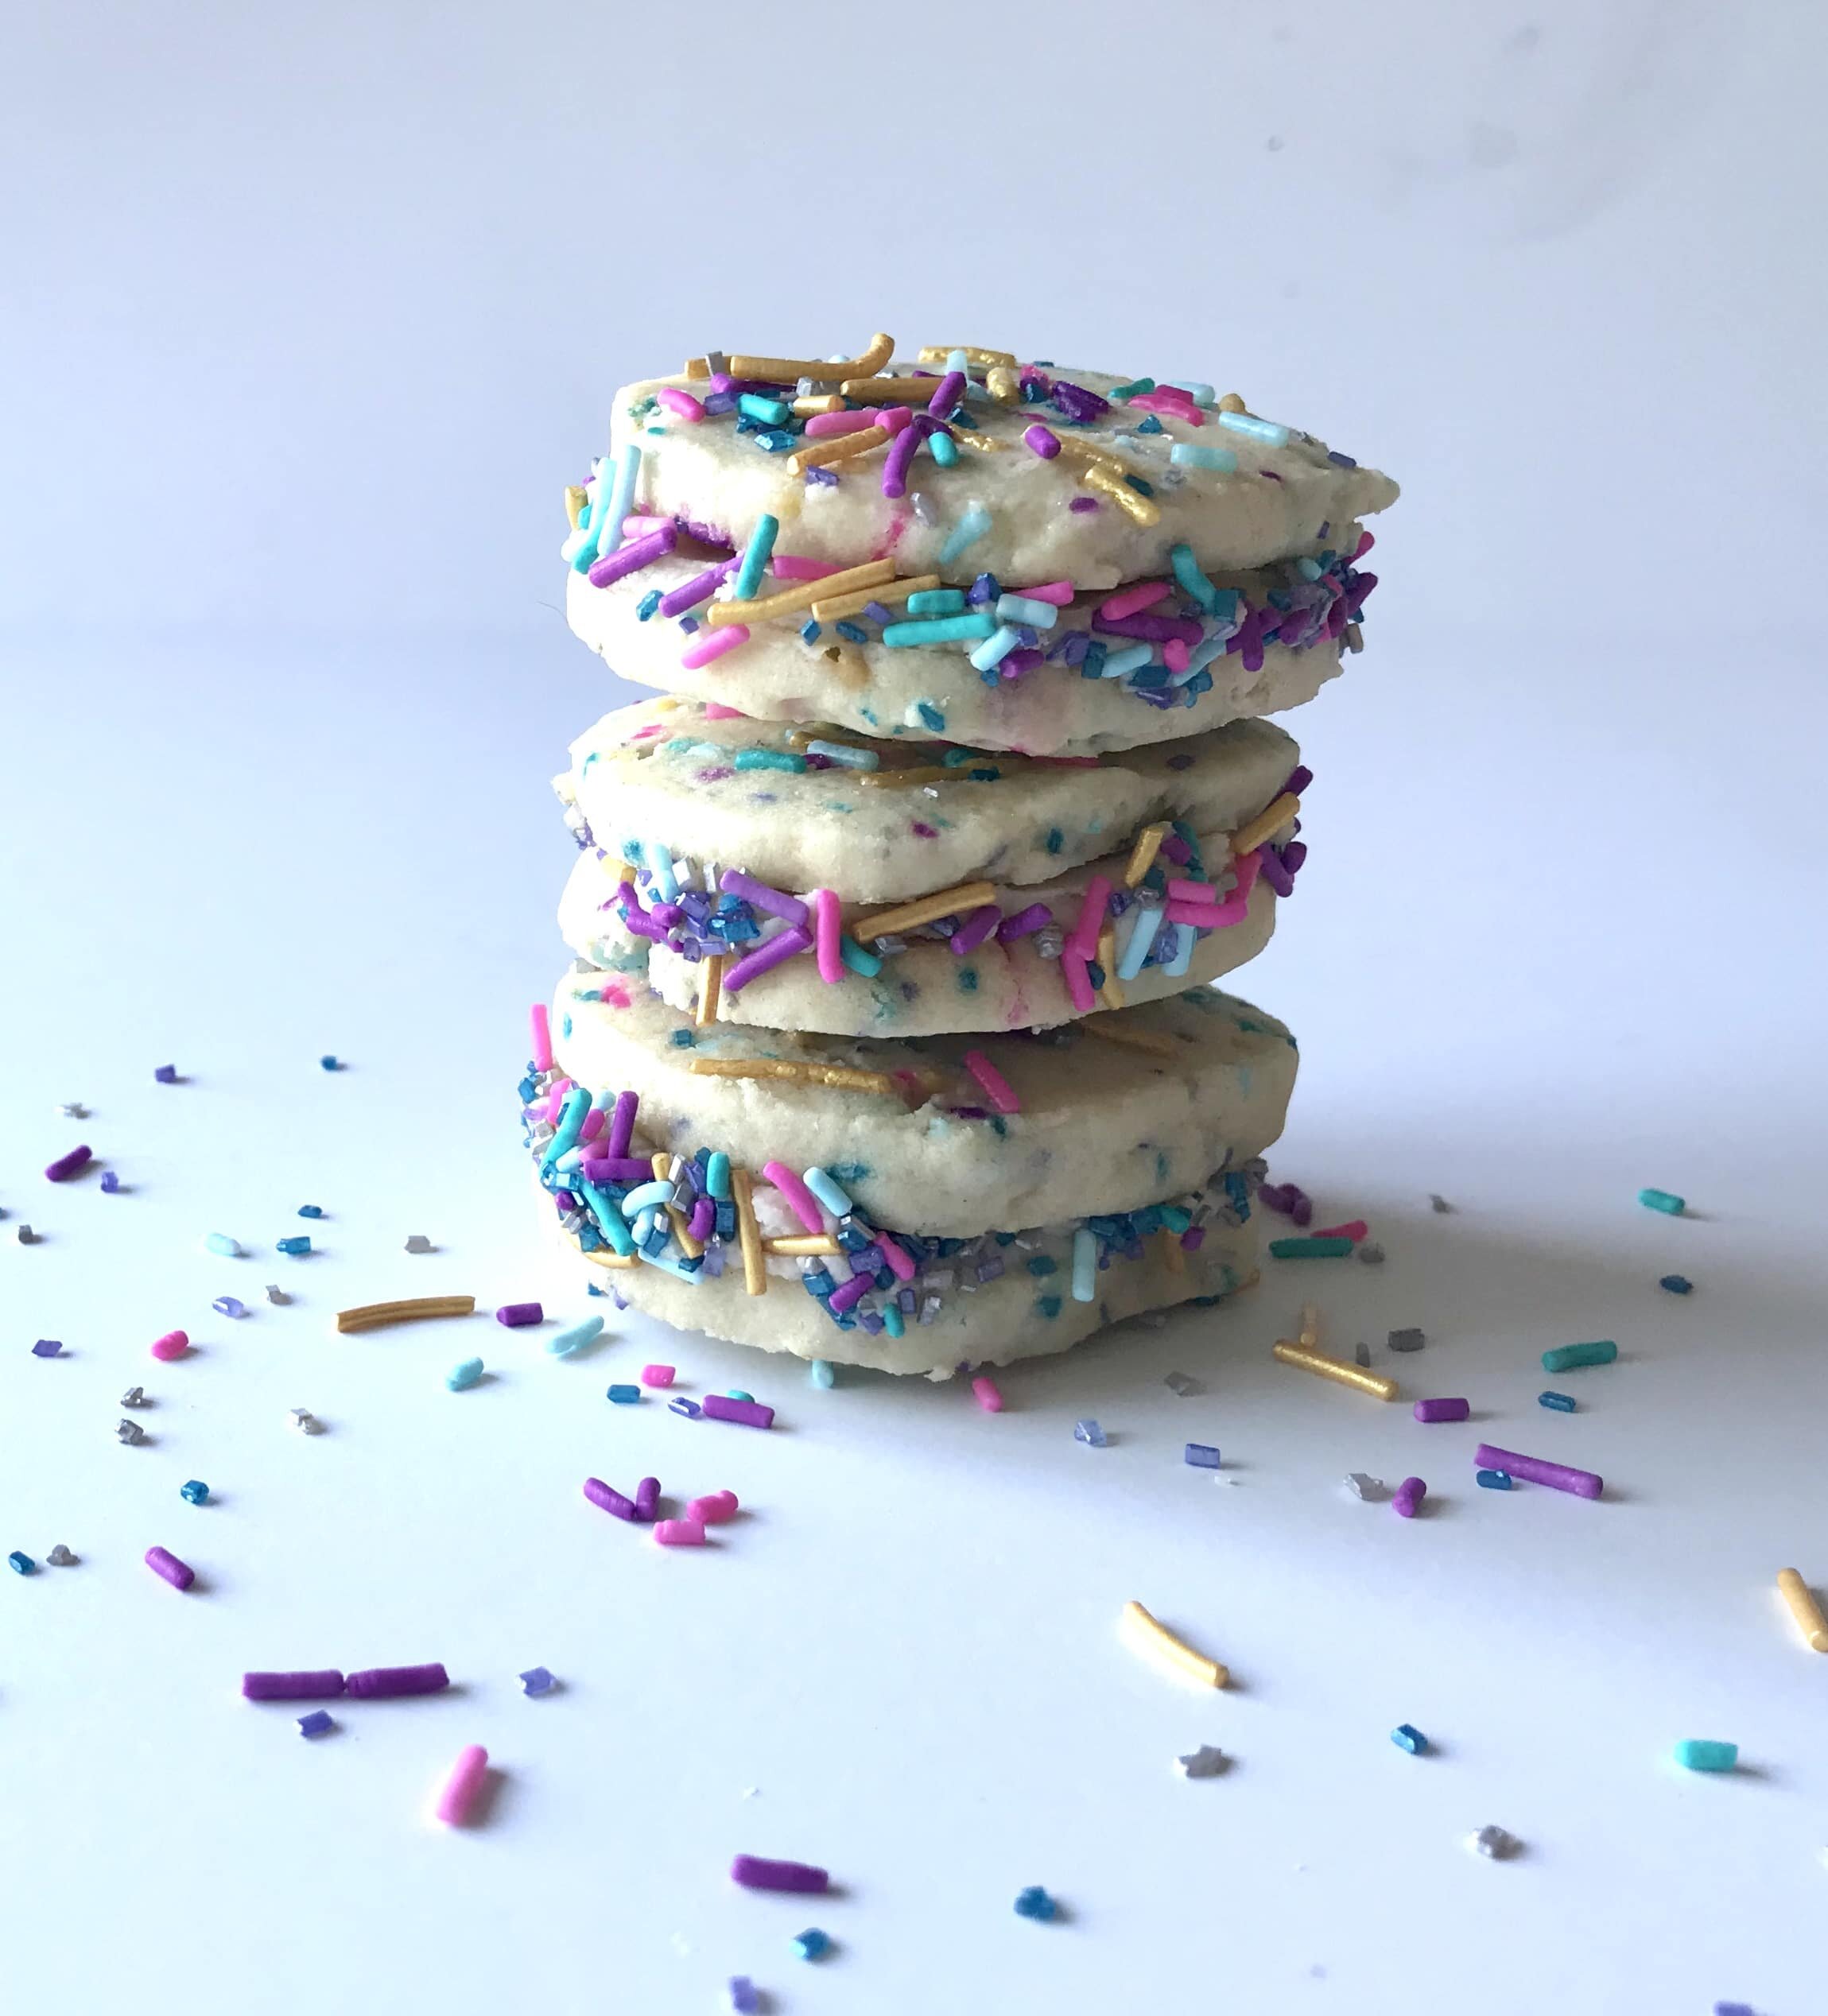
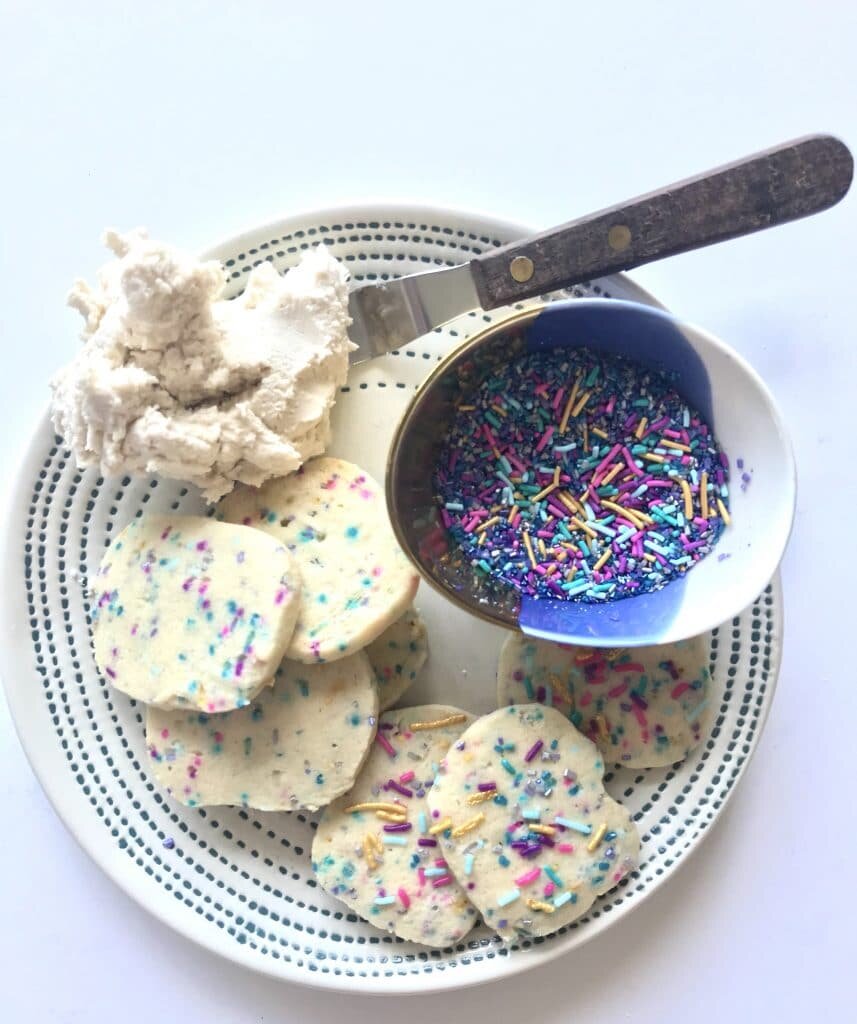
Funfetti Cookie Sandwiches

[wprm-recipe-jump]
*Disclaimer: This post contains affiliate links. To learn more, please go here.What's more fun than a cookie? A funfetti cookie sandwiches yummy cookie dough decorated with sprinkles and flavored with princess extract. Couldn't be any better than that! But then there is also the buttercream that is in between those cookies so that makes it so much better! Oh, and kids will absolutely love them too!These funfetti cookie sandwiches are made with princess extract, which is a delicious emulsion that I have in my kitchen at all times. (More about this down below.) If you don't want to buy the princess extract than that is completely up to you. You can use almond extract instead or just stick to plain vanilla. The flavor isn't what really matters with these cookies, it's the fun of the sprinkles that are mixed in them!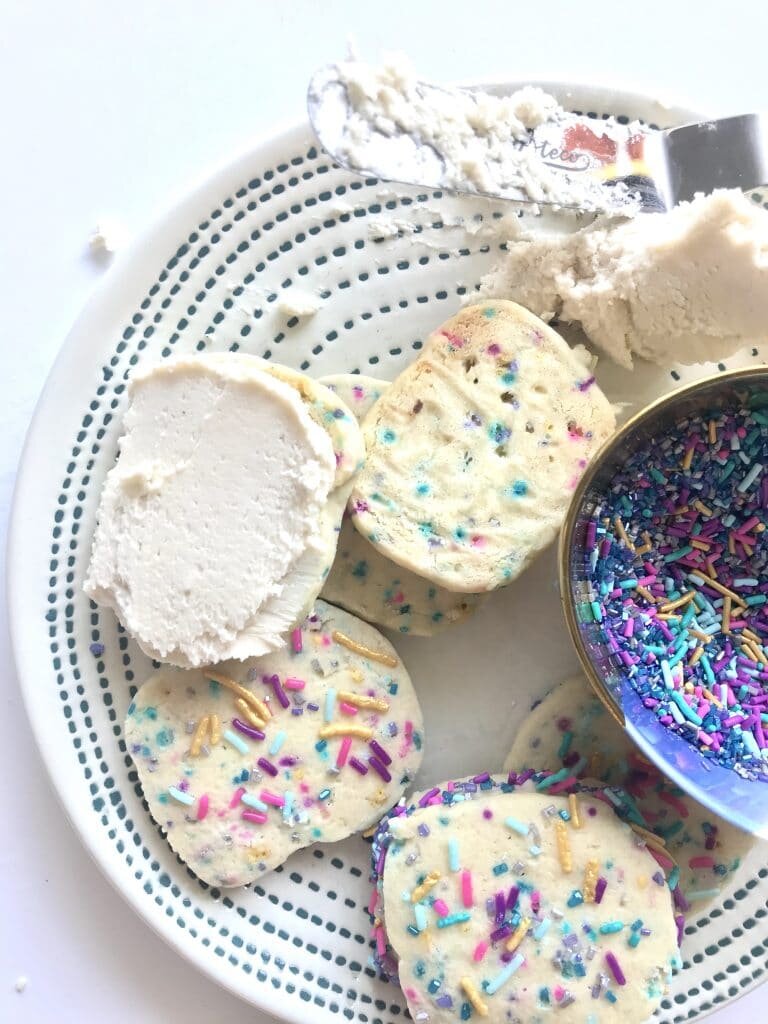
[mailerlite_form form_id=1]
Above are some products that I personally use and recommend for this recipe and to have for everyday use. One thing these cookies have in them is princess extract. Now this extract is delicious and is one of my favorite things to have in my kitchen at all times. It's a mix of vanilla, lemon and almond extracts and when they are all combined they make an addicting concoction.
_______________________________________________________________________________________
funfetti cookie sandwiches

shortbread cookies with a buttercream filling. flavored with princess extract and loaded with sprinkles!
cookies
- 1 1/2 sticks unsalted butter (room temp)
- 2/3 cup granulated sugar
- 1 egg
- 1 1/2 tsp princess extract
- 1/4 tsp salt
- 1 tsp baking powder
- 1/4 cup cornstarch
- 1 1/2 cup all-purpose flour
- 1/4 cup sprinkles (don't add in any sixlets chocolates if using a sprinkle blend)
buttercream
- 2 stick unsalted butter (room temp)
- 1 tsp princess extract
- 3 cup powdered sugar
- 1 tbsp water
cookies
- preheat the oven to 350 degrees F. in a bowl, combine the salt, baking powder, cornstarch, and flour; set aside. in another bowl, combine the butter and sugar and cream together with a paddle attachment until fluffy, about 1 minute. scrape down the sides of the bowl then add in the egg and princess extract. mix until incorporated, about 1 minute. scrape down the sides of the bowl again and then gradually add in the dry ingredients. fold in the sprinkles. roll the dough out into a log and wrap in cling wrap. place into the fridge for about 30 minutes. carefully cut the cookies with a sharp knife into 1/4 inch thick pieces and sprinkle a little more sprinkles on top of each cookie. place on a lined sheet pan and bake for 10-12 minutes. let cool. (you can roll them out and use cookie cutters too)
buttercream
- put all of the ingredients into the bowl of an electric mixer fitted with a whisk attachment. start slow and then gradually increase the speed. whip on high until light and fluffy, about 3 minutes. frost the cookies.

Coconut Sugar Cookies


[wprm-recipe-jump]
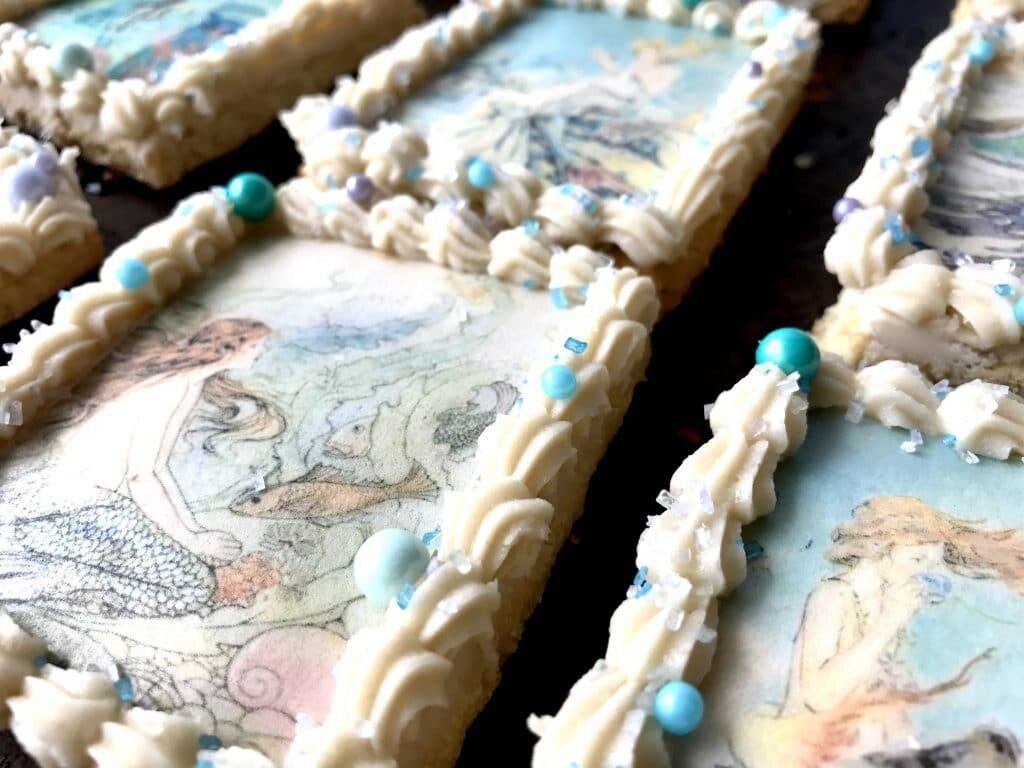
*Disclaimer: This post contains affiliate links. To learn more, please go here.These coconut sugar cookies are so simple and easy. Just like a regular cookie but with a little extra with coconut flour added into the mix. Coconut flour adds a nice flavor that way you don't need to add any of that fake coconut extract. You can firm the dough up in the fridge and cut out into desired shapes and even add on these super cute mermaid edible images or use whatever cookie cutter you like!Want to learn how to get images onto cookies and even cakes and chocolates? Then check out my new online edible printing course that will guide you through everything you need to know about edible printing, from start to finish! You won't regret it! Not too sure if you want to buy something so pricey if you aren't sure you'd like it? Ten you can certainly check out my array of edible paper images you buy and try out before making such a huge purchase. You can even buy these images here in my shop!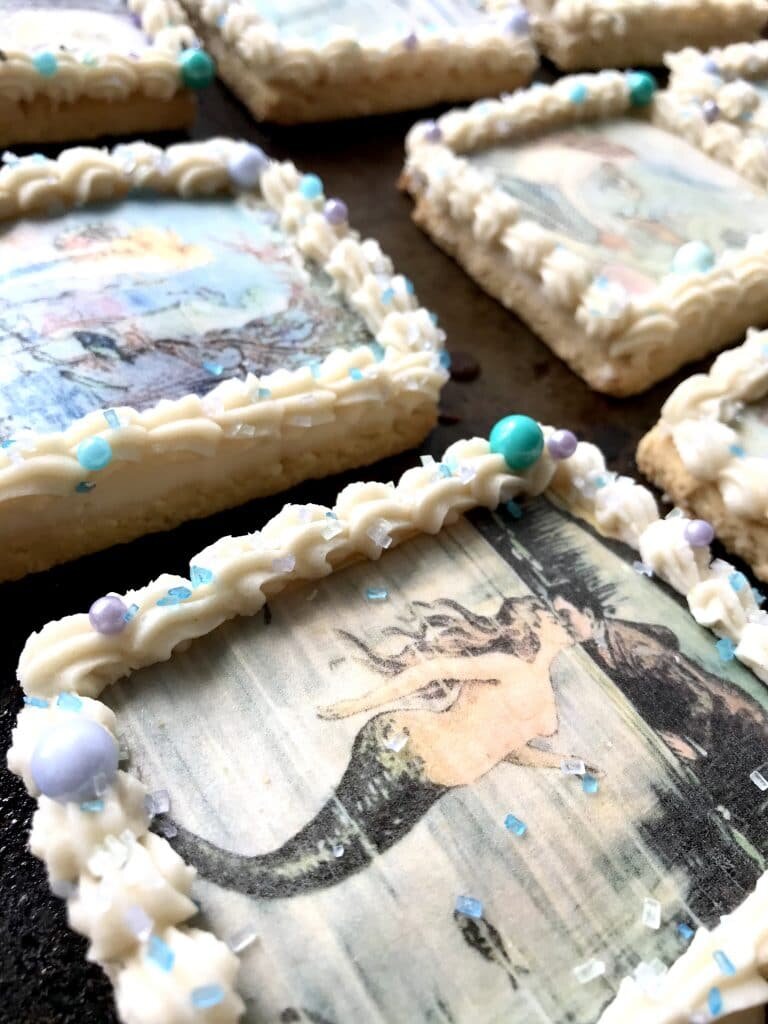
[mailerlite_form form_id=1]
[gallery columns="2" size="large" ids="4325,4329"]
Above are some products that I personally use and recommend for this recipe and to have for everyday use. When making these coconut sugar cookies you absolutely, no exception, have to use coconut flour! If you try to sub it out for regular flour or almond flour than they will not turn out the way they are supposed to. So please stick to the recipe or else it won't turn out for you. Coconut flour should be available at your local grocery store, otherwise I have provided a link for you to get it from amazon.
_________________________________________________________________________________
coconut sugar cookies

these cookies are made with coconut flour which gives it a natural coconut flavor. iced with a simple buttercream makes these sugar cookies complete and perfect for a summer treat.
- 2 sticks unsalted butter (room temp)
- 2/3 cup granulated sugar
- 1 1/2 tsp vanilla extract
- 1 egg
- 1/2 tsp salt
- 1 tsp baking soda
- 3/4 cup coconut flour
- 1 cup all-purpose flour
- 1/3 cup shredded coconut
-
preheat the oven to 350 degrees F. line a pan with parchment paper. in the bowl of an electric mixer fitted with a paddle attachment cream the sugar and the butter until light and fluffy, about 1 minute. scrape down the side of the bowl and then add in the egg and vanilla. in another bowl combine the coconut flour, flour, baking soda, and salt and whisk together. scrape down the sides of the bowl then on low speed, gradually add in the dry ingredients. add in the shredded coconut. wrap the dough into cling-wrap and refrigerate for 30 minutes. roll to 1/4 inch thickness and cut out with desired shapes and bake for 8-10 minutes. enjoy as is or ice with your favorite royal icing or simple buttercream.

Vegan Cranberry Almond Chai Cookies

[wprm-recipe-jump]
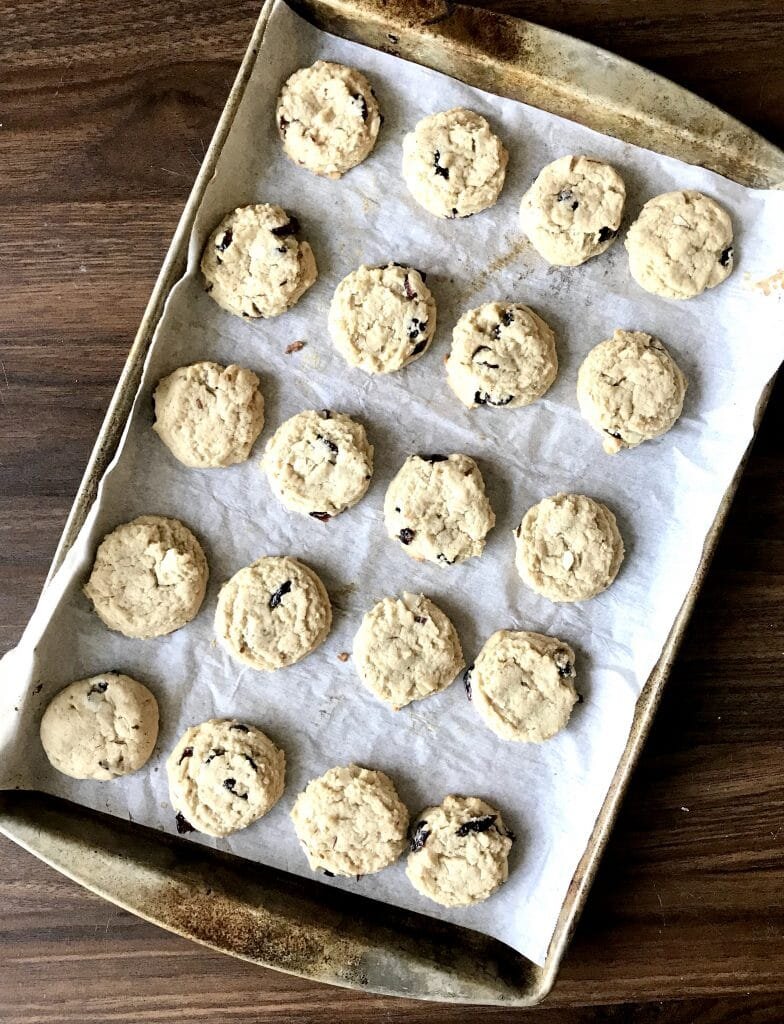
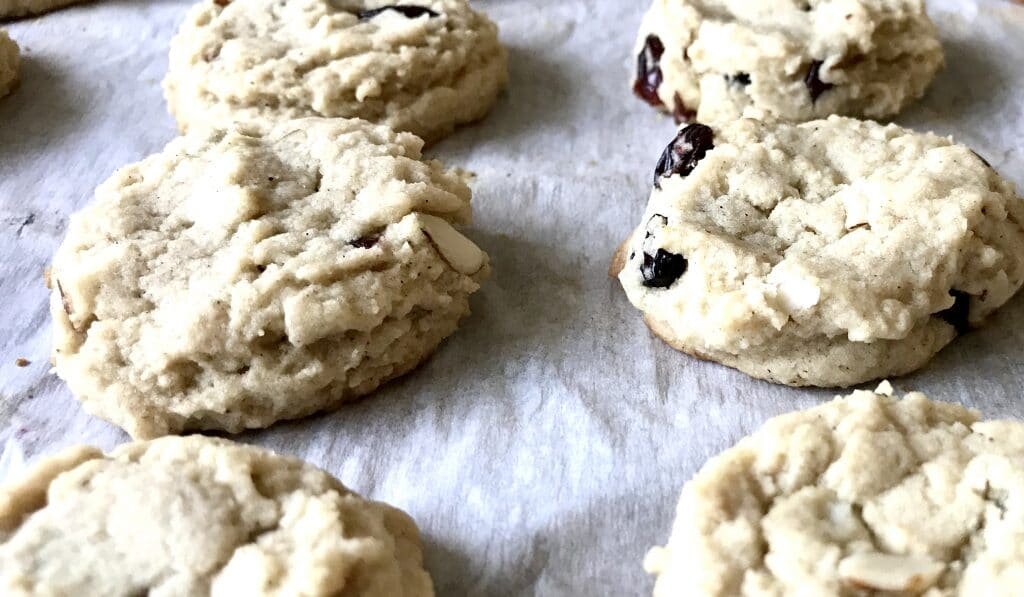
*Disclaimer: This post contains affiliate links. To learn more, please go here.These vegan cranberry almond chai cookies are one of my favorites. We make a version of these cookies at work and I fell in love with them. They are so addicting that you can't have just one. The original recipe calls for different ingredients, like chai concentrate and hazelnuts plus a whole lot more things to also make it gluten free (which my recipe is not). But just because these guys aren't gluten free doesn't mean that they are mouthwatering and delicious!Not a fan of almonds? You can substitute them out for the hazelnuts like in the original recipe as I've stated above or you could even use cashews or macadamia nuts! Want to add in some white chocolate chips? That would be amazing in these cookies too! Cookies are so easy to make your own by adding in the mix-ins that you want and love into them. Use dried apricots or cherries instead of cranberries, instead of chai spice use just simple cinnamon or don't even add it in if that's something you'd prefer! Overall these vegan cranberry almond chai spice cookies are delicious and I personally wouldn't change the recipe in either way.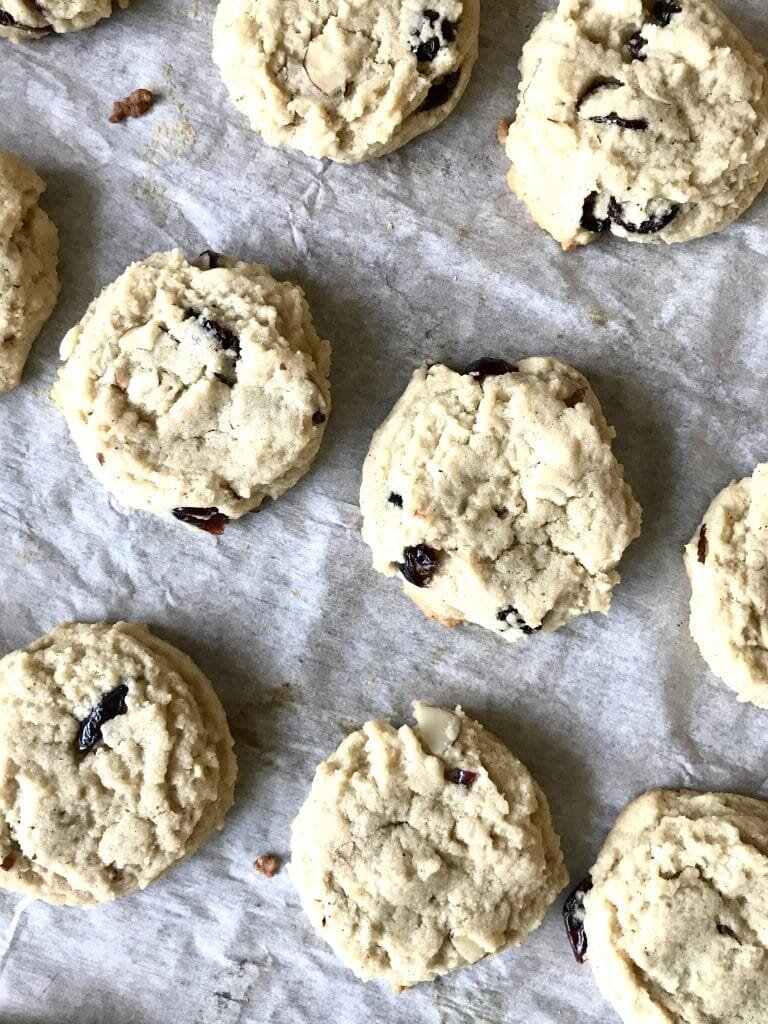
[mailerlite_form form_id=1]
Above are some products that I personally use and recommend for this recipe and to have for everyday use. I highly suggest getting this chai spice from King Arthur Flour for this recipe. Otherwise another really great option is to make your own chai spice! It's super easy and you can find a recipe easily online.
_________________________________________________________________________________________________
vegan cranberry almond chia cookies
vegan cookies packed with flavor! contains chai spice, dried cranberries and a bit of crunch from some slivered almonds.
- 1 1/2 sticks vegan butter (room temp (i used country crock almond oil butter))
- 1/2 cup granulated sugar
- 2/3 cup brown sugar
- 1 tsp vanilla extract
- 1/3 cup almond milk
- 1/2 tsp salt
- 1/2 tsp baking soda
- 2 tsp chai spice
- 2 cup almond flour
- 1 cup all-purpose flour
- 1/2 cup almond slivers
- 1/2 cup dried cranberries
- preheat the oven to 350 degrees F. line a sheet pan with parchment paper. place the vegan butter and the sugars into a bowl of an electric mixer fitted with a paddle attachment, and cream until light and fluffy, about 1 minute. scrape the sides of the bowl and add in the almond milk and vanilla and mix until incorporated. place the almond flour, flour, salt, baking soda, and chai spice in another bowl and whisk together. gradually add the flour mixture to the butter mixture. fold in the almonds and cranberries and scoop the cookies out on the sheet pan and bake for 8-10 minutes.

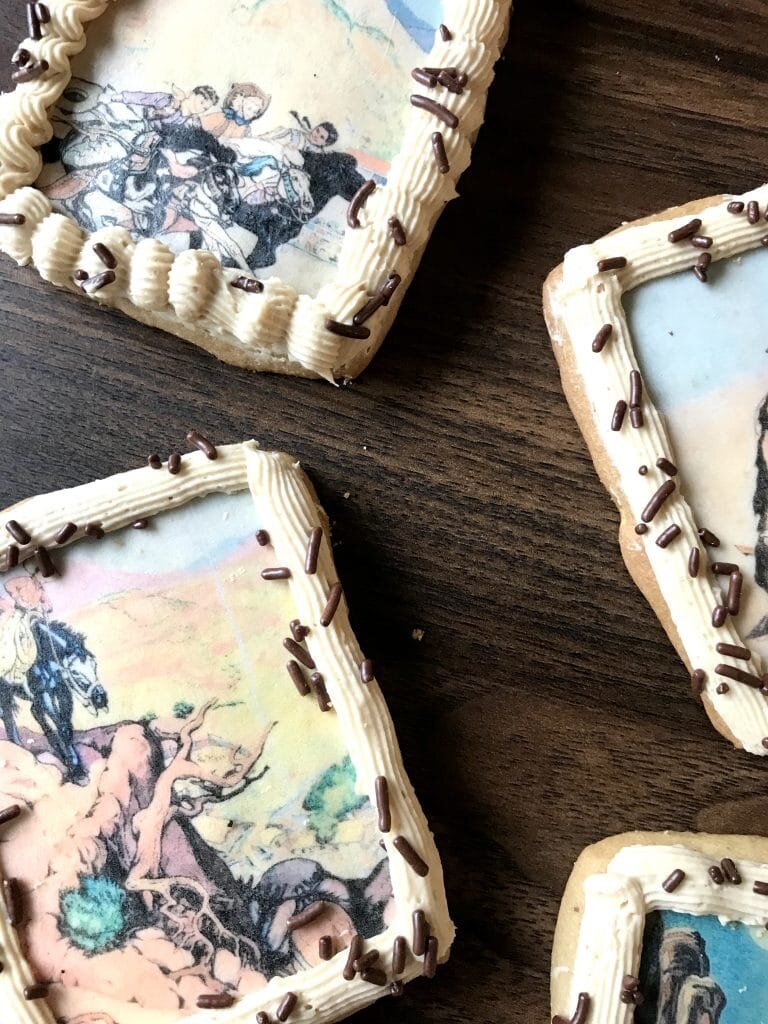
Cowboy Cookies

[wprm-recipe-jump]
*Disclaimer: This post contains affiliate links. To learn more, please go here.I made these cowboy cookies in mind of my dad. He loves cookies, and these guys are filled with chocolate candies and frosted with a peanut butter frosting. Not only that but they are topped with the cutest cowboy images! They are so fun, simple and just down right yummy!Want to learn how to get images onto cookies and even cakes and chocolates? Then check out my new online edible printing course that will guide you through everything you need to know about edible printing, from start to finish! You won't regret it! Not too sure if you want to buy something so pricey if you aren't sure you'd like it? Then you can certainly check out my array of edible paper images you buy and try out before making such a huge purchase. You can even buy these images here in my shop!
[mailerlite_form form_id=1]
Above are some products that I personally use and recommend for this recipe and to have for everyday use. One main thing that you will need in this recipe is the meringue powder for the buttercream. Meringue powder helps make the buttercream form a crust so that it won't make a mess and smudge everywhere. If you prefer to not use meringue powder, than I suggest making a crusting buttercream or a royal icing.
________________________________________________________________________________
m&m cookies with peanut butter buttercream

i call these cookies cowboy cookies, as they remind me of my western loving dad. incorporated with chocolate candies and peanut butter makes these an absolute favorite household staple
cookies
- 1 cup unsalted butter (room temp)
- 1/2 cup granulated sugar
- 1/3 cup brown sugar
- 1 egg
- 1 tbsp vanilla extract
- 1 1/2 tsp baking soda
- 1 tsp salt
- 2 cup all-purpose flour
- 1/2 cup mini m&ms
buttercream
- 1/2 cup unsalted butter (room temp)
- 1/4 cup creamy peanut butter
- 2 tsp meringue powder
- 1 tsp vanilla extract
- 3 cup powdered sugar
- 1 tbsp water
cookies
- preheat the oven to 350 degrees F. line a pan with parchment paper. in the bowl of an electric mixer fitted with a paddle attachment cream the sugars and the butter until light and fluffy, about 1 minute. scrape down the side of the bowl and then add in the egg and vanilla. in another bowl combine the flour, baking soda, and salt and whisk together. scrape down the sides of the bowl then on low speed, gradually add in the dry ingredients. add in the mini m&ms. wrap the dough into cling-wrap and refrigerate for 30 minutes. roll to 1/4 inch thickness and cut out with desired shapes and bake for 8-10 minutes.
buttercream
- put all of the ingredients into the bowl of an electric mixer fitted with a whisk attachment. start slow and then gradually increase the speed. whip on high until light and fluffy, about 3 minutes. frost the cookies.

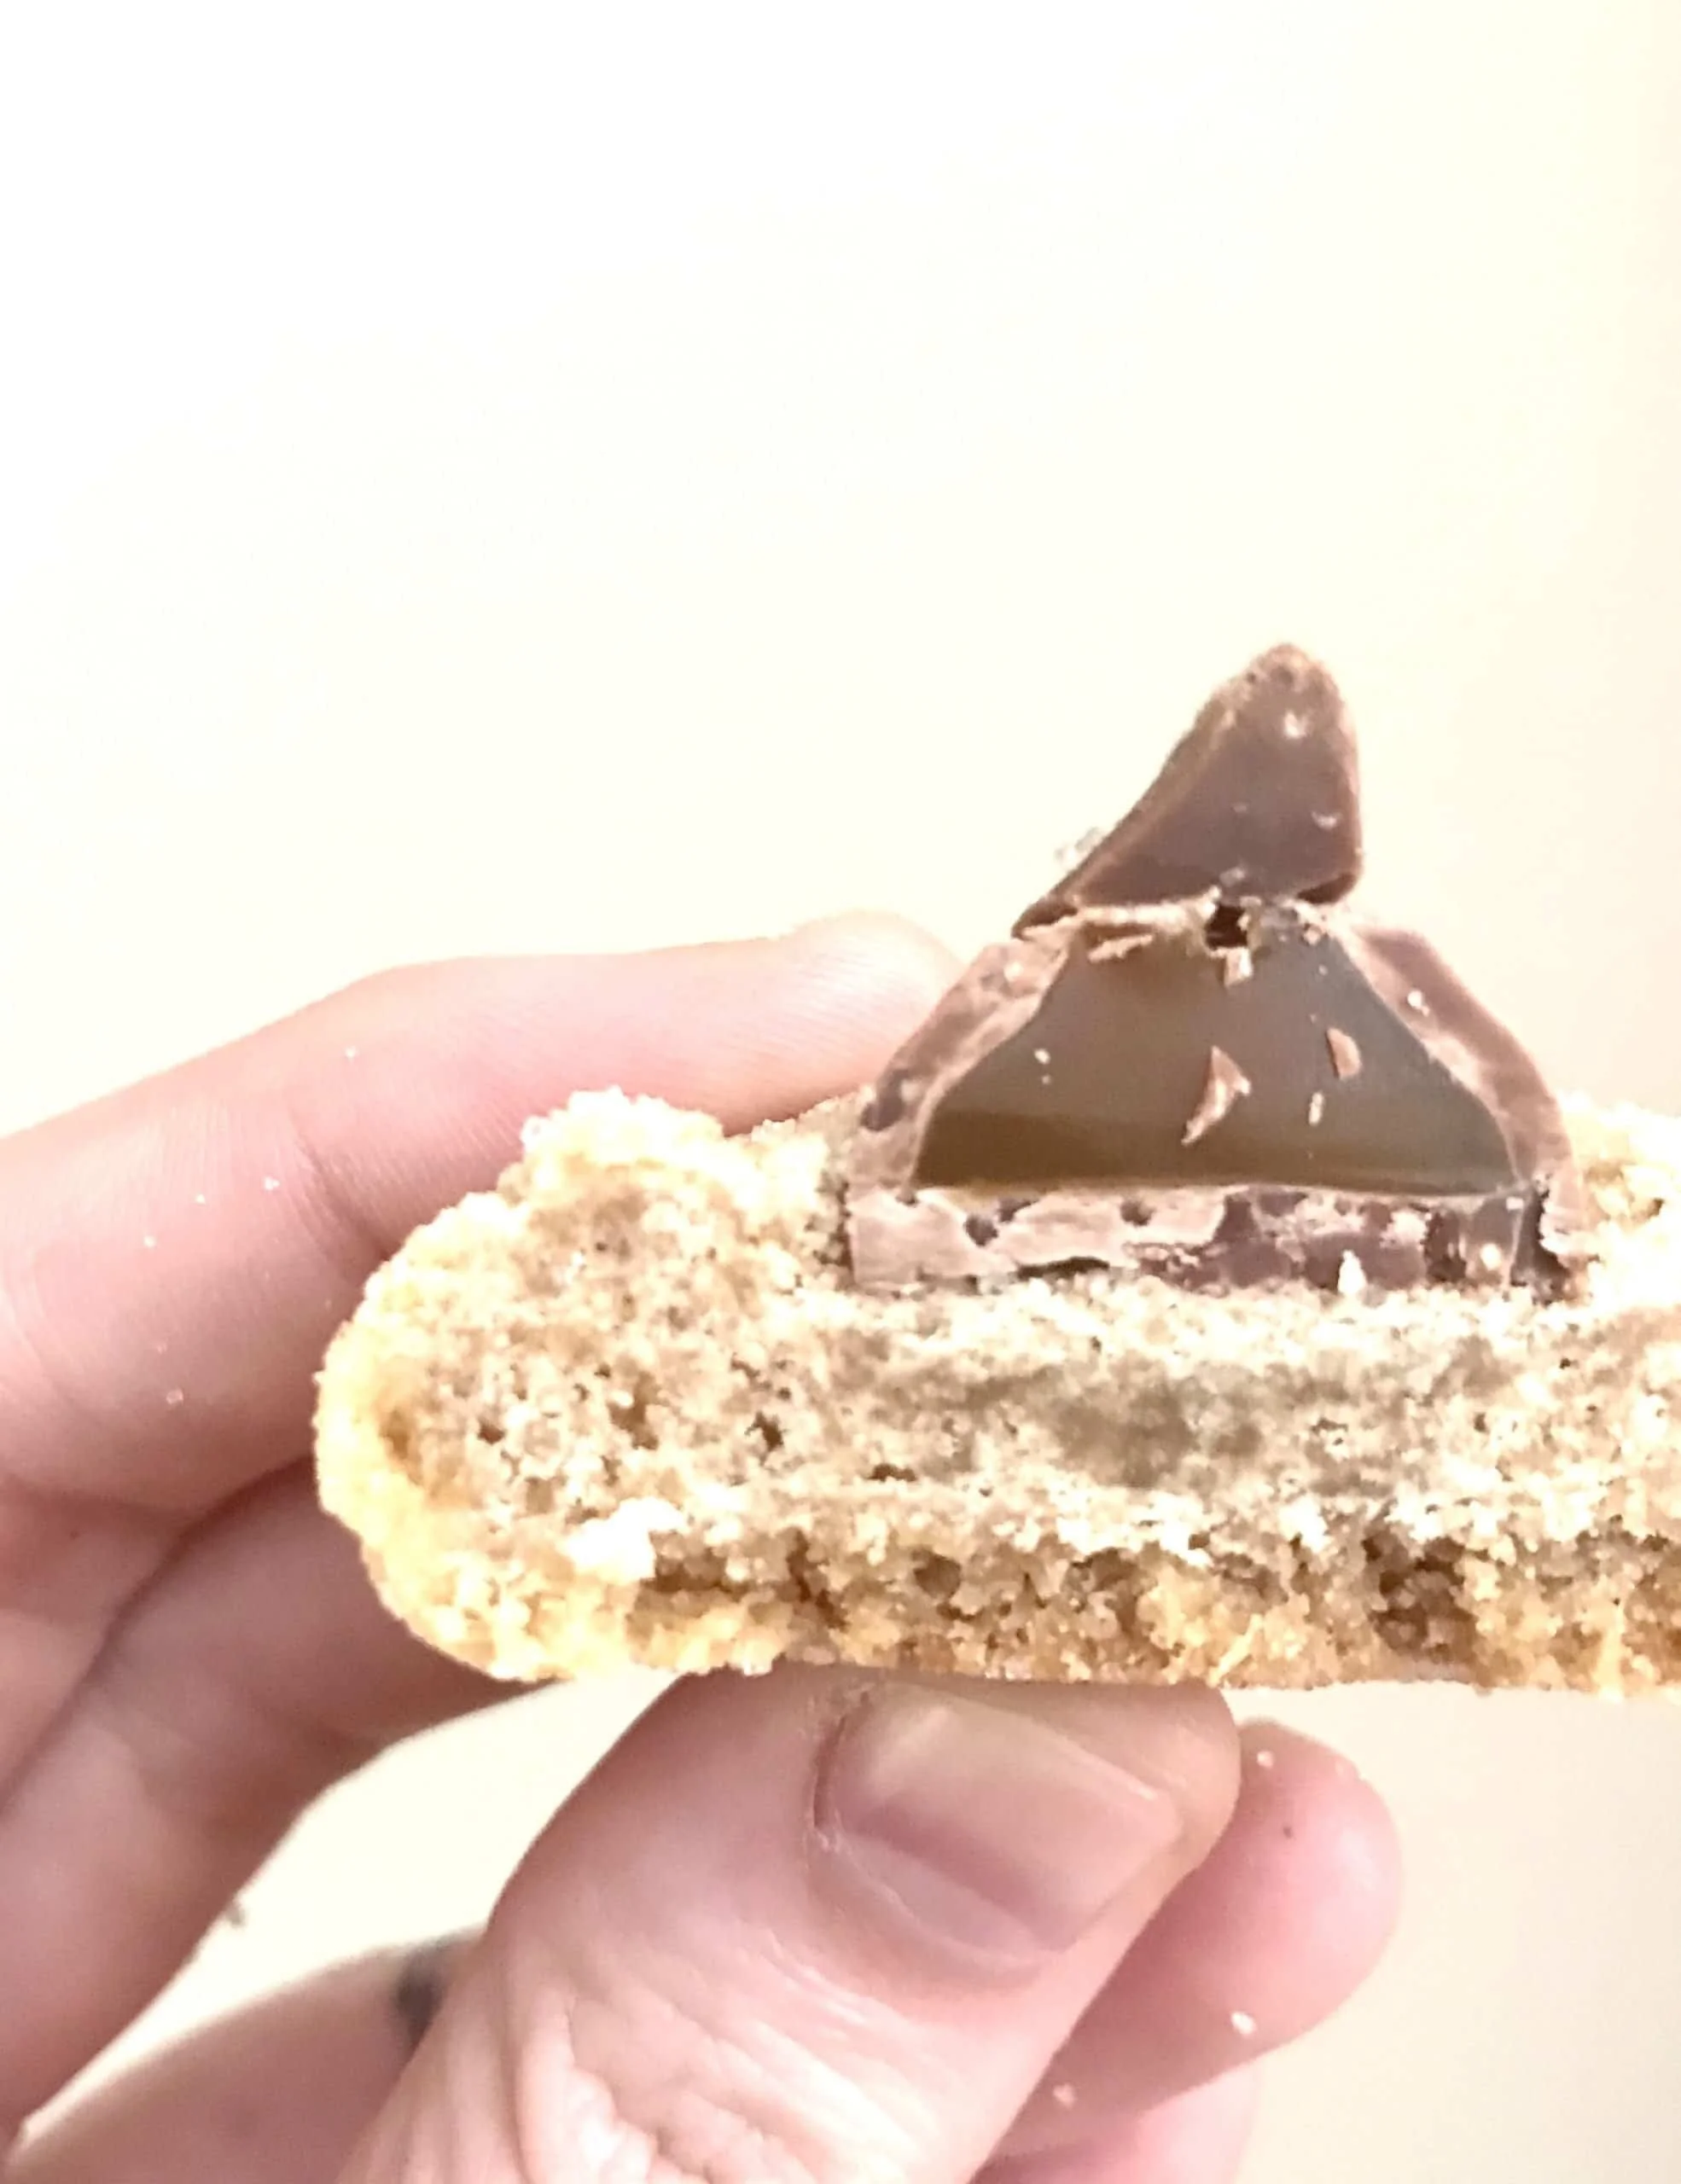
Peanut Butter Caramel Kiss Cookies

[wprm-recipe-jump]
A plate of delicious cookies that are typically requested from the family during the holidays. There's the basic peanut butter kiss cookies that I like to spice up a little bit. I like to use caramel kiss chocolates rather than the regular ones. And that creates the peanut butter caramel kiss cookies! It adds another dimension of texture and flavor to the cookies and they are absolutely, in my opinion, better this way.Have any of you ever switched up the chocolate kiss on these cookies before? What's your favorite one to use or do you prefer to keep it the classic, traditional way? There are so many different flavors of these chocolate kisses available out in stores that you can play around with! Let me know in the comments what you like to use!The other cookie in the photos is the gingersnap that is dipped in white chocolate which you can find the recipe for right here!
[mailerlite_form form_id=1]

Above are some products that I personally use and recommend for this recipe and to have for everyday use. One of my favorite things that I have many of are the BlueQ oven mitts. They aren't just really funny and a great statement piece for your kitchen, but they are great quality too!
___________________________________________________________________________
peanut butter caramel kiss cookies
tender peanut butter cookies topped with a caramel filled chocolate kiss
- 1 stick unsalted butter (room-temp)
- 1 cup creamy peanut butter
- 1/2 cup granulated sugar
- 1/3 cup brown sugar
- 2 eggs
- 1 tsp vanilla extract
- 1/2 tsp salt
- 1 1/2 tsp baking soda
- 2 cup all-purpose flour
- 1 bag caramel chocolate kisses
- granulated sugar for rolling
- preheat the oven to 350 degrees F. in the bowl of an electric mixer, cream the butter, peanut butter and sugars until fluffy, about 1 minute. scrape down the sides of the bowl and then add in the eggs and vanilla. continue mixing until combined and then scrape the bowl down again. add in the flour, baking soda and salt and mix until combined. roll out the cookie dough into a tablespoon sized ball and then roll in the granulated sugar. place on a lined sheet pan and bake for 8 minutes. remove from the oven and then add the caramel kisses to each cookie and bake for another 2-3 minutes. remove from the oven and let cool.


Frosted Sugar Cookies


[wprm-recipe-jump]
*This post contains affiliate links. Please read disclosure to learn more
busy busy busy!
This recipe is a few days too late, I've been so busy that I've been lacking on here. I'm trying to grow my business and brand so the past two months have been hectic. I've been working on making all kinds of yummy goodies and treats to sell at a local market (some of these things you can find on my etsy shop!). I'm having a lot of fun taking this next big step.It's a lot of hard work, sometimes it can be slow and bring you down. Other times people who come up to me and want to buy my treats makes my day. Especially when they admire the work I put into everything I made. It's very hard but so rewarding at the end of the day and I can't wait to continue down this path! Now for these cookies!
[mailerlite_form form_id=1]
 These frosted sugar cookies have a crispness to them. They are snappy sugar cookies, which I know some people would prefer to have a soft sugar cookie which you can find in my favorite cookie recipe here! The buttercream that I frosted these cookies with makes the cookies though. It helps to soften the cookies with the fluffy sweetness of the buttercream soaks into the cookies to make them a little softer.
Above are some products that I personally use and recommend for this recipe and to have for everyday use. When I made these cookies I was at my parent's house, so I didn't have any baking tools at all! I had to be creative and buy a minimal amount of tools that I knew I would need from Michael's. Just a simple small round tip to pipe out the details is all you need. Having a collection of tips on hand for creating all kinds of swoops, swirls and boarders.
________________________________________________________________________
frosted sugar cookies
crisp sugar cookies with buttercream that helps soften it and makes it sugary sweet.
cookies
- 2 sticks unsalted butter
- 1 1/2 cup granulated sugar
- 1 egg
- 1/3 cup sour cream
- 2 tsp vanilla extract
- 1/2 tsp almond extract
- 2 tbsp cornstarch
- 1 tsp baking powder
- 1/2 tsp salt
- 3 1/4 cup all-purpose flour
buttercream
- 3 sticks salted butter
- 4 cup powdered sugar
- 2 tsp vanilla extract
- 1-3 tbsp heavy cream
cookies
- preheat the oven to 350 degrees F. line a pan with parchment paper. in the bowl of an electric mixer fitted with a paddle attachment cream the sugar and the butter until light and fluffy, about 1 minute. scrape down the side of the bowl and then add in the egg, vanilla and sour cream. in another bowl combine the flour, cornstarch, baking powder, and salt and whisk together. scrape down the sides of the bowl then on low speed, gradually add in the dry ingredients. wrap the dough into cling-wrap and refrigerate for 30 minutes. roll to 1/4 inch thickness and cut out with desired shapes and bake for 8-10 minutes.
buttercream
- put all of the ingredients into the bowl of an electric mixer fitted with a whisk attachment. start slow and then gradually increase the speed. whip on high until light and fluffy, about 3 minutes.


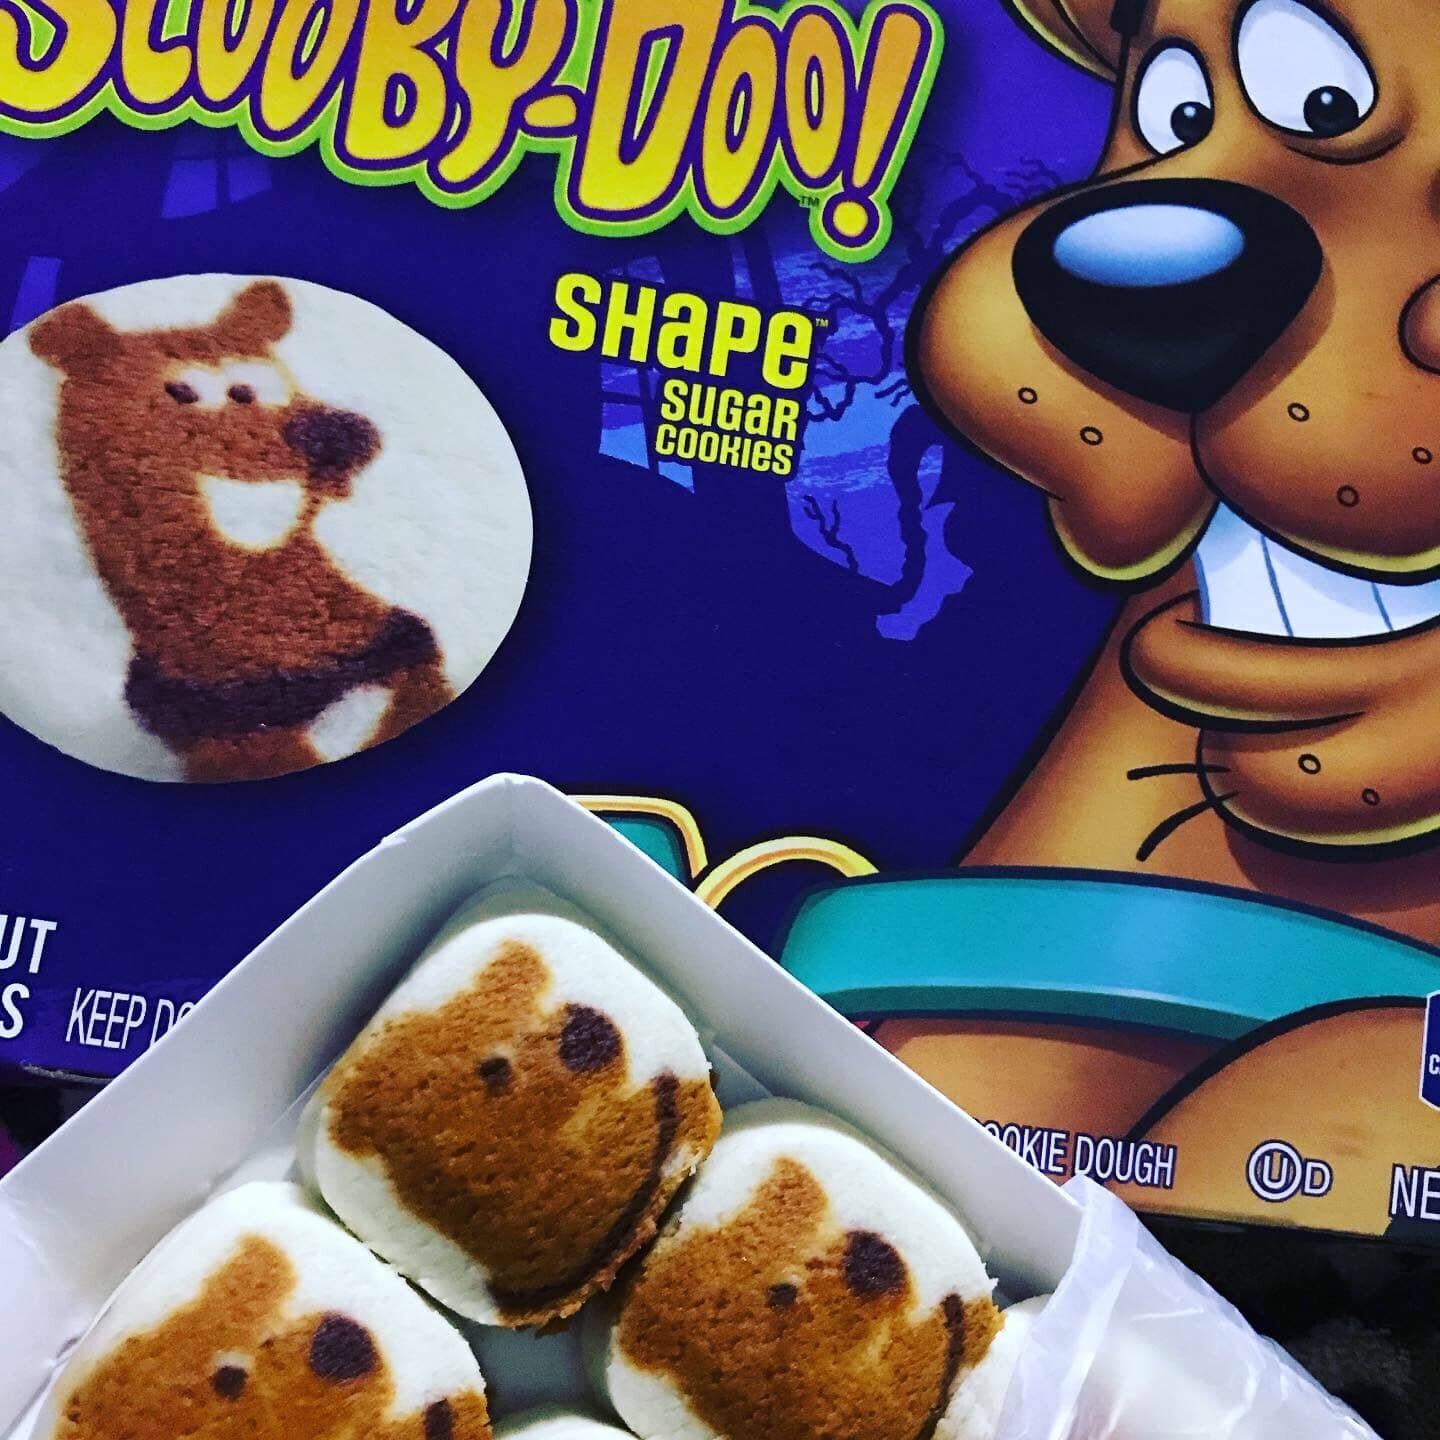
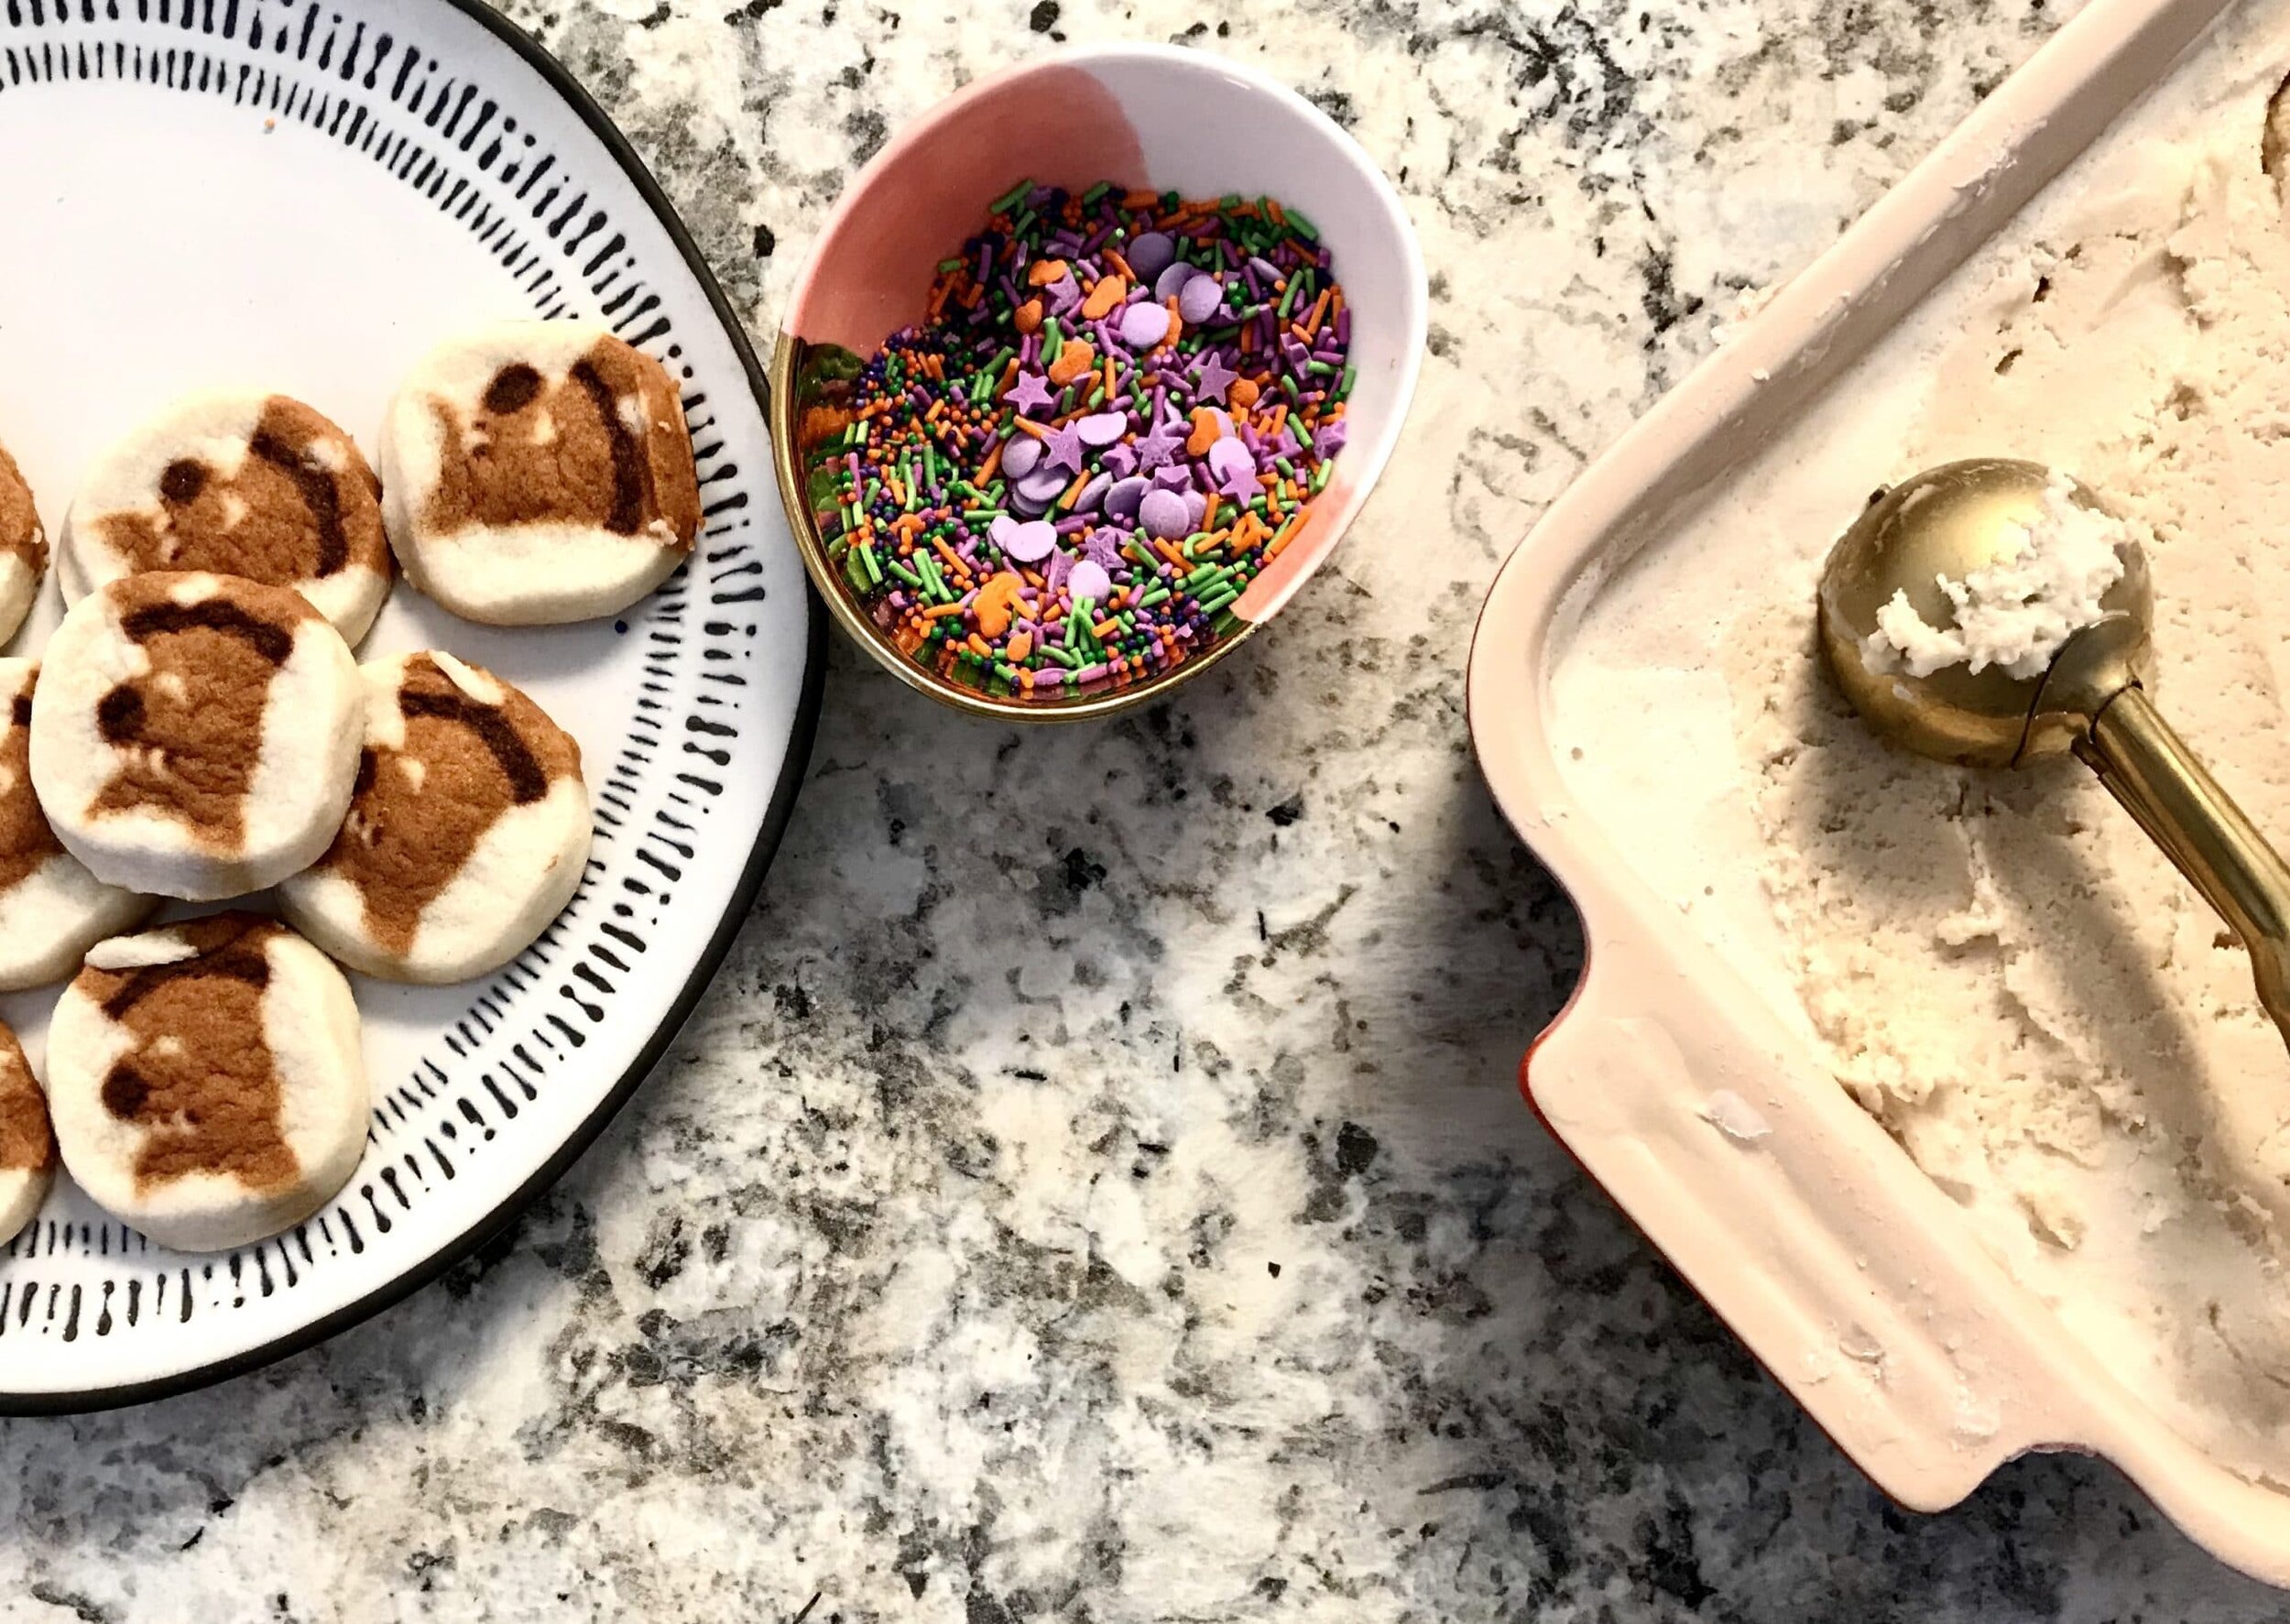
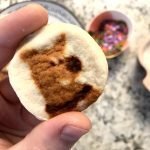
Scooby Doo Cinnamon Ice Cream Sandwiches


[wprm-recipe-jump]
*Disclaimer: This post contains affiliate links. To learn more, please go here.I was visiting a friend in Texas a couple of weeks ago to go and get pancak. We went to the grocery store to buy a bunch of junk to stuff our faces with. These scooby doo sugar cookies was one of the things that I got and i'm so in love with them! I just had to make something with these cookies and I thought a fun ice cream sandwich would be perfect! These guys are filled with a simple cinnamon ice cream that's not too sweet and not too spicy.I found it a bit difficult to find these cookies when I got back to Nashville and couldn't find them at either walmart or target. But I did find it at kroger! So if you have a kroger in your town, then that is the most likely place you will be able to find these cookies. Otherwise any other kind of sugar cookie works too!When I thought of what kind of ice cream would fit perfectly with these cookies, I thought of cinnamon. Cinnamon ice cream was the perfect choice for this sandwich, and it isn't intense or overly sweet either. But that doesn't mean you have to use cinnamon if you don't want to.
[mailerlite_form form_id=1]

Above are some products that I personally use and recommend for this recipe and to have for everyday use. I highly recommend starting off with the cuisinart ice cream machine as your first ice cream maker. It's the cheapest one on amazon and I personally use it and love it! I also suggest getting a reusable ice cream container as well, it's dishwasher safe and you can use it over and over again!
___________________________________________________________________________
scooby doo cinnamon ice cream sandwiches
a cute scooby doo store bought cookie sandwiched with a cinnamon ice cream
- 2 packs scooby sugar cookies (i got mine from kroger)
- sprinkles (for the sides of the sandwich)
- 1 1/2 cup milk
- 1 1/2 cup heavy cream
- 3/4 cup brown sugar
- 1/2 tsp cinnamon
- 1 tbsp vanilla extract
- place all of the ingredients into a pot and bring to a boil, whisking to make sure the sugar dissolves. place the ice cream base into the fridge overnight to cool and to let the flavor increase. following the manufacturer's instructions of your ice cream machine, turn the base for 20-25 minutes. place the ice cream into a freezer safe container and freeze overnight to firm up.
assembly
- take a small ice cream scoop and take a little bit of the cinnamon ice cream and place onto one of the cookies. take another cookie and carefully sandwich them together. roll the sides of the ice cream sandwich in sprinkles. freeze until ready to serve.

Alien French Macarons
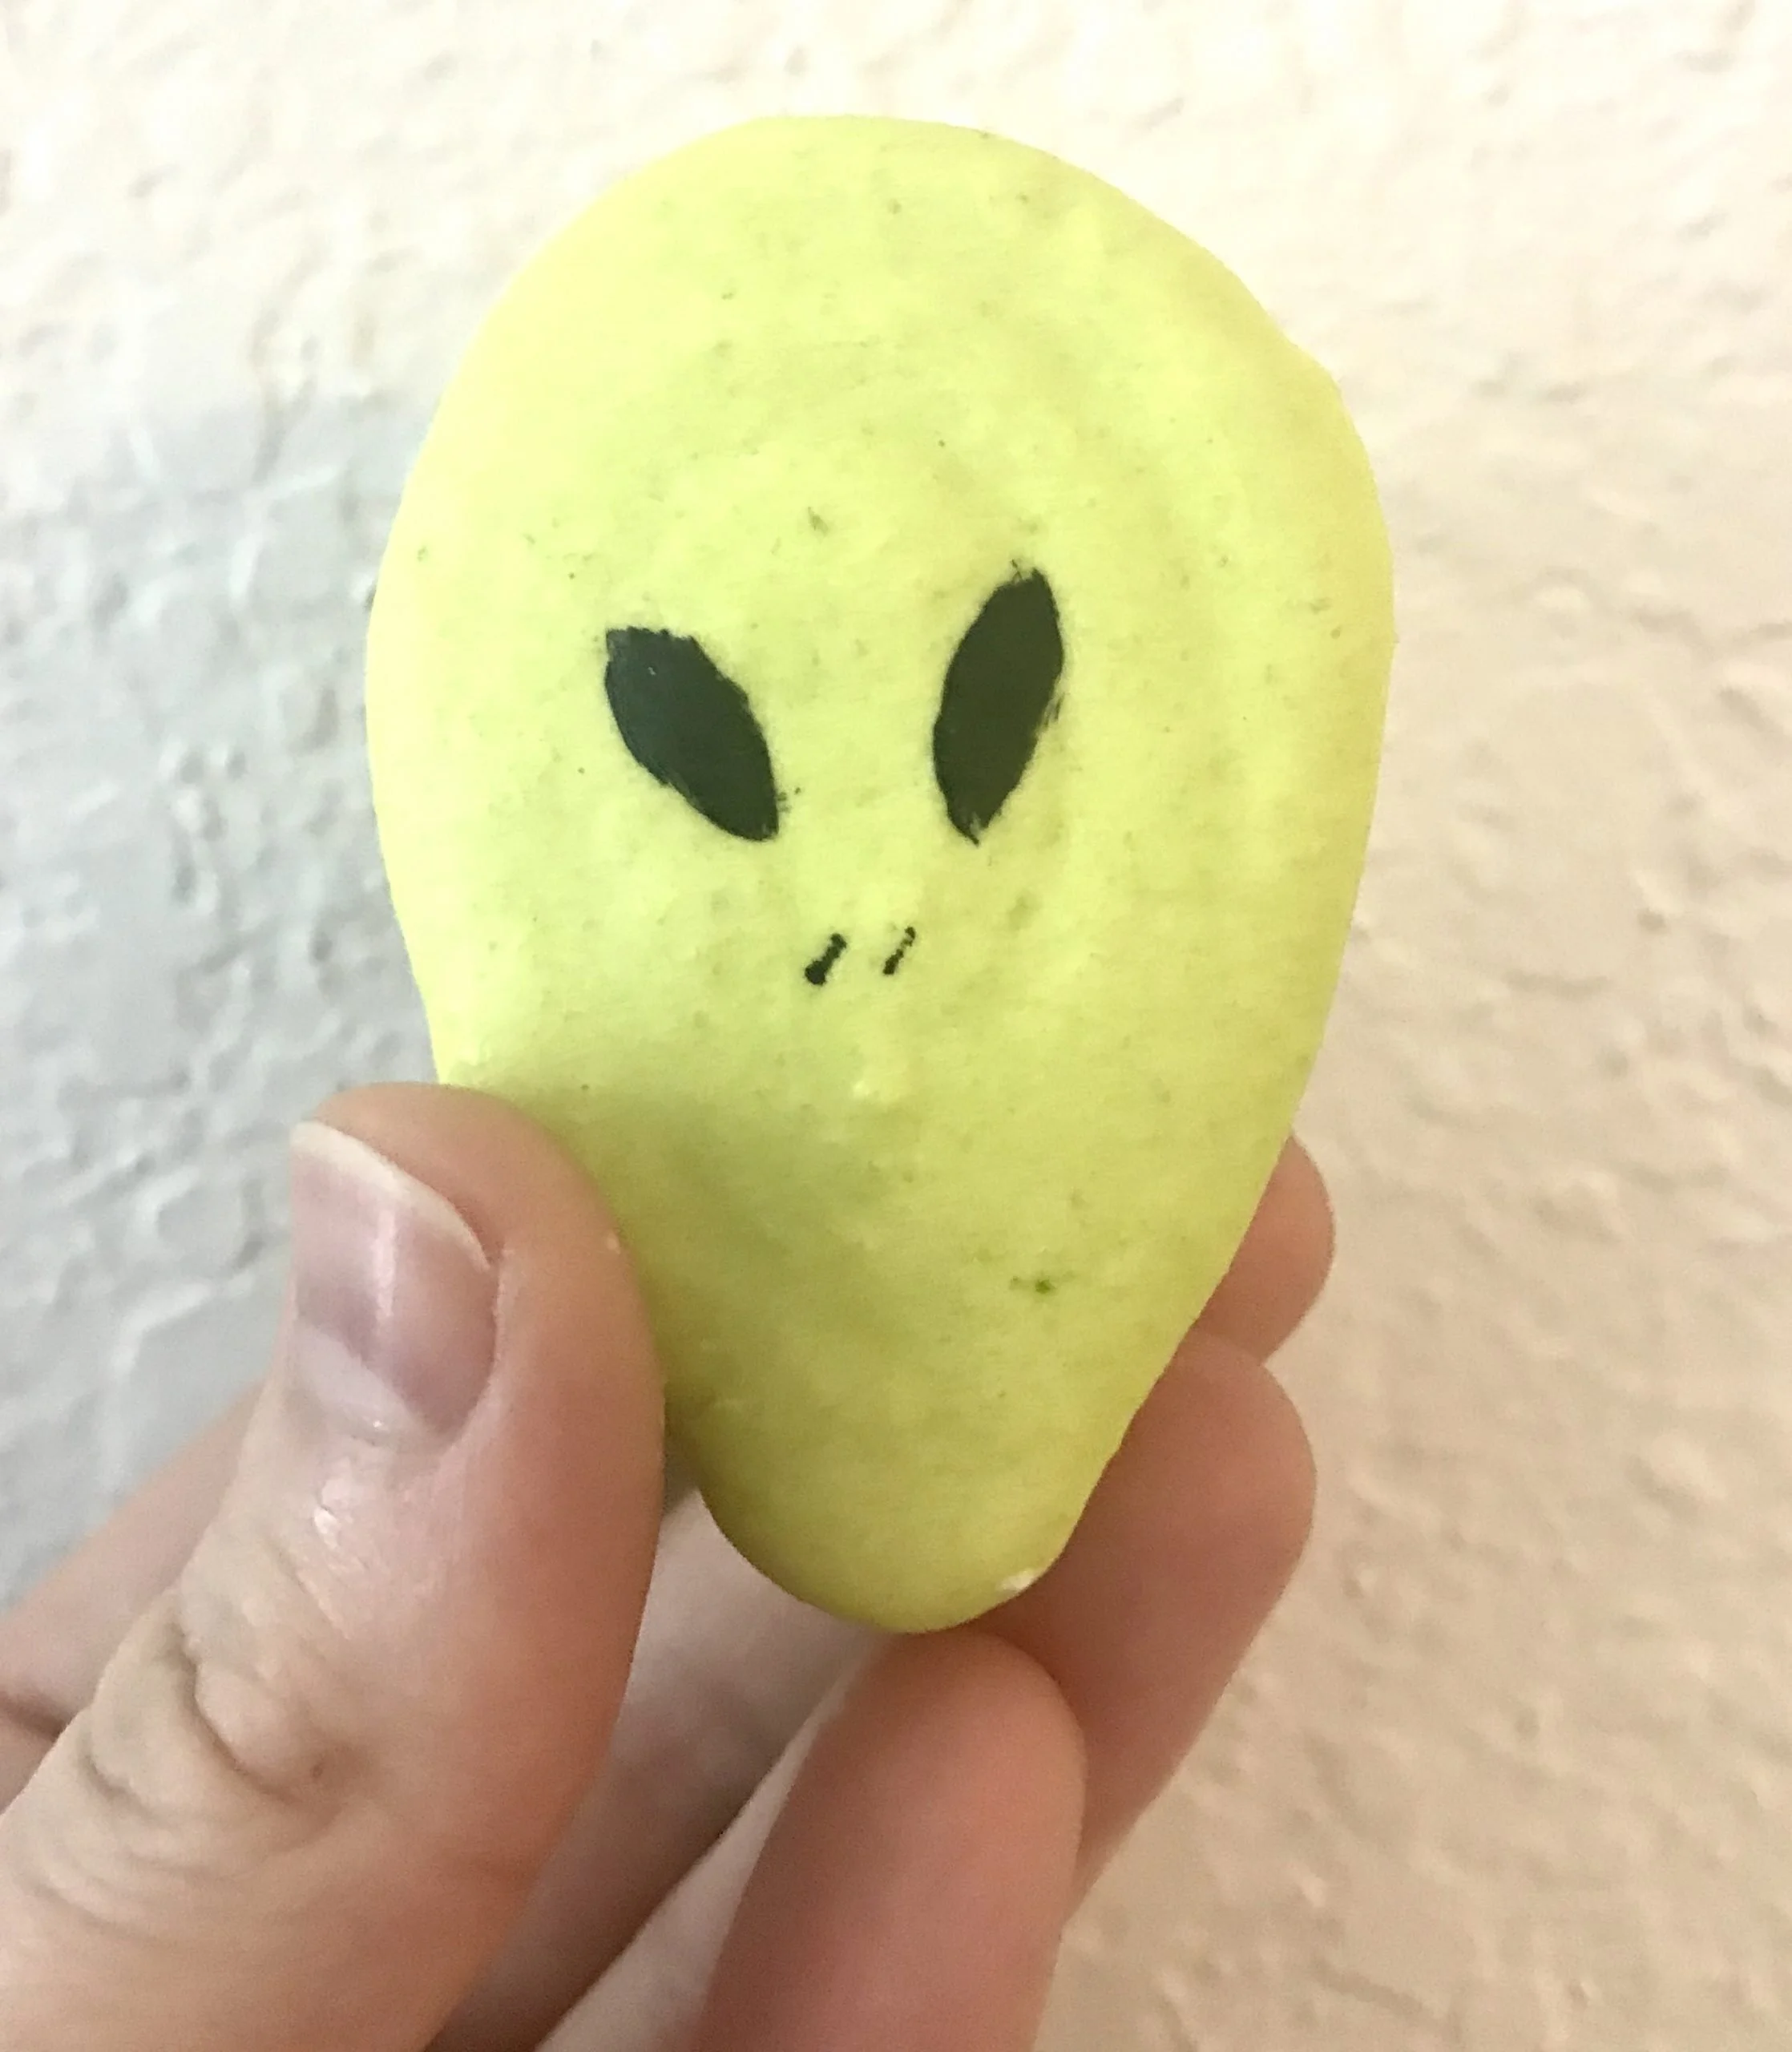
 *This post contains affiliate links. Please read disclosure to learn moreJust a real quick and basic alien french macarons. Cute little alien faces that are sandwiched with lime buttercream. they're so cute for halloween and they are delicious too. It's not necessary to make them into little aliens if you don't want to or to even use lime buttercream either. You can make them into a basic french macaron or even try and make your own design!Just know that making french macarons can be temperamental. They don't like humidity and you have to whip the egg whites just right. Another important part is to make sure that you let the batter dry before baking. This is a crucial step! If you don't follow it than the macarons will end up as pancakes.
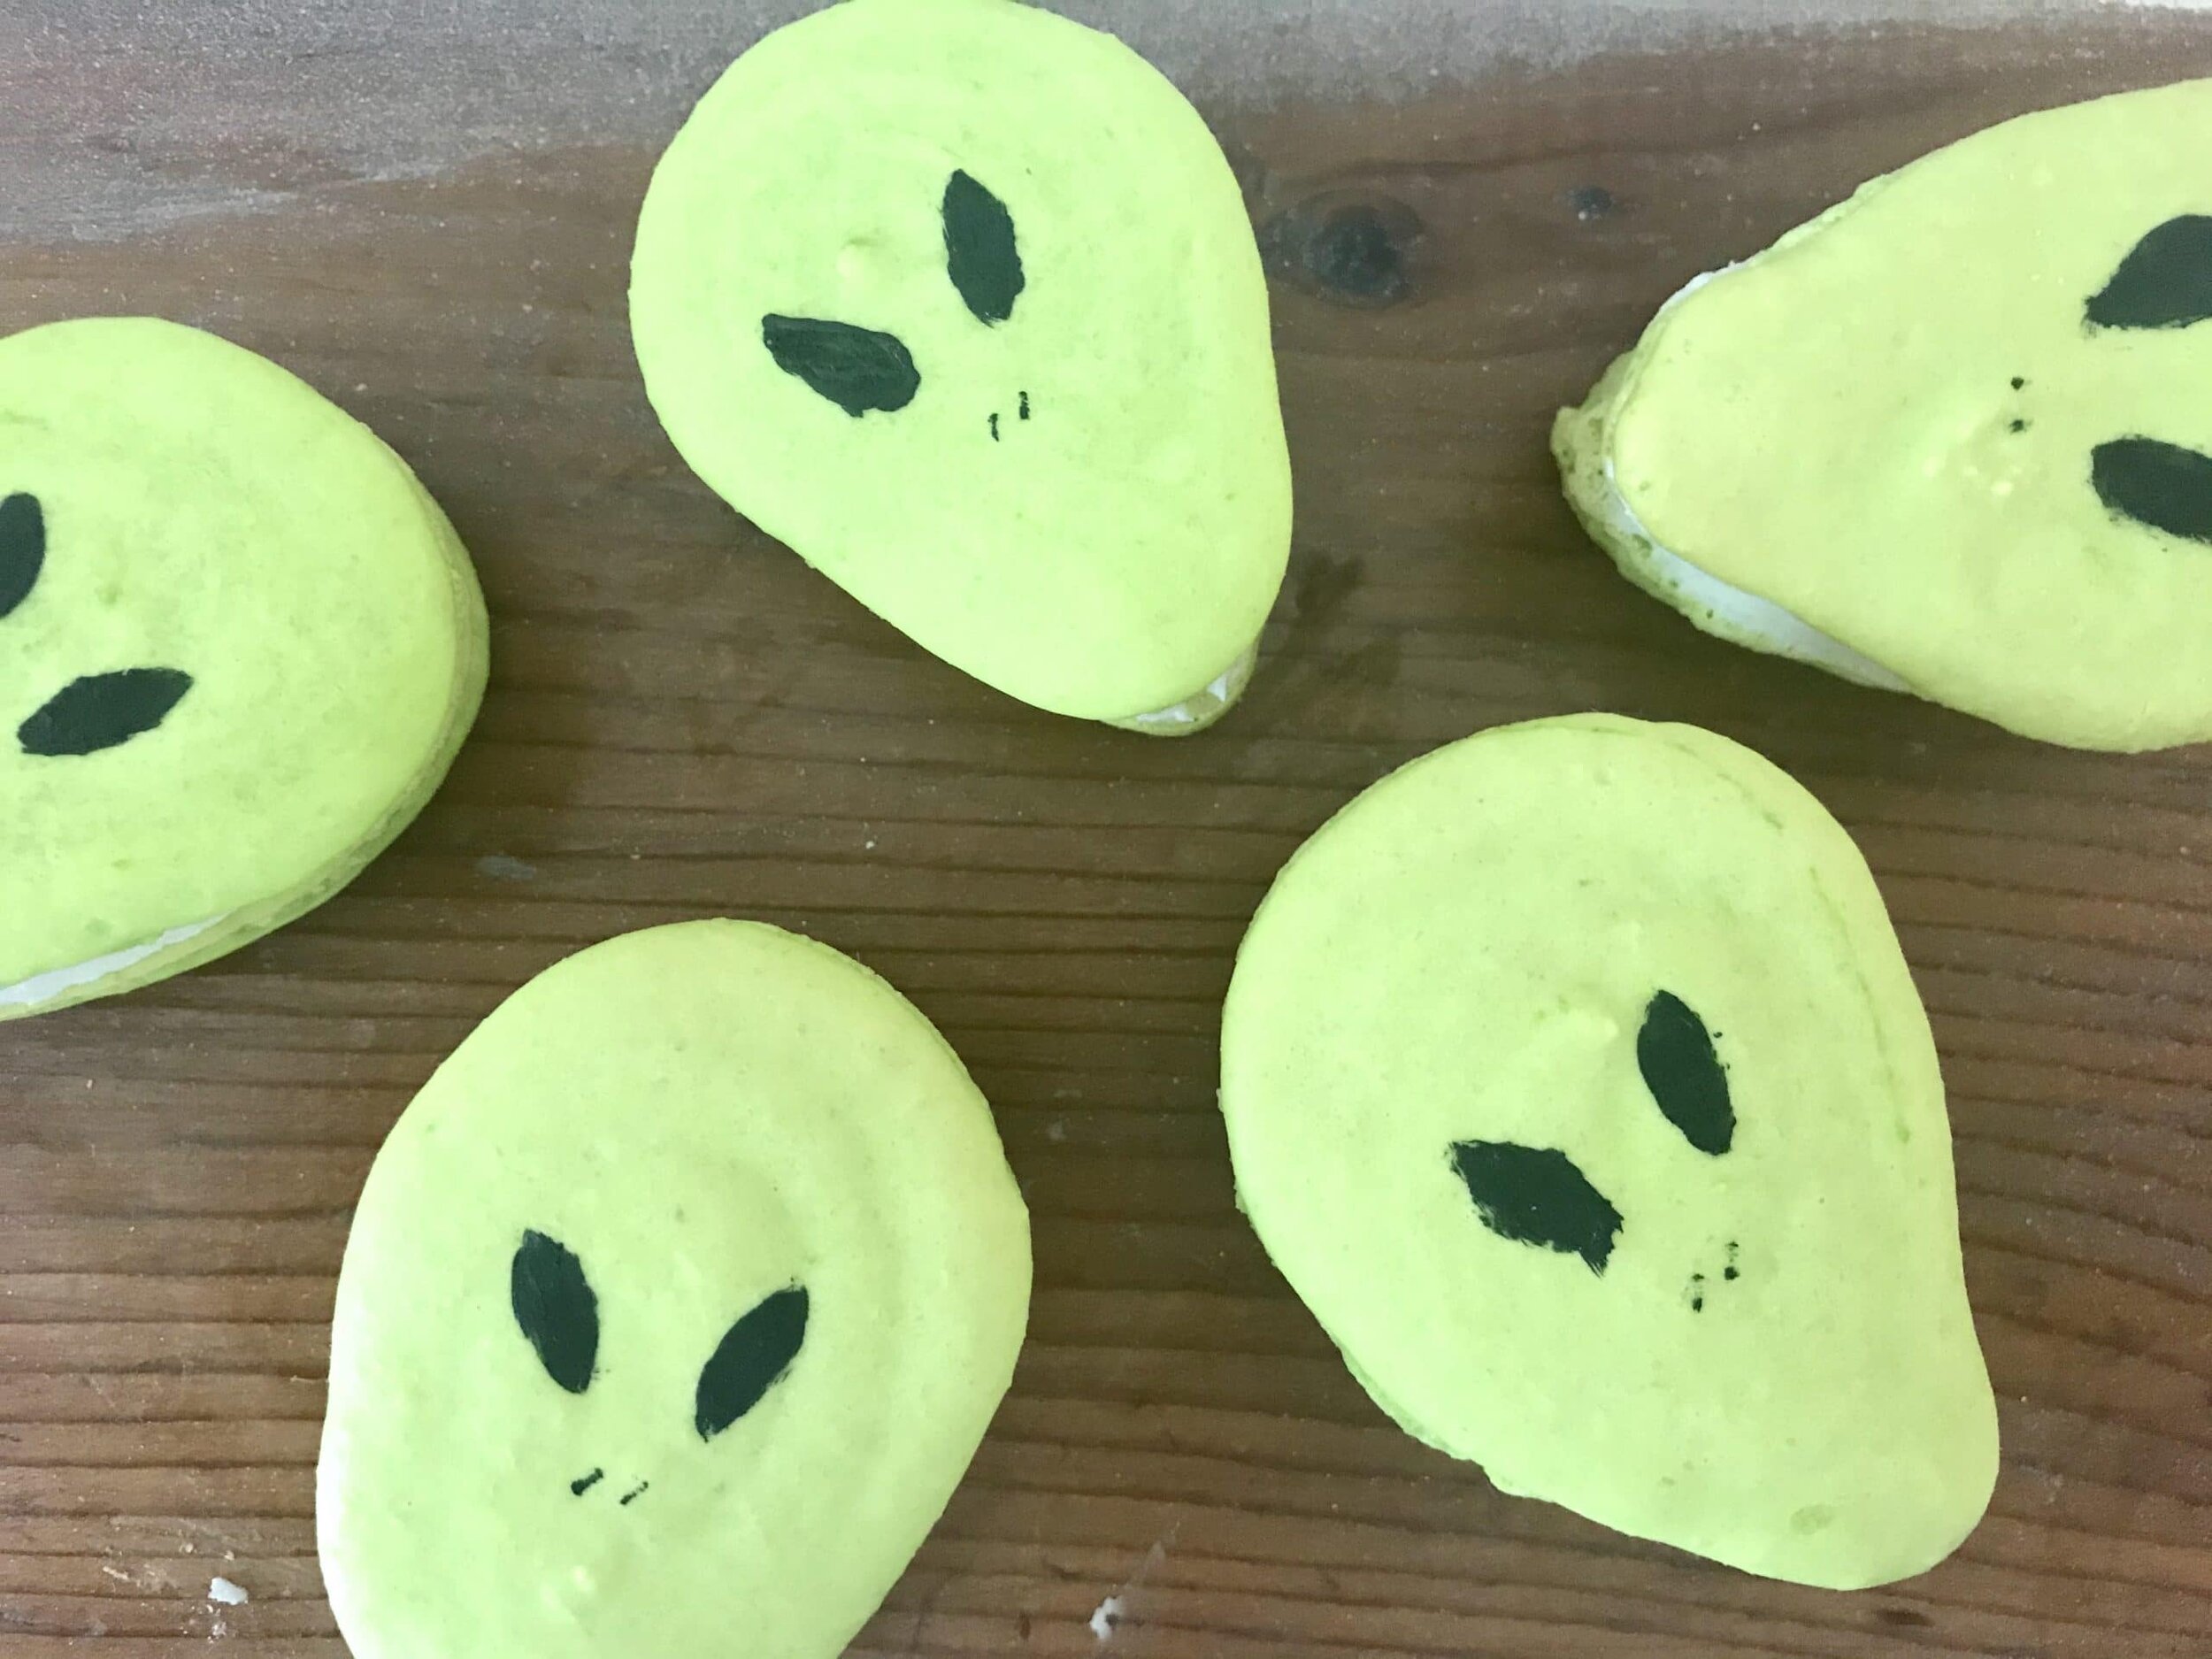
[mailerlite_form form_id=1]
Above are some products that I personally use and recommend for this recipe and to have for everyday use. One thing that I highly suggest getting when making french macarons is a silpat. A silpat is a reusable parchment paper and it's such a great investment. I find it easier to use a silpat versus parchment paper when making french macarons because it doesn't move around but it also makes it easier to remove the cookies too.
_____________________________________________________________
alien french macarons

delicious french macaron cookies sandwiched with a lime buttercream that look like cute little aliens
french macarons
- 3/4 cup almond flour
- 1 1/2 cup powdered sugar
- 3 fresh egg whites
- 1/3 cup granulated sugar
- pinch cream of tartar
- food coloring
buttercream
- 1 stick salted butter
- 2 cup powdered sugar
- 1/4 tsp vanilla extract
- 1 tsp lime zest
- 1-2 tbsp lime juice
french macarons
- preheat the oven to 300 degrees F. whip the egg whites and cream of tartar until foamy and gradually add in the granulated sugar. whip until stiff peaks form then add in the food coloring. in a large bowl, sift together the almond flour and powdered sugar. gradually fold the egg whites into the dry ingredients. put the batter into a piping bag and pipe onto a sheet pan that is lined with a silpat into the shape of a teardrop (parchment works fine). bang the pan really good on the counter to release any air bubbles and then let the macarons sit to dry, about 30 minutes, or until it doesn't stick to your finger. you can test by lightly patting the tops, if it sticks then let it sit a little longer. once dry, bake for 16-20 minutes or until the bottoms of the macarons don't stick and come off the silpat clean. paint alien faces on with black food gel.
buttercream
- place all of the ingredients into a bowl of an electric mixer fitted with a whisk attachment and whip until light and fluffy, about 2 minutes.

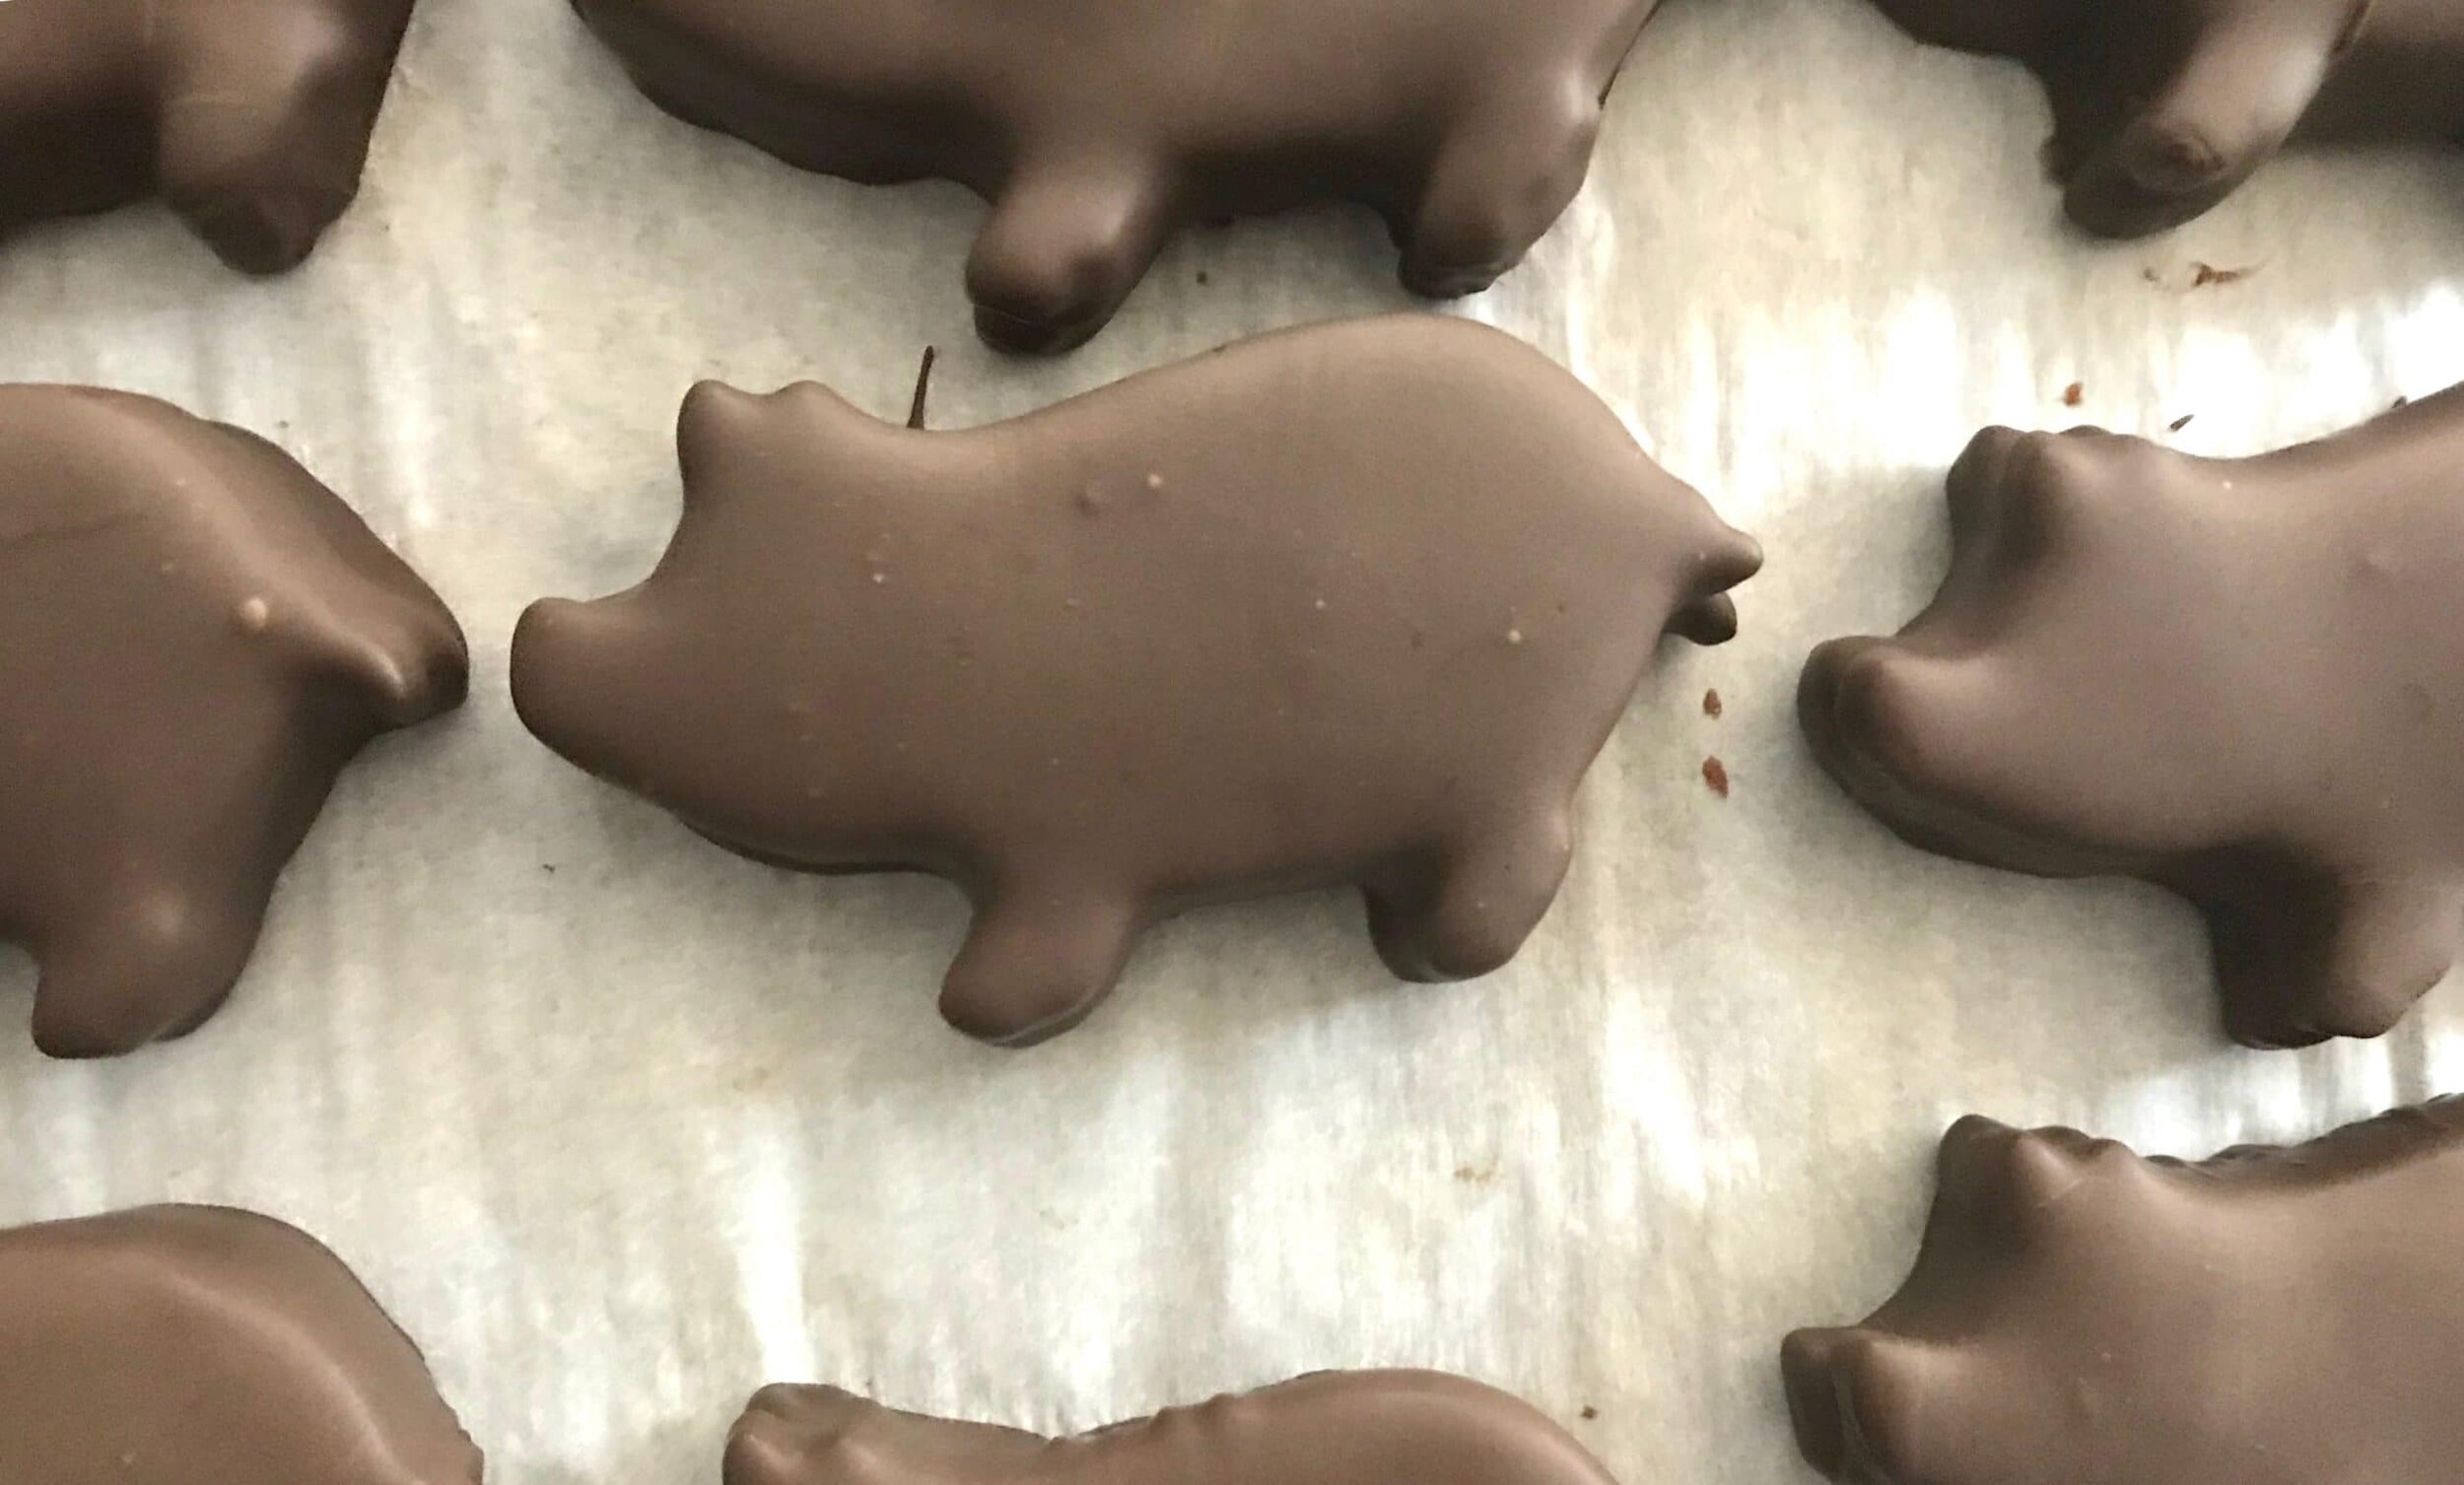
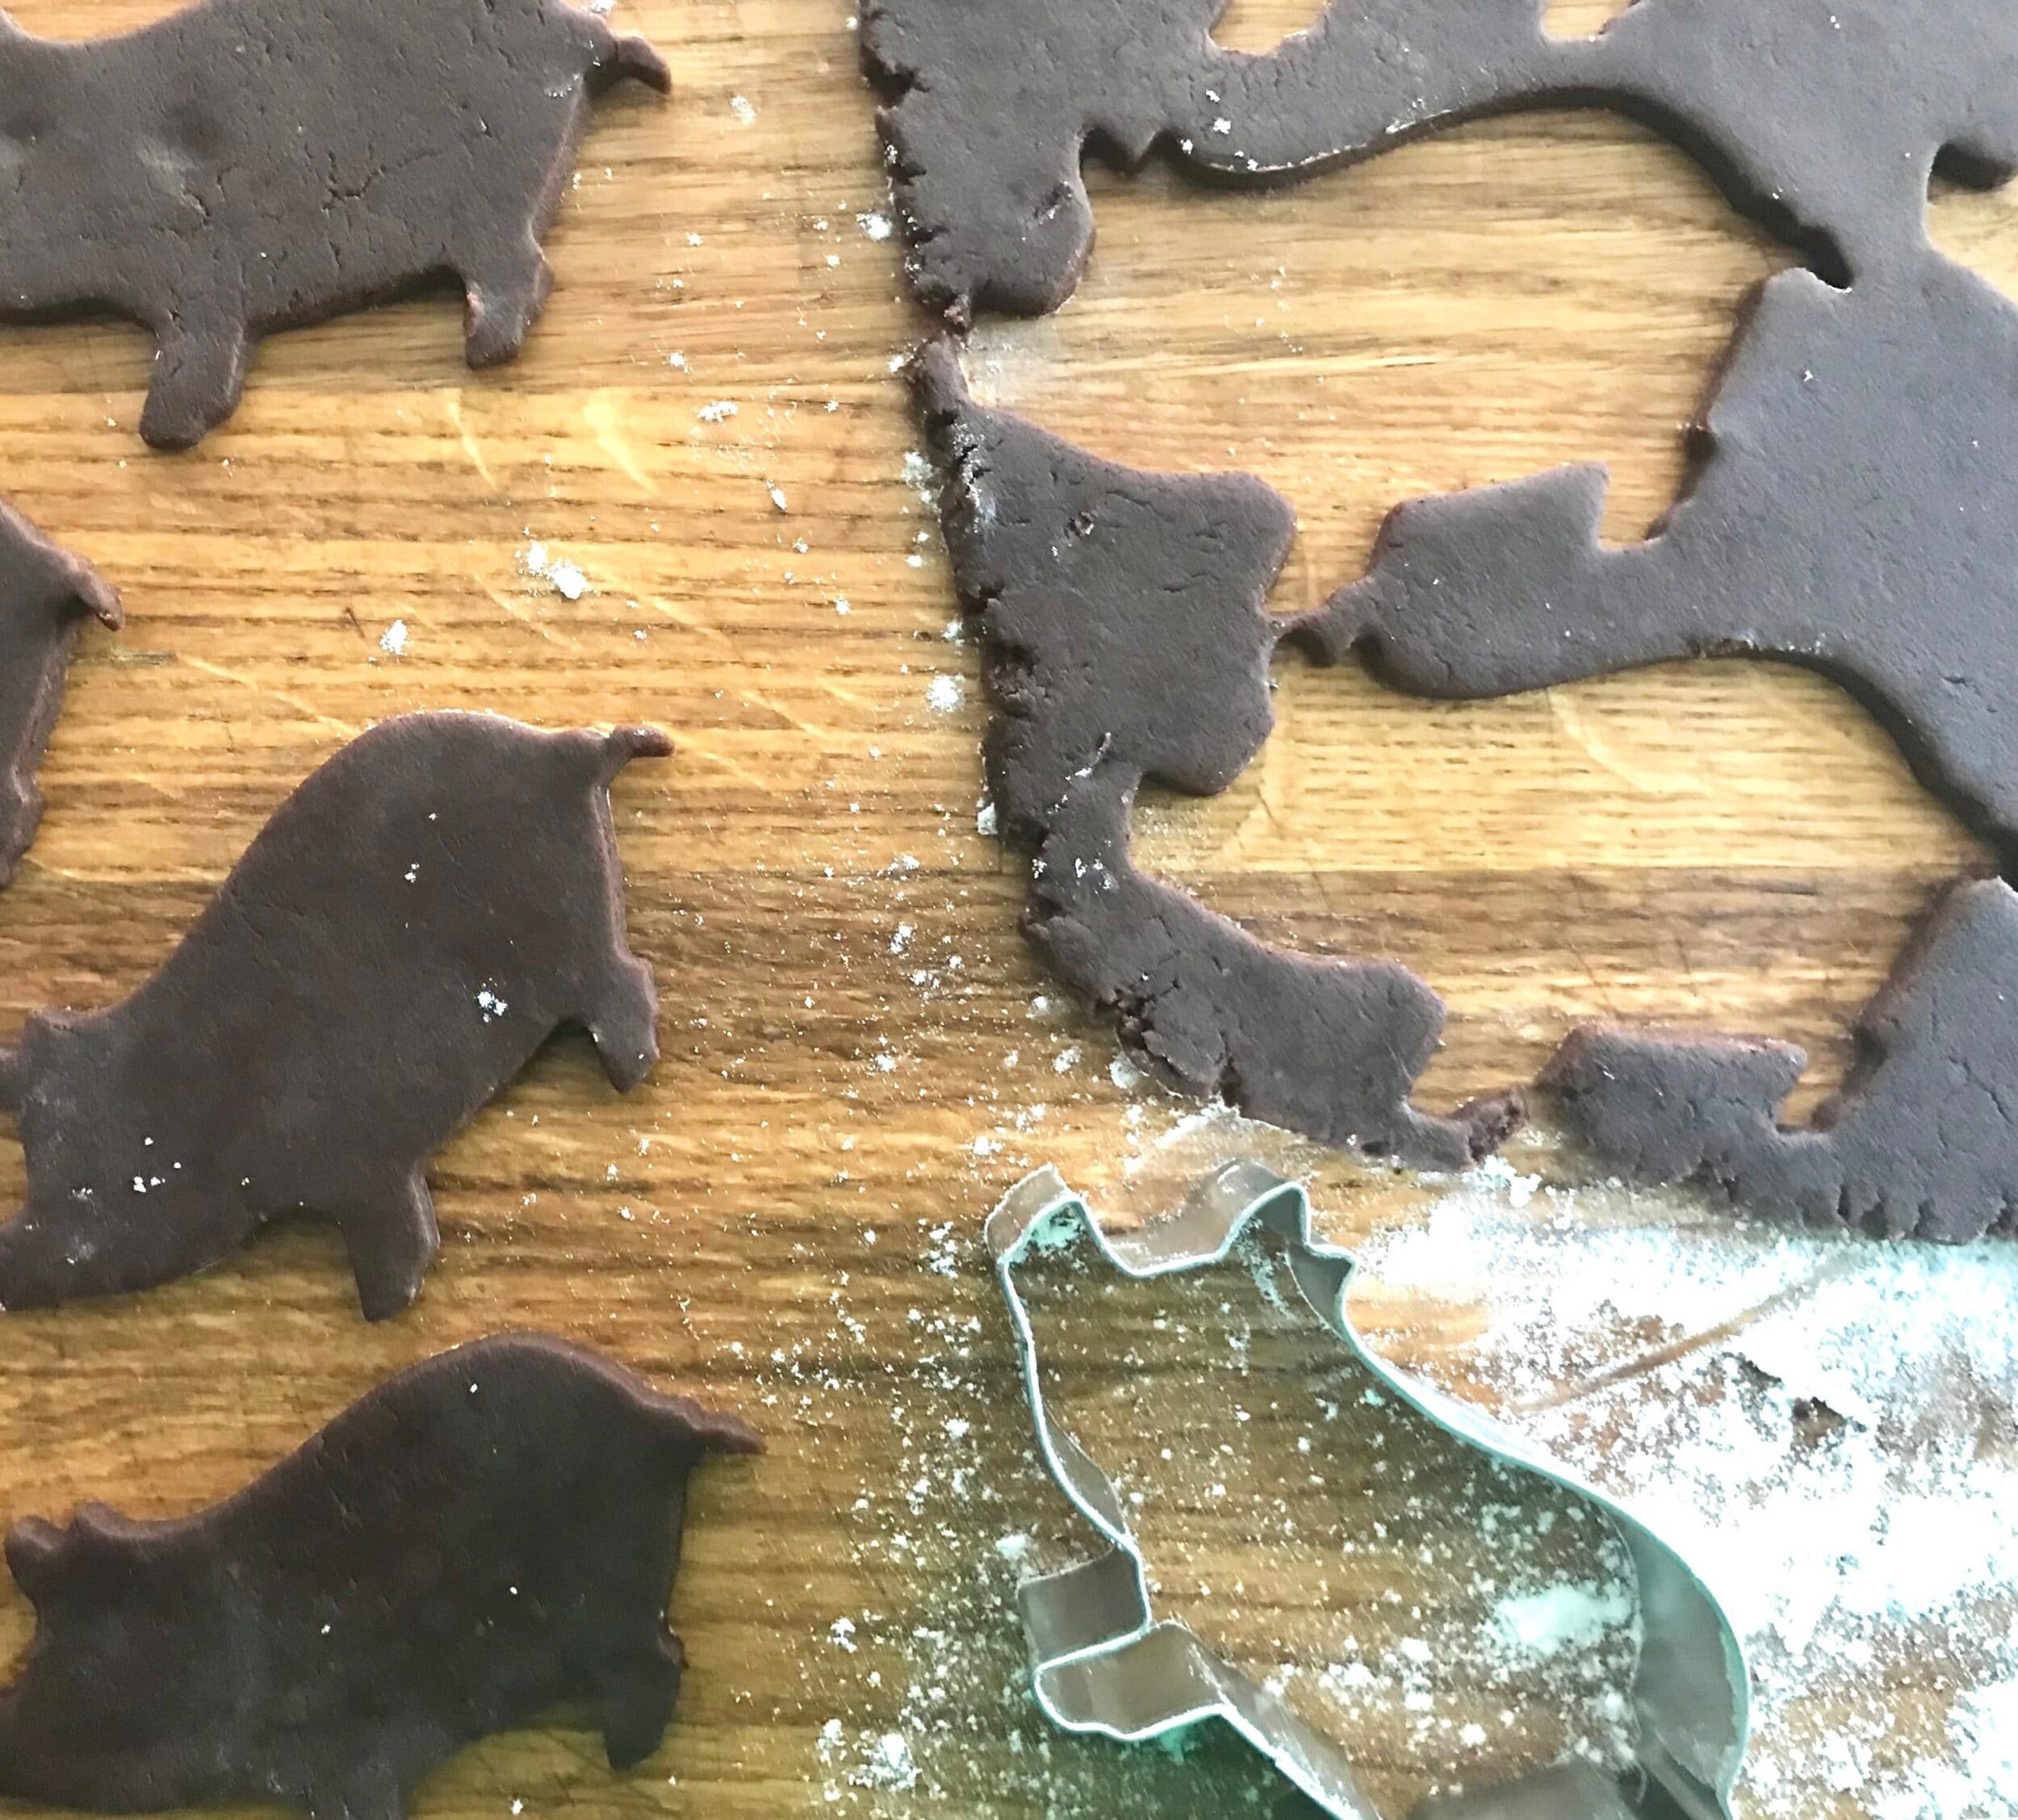
Chocolate Sandwich Cookies


[wprm-recipe-jump]
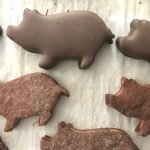
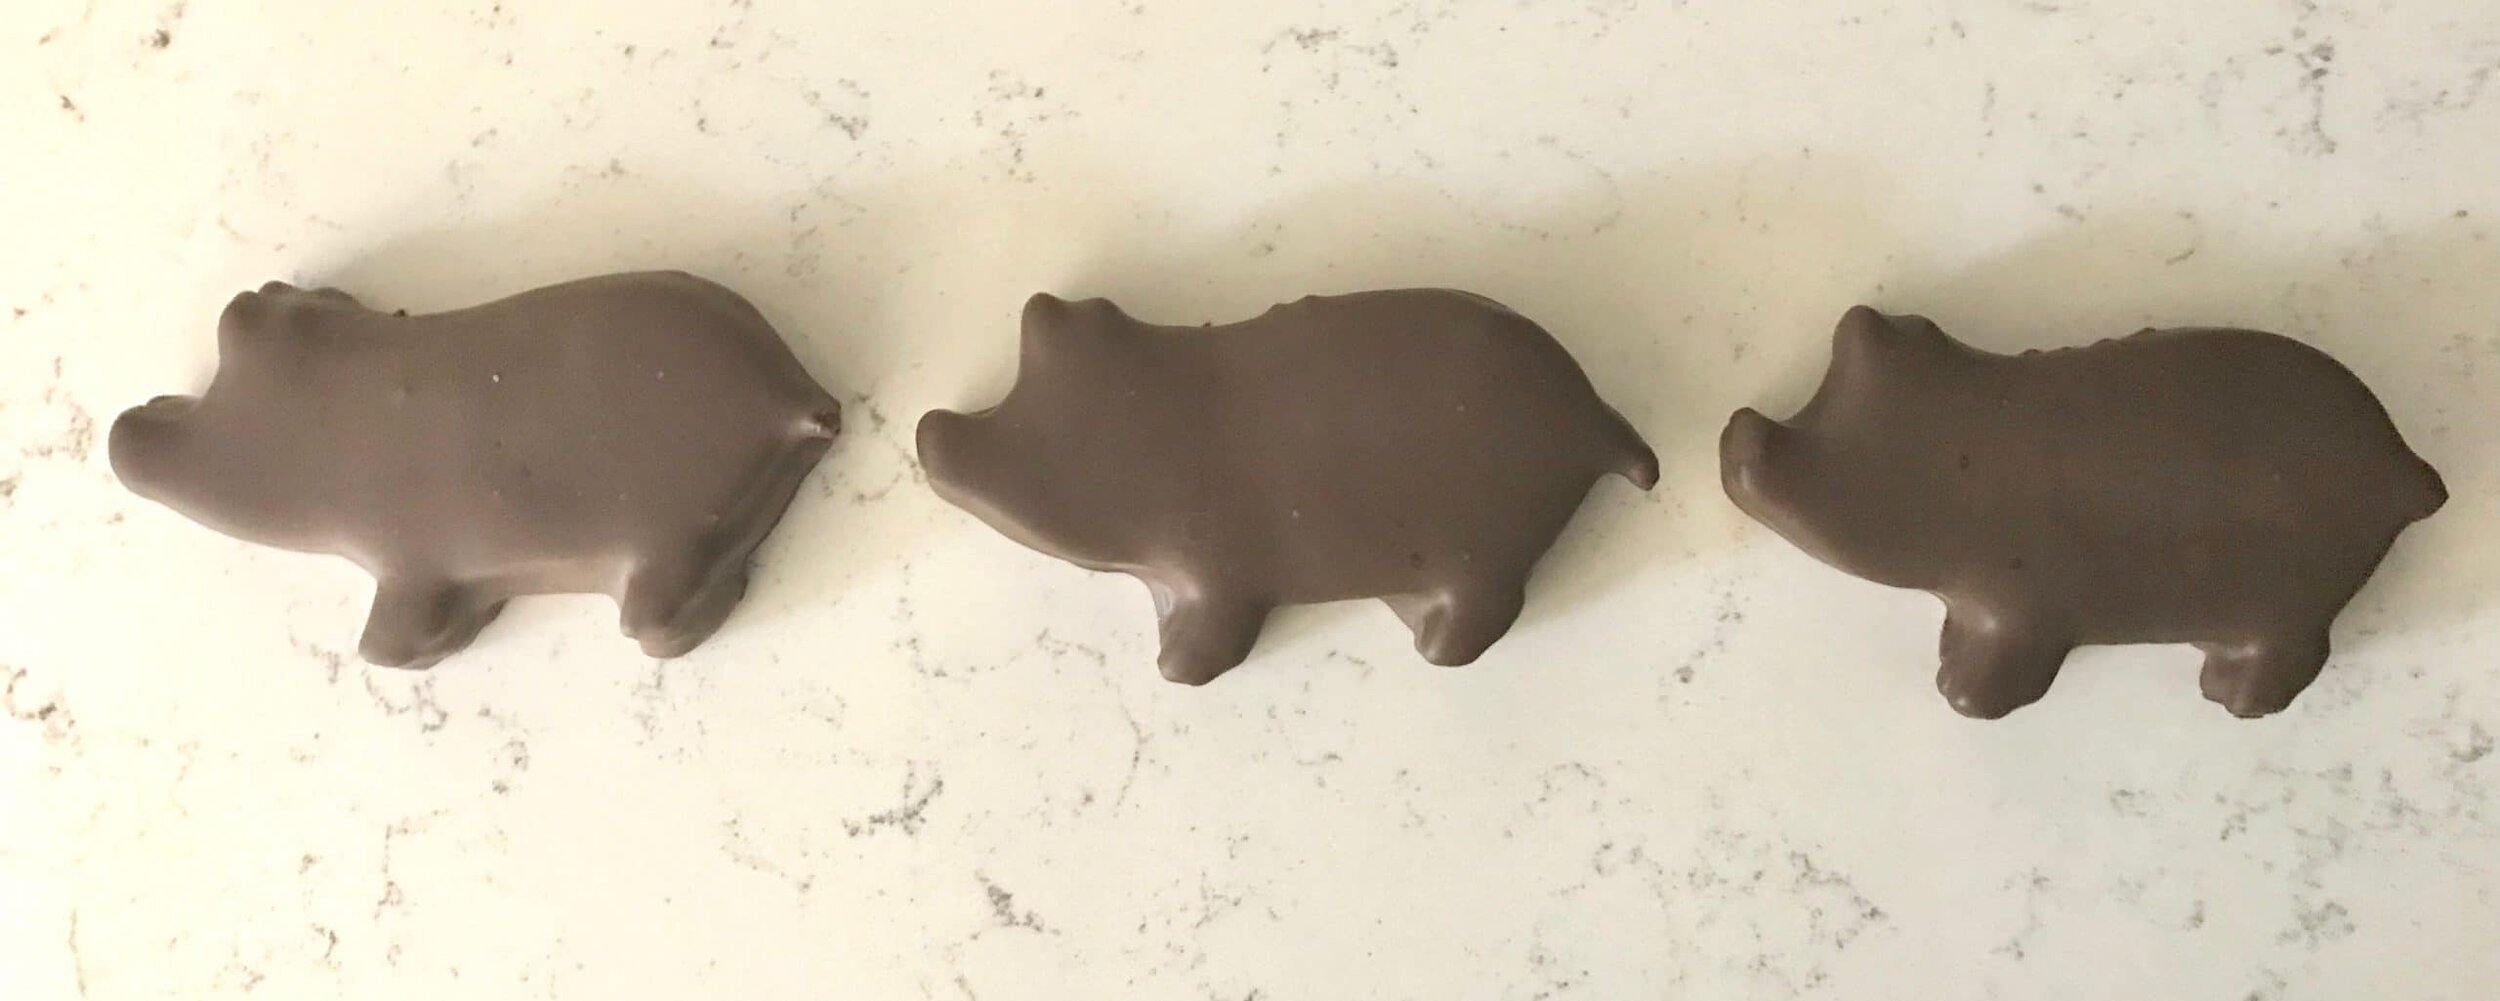
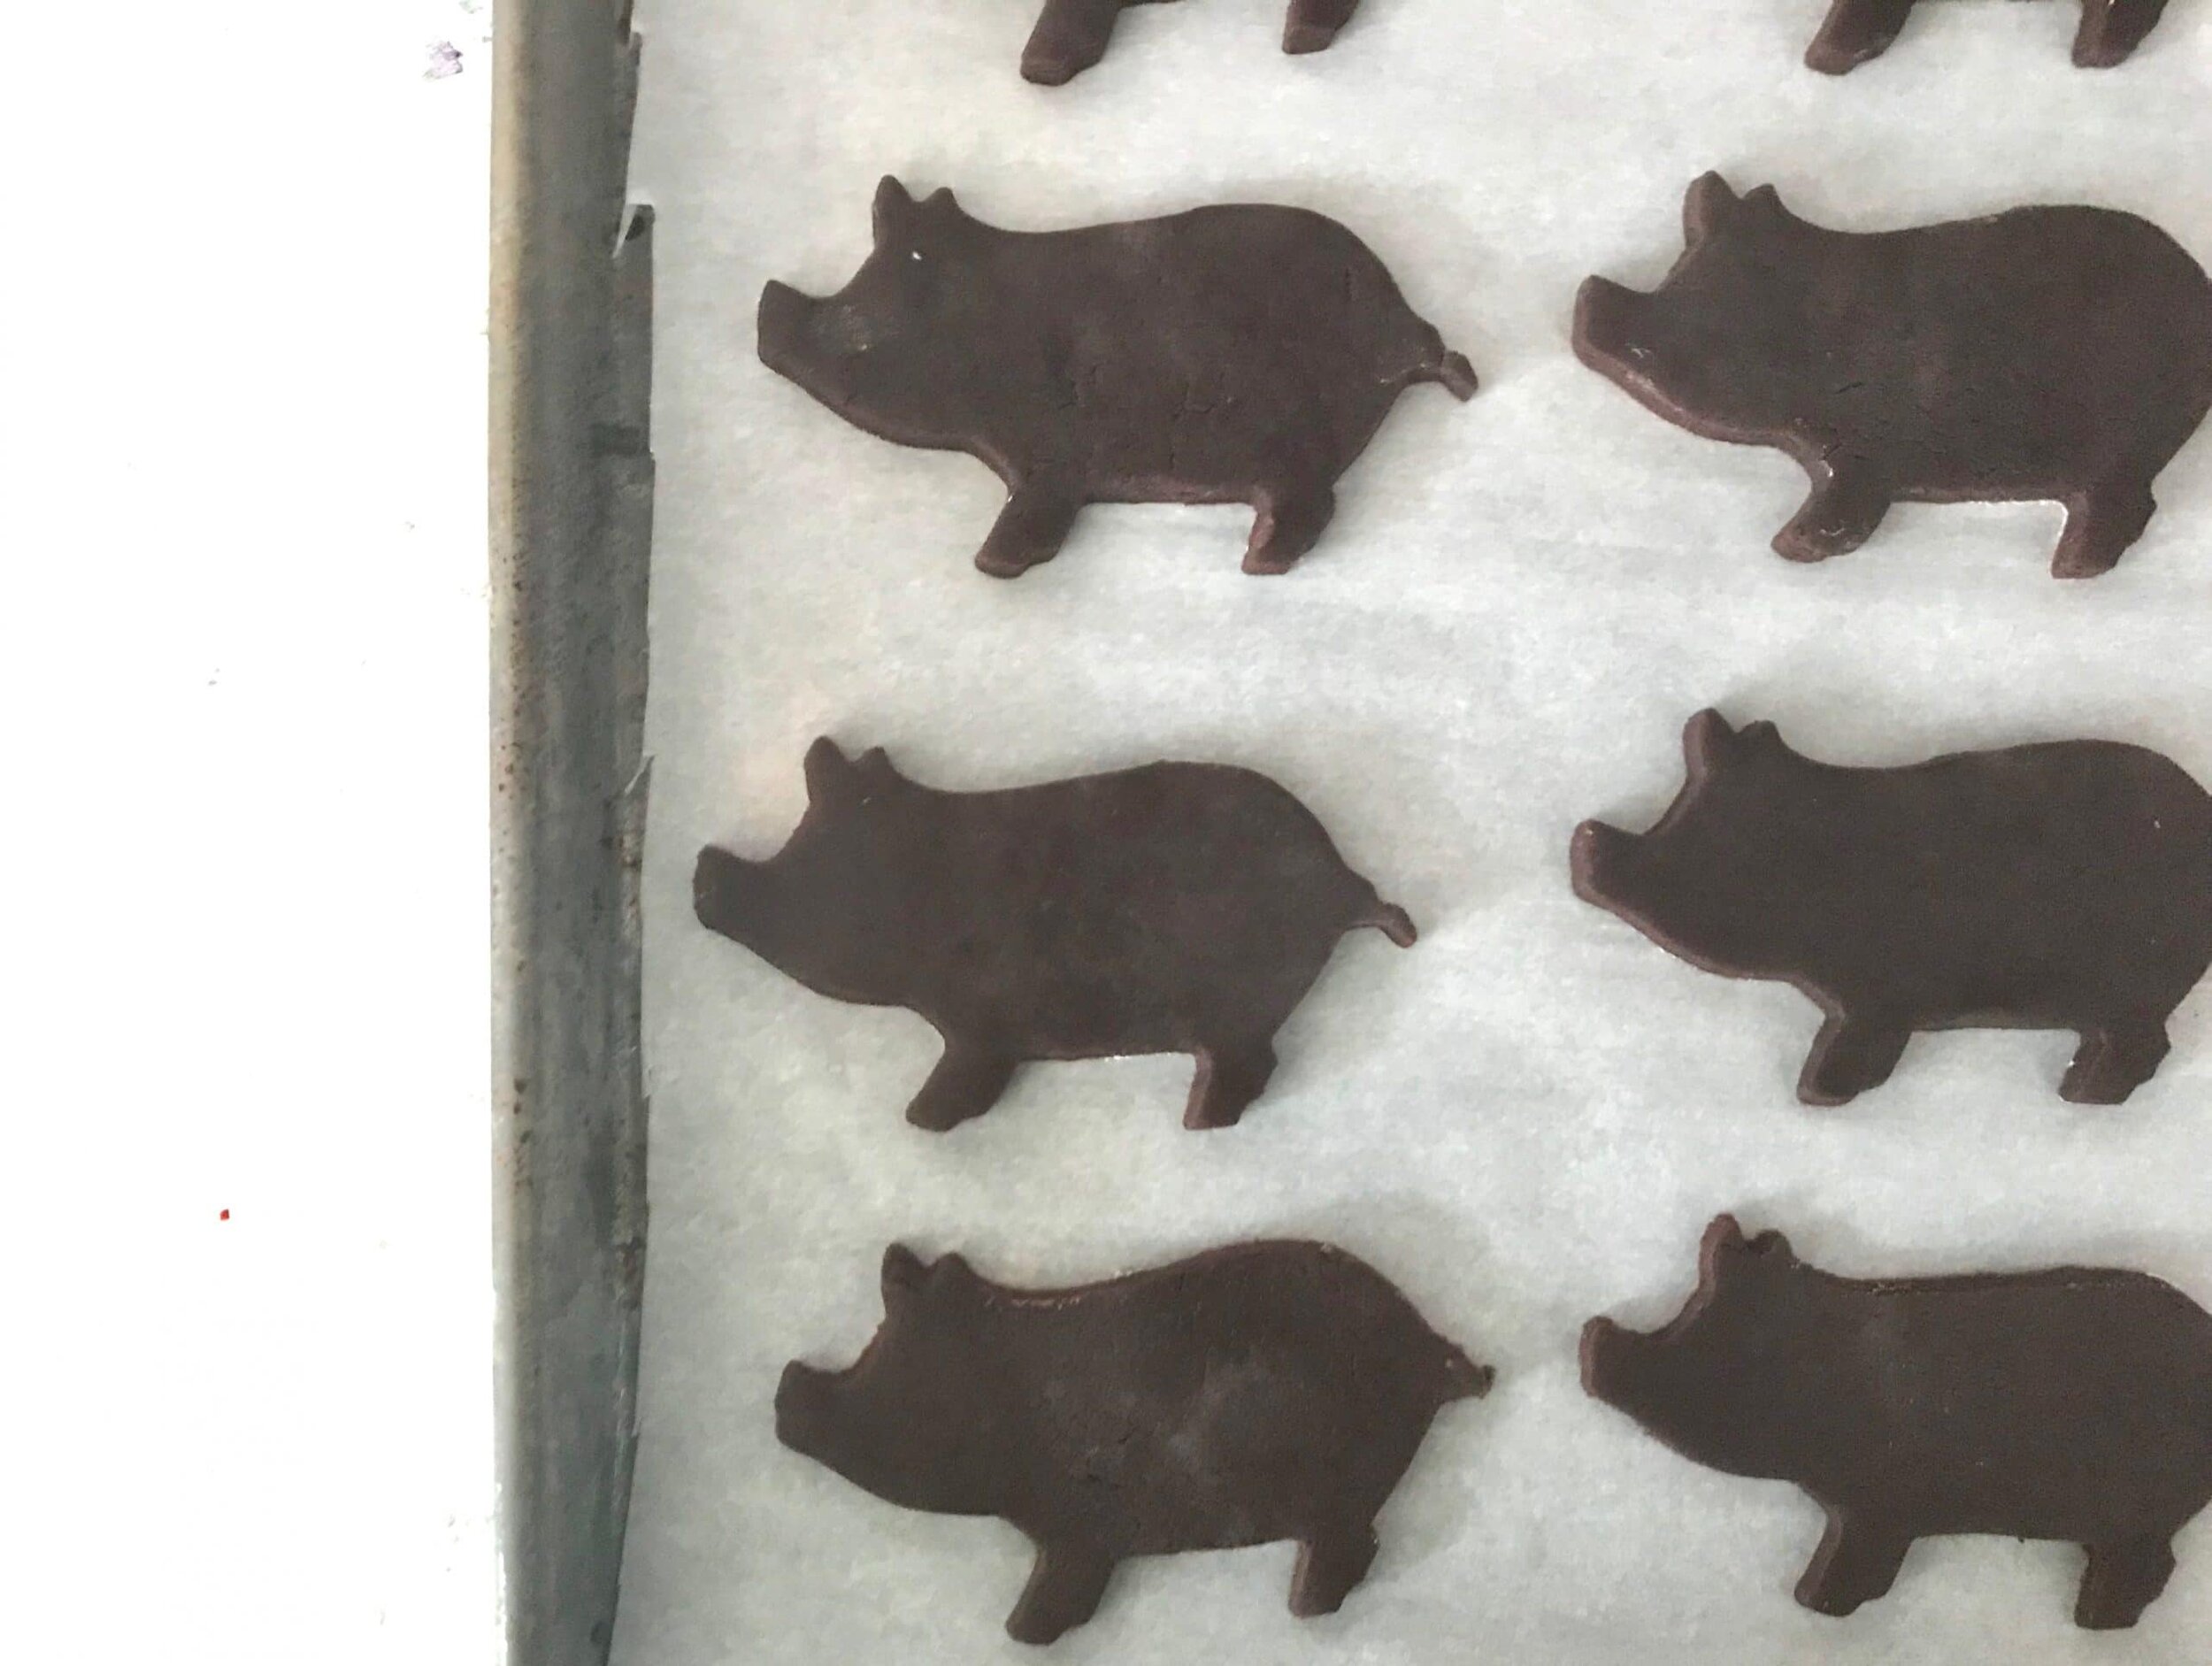
*Disclaimer: This post contains affiliate links. To learn more, please go here.I've been wanting to make a chocolate sandwich cookies that resembles the penguin biscuits that I fell in love with during my time in England. It's a chocolate sandwich cookie that is filled with a chocolate frosting and coated in chocolate. It's chocolate cookie heaven basically.Now these chocolate sandwich cookies are not as sweet as the packaged ones. If you like it more sweet you can always add in a little more cocoa powder to the buttercream. I didn't even have a penguin cookie cutter to make these bad boys even better. So instead I used this cute pig cookie cutter and these cookies turned out just absolutely adorable!Now you don't have to use the cute pig cookie cutter. Use whatever cookie cutter you want! You don't have to use chocolate buttercream either. Certainly use a vanilla buttercream or even a caramel buttercream would be so good in these cookies! Don't want to coat them in dark chocolate? You can use white if you want. You could even have fun with it and use a colored candy coating and add sprinkles on top!
 [mailerlite_form form_id=1]

Above are some products that I personally use and recommend for this recipe and to have for everyday use. One of my favorite things that I have many of are the BlueQ oven mitts. They aren't just really funny and a great statement piece for your kitchen, but they are great quality too!
____________________________________________________________________________
chocolate sandwich cookies
chocolate cookies that have a chocolate buttercream filling and dipped in chocolate coating. talk about a chocolate overload!
cookies
- 1 1/2 cup all-purpose flour
- 1/4 cup cocoa powder
- 1/3 cup granulated sugar
- pinch salt
- 1 tsp vanilla extract
- 1 1/2 sticks unsalted butter
- 2 tbsp water
buttercream
- 2 sticks unsalted butter
- 3 cup powdered sugar
- 3 tbsp cocoa powder
- 1-3 tbsp water
- chocolate (for coating)
cookies
- preheat the oven to 350 degrees F. in a bowl, combine the flour, cocoa powder, sugar and salt; with a paddle attachment, mix the dry ingredients until combined. add in the butter, vanilla, and water and mix until the dough starts to come together. wrap the dough in cling wrap and refrigerate for 30 minutes. roll out the dough and using a cookie cutter, cut out multiple shapes. place on a lined sheet pan and bake for 10 minutes. let cool.
buttercream
- combine all of the ingredients into a bowl and mix until light and fluffy, about 3 minutes
assembly
- frost half of the cookies with the buttercream and then sandwich with the remaining half of cookies. place into the freezer to firm, about 15 minutes. melt the chocolate in a microwave safe bowl until melted. take a cookie at a time and dip into the chocolate until the cookie is completely coated and then place onto a sheet pan with parchment. let dry.


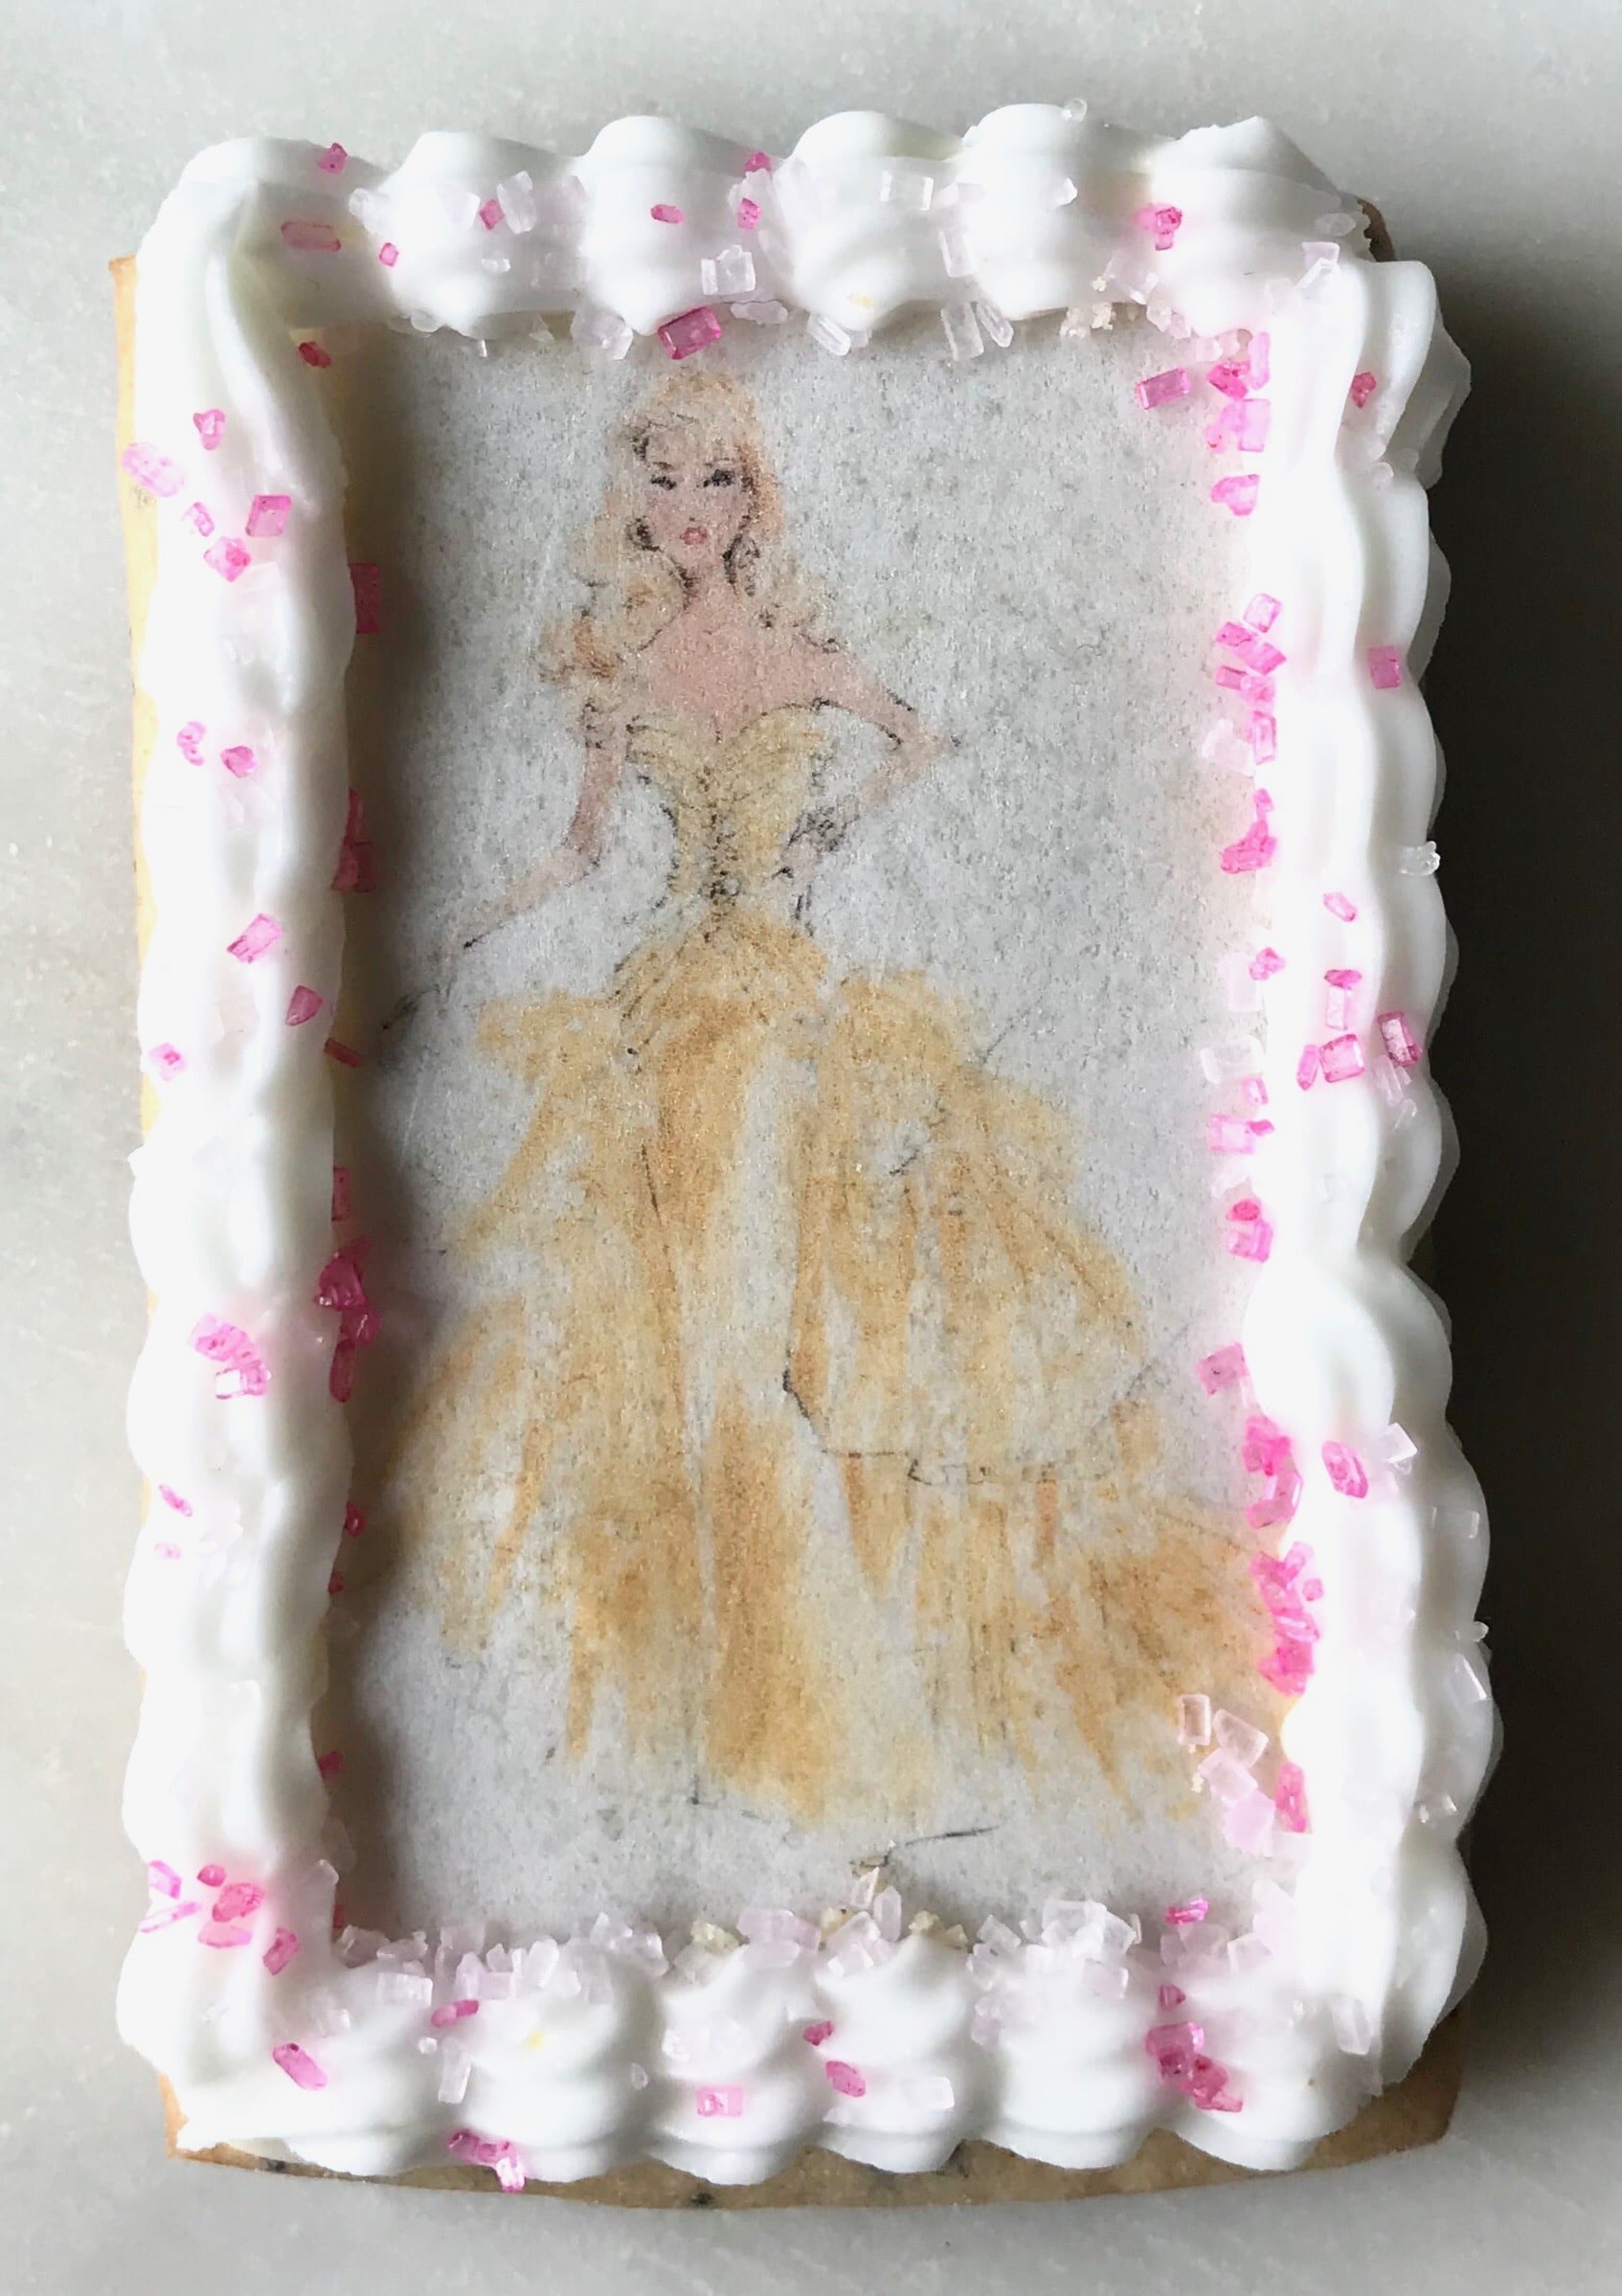
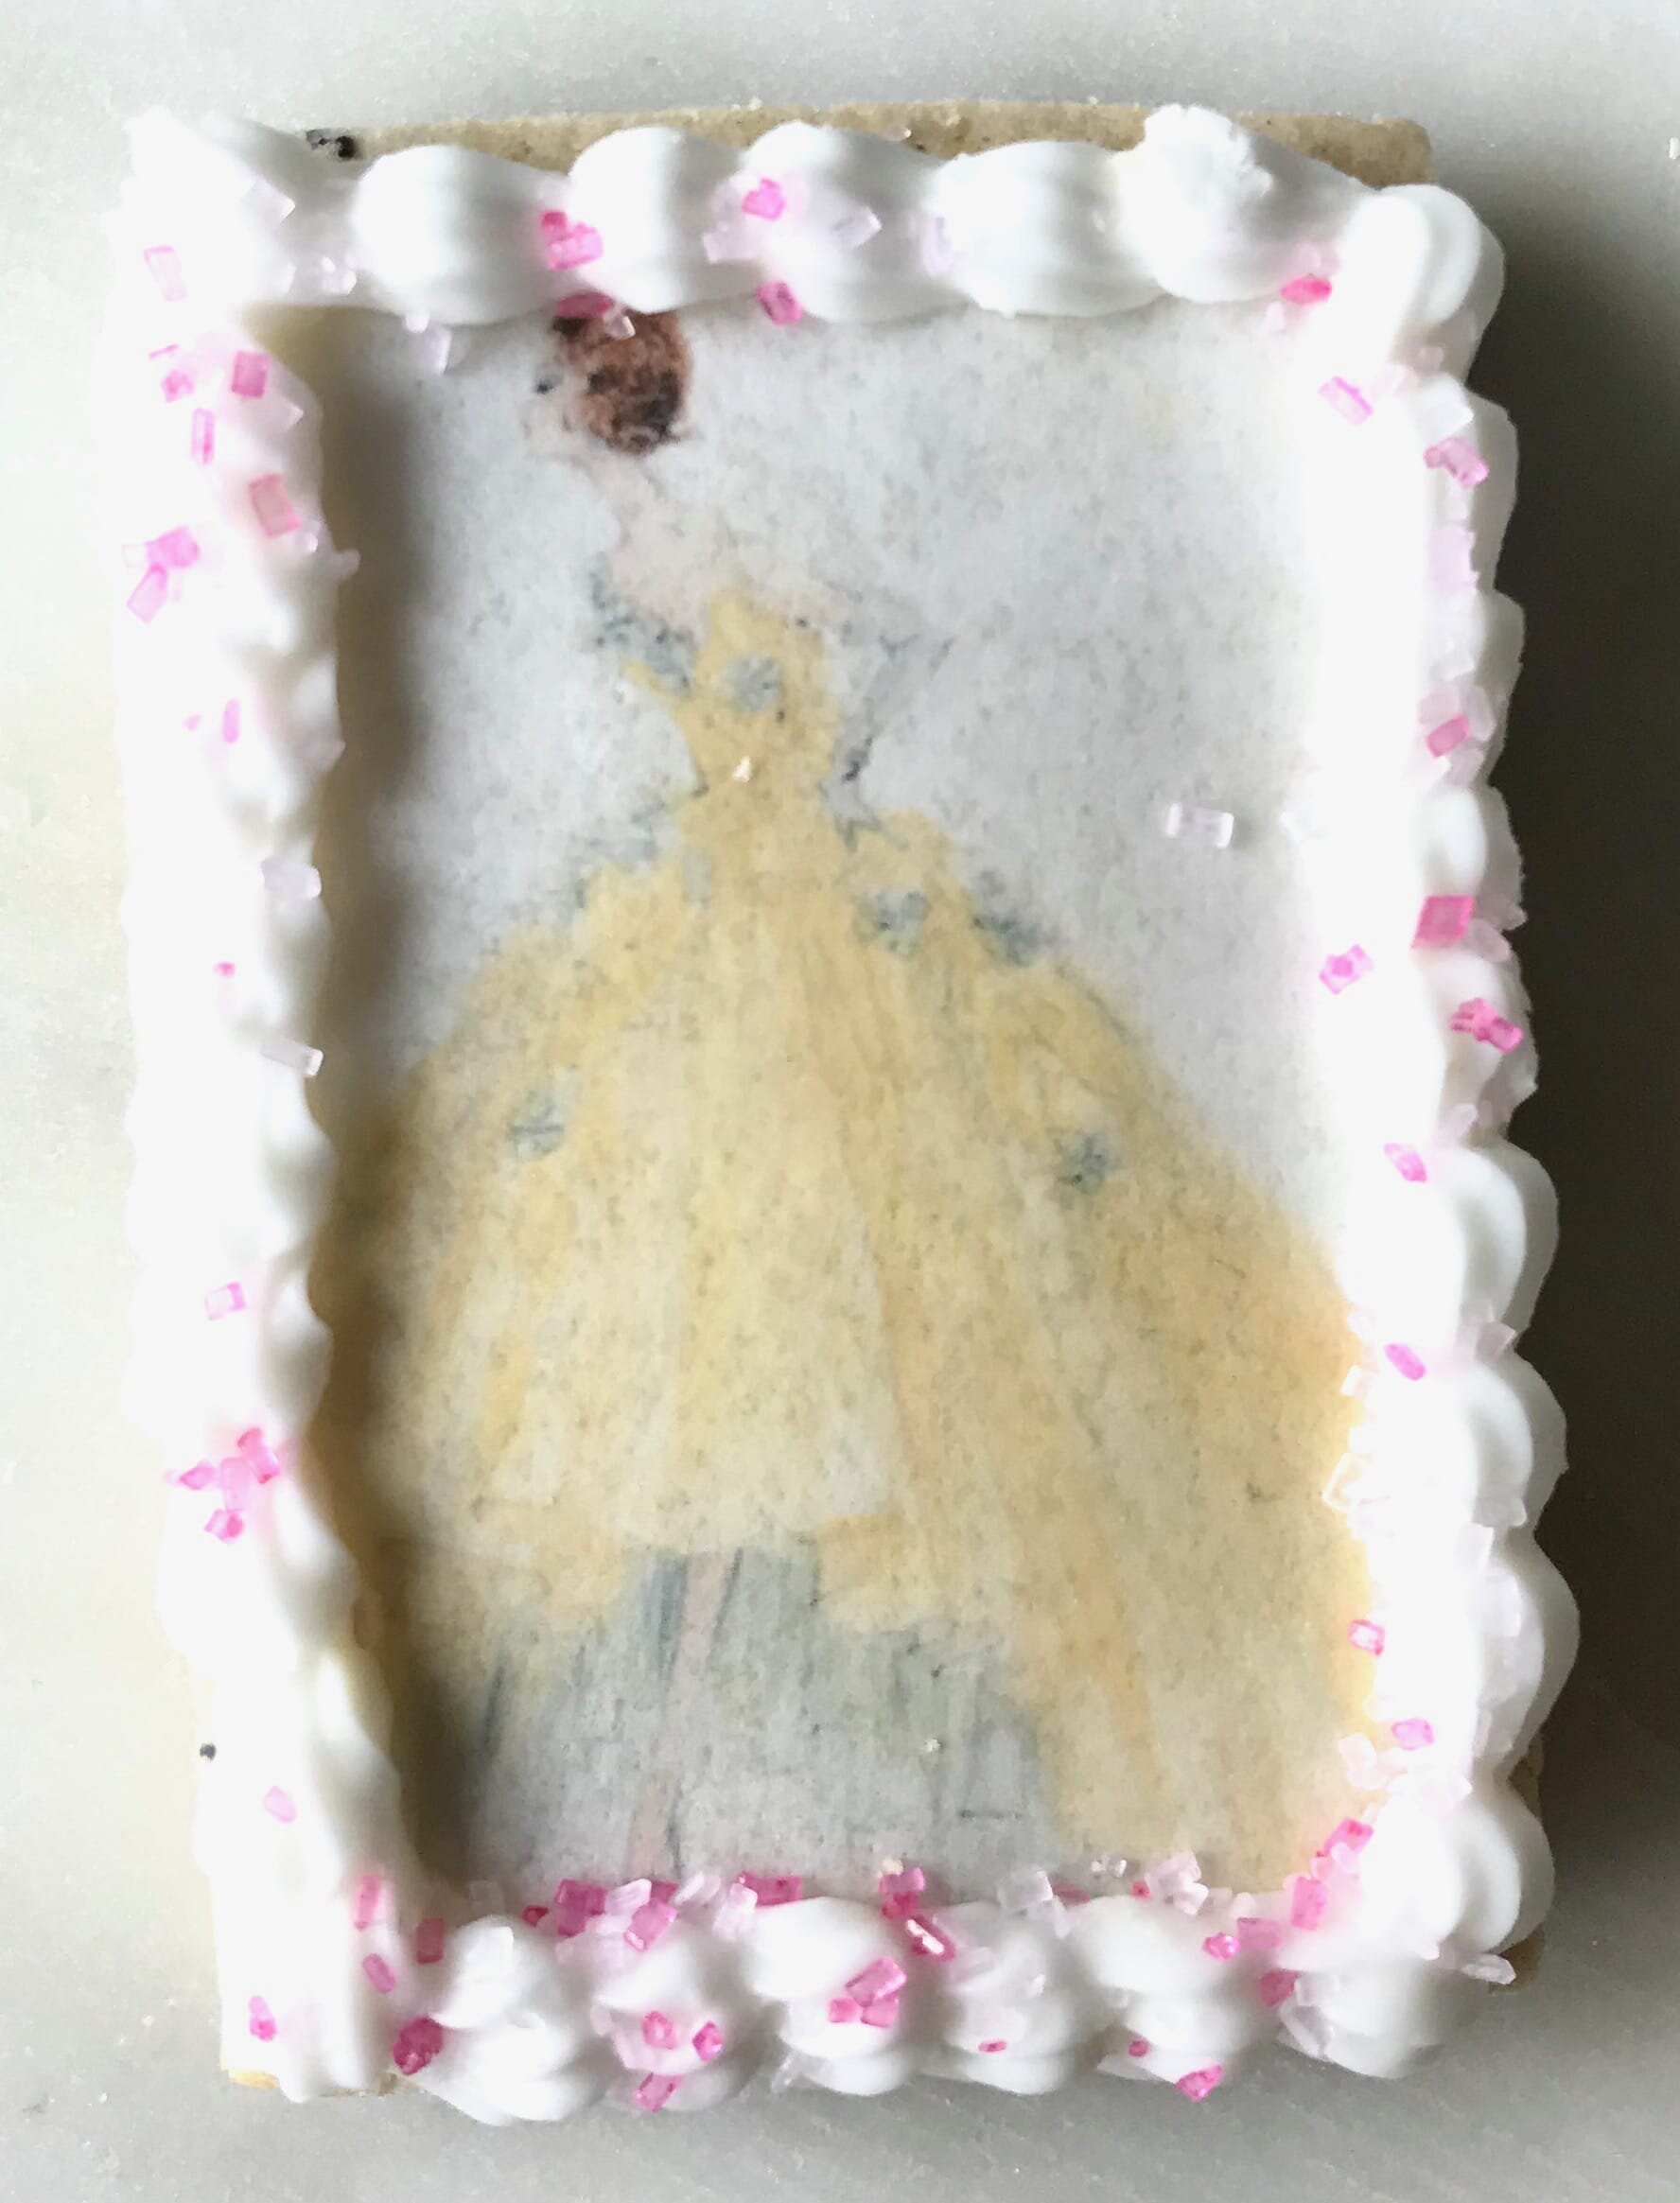
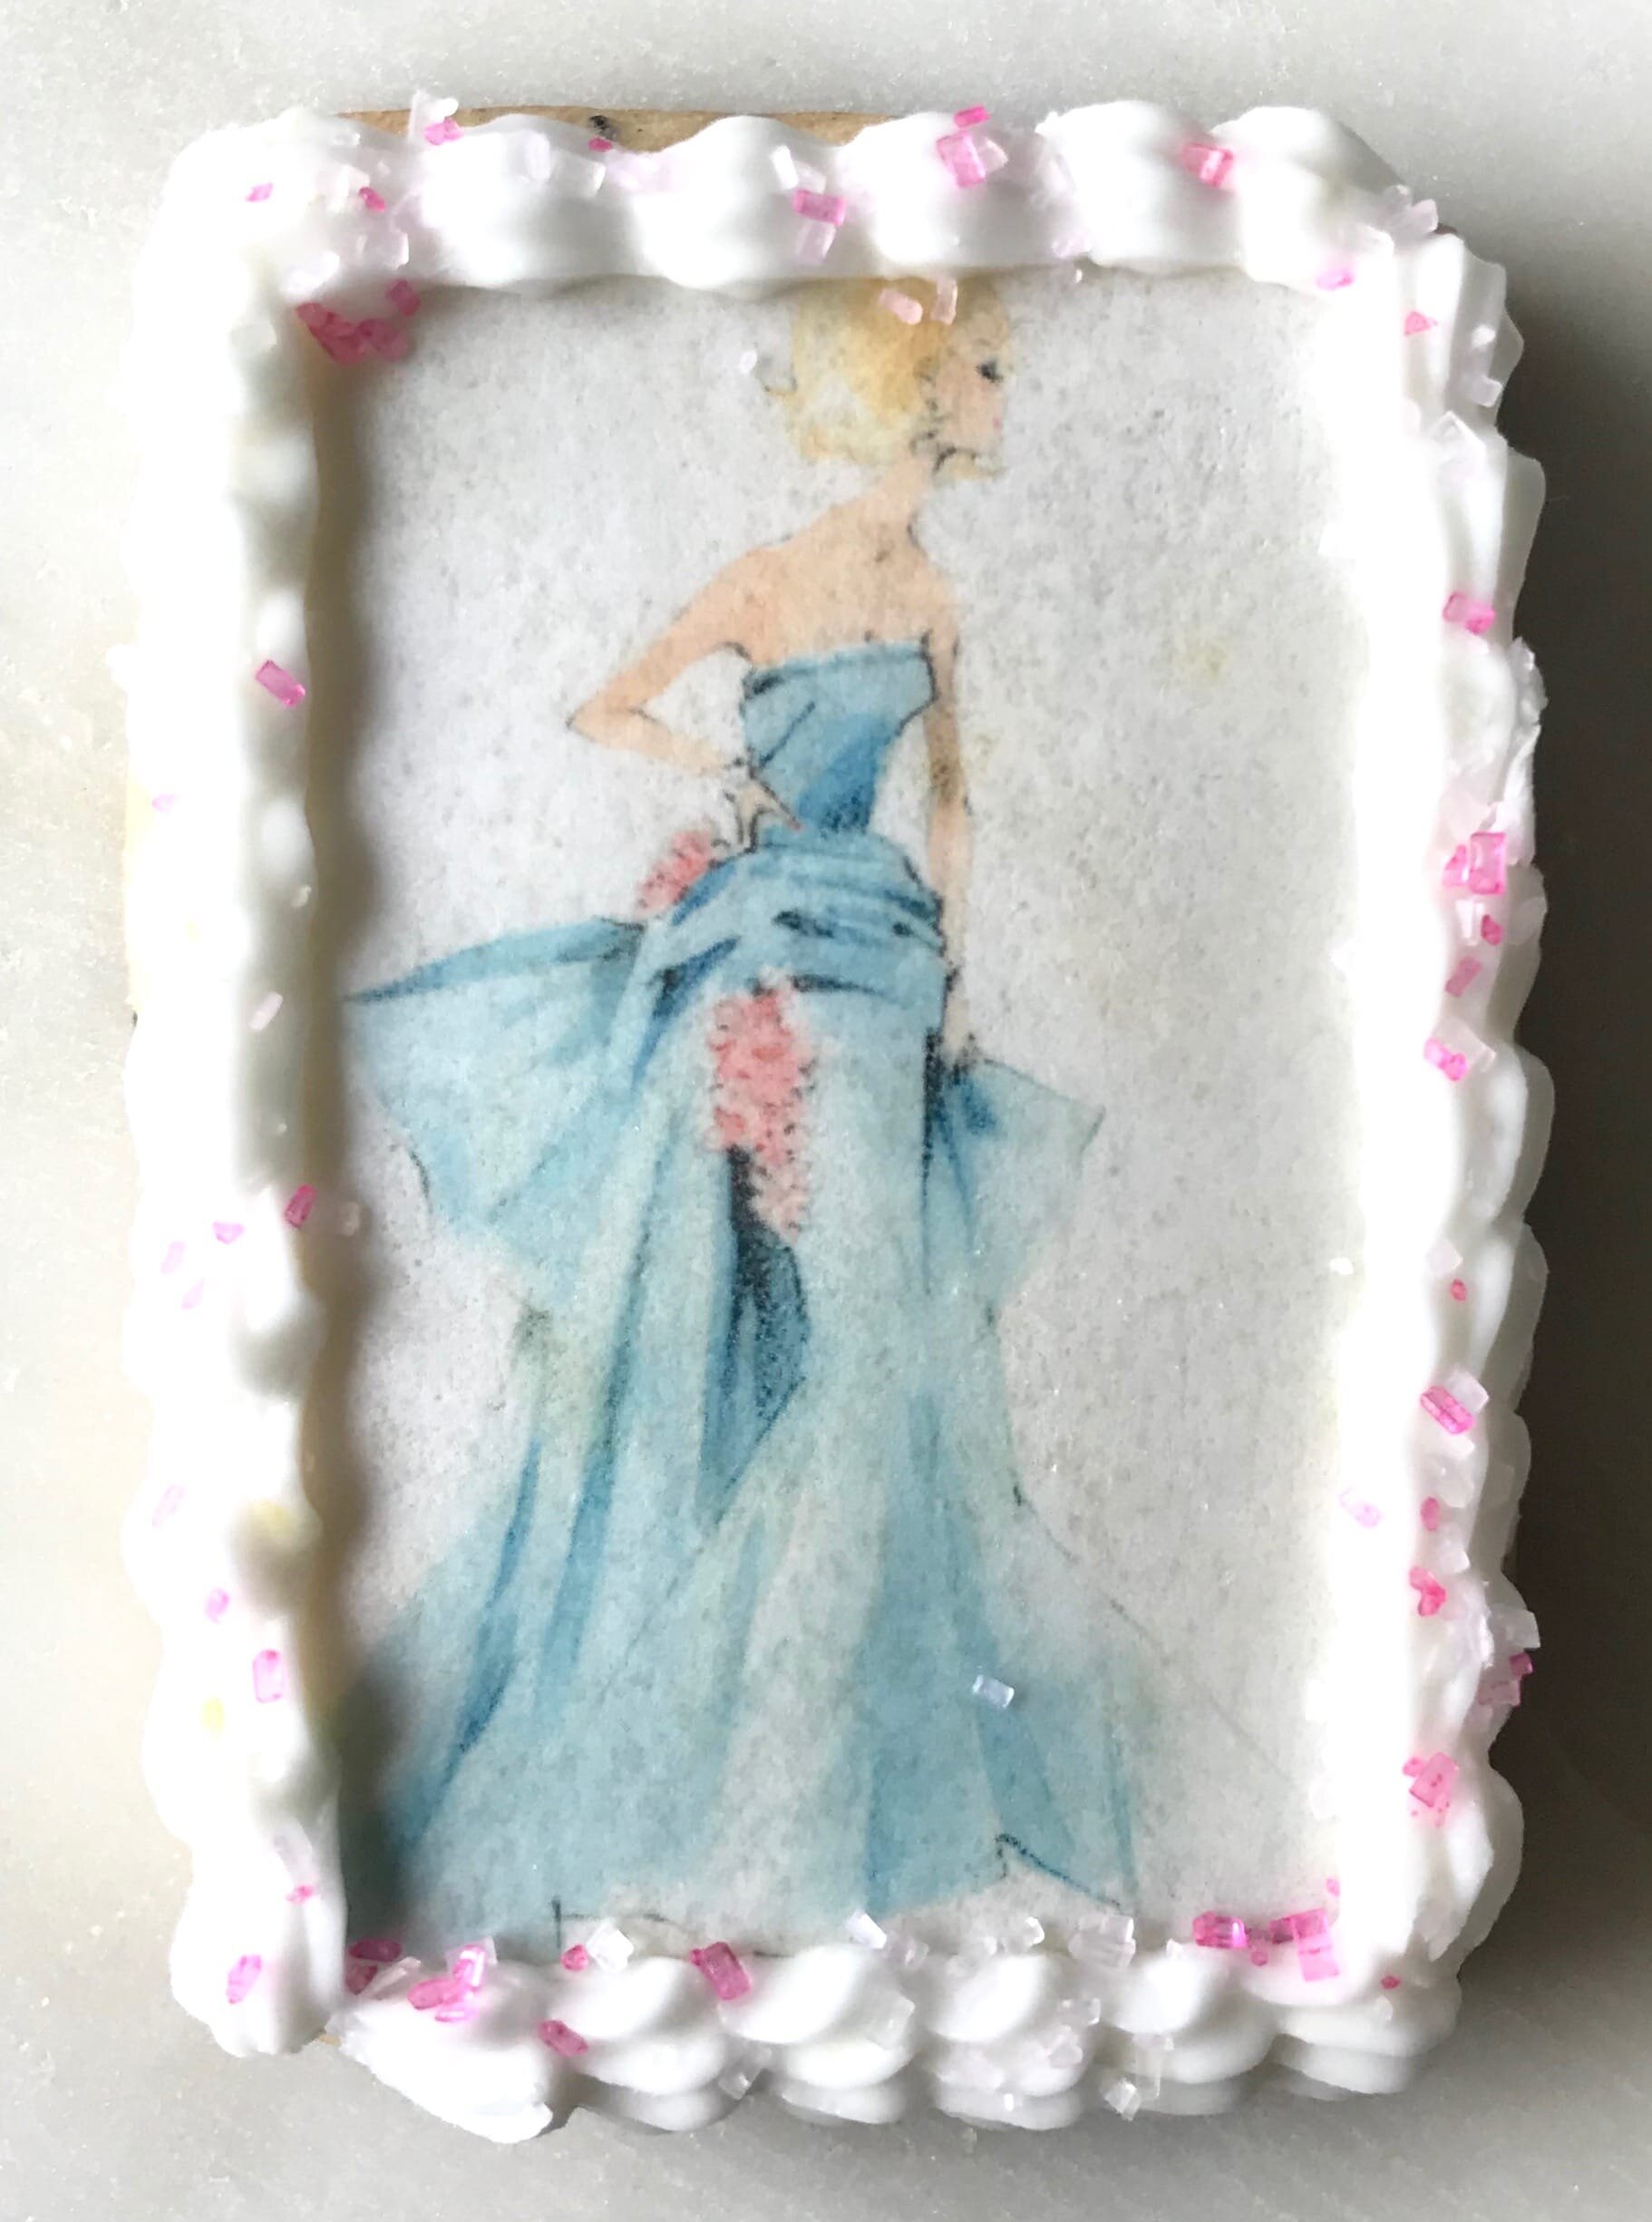
Lemon Poppy Seed Cookies


[wprm-recipe-jump]
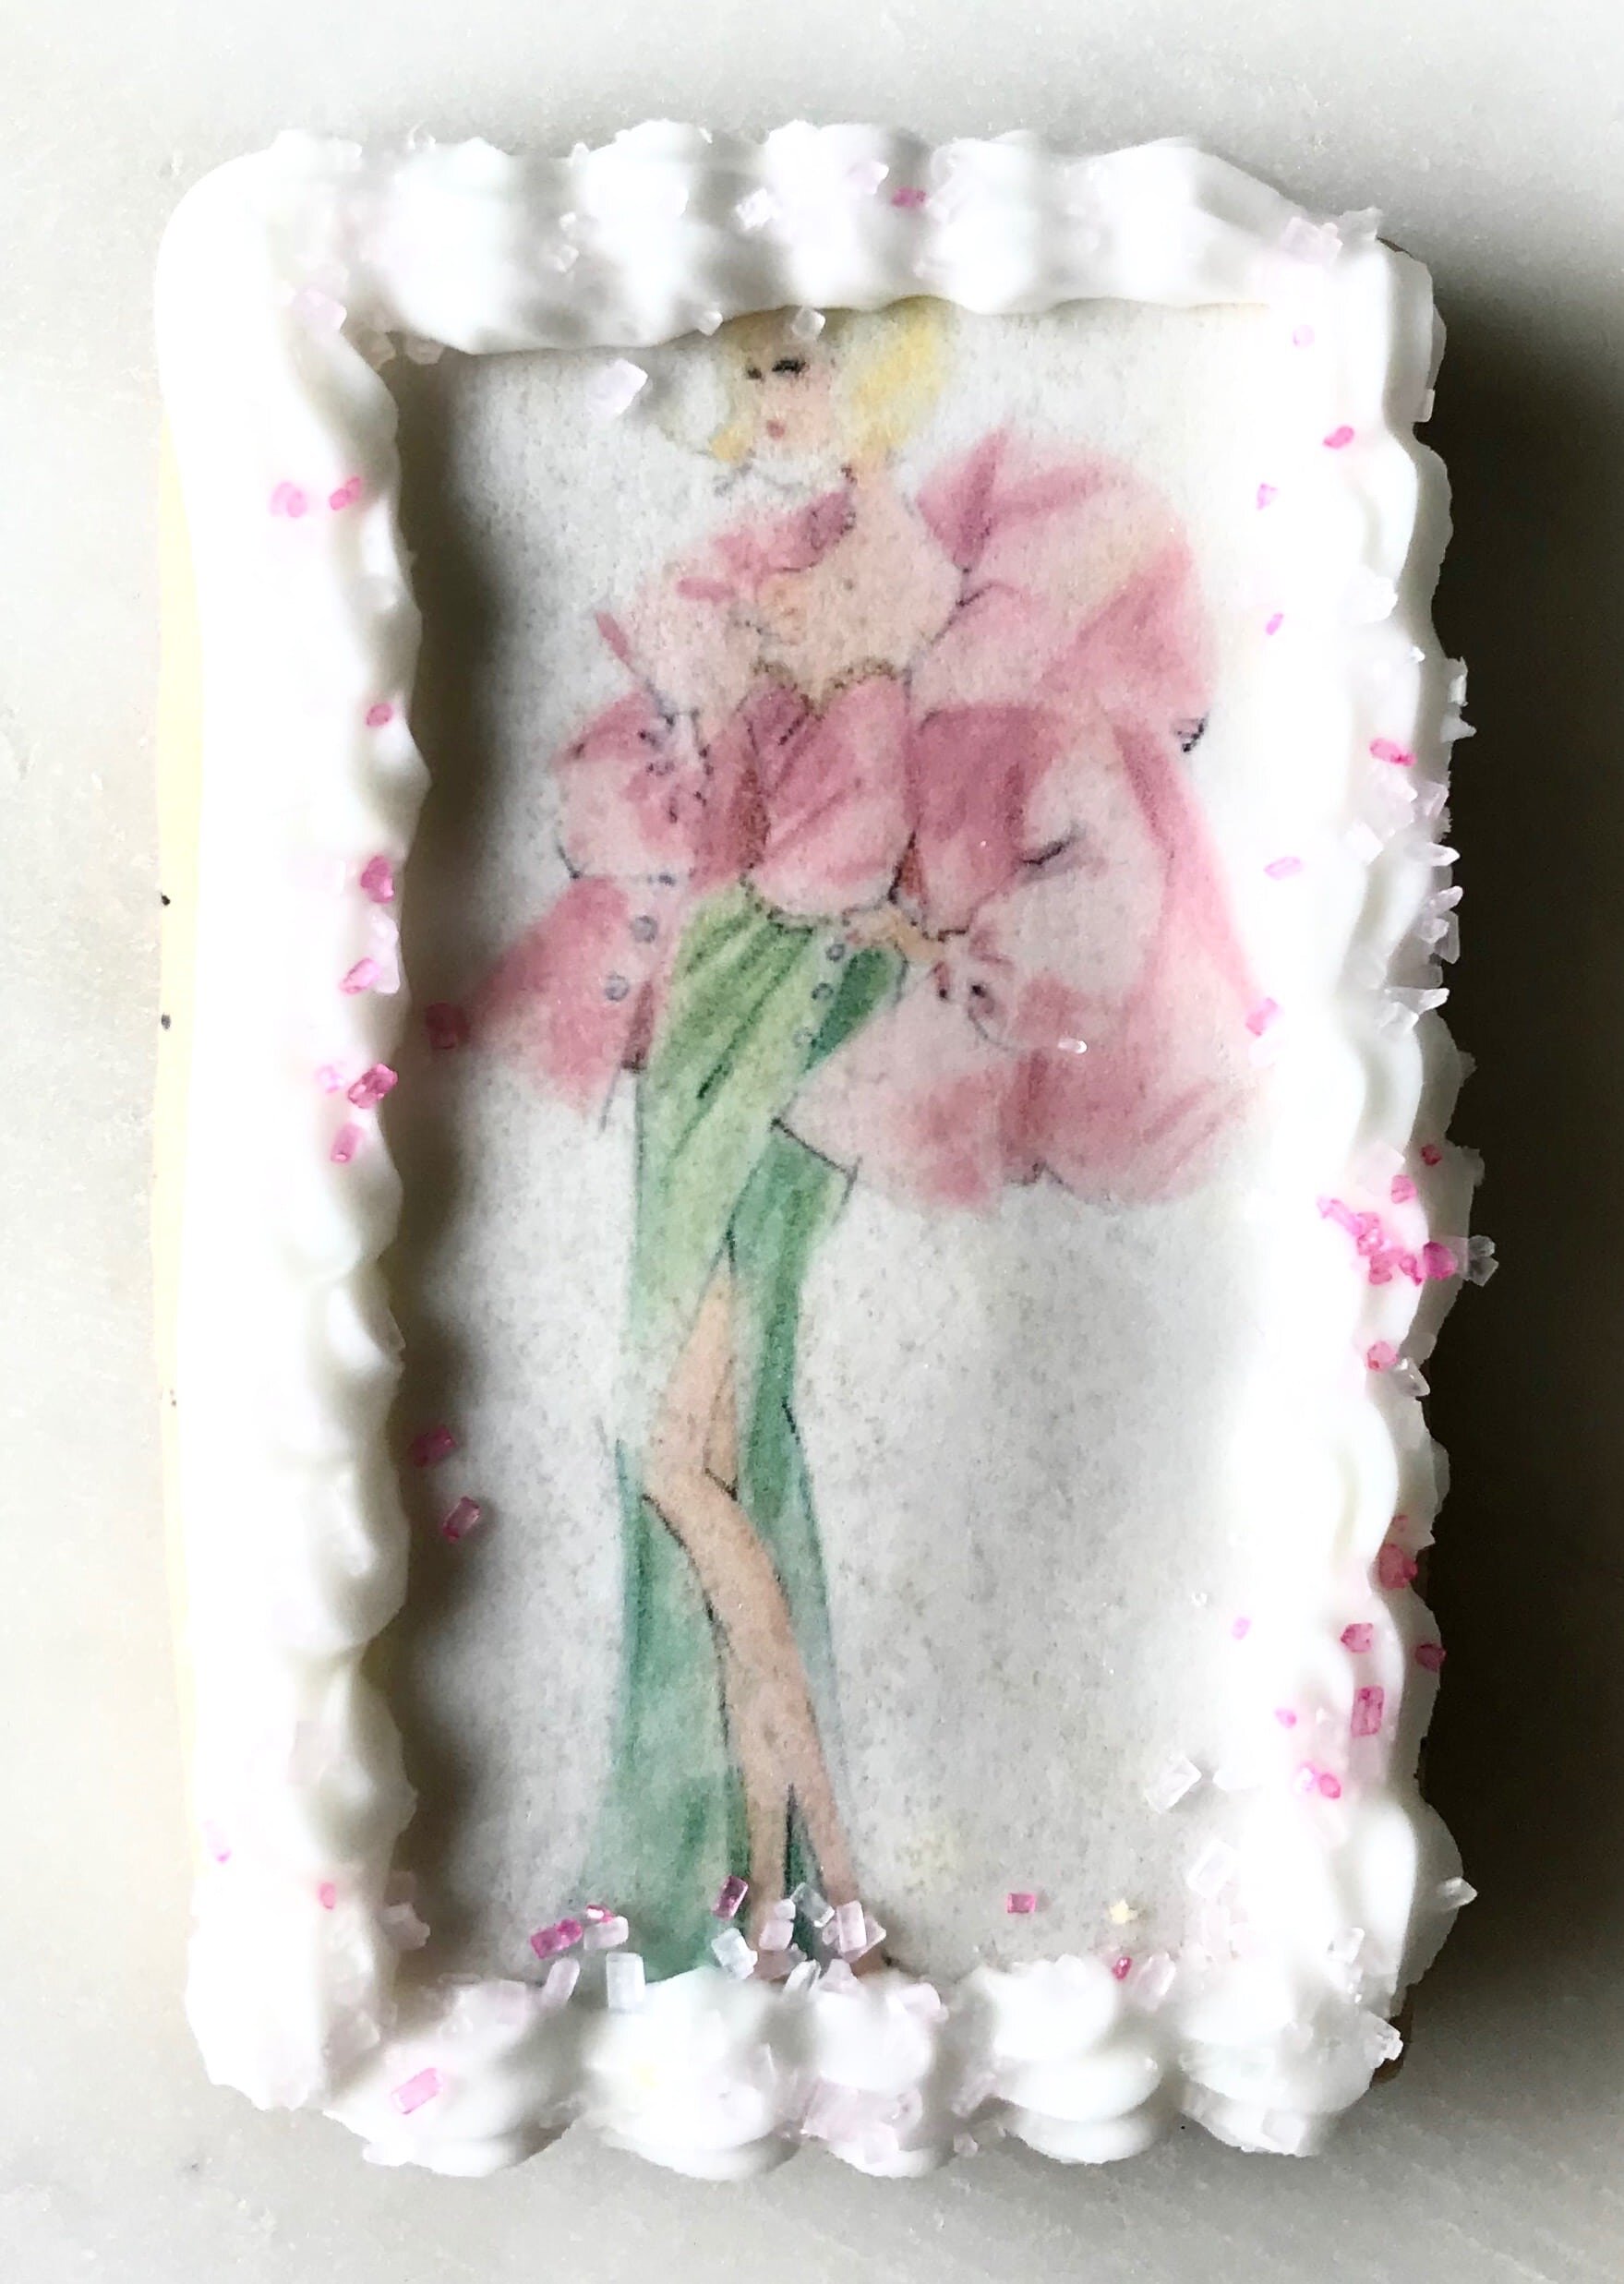
*Disclaimer: This post contains affiliate links. To learn more, please go here.These lemon poppy seed cookies are soft, chewy and even a tad crunchy. But mostly they are packed with a lovely lemon flavor that comes from the cookies that also really pops from the icing! It's a nice summer treat to have at your table for that little sweet tooth kick you may have in the afternoon. You could even skip the icing on the cookies and enjoy it with a cup of tea!
[mailerlite_form form_id=1]

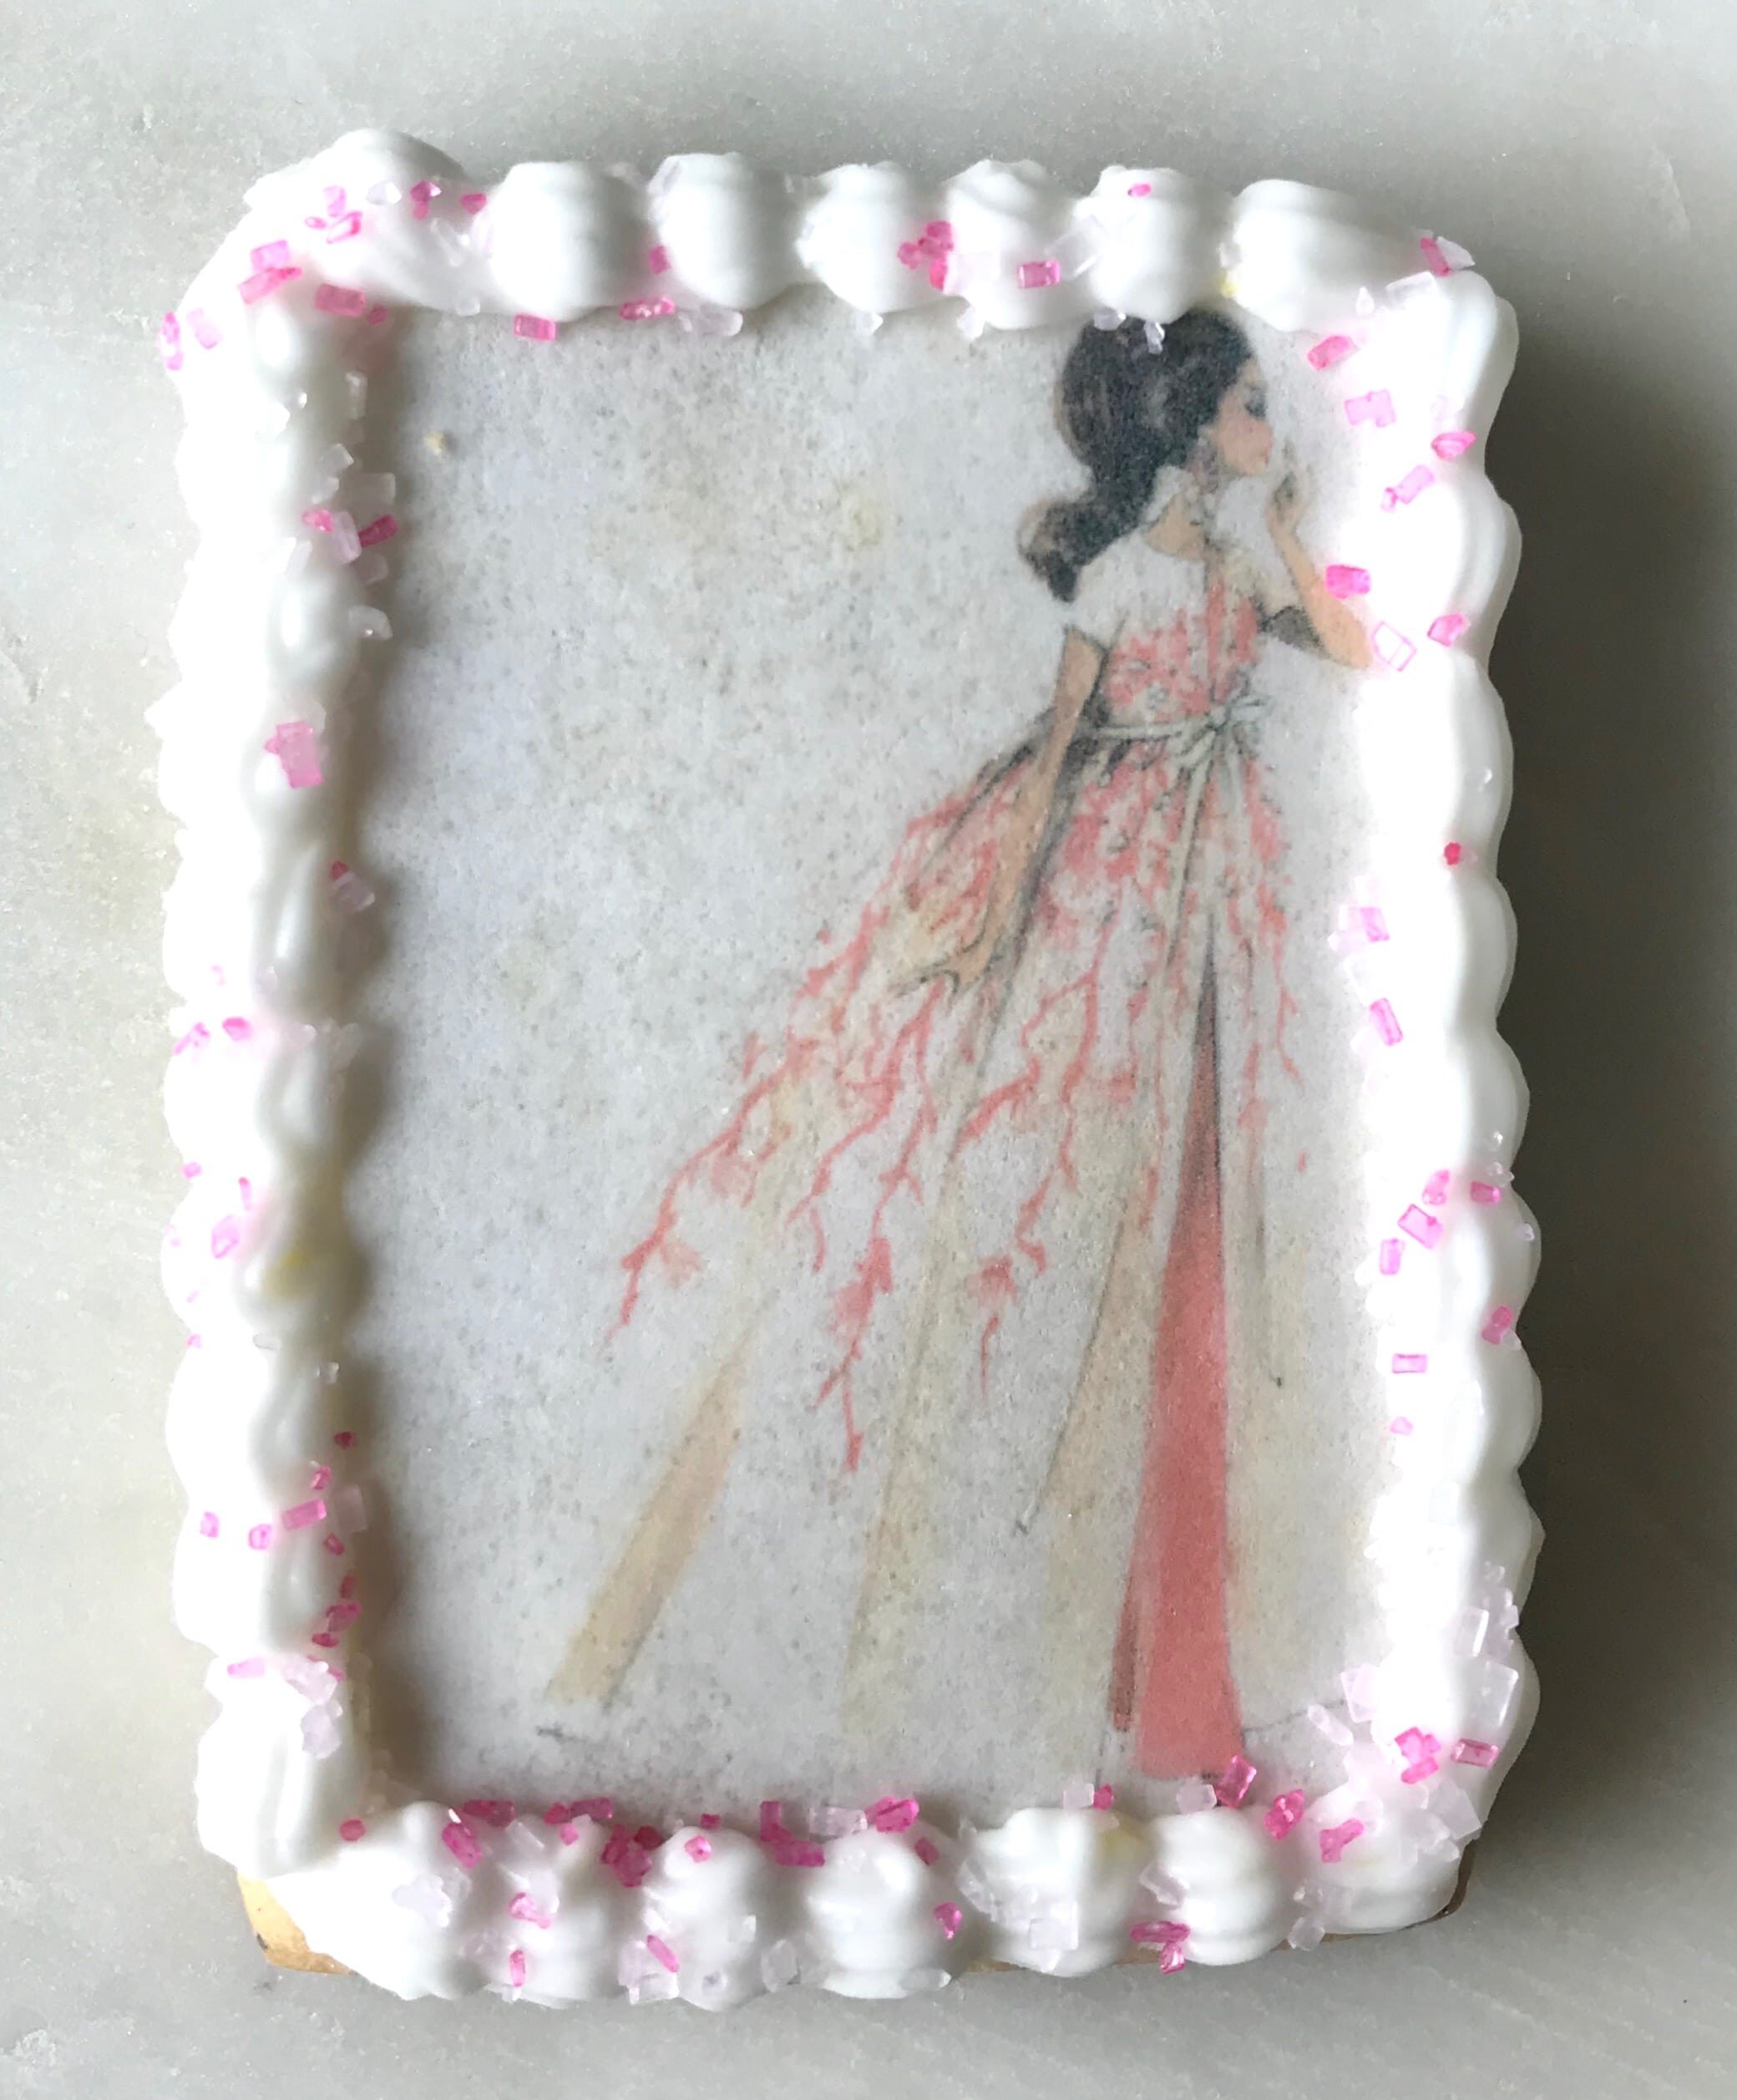
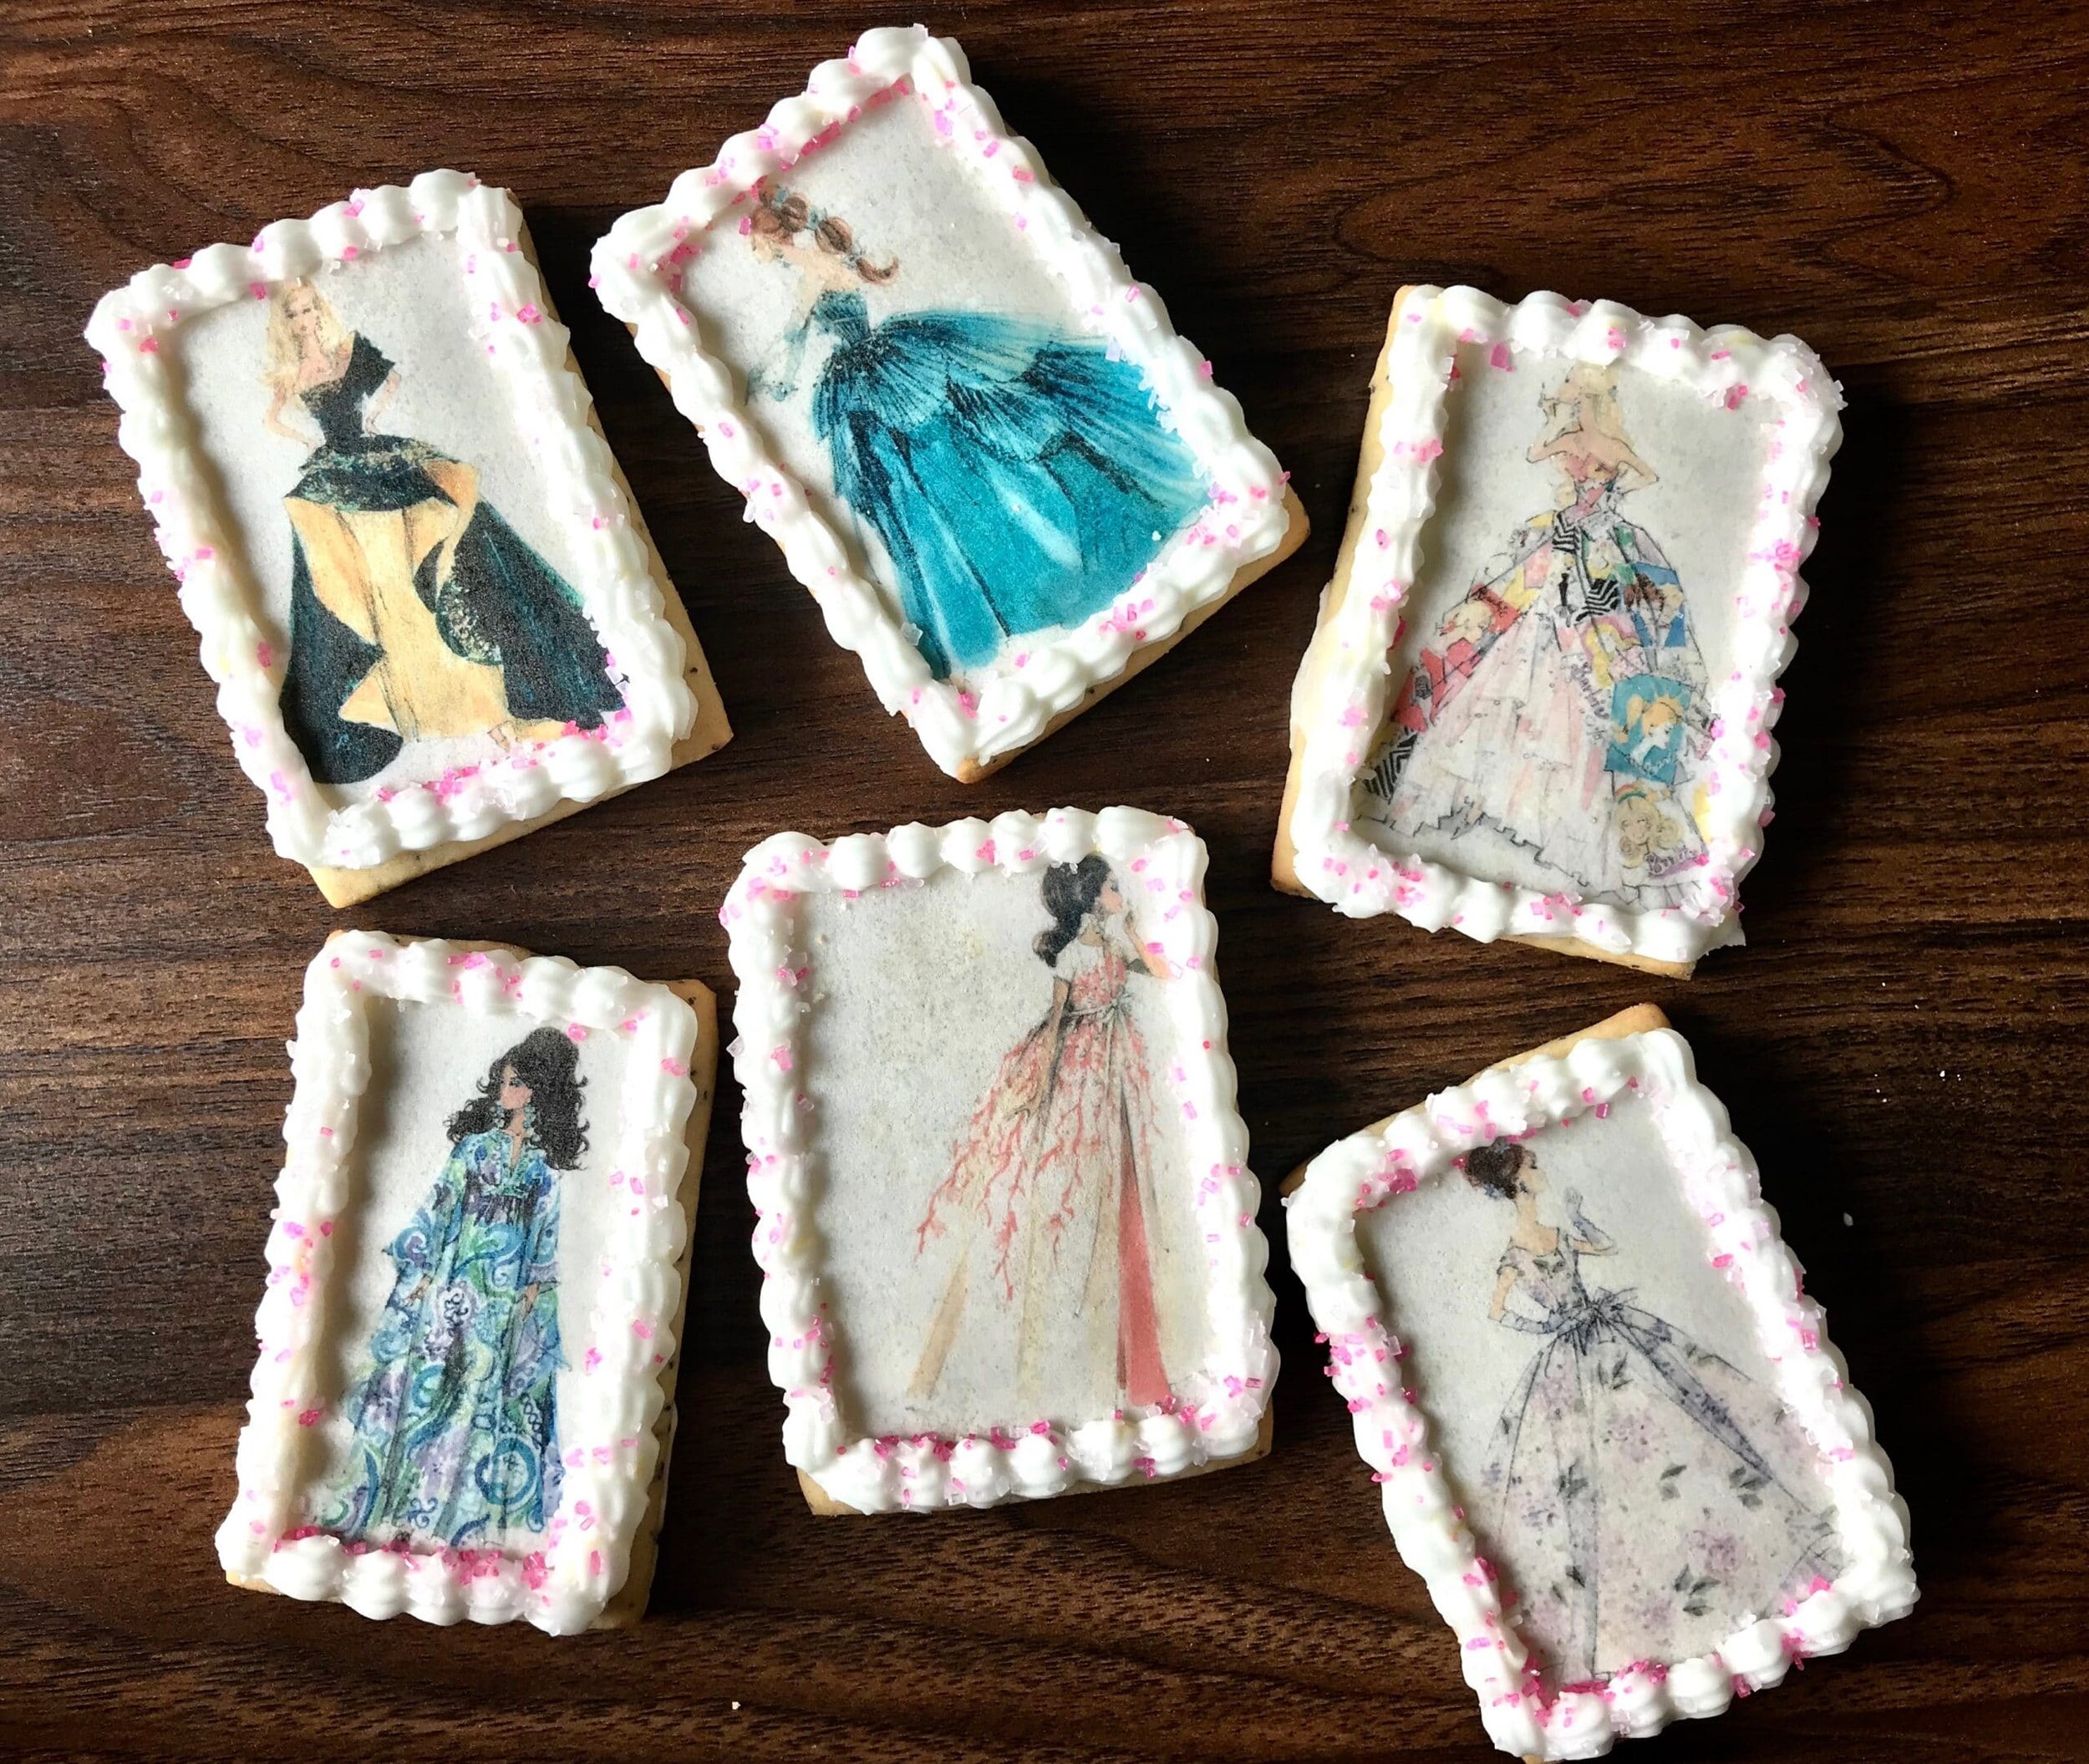
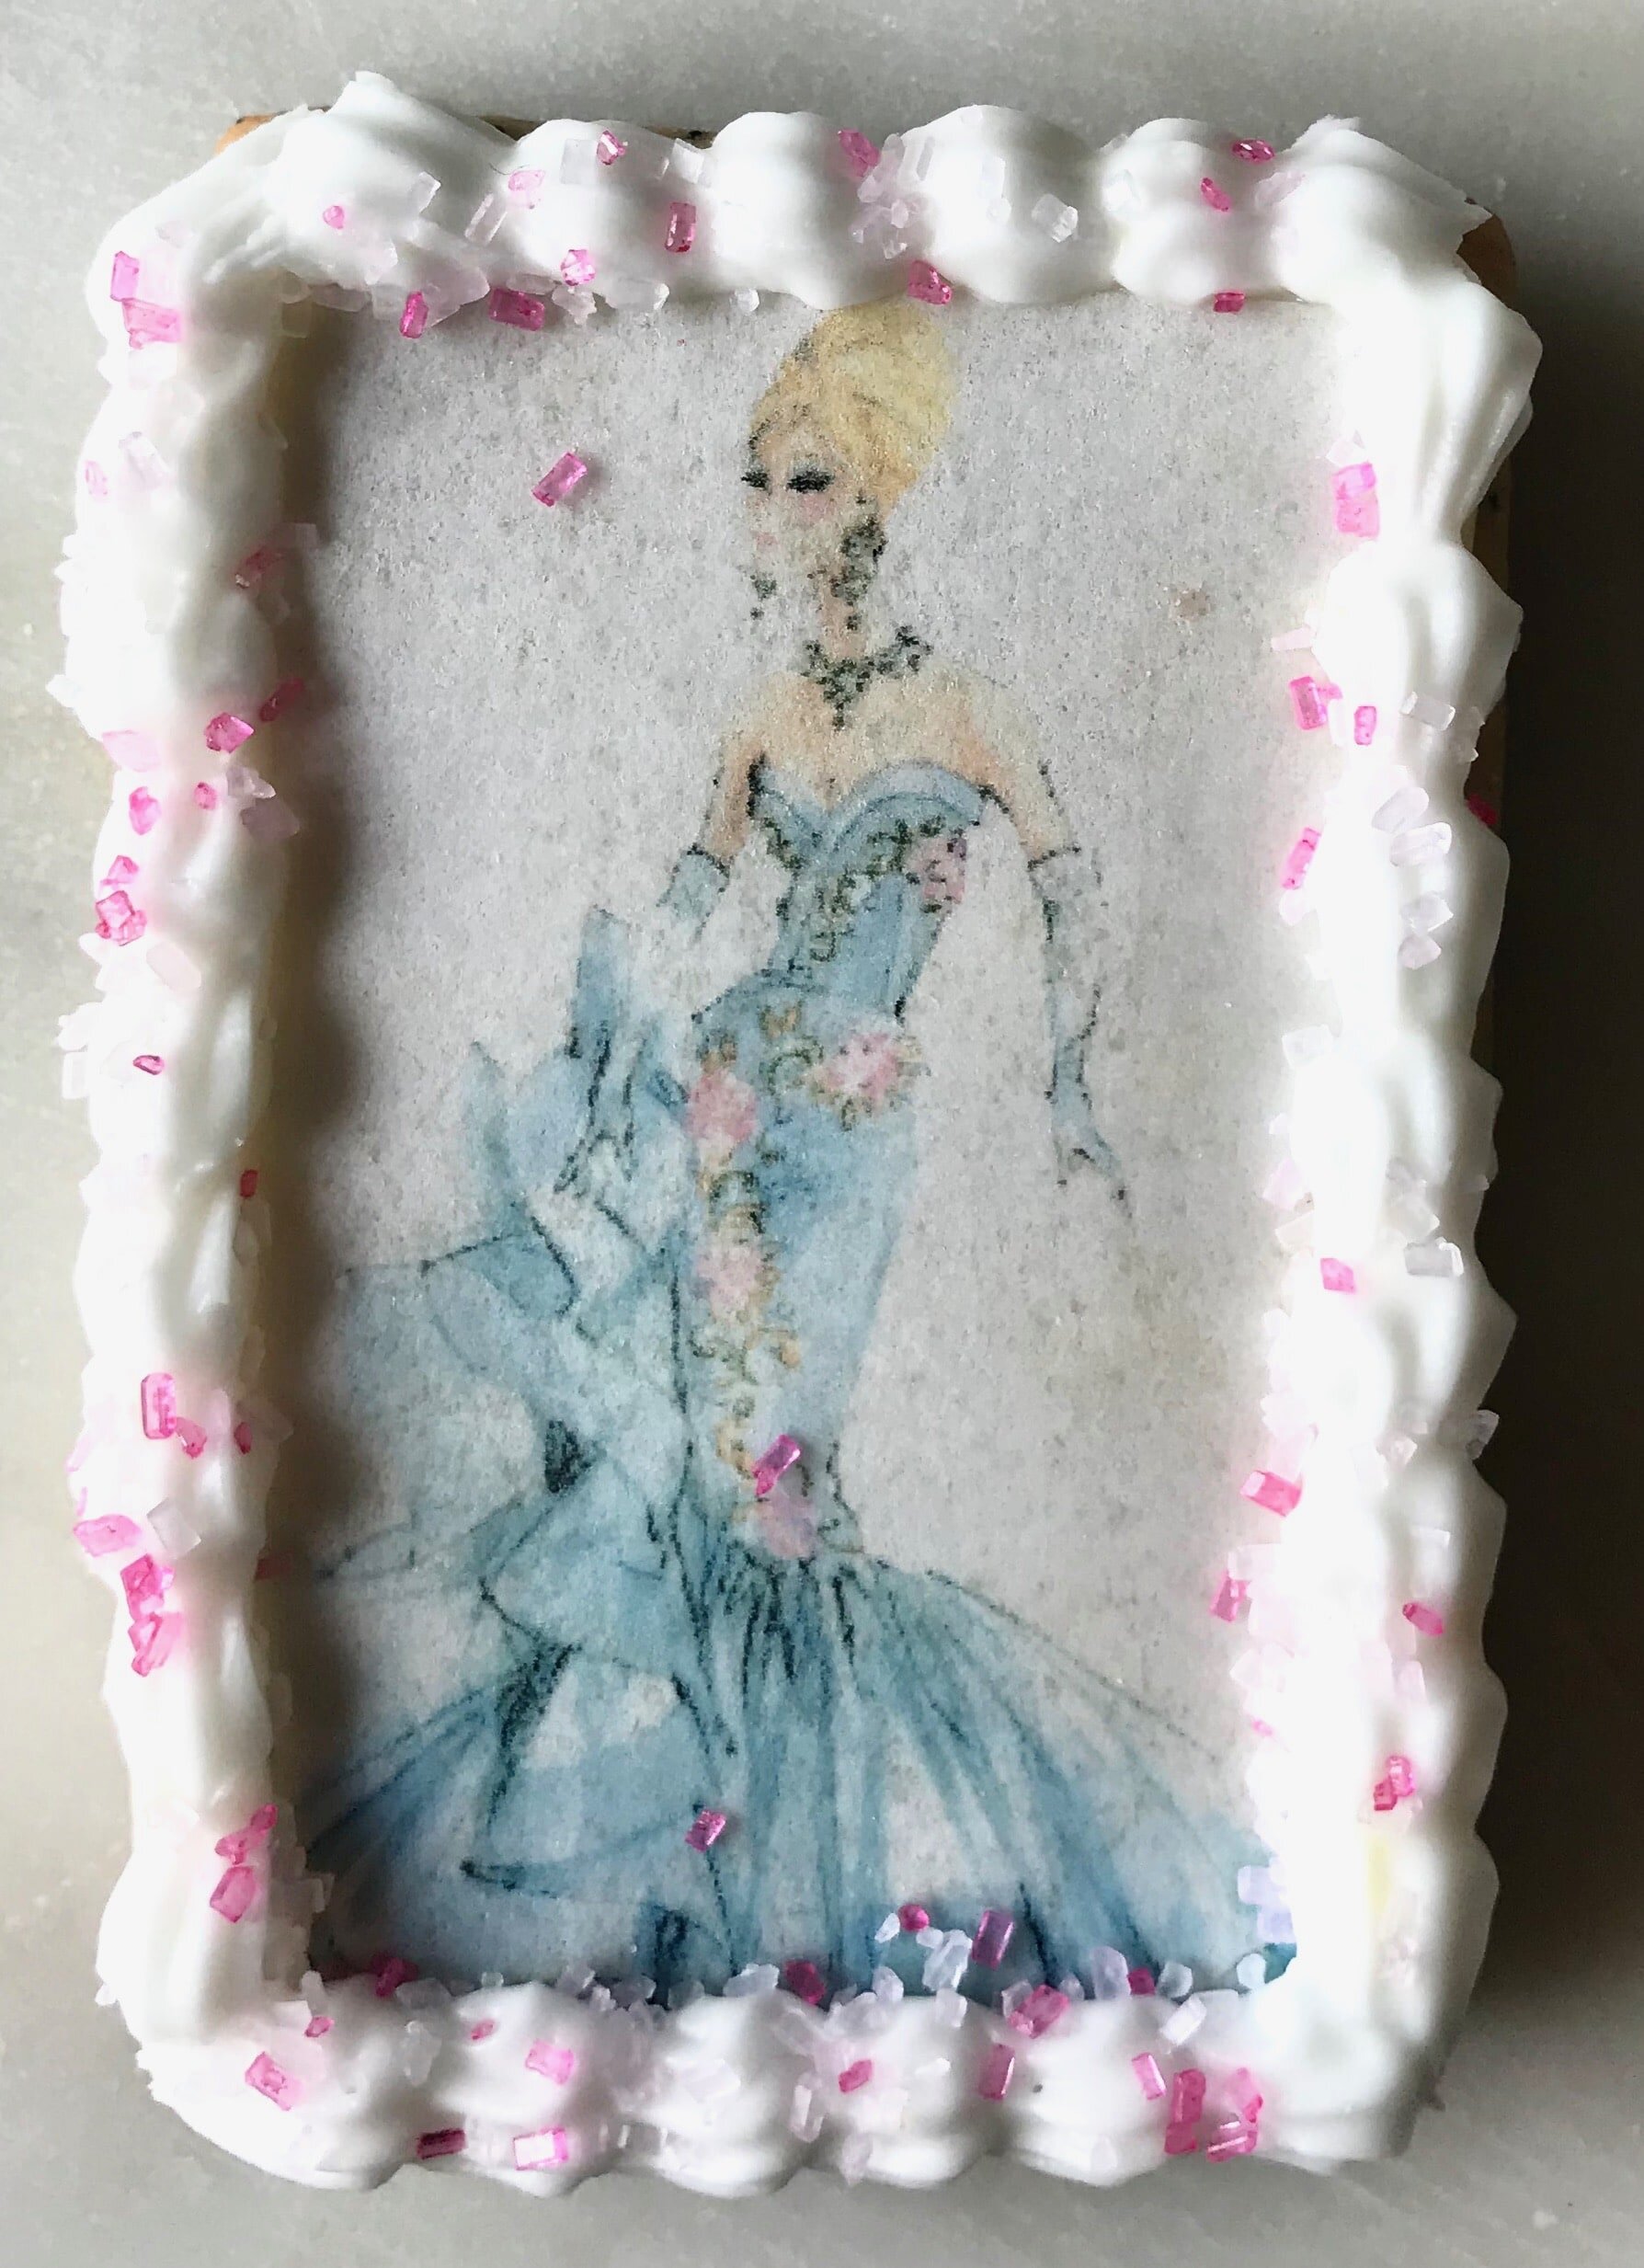
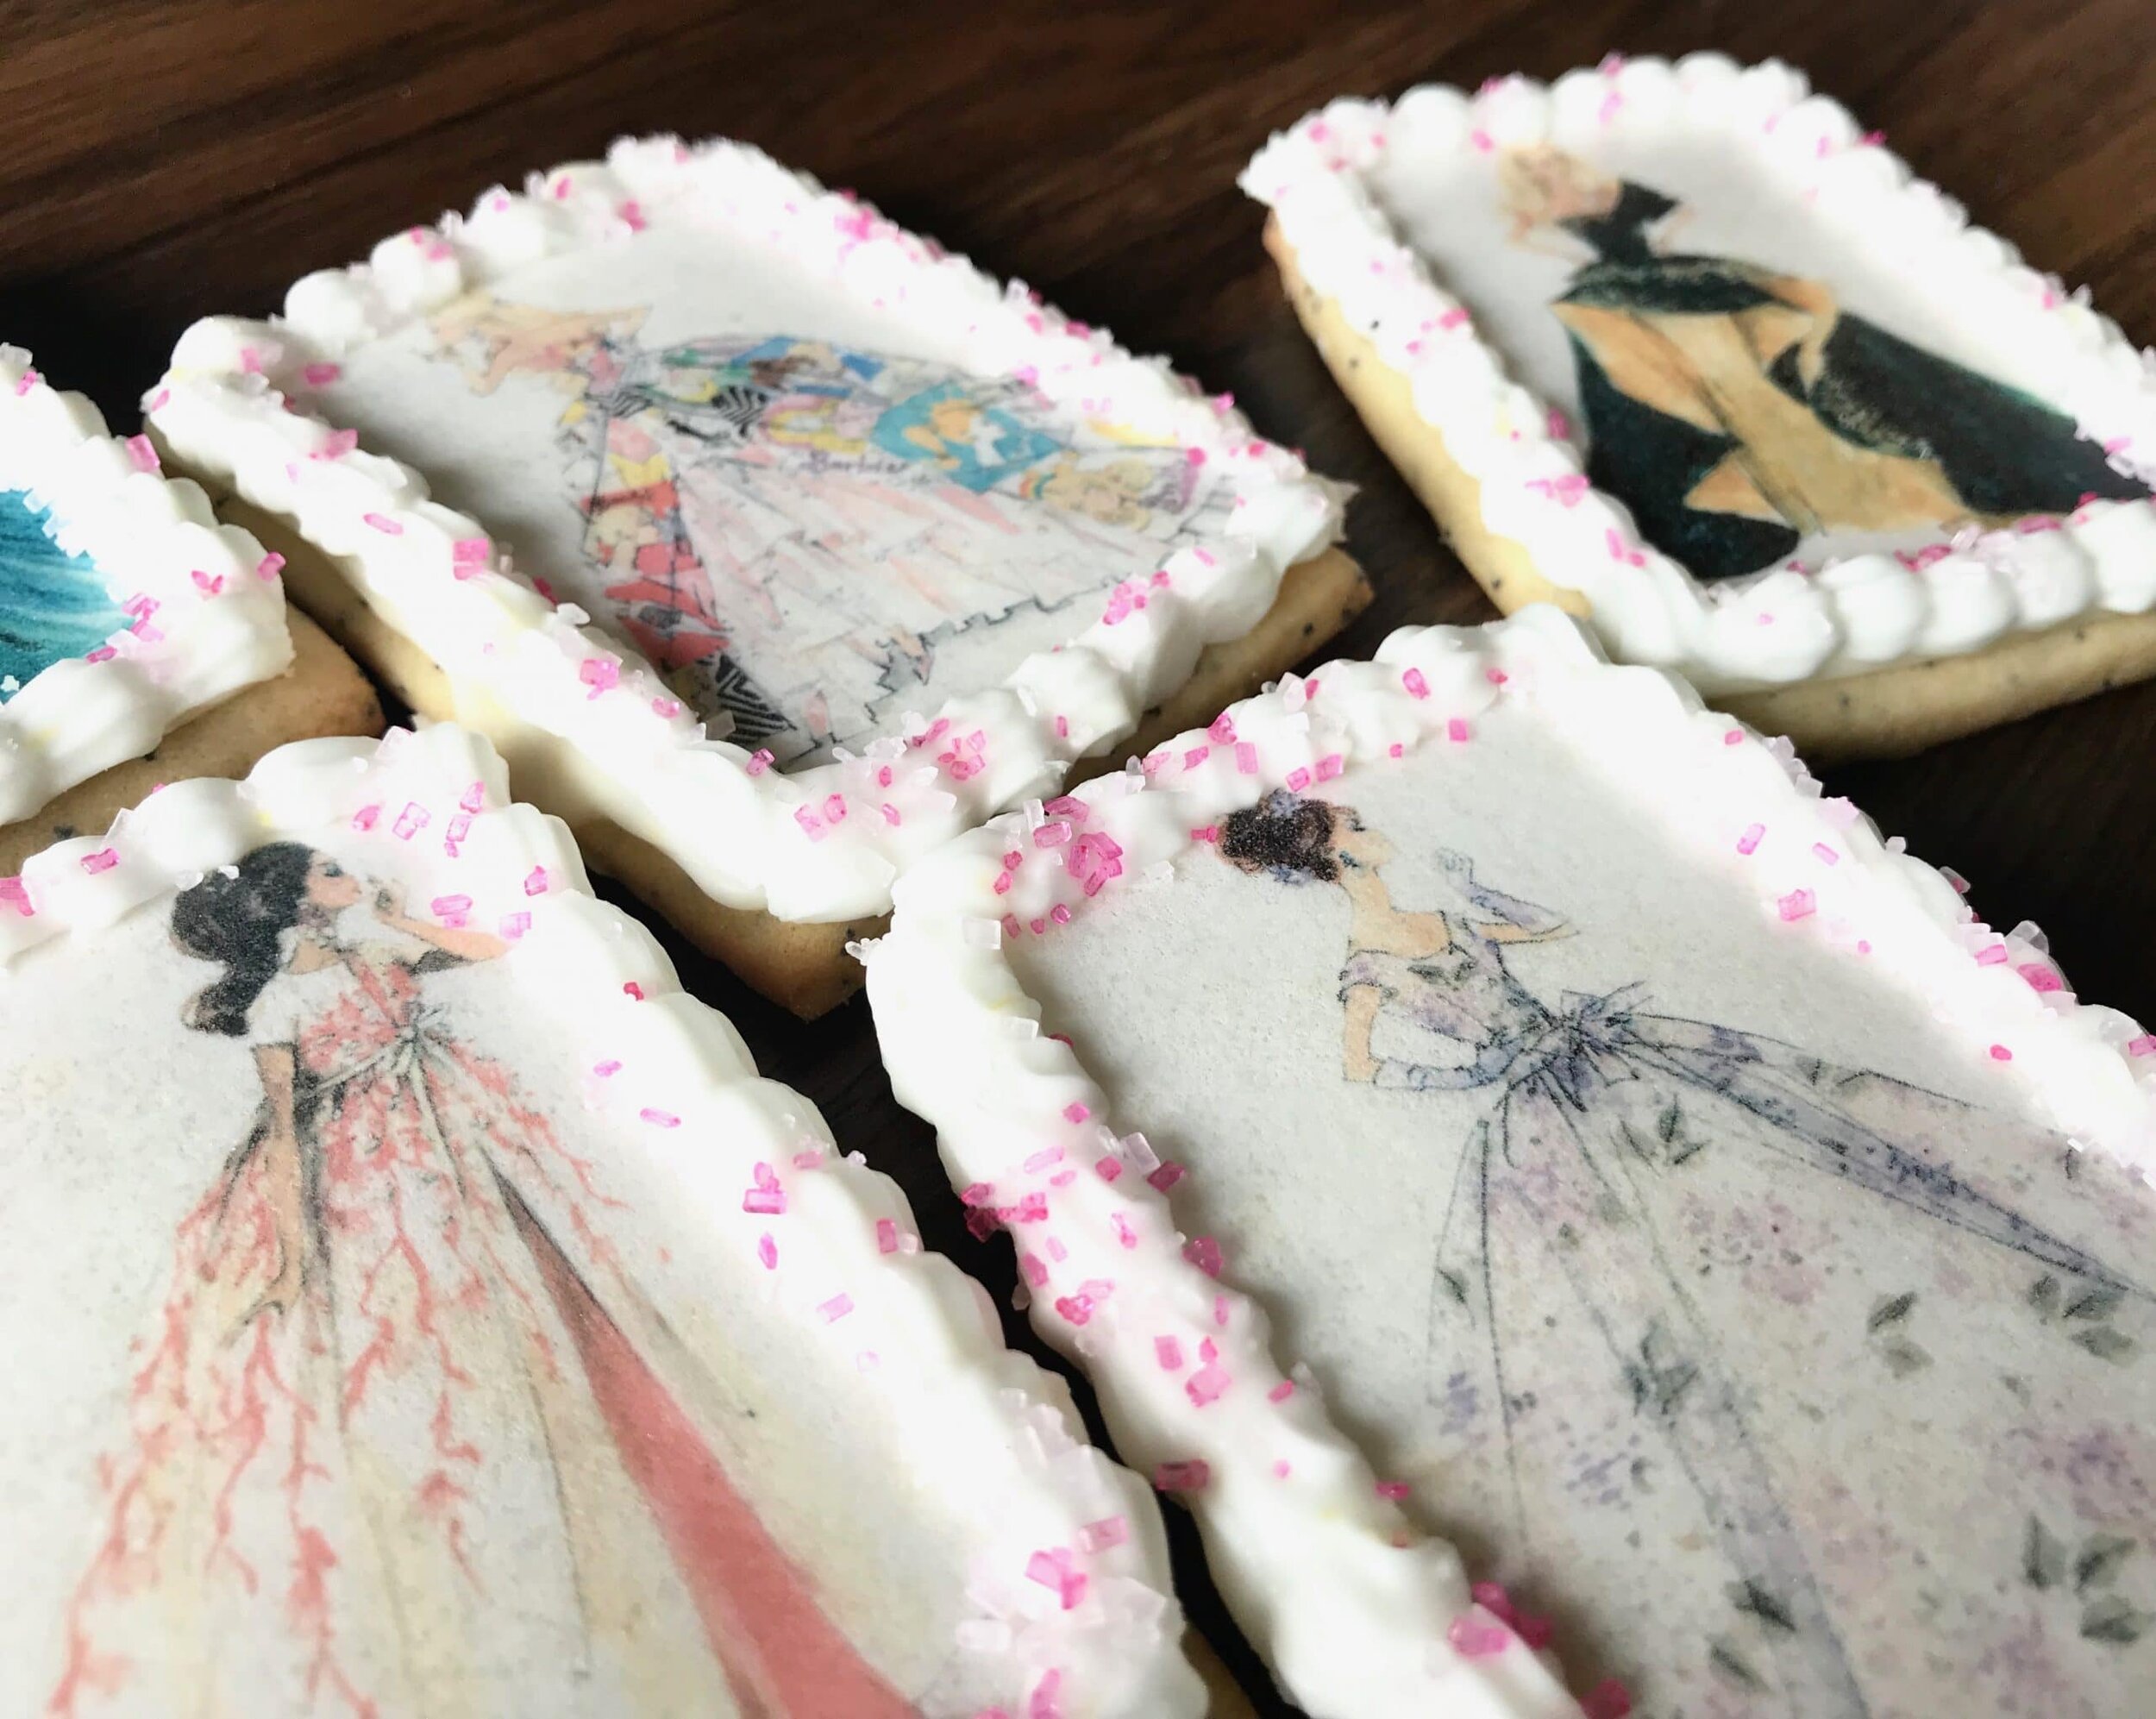
edible printing
Originally I wasn't going to use these fashion wafer papers on these lemon poppy seed cookies but actually on funfetti cookies! I mistakenly cut out the funfetti cookies way to big so I opted to put these pretty edible images on these cookies instead. If you absolutely love these images and want to use them yourself for your own cookies I'm selling them in my shop! Any little girl, boy or fashionista would love these for a birthday or even just because! I also have a series that explains everything on edible printing as well! It's a detailed step by step guide on how you can get images on your cakes and cookies too! I'm also working on a new part to the series on how to print for chocolate! How fun is that!Want to learn how to get images onto cookies and even cakes and chocolates? Then check out my new online edible printing course that will guide you through everything you need to know about edible printing, from start to finish! You won't regret it! Not too sure if you want to buy something so pricey if you aren't sure you'd like it? Then you can certainly check out my array of edible paper images you buy and try out before making such a huge purchase. You can even buy these images here in my shop!
Above are some products that I personally use and recommend for this recipe and to have for everyday use. When making royal icing you can go one of two ways. You can use meringue powder for a more safe route or you can use egg whites. I try to stick with using meringue powder mainly because I would rather save the egg whites for something else. This is completely optional but the recipe for these cookies uses meringue powder.
______________________________________________________________________
lemon poppy seed cookies

these cookies are popping with lemon flavor and poppy seeds too!
cookies
- 2 sticks unsalted butter (room-temp)
- 3/4 cup granulated sugar
- 1 egg
- 1/2 tsp vanilla extract
- 1/4 cup lemon juice
- 1 tbsp lemon zest
- 1 tsp baking soda
- 1/2 tsp salt
- 1 1/2 tbsp poppy seeds
- 2 1/2 cup all-purpose flour
royal icing
- zest of 1 lemon
- 3 tbsp lemon juice
- 2 cup powdered sugar
- 2 tbsp meringue powder
cookies
- preheat the oven to 350 degrees F. line a sheet pan with parchment paper. place the butter and the sugar into a bowl of an electric mixer fitted with a paddle attachment and cream until light and fluffy, about 3 minutes. scrape the sides of the bowl and add in the vanilla, lemon juice, lemon zest and egg and mix until incorporated. place the flour, salt, and baking soda, and poppy seeds in another bowl and whisk together. gradually add the flour mixture to the butter mixture. wrap the dough in cling wrap and refrigerate the dough for about 30 minutes. roll the cookies out to 1/4 inch thickness and cut out desired shapes. place on the sheet pan and bake for 10-12 minutes or until the edges are golden brown.
royal icing
- combine all of the ingredients in the bowl of an electric mixer fitter with a whisk attachment. gradually add in water, a teaspoon at a time, until a thick yet pipable consistency forms. once you are done with the thicker icing for piping a boarder on the cookies add in a little more water gradually until the icing becomes slightly looser to flood the cookies.


Coconut Macaroons


[wprm-recipe-jump]
*Disclaimer: This post contains affiliate links. To learn more, please go here.I love coconut and whenever I think about good coconut macaroons, I think about either the ones that I had found at a grocery store while I was in England or the samoa cookies from the girl scouts. For me it's incredibly hard to find that perfect coconut macaroon. It needs to be soft, moist, and chewy. A lot of the times I get ones that are hard and flavorless and it just isn't the same. These coconut macaroons are good, but I can admit that they still need a little bit of work to become the absolute best coconut macaroon.Even though these guys don't have caramel in them, doesn't mean you can't add in a little caramel drizzle. Or if you would rather have a little crunch you can add some sliced almonds on top. There really is no wrong way to making these coconut macaroons a little different for your taste buds.
[mailerlite_form form_id=1]

Above are some products that I personally use and recommend for this recipe and to have for everyday use. One of my favorite things that I have many of are the BlueQ oven mitts. They aren't just really funny and a great statement piece for your kitchen, but they are great quality too!
_____________________________________________________________________
coconut macaroons
soft and chewy coconut macarons drizzled with chocolate
- 12 oz bag shredded coconut
- 14 oz can sweetened condensed milk
- 1/2 tsp vanilla extract
- 1/4 tsp almond extract
- pinch salt
- 2 egg whites
- chocolate for drizzling
- preheat oven to 350 degrees F and line a sheet pan with parchment paper. in a bowl, whip the egg whites to stiff peaks. in another bowl, combine the coconut, sweetened condensed milk, extracts and salt and mix together. gently fold the whipped egg whites into the coconut mixture. scoop the batter onto the pan and bake for 20-25 minutes or until golden brown. liquid may spread on the pan and around the cookies, but don't worry it is easy to remove and the cookies are still nice and moist! let the cookies cool and then drizzle with the chocolate.

Slice and Bake Cookies


[wprm-recipe-jump]
*Disclaimer: This post contains affiliate links. To learn more, please go here.
This was originally supposed to be posted back in February, but I got into a funk and just didn't feel like doing anything at all. So the pictures aren't the best but at least these slice and bake heart cookies themselves are pretty freaking great. Plus they're cute!
You can use this technique to make all kinds of cute slice and bake cookies. Instead of using a heart shaped cutter you could use a Christmas tree for the holidays or a pumpkin for Halloween. There are really so many different ways you could go about making these cookies as your own! You can even try to make your own design! How fun would that be?!
[mailerlite_form form_id=1]
Above are some products that I personally use and recommend for this recipe and to have for everyday use. One thing these slice and bake heart cookies have in them is princess extract. Now this extract is delicious and is one of my favorite things to have in my kitchen at all times. It's a mix of vanilla, lemon and almond extracts and when they are all combined they make an addicting concoction.
_________________________________________________________________________
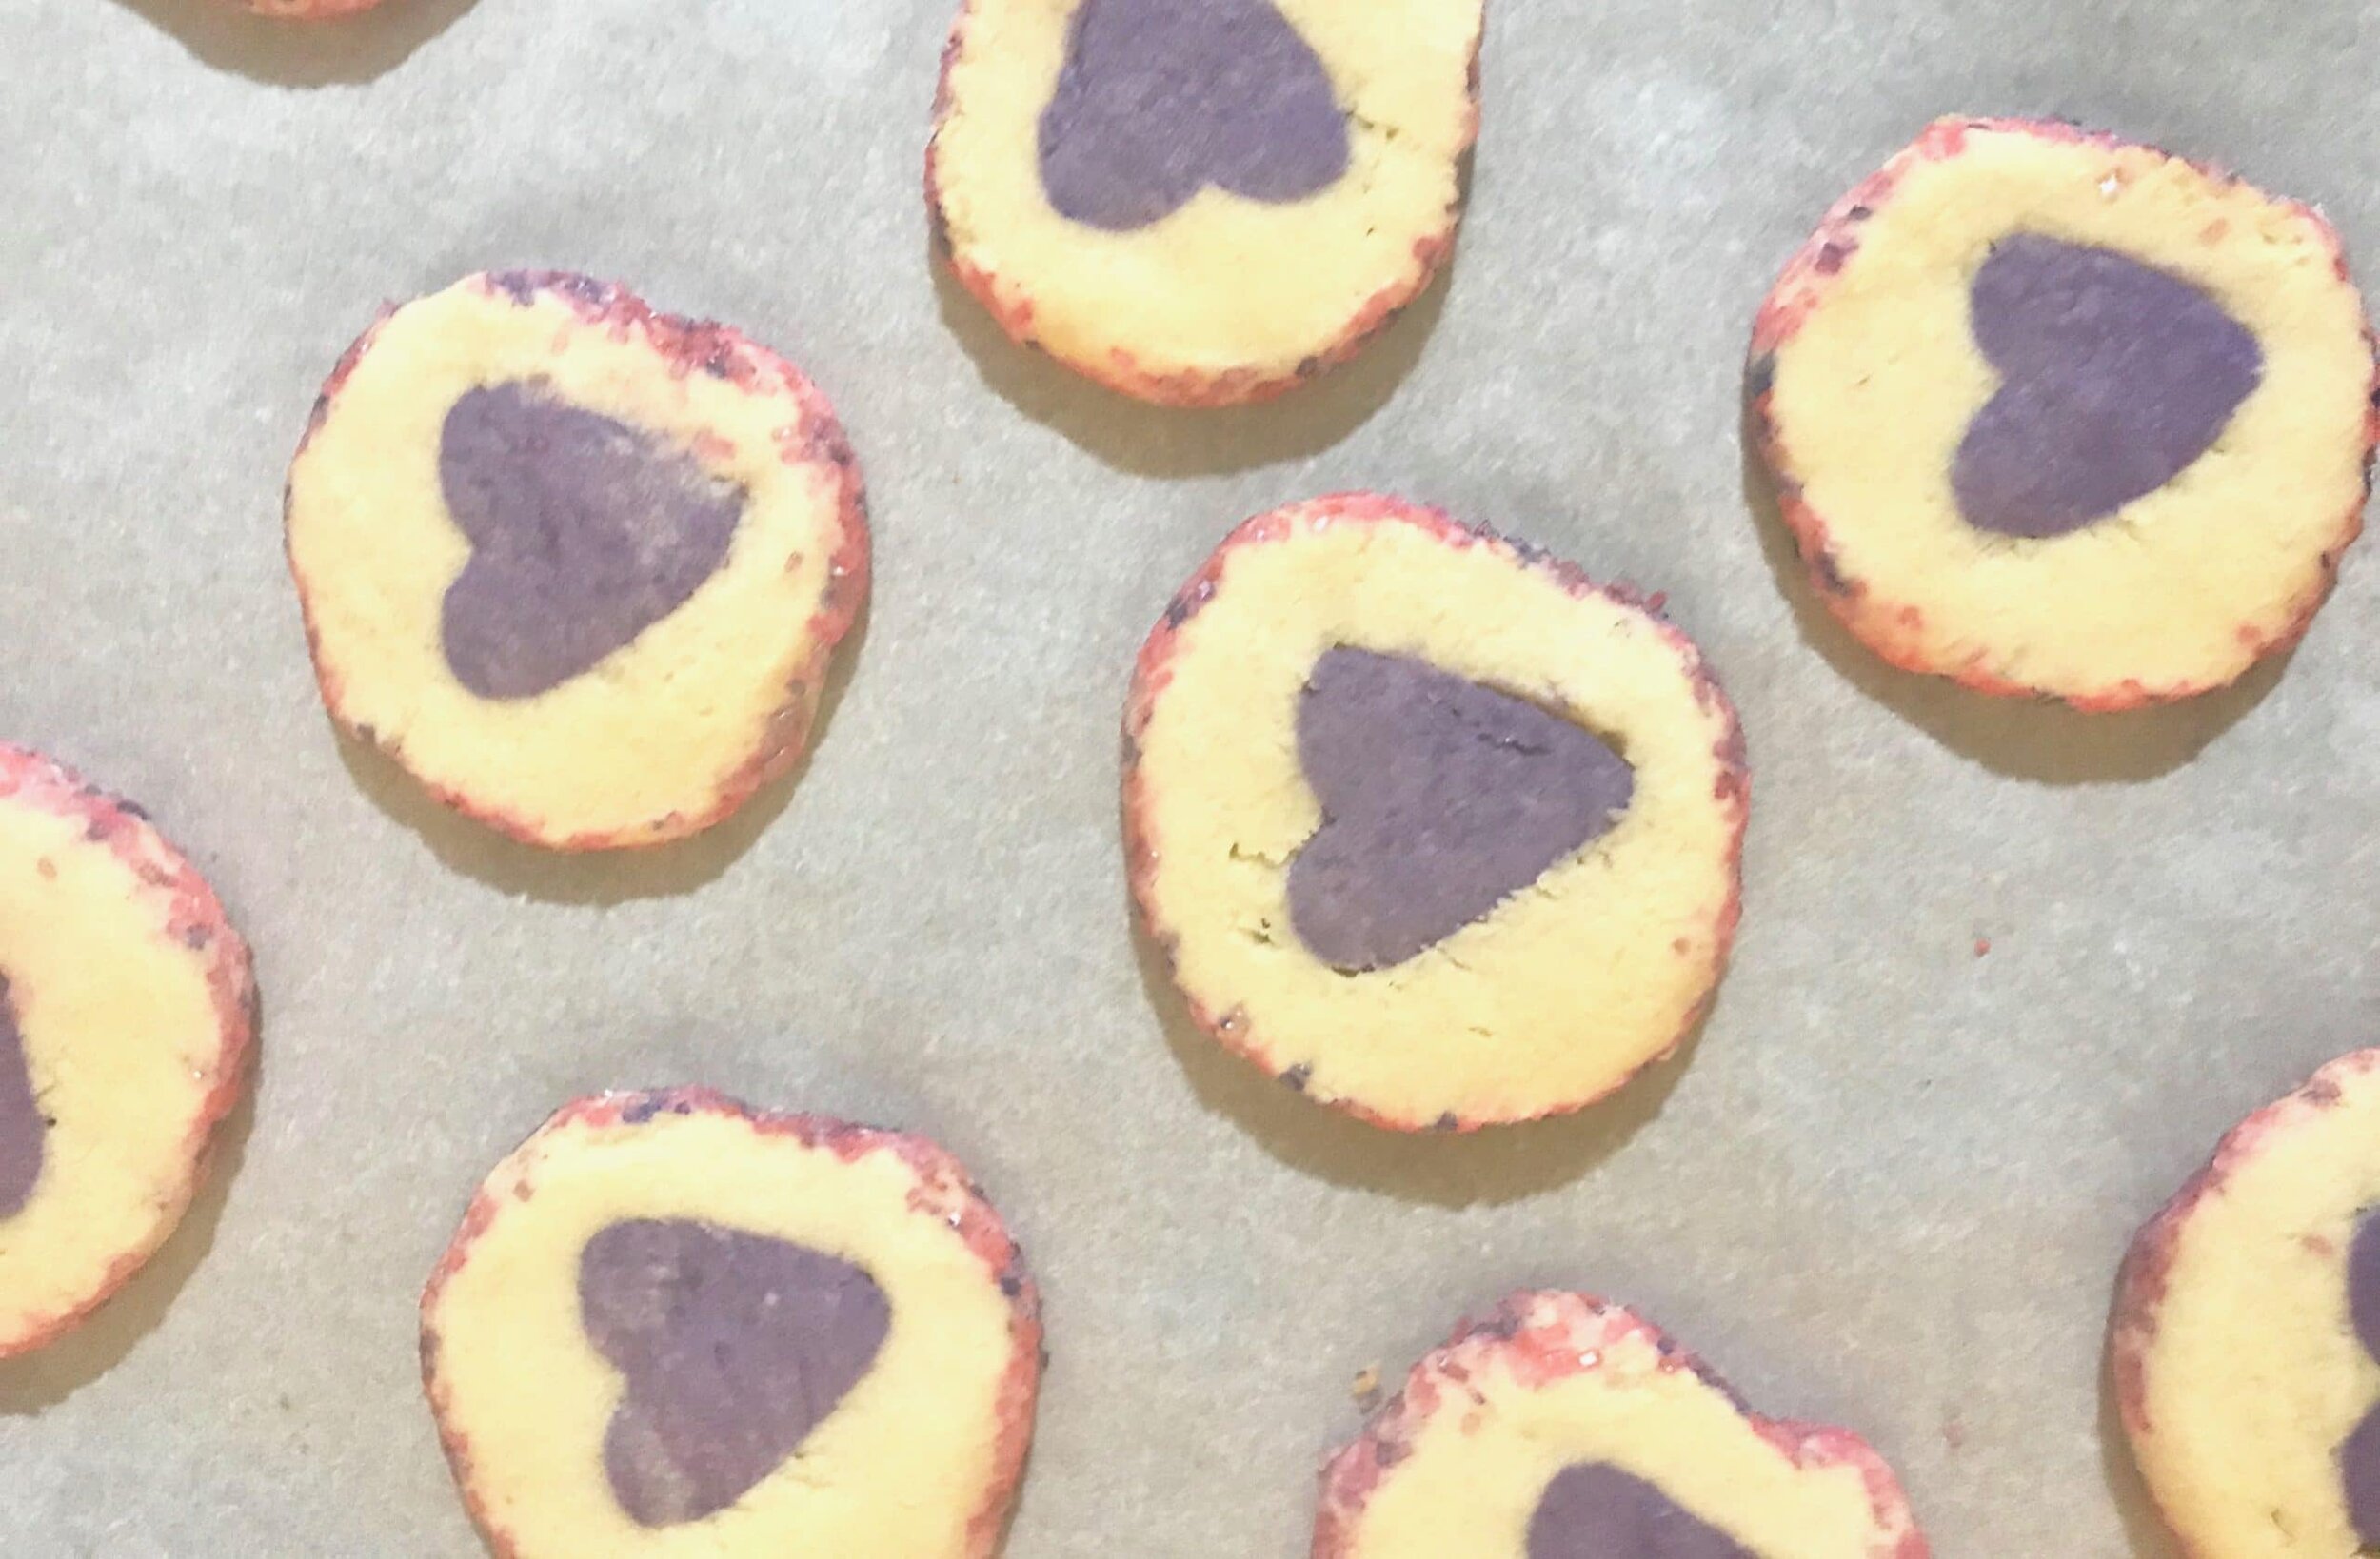
heart cookies

cute slice and bake cookies with a heart in the middle and surrounded with sprinkles. perfect for valentines day
- 2 sticks unsalted butter
- 3/4 cup granulated sugar
- 1 egg
- 1 tsp princess extract
- 1 1/2 tsp baking powder
- pinch salt
- 2 1/2 cup all-purpose flour
- food coloring
- sprinkles
-
preheat the oven to 350 degrees F. in a bowl, combine the salt, baking powder, and flour; set aside. in another bowl, combine the butter and sugar and cream together with a paddle attachment until fluffy, about 1 minute. scrape down the sides of the bowl then add in the egg and princess extract. mix until incorporated, about 1 minute. scrape down the sides of the bowl again and then gradually add in the dry ingredients.
-
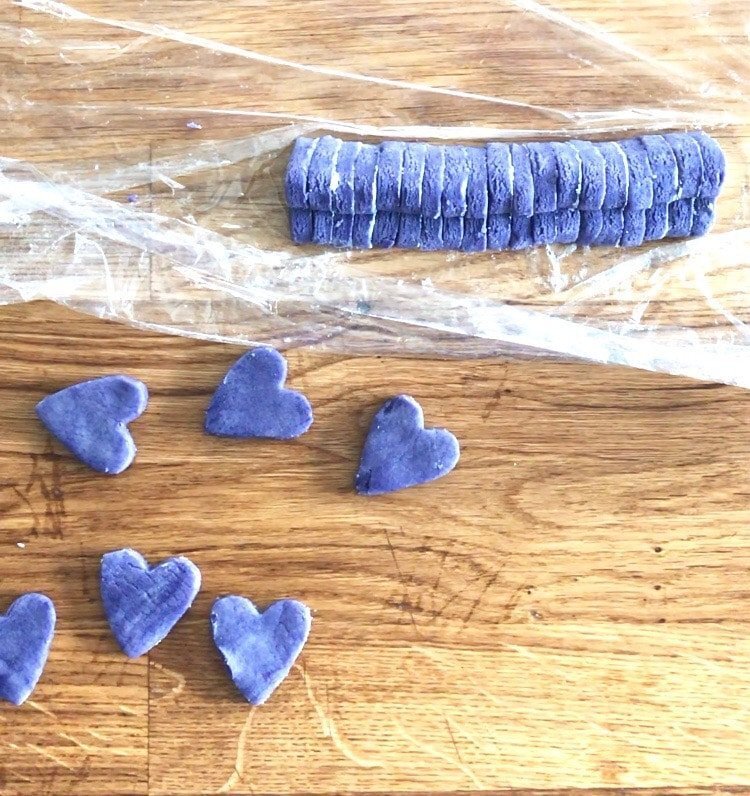
separate the dough in 1/4 and 3/4. take the 1/4 amount of dough and color it with your desired color of choice. roll out the colored dough and using a small heart cutter, cut out multiple hearts shapes. stack the heart shapes and place on some cling-wrap and roll it. freeze the dough for about 15 minutes until firm.
-
taking the remaining dough, roll out multiple long ropes of the dough and then carefully mold them around the heart shaped log. freeze for a couple minutes until firm and i found it easier to rub a little water on the dough and then press the sprinkles in firmly. carefully cut the cookies with a sharp knife into 1/4 inch thick pieces. place on a lined sheet pan and bake for 10-12 minutes. let cool.

Passion Fruit French Macarons


[wprm-recipe-jump]
*Disclaimer: This post contains affiliate links. To learn more, please go here.
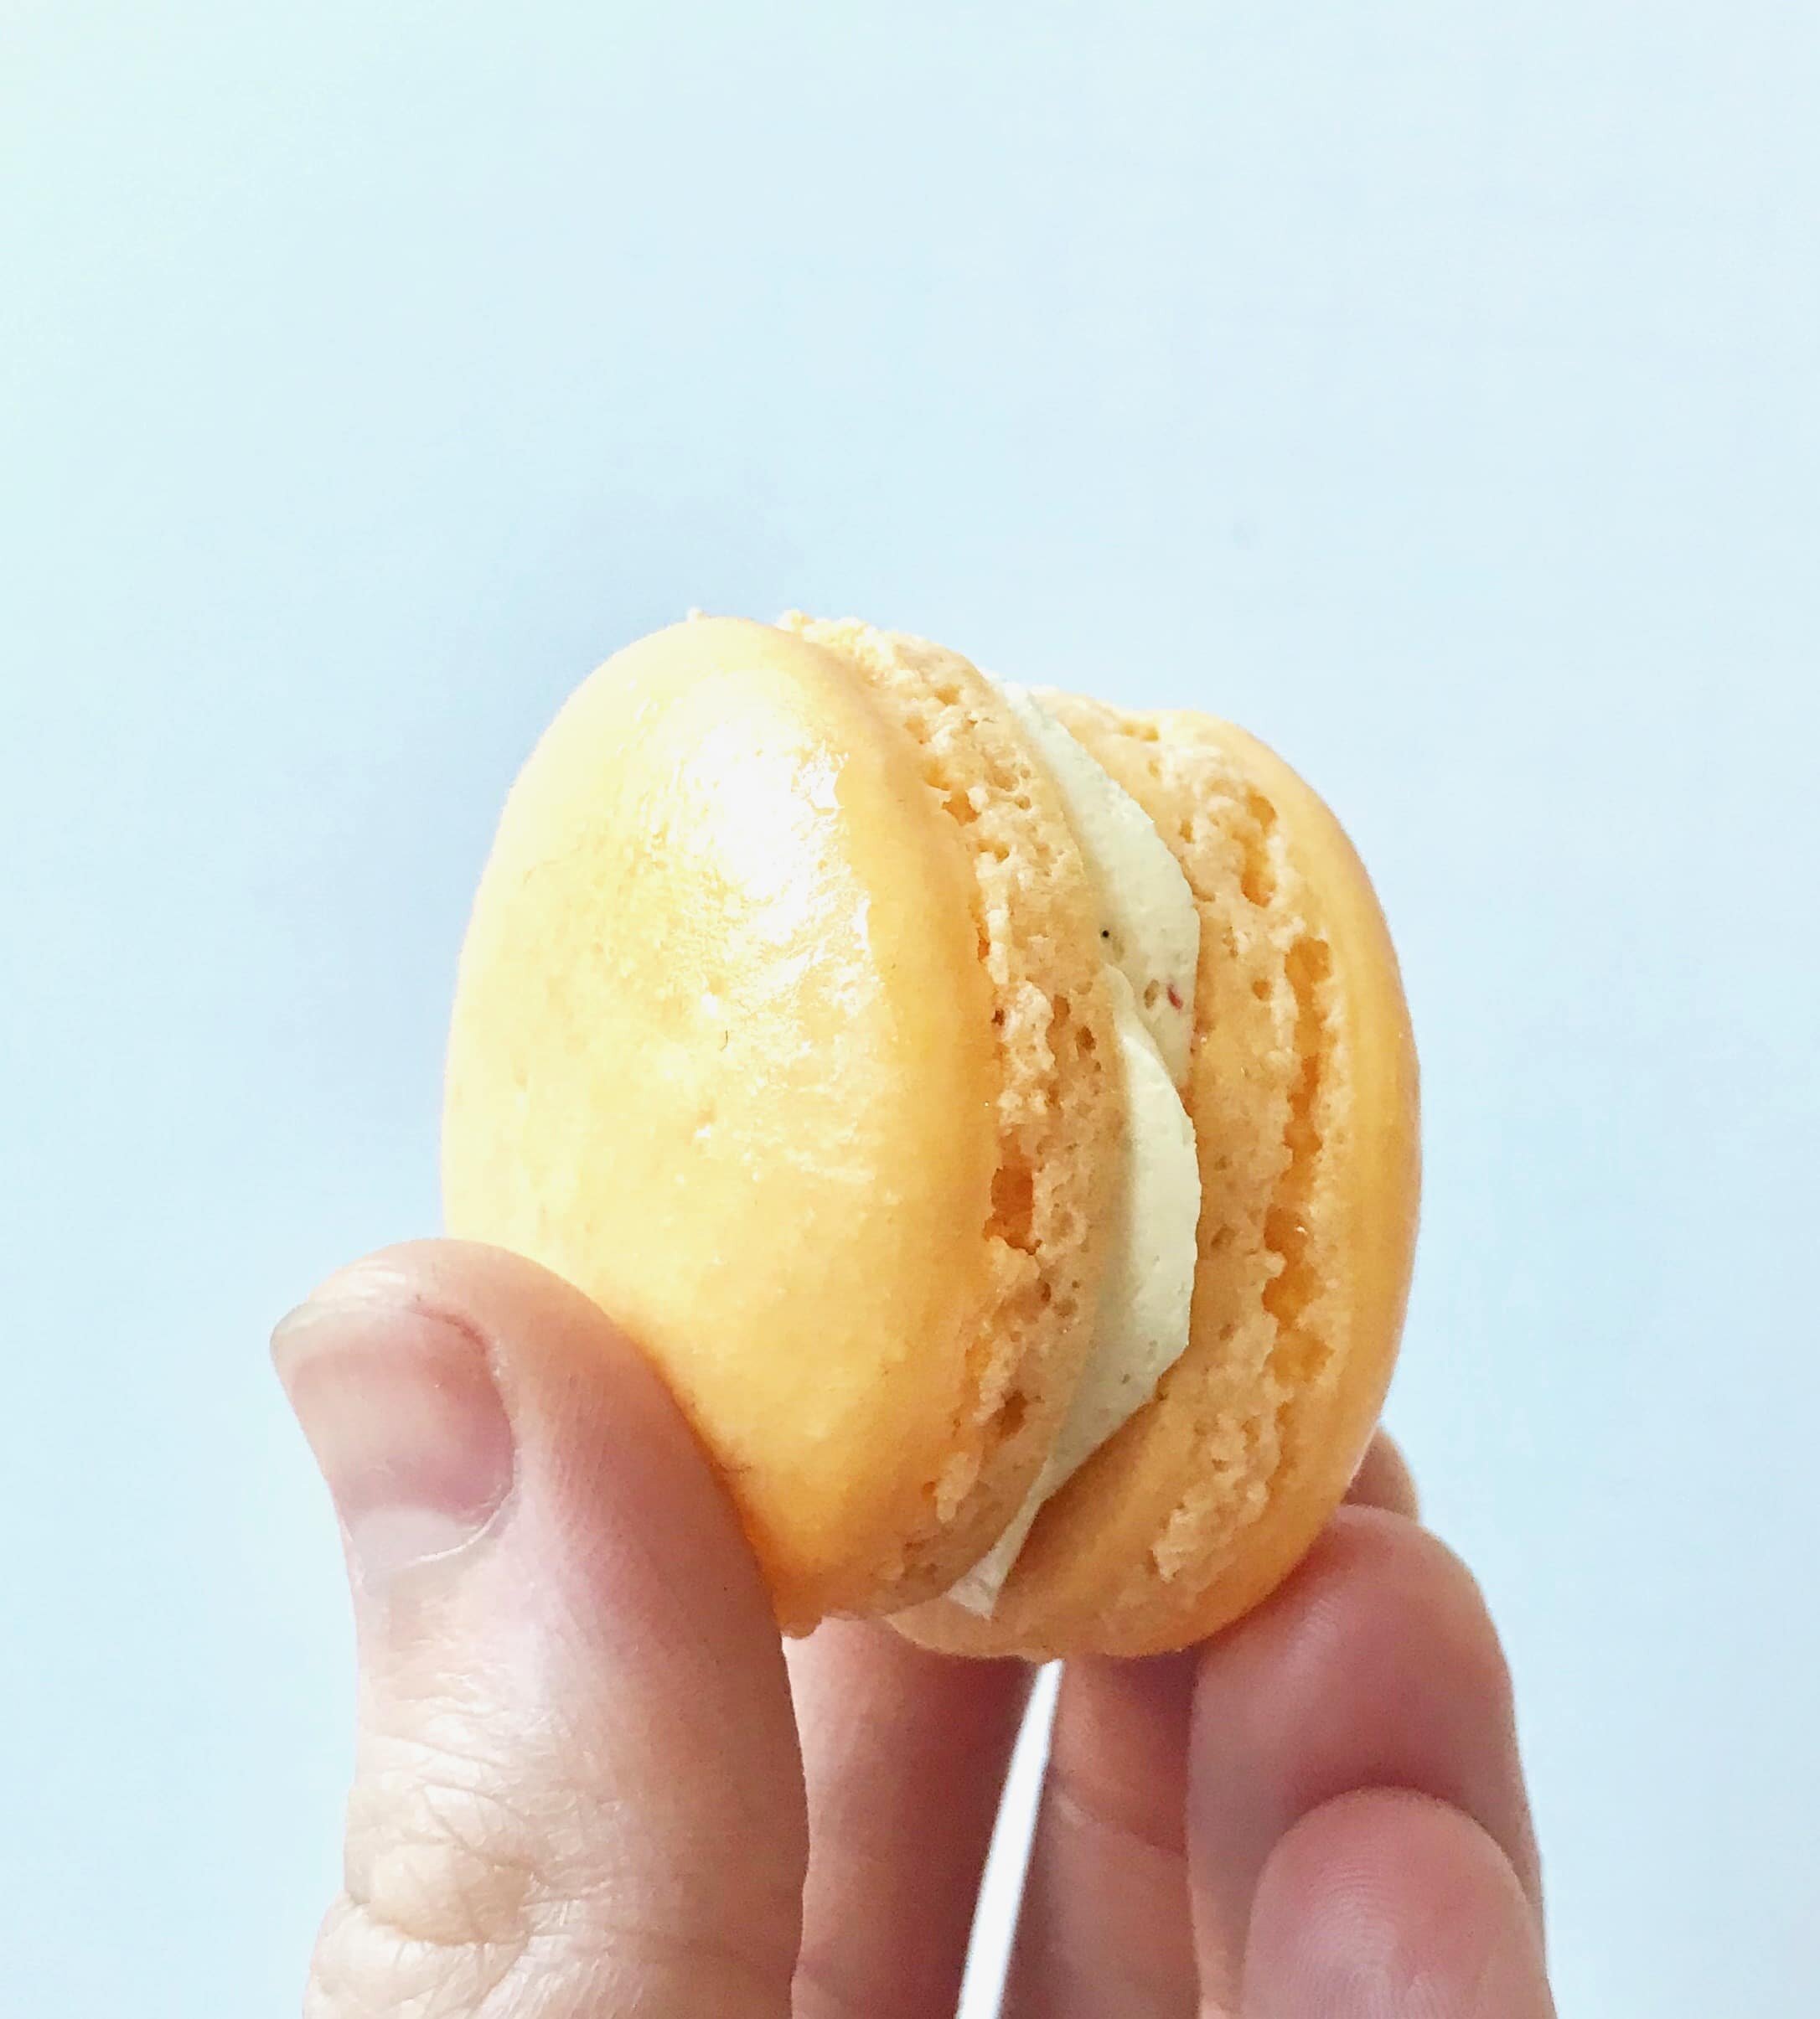
These little passion fruit french macarons are so cute! But they are also tangy and pack a punch. The buttercream is full of passion fruit puree which gives it such a freshness to these cookies.
Just know that making french macarons can be temperamental. They don't like humidity and you have to whip the egg whites just right. Another important part is to make sure that you let the batter dry before baking. This is a crucial step! If you don't follow it than the macarons will end up as pancakes.
Change it up!
Use whatever food coloring you like when you make french macarons. I chose orange for these passion fruit french macarons, but you can coordinate the color to the fruit you choose. Want to try something fun with these cookies? If you can't find passion fruit puree anywhere but you can find the fruit in your local grocery store, than I think a fun way would be to make a plain swiss buttercream and then add in a small spoonful of the fresh passion fruit right into the center before you sandwich the cookie together. Now that sounds delicious!
[mailerlite_form form_id=1]
Products I recommend for making this dessert.
Above are some products that I personally use and recommend for this recipe and to have for everyday use. One thing that I highly suggest getting when making french macarons is a silpat. A silpat is a reusable parchment paper and it's such a great investment. I find it easier to use a silpat versus parchment paper when making french macarons because it doesn't move around but it also makes it easier to remove the cookies too.
______________________________________________________________________________
passion fruit french macarons
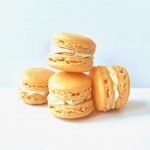
french macaron cookies with a creamy passion fruit swiss buttercream in the middle
french macaron
- 3/4 cup almond flour
- 1 1/2 cup powdered sugar
- 3 fresh egg whites
- 1/3 cup granulated sugar
- pinch cream of tartar
- food coloring (optional)
- sprinkles (optional)
swiss buttercream
- 5 egg whites
- 1 cup granulated sugar
- 3 sticks unsalted butter
- 2 tsp vanilla extract
- passion fruit puree (to taste)
french macaron
- preheat the oven to 300 degrees F. whip the egg whites and cream of tartar until foamy and gradually add in the granulated sugar. whip until stiff peaks form then add in the food coloring. in a large bowl, sift together the almond flour and powdered sugar. gradually fold the egg whites into the dry ingredients. put the batter into a piping bag and pipe onto a sheet pan that is lined with a silpat (parchment works fine). bang the pan really good on the counter to release any air bubbles and then let the macarons sit to dry, about 30 minutes, or until it doesn't stick to your finger. you can test by lightly patting the tops, if it sticks then let it sit a little longer. once dry, bake for 16-20 minutes or until the bottoms of the macarons don't stick and come off the silpat clean.
swiss buttercream
- over a double boiler, combine the sugar and egg whites. whisk together until the sugar is fully dissolved. you can check this by rubbing some of the mixture together between your finger and thumb. if smooth, then it is ready. place the egg mixture into a bowl of an electric mixer fitter with a whisk attachment. whip on high for about 2 minutes and the mixture has cooled slightly. gradually add in the butter, about a tablespoon at a time. once all of the butter is added continue whipping until fully combined. add in the vanilla and passion fruit.

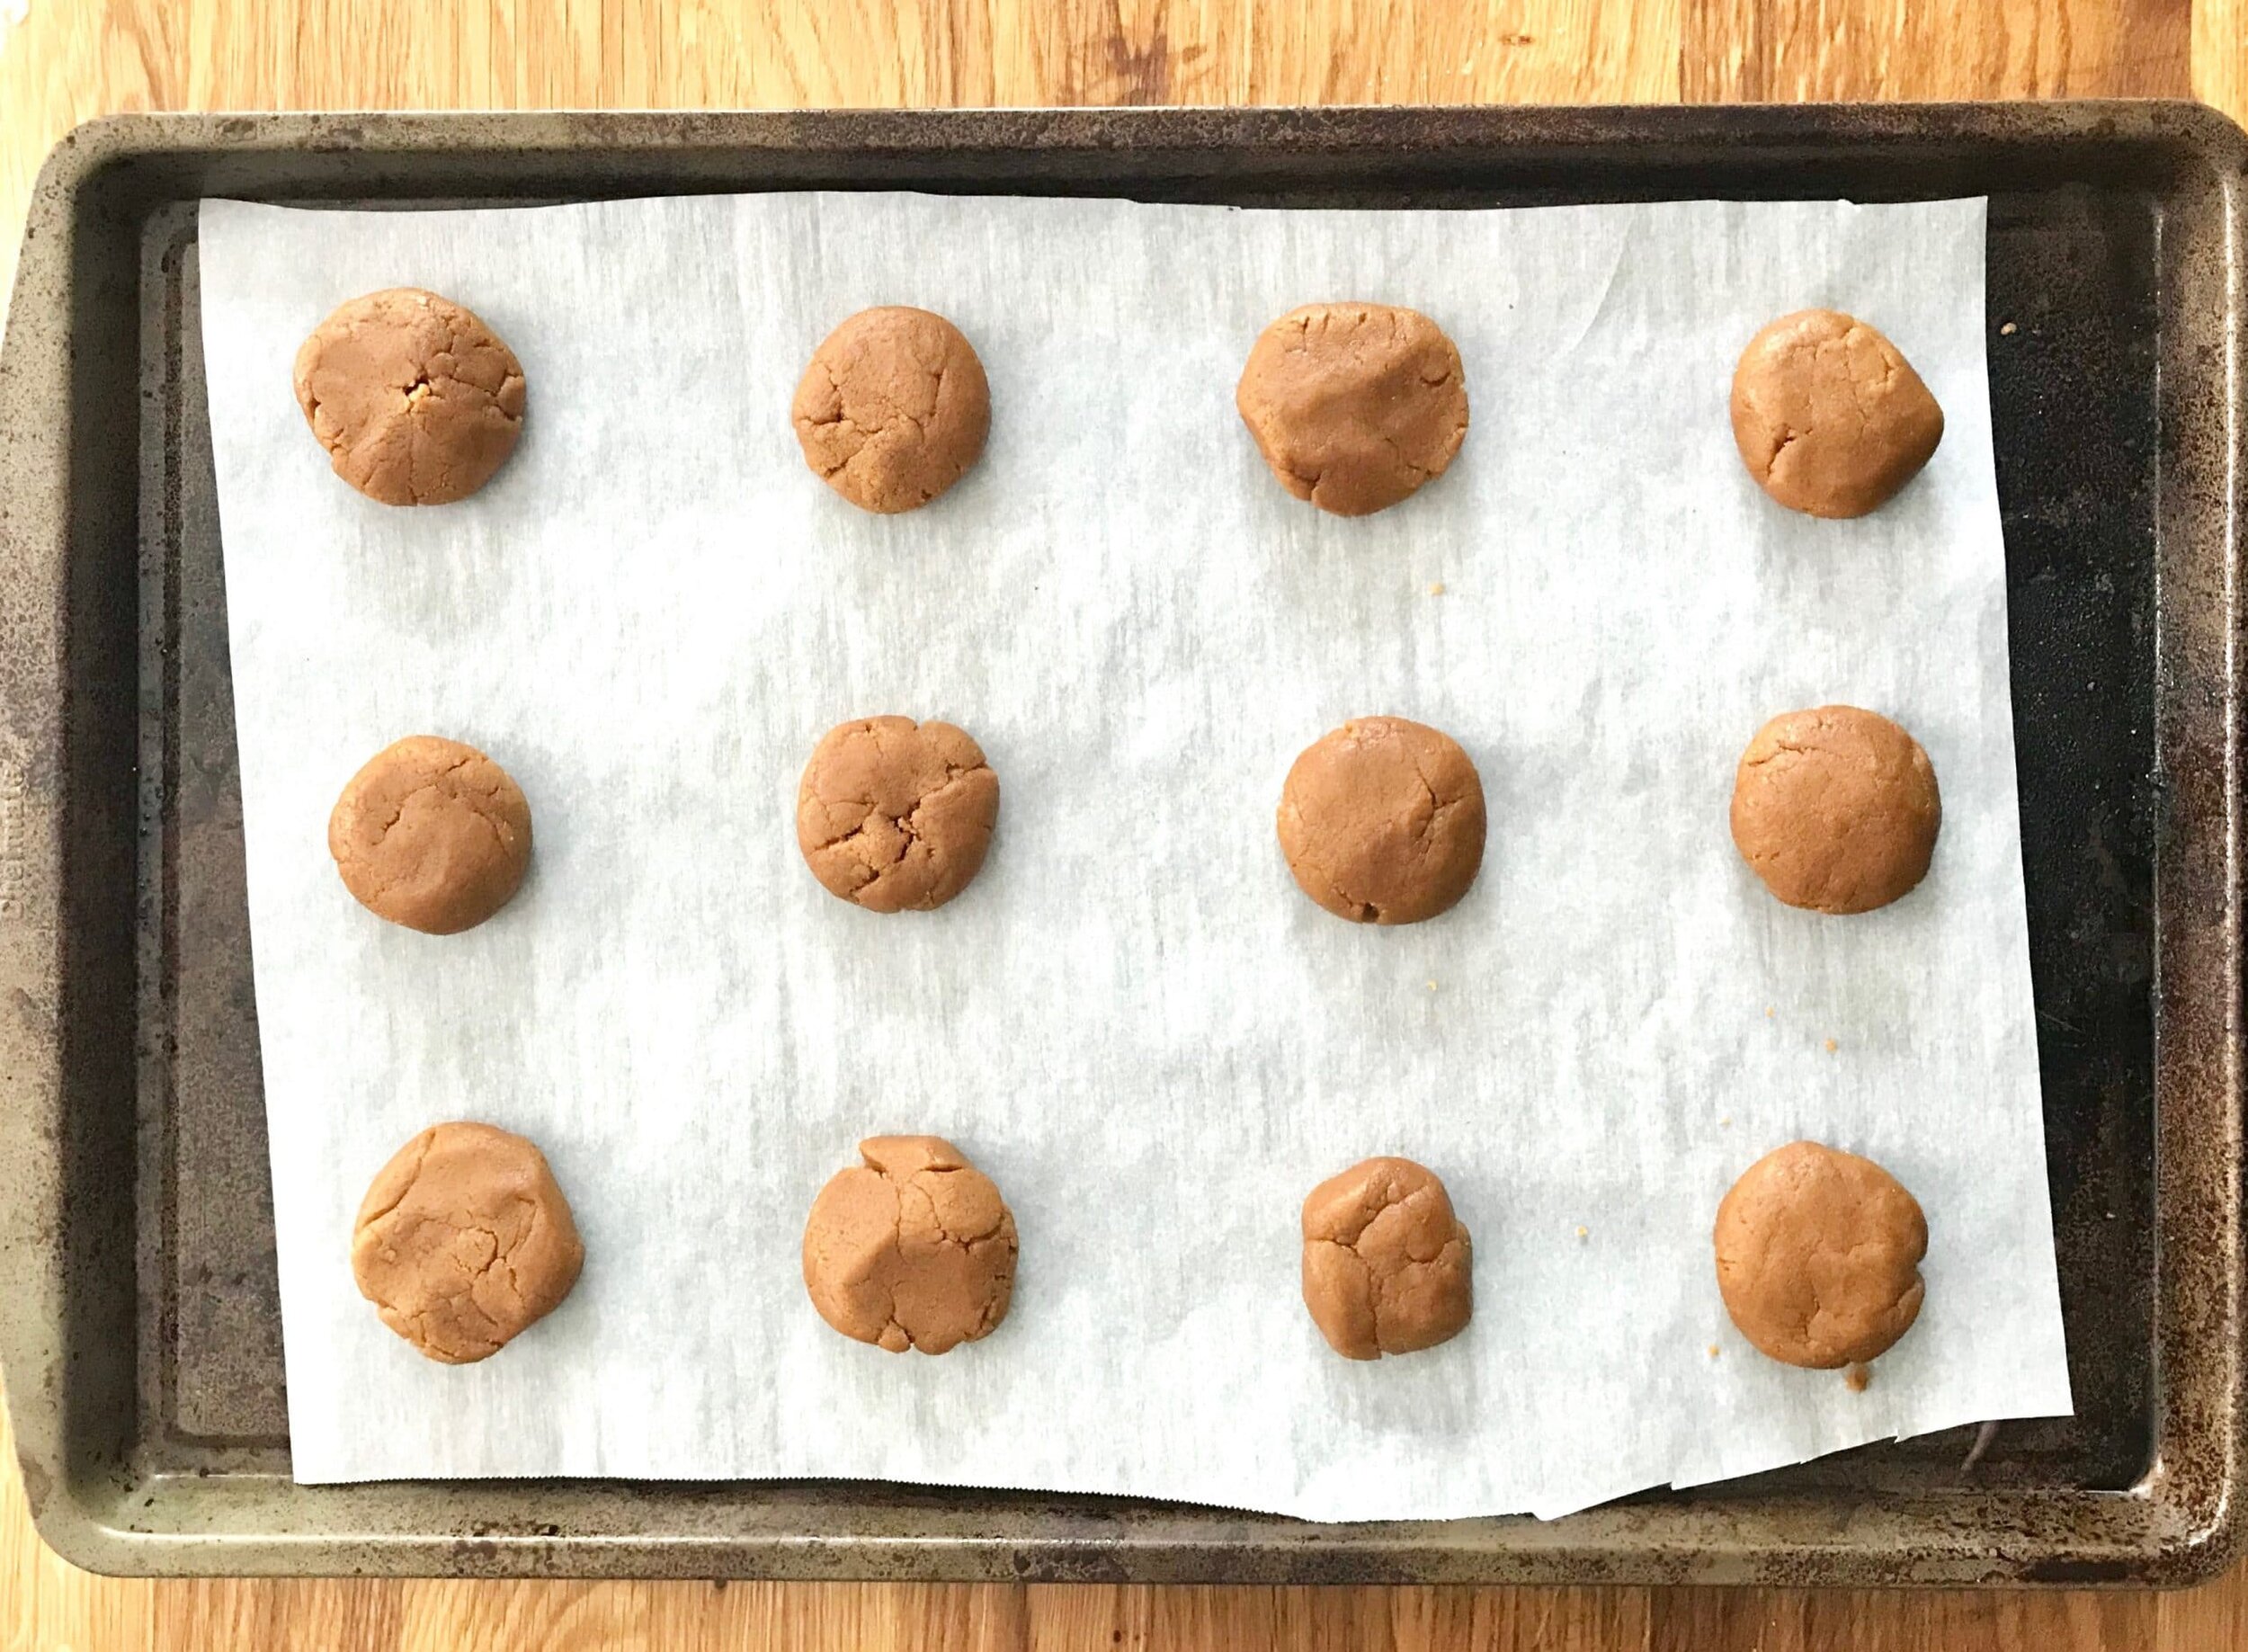
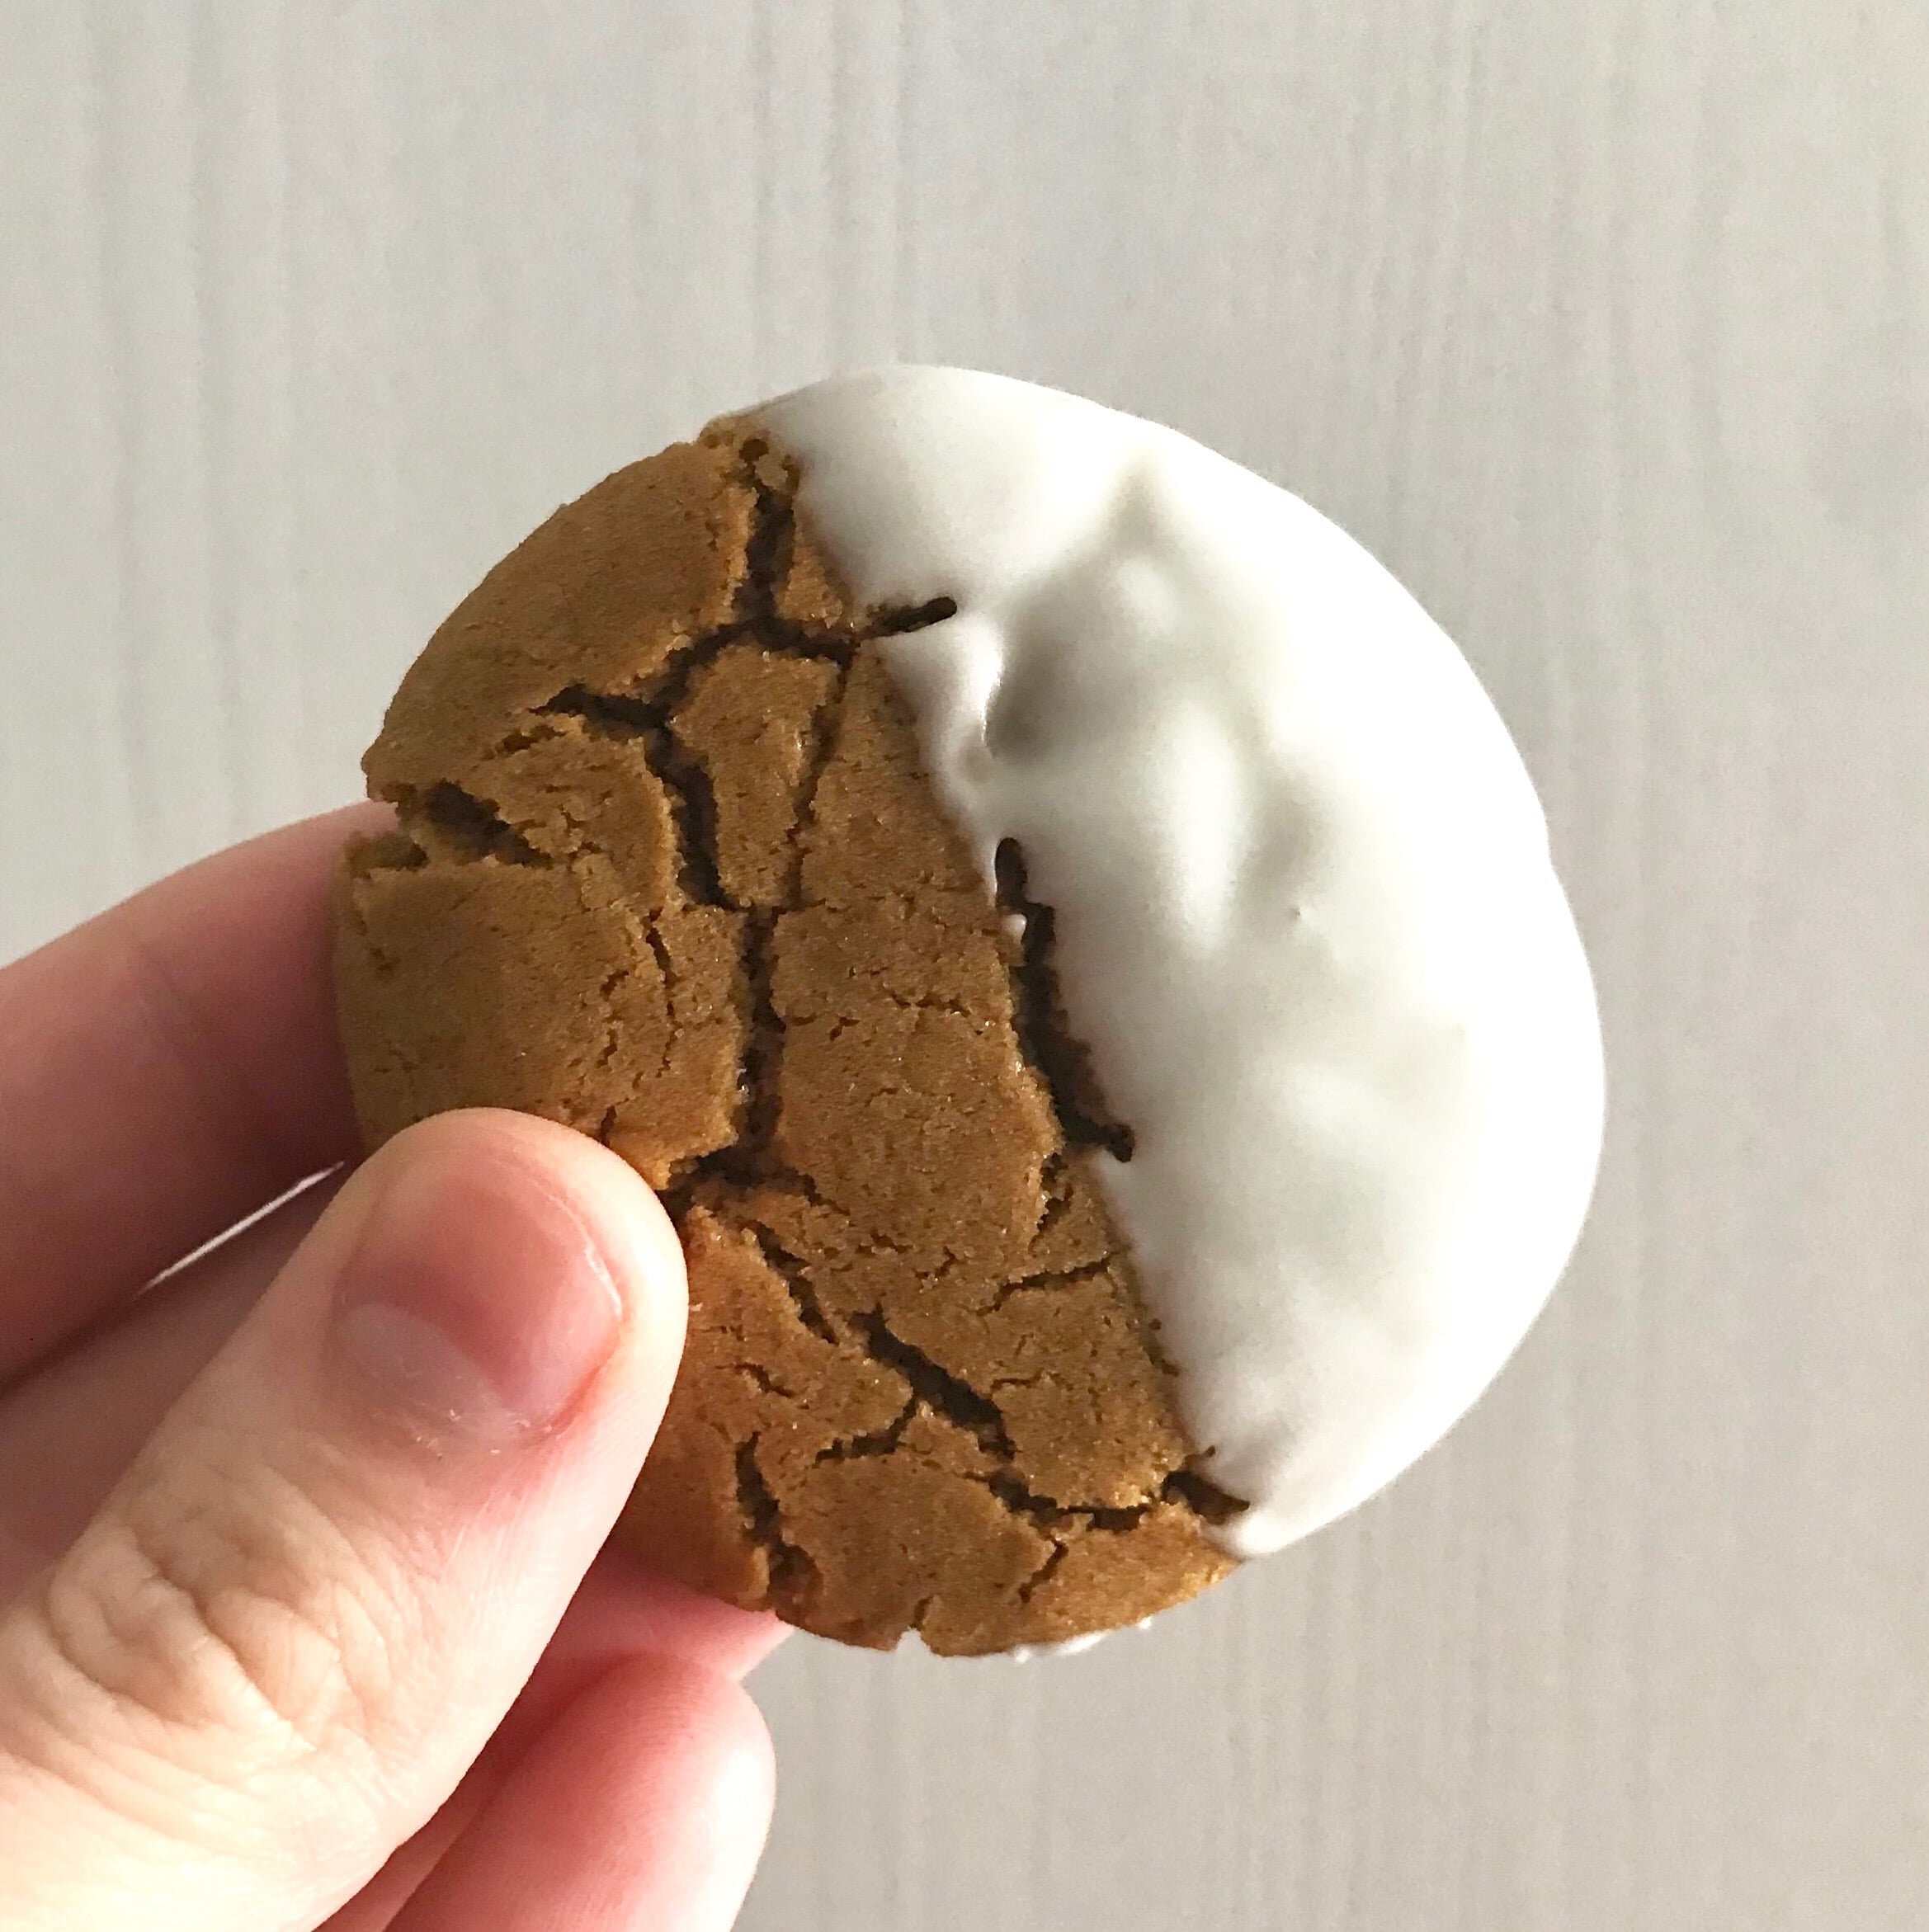
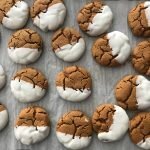
Ginger Snap Cookies


[wprm-recipe-jump]
*Disclaimer: This post contains affiliate links. To learn more, please go here.
My sister graduates college this month and as typical I ask if I should make anything. these ginger snap cookies were her request. A yummy spiced ginger cookie dipped in white chocolate. Now don't get me wrong, these cookies are delicious, but I was like, "aren't these more of a Christmas cookie?". Well, if you know my sister, then you know she doesn't care. So here we are, with a bunch of these spiced, chocolate dipped, delicious cookies.
Since these ginger snap cookies are made with oil instead of butter, the consistency of the dough is a little weird. It has like this dry-ish and crumbly like feel and look to it, but once it is baked it's like chewy goodness. When you pair it with the white chocolate it makes for the perfect bite.
[mailerlite_form form_id=1]

Products I recommend for making this dessert.
Above are some products that I personally use and recommend for this recipe and to have for everyday use. My absolute favorite is the BlueQ oven mitts. I have a collection of them and I love them! They are great quality and it’s nice to have a kitchen item with a sense of humor.
______________________________________________________________________________
ginger snap cookies
delicious ginger cookies with a white chocolate dip
- 1 cup vegetable oil
- 1/3 cup granulated sugar
- 3/4 cup brown sugar
- 1 egg
- 2/3 cup molasses
- 1 tsp cinnamon
- 2 tsp ginger
- 3/4 tsp salt
- 1 1/2 tsp baking soda
- 2 1/2 cup all-purpose flour
- 12 oz white chocolate (for dipping)
- preheat the oven to 350 degrees F. line a sheet pan with parchment paper. place the oil and the sugars into a bowl of an electric mixer fitted with a paddle attachment, and cream until light and fluffy, about 1 minute. scrape the sides of the bowl and add in the molasses and egg and mix until incorporated. place the flour, salt, baking soda, and spices in another bowl and whisk together. gradually add the flour mixture to the oil mixture. scoop the cookies out on the sheet pan and bake for 8-10 minutes.
- melt the white chocolate in a small bowl and dip half of the cookie into the chocolate. shake the excess chocolate off and place onto a sheet pan with parchment until the chocolate sets.

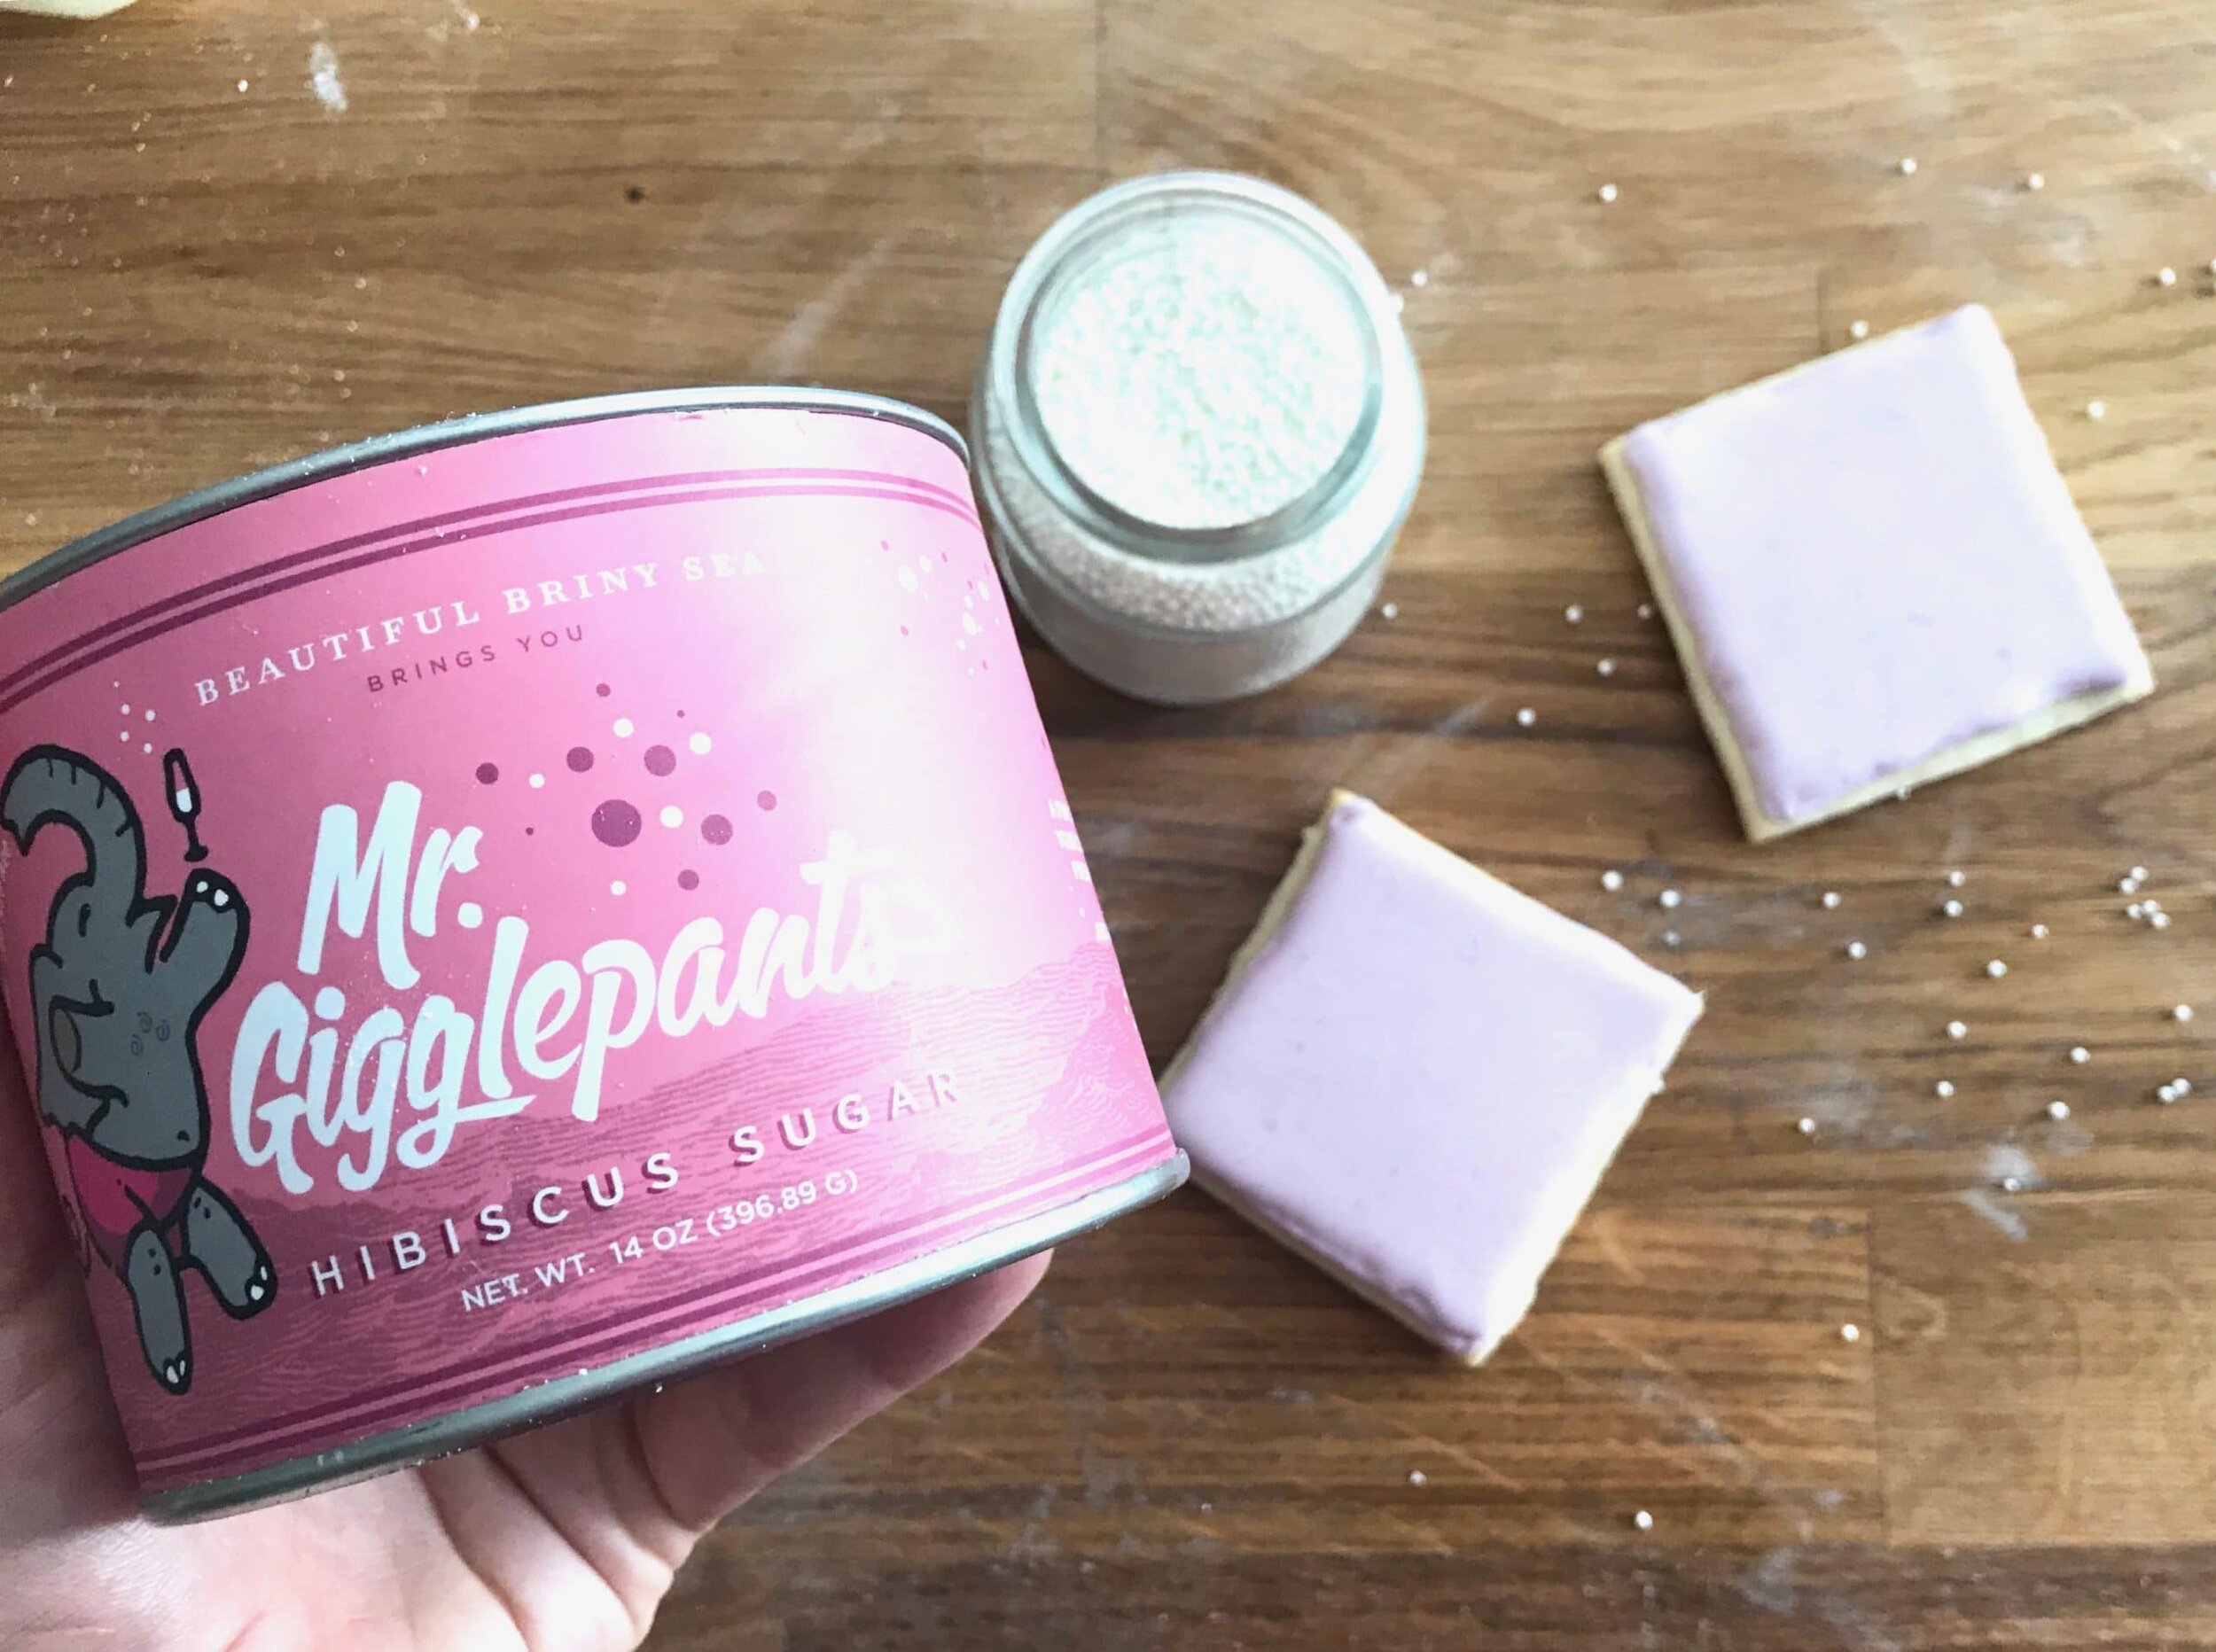
Cream Cheese Cookies with Hibiscus Icing

[wprm-recipe-jump]
*Disclaimer: This post contains affiliate links. To learn more, please go here.
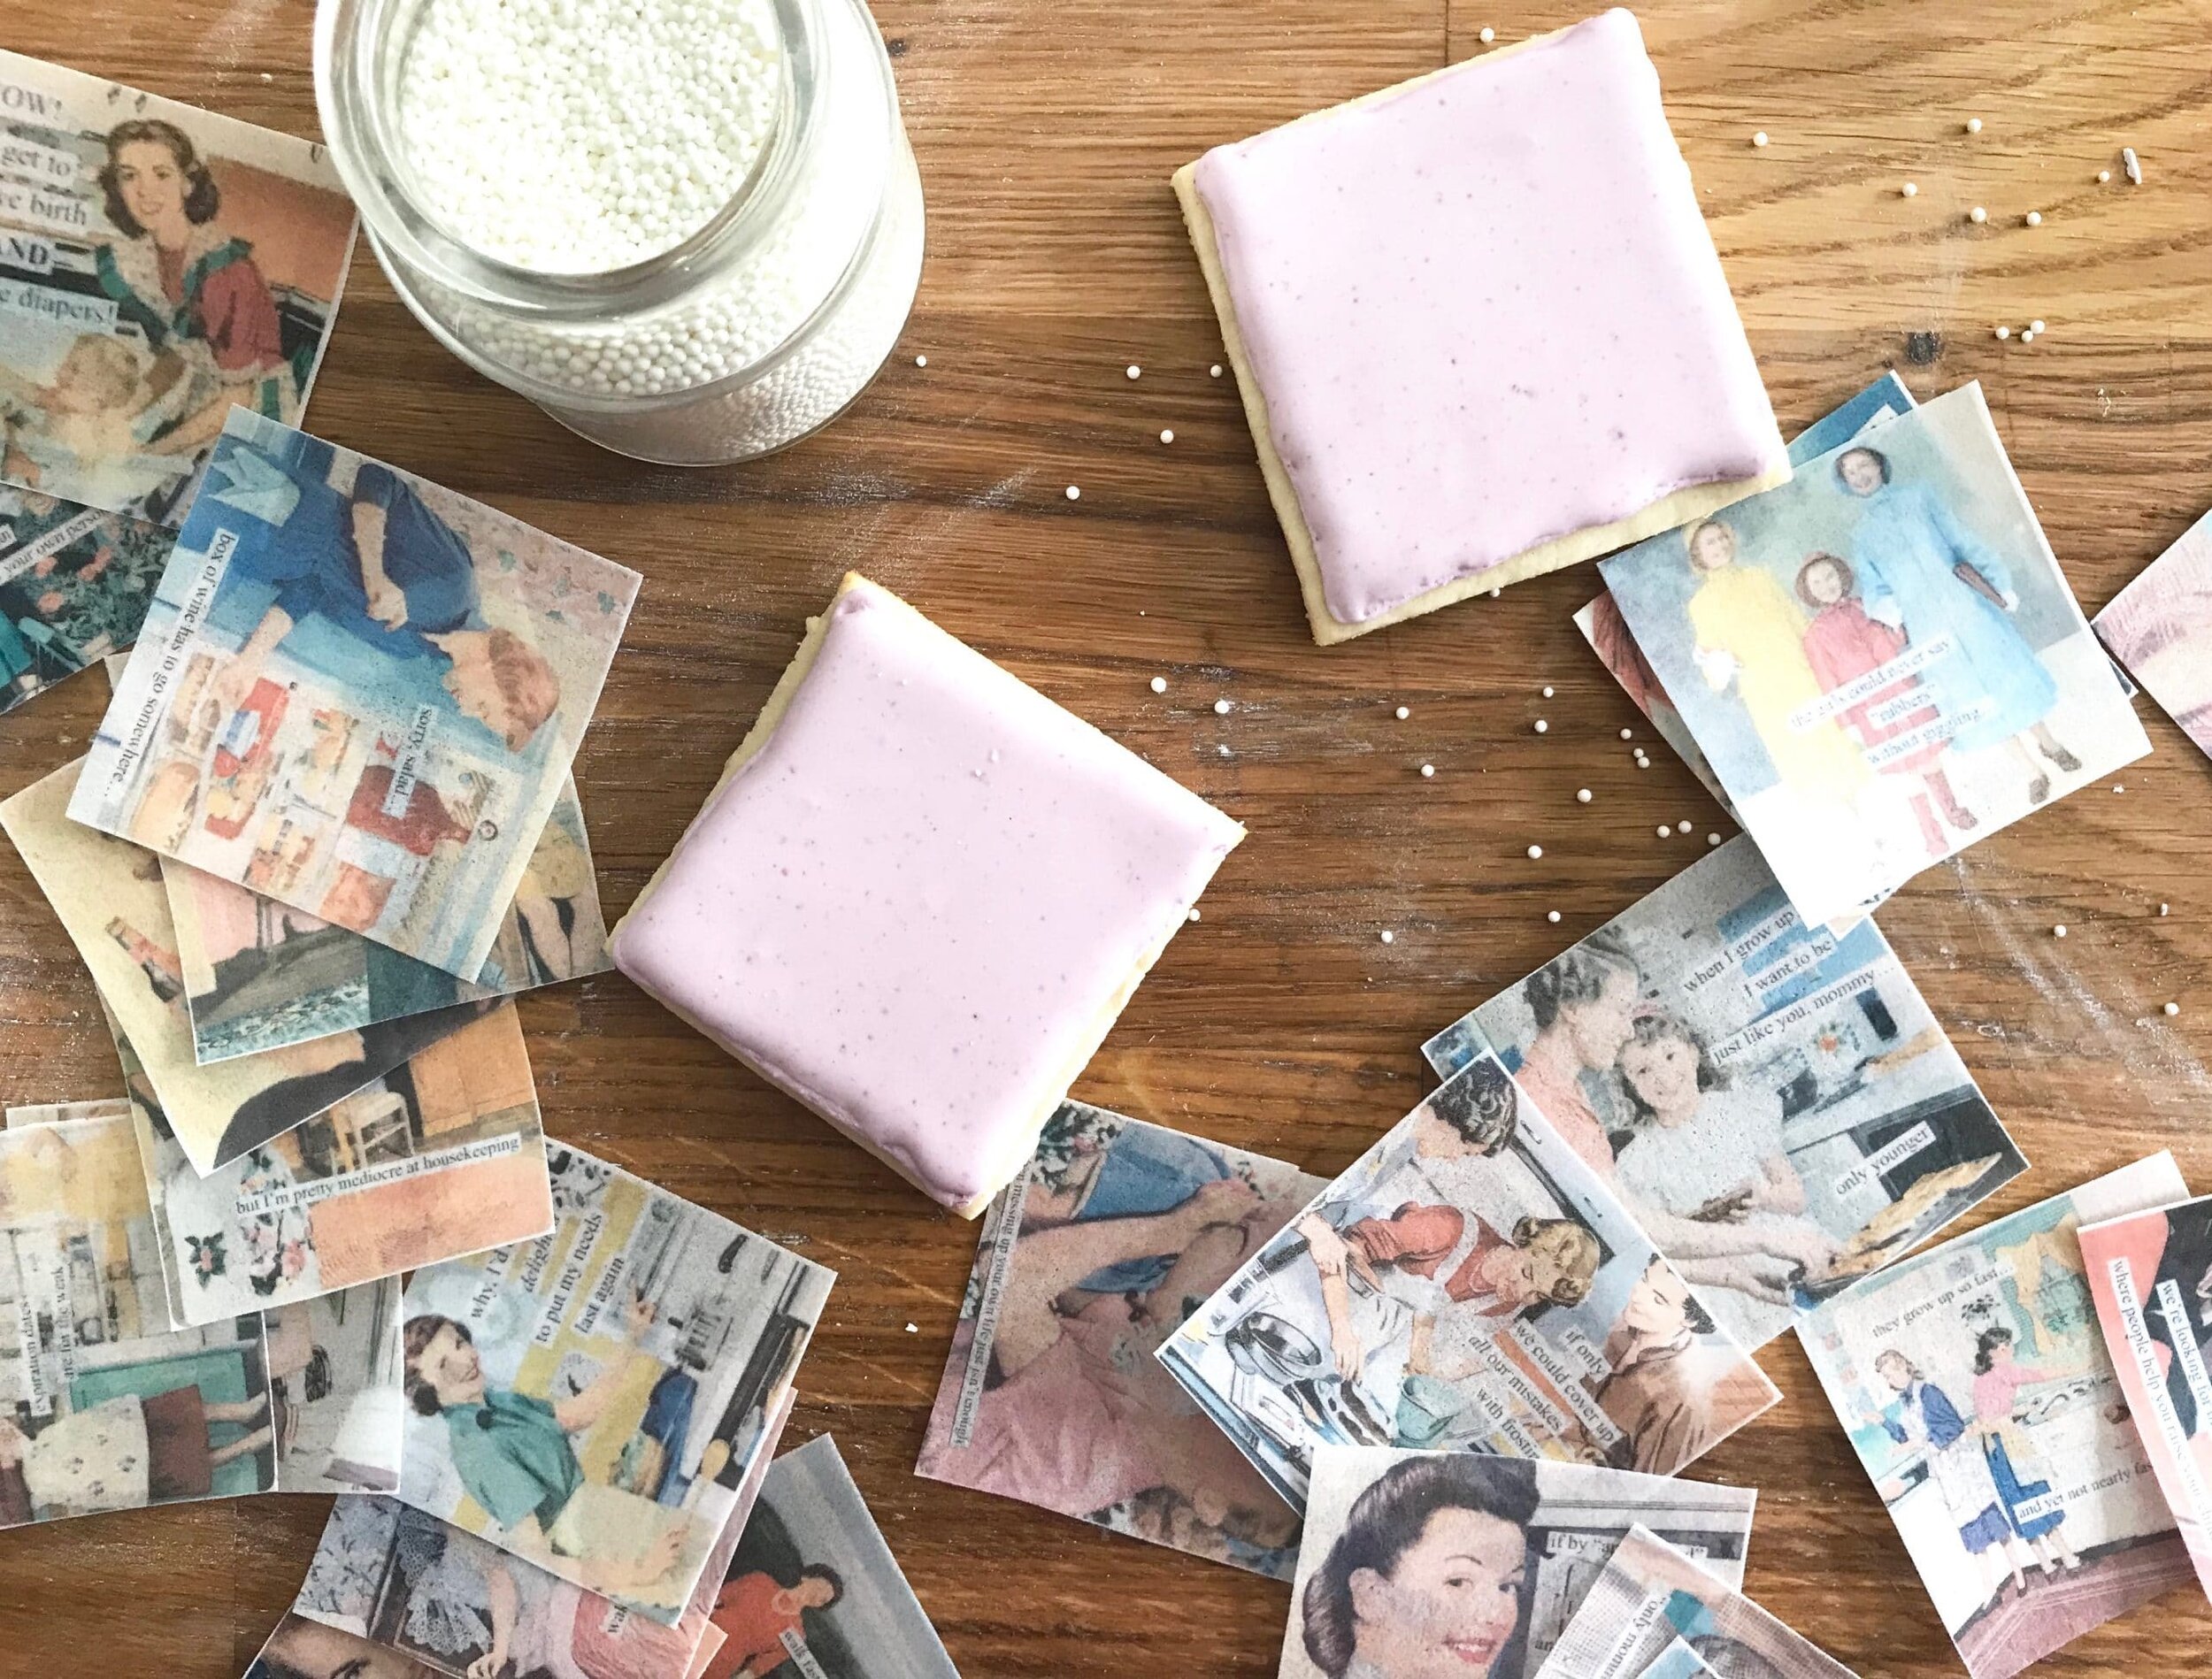
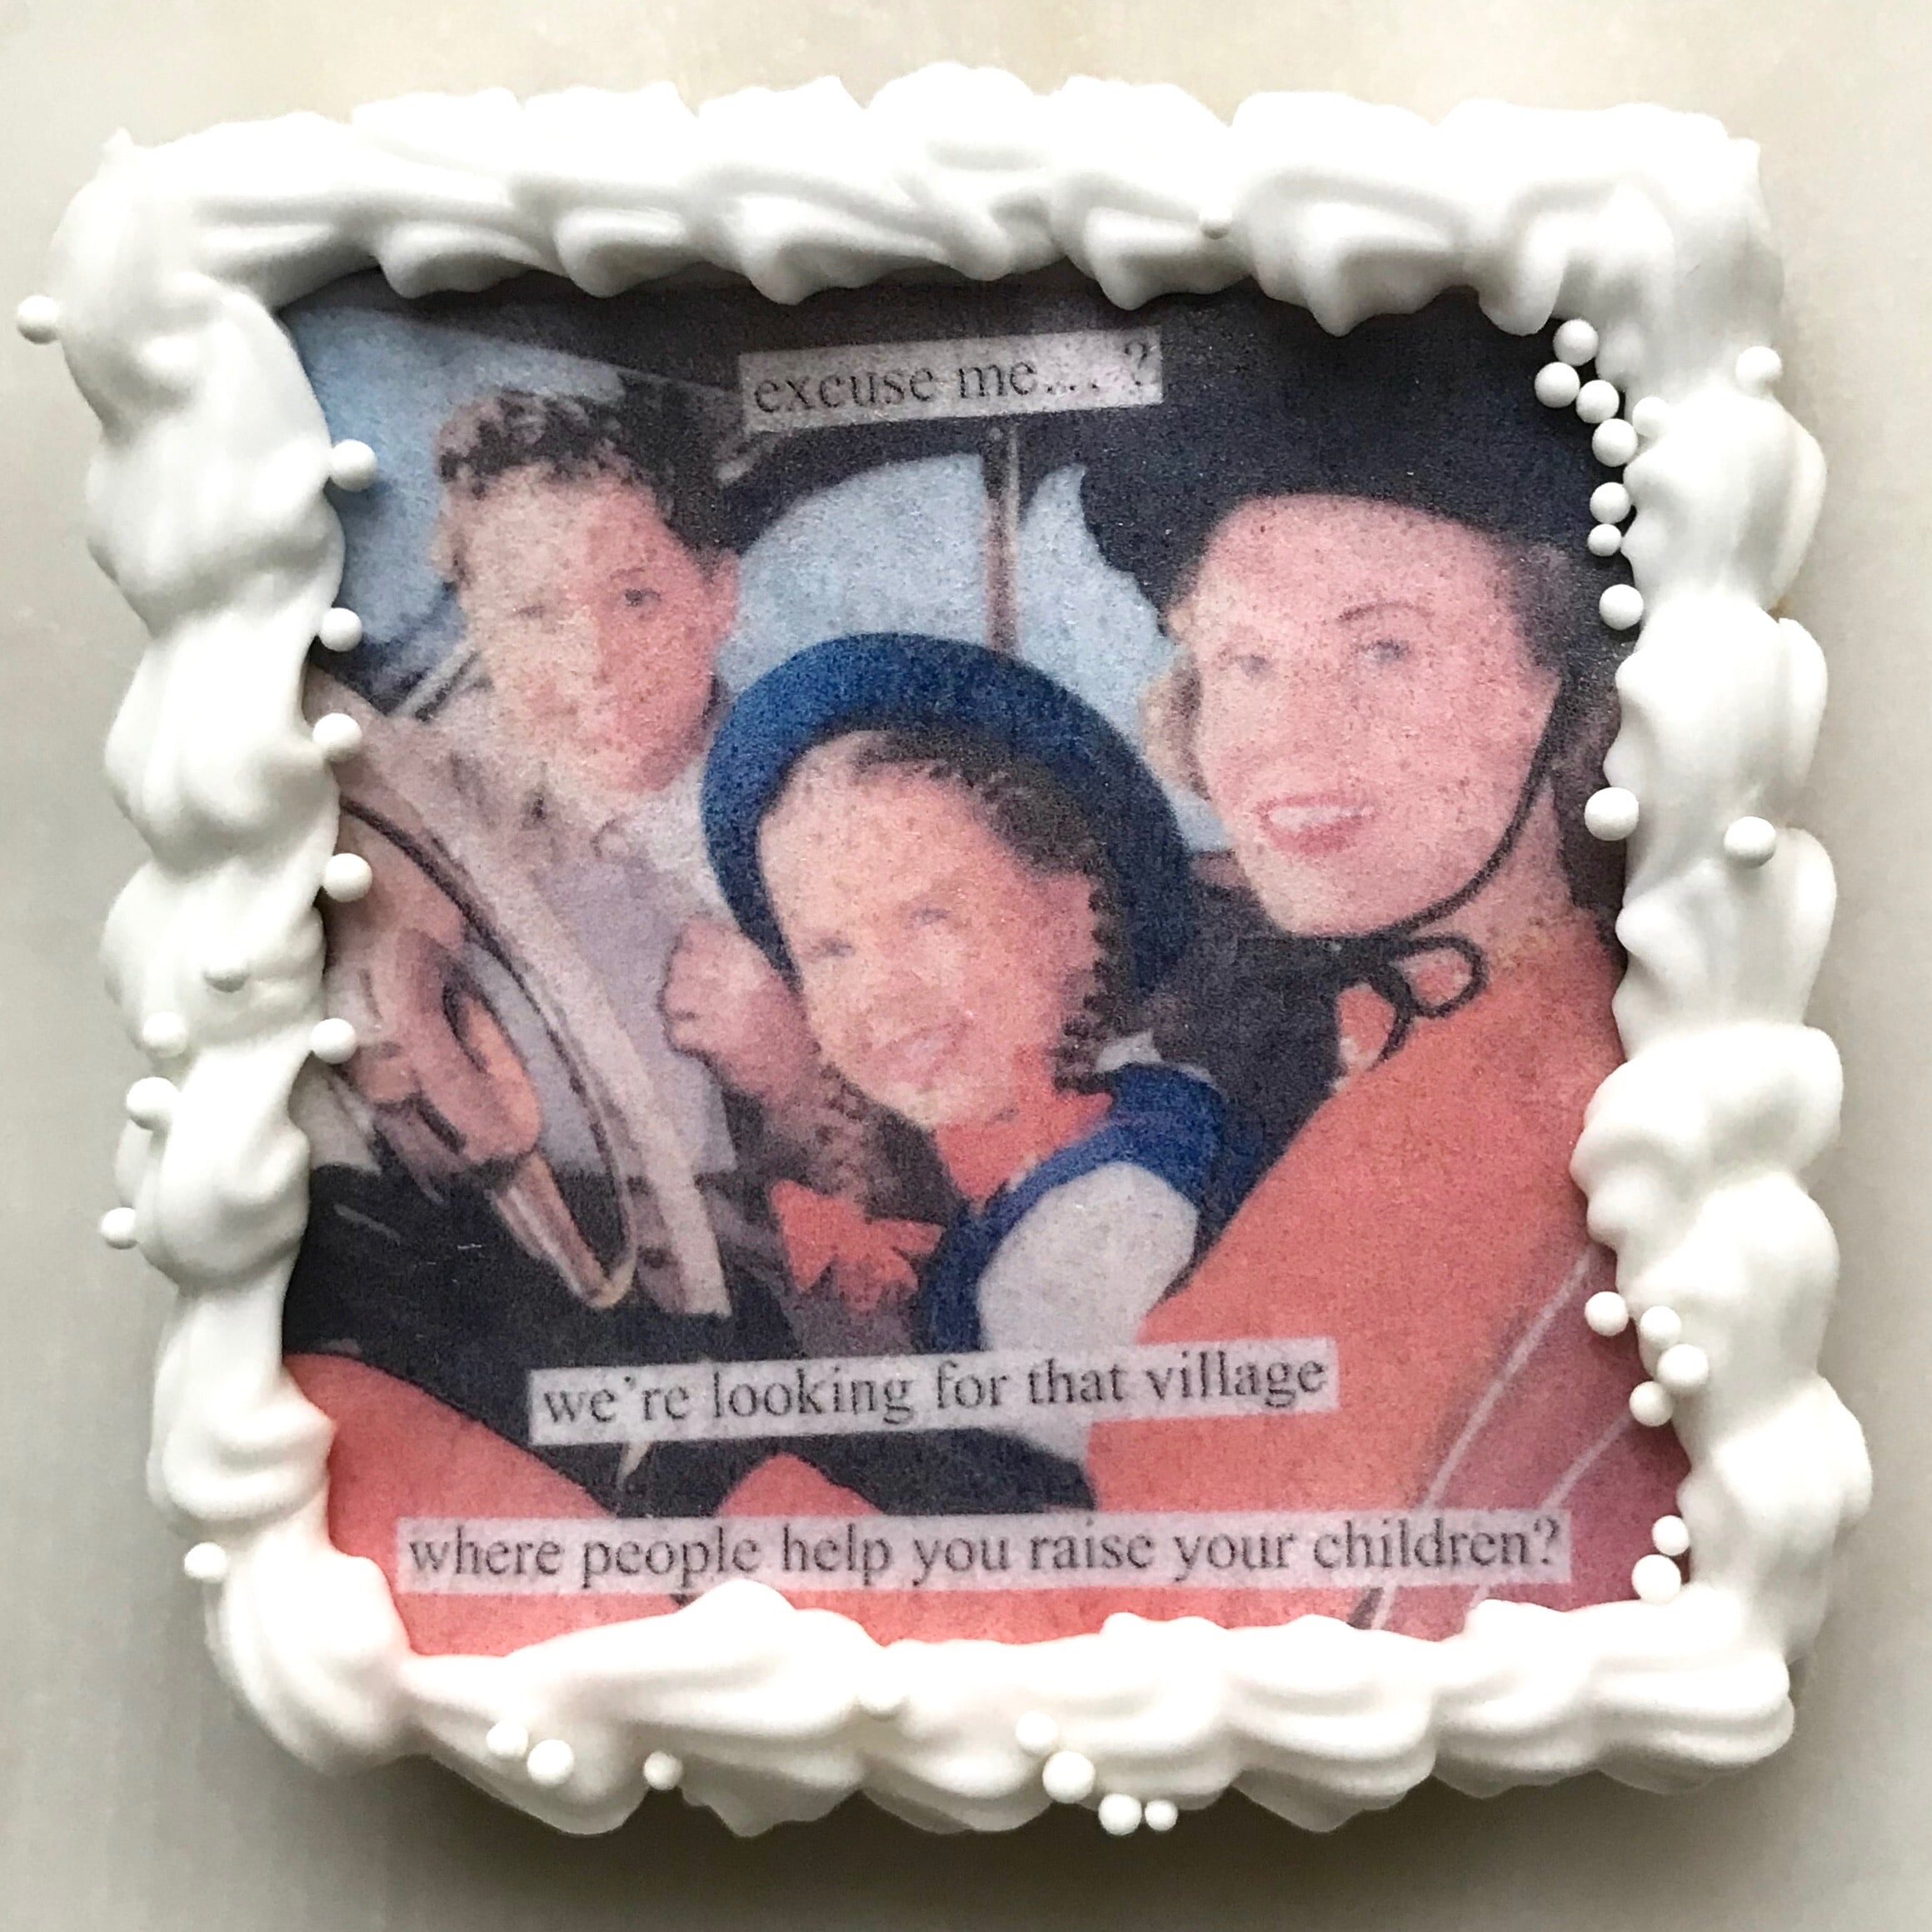
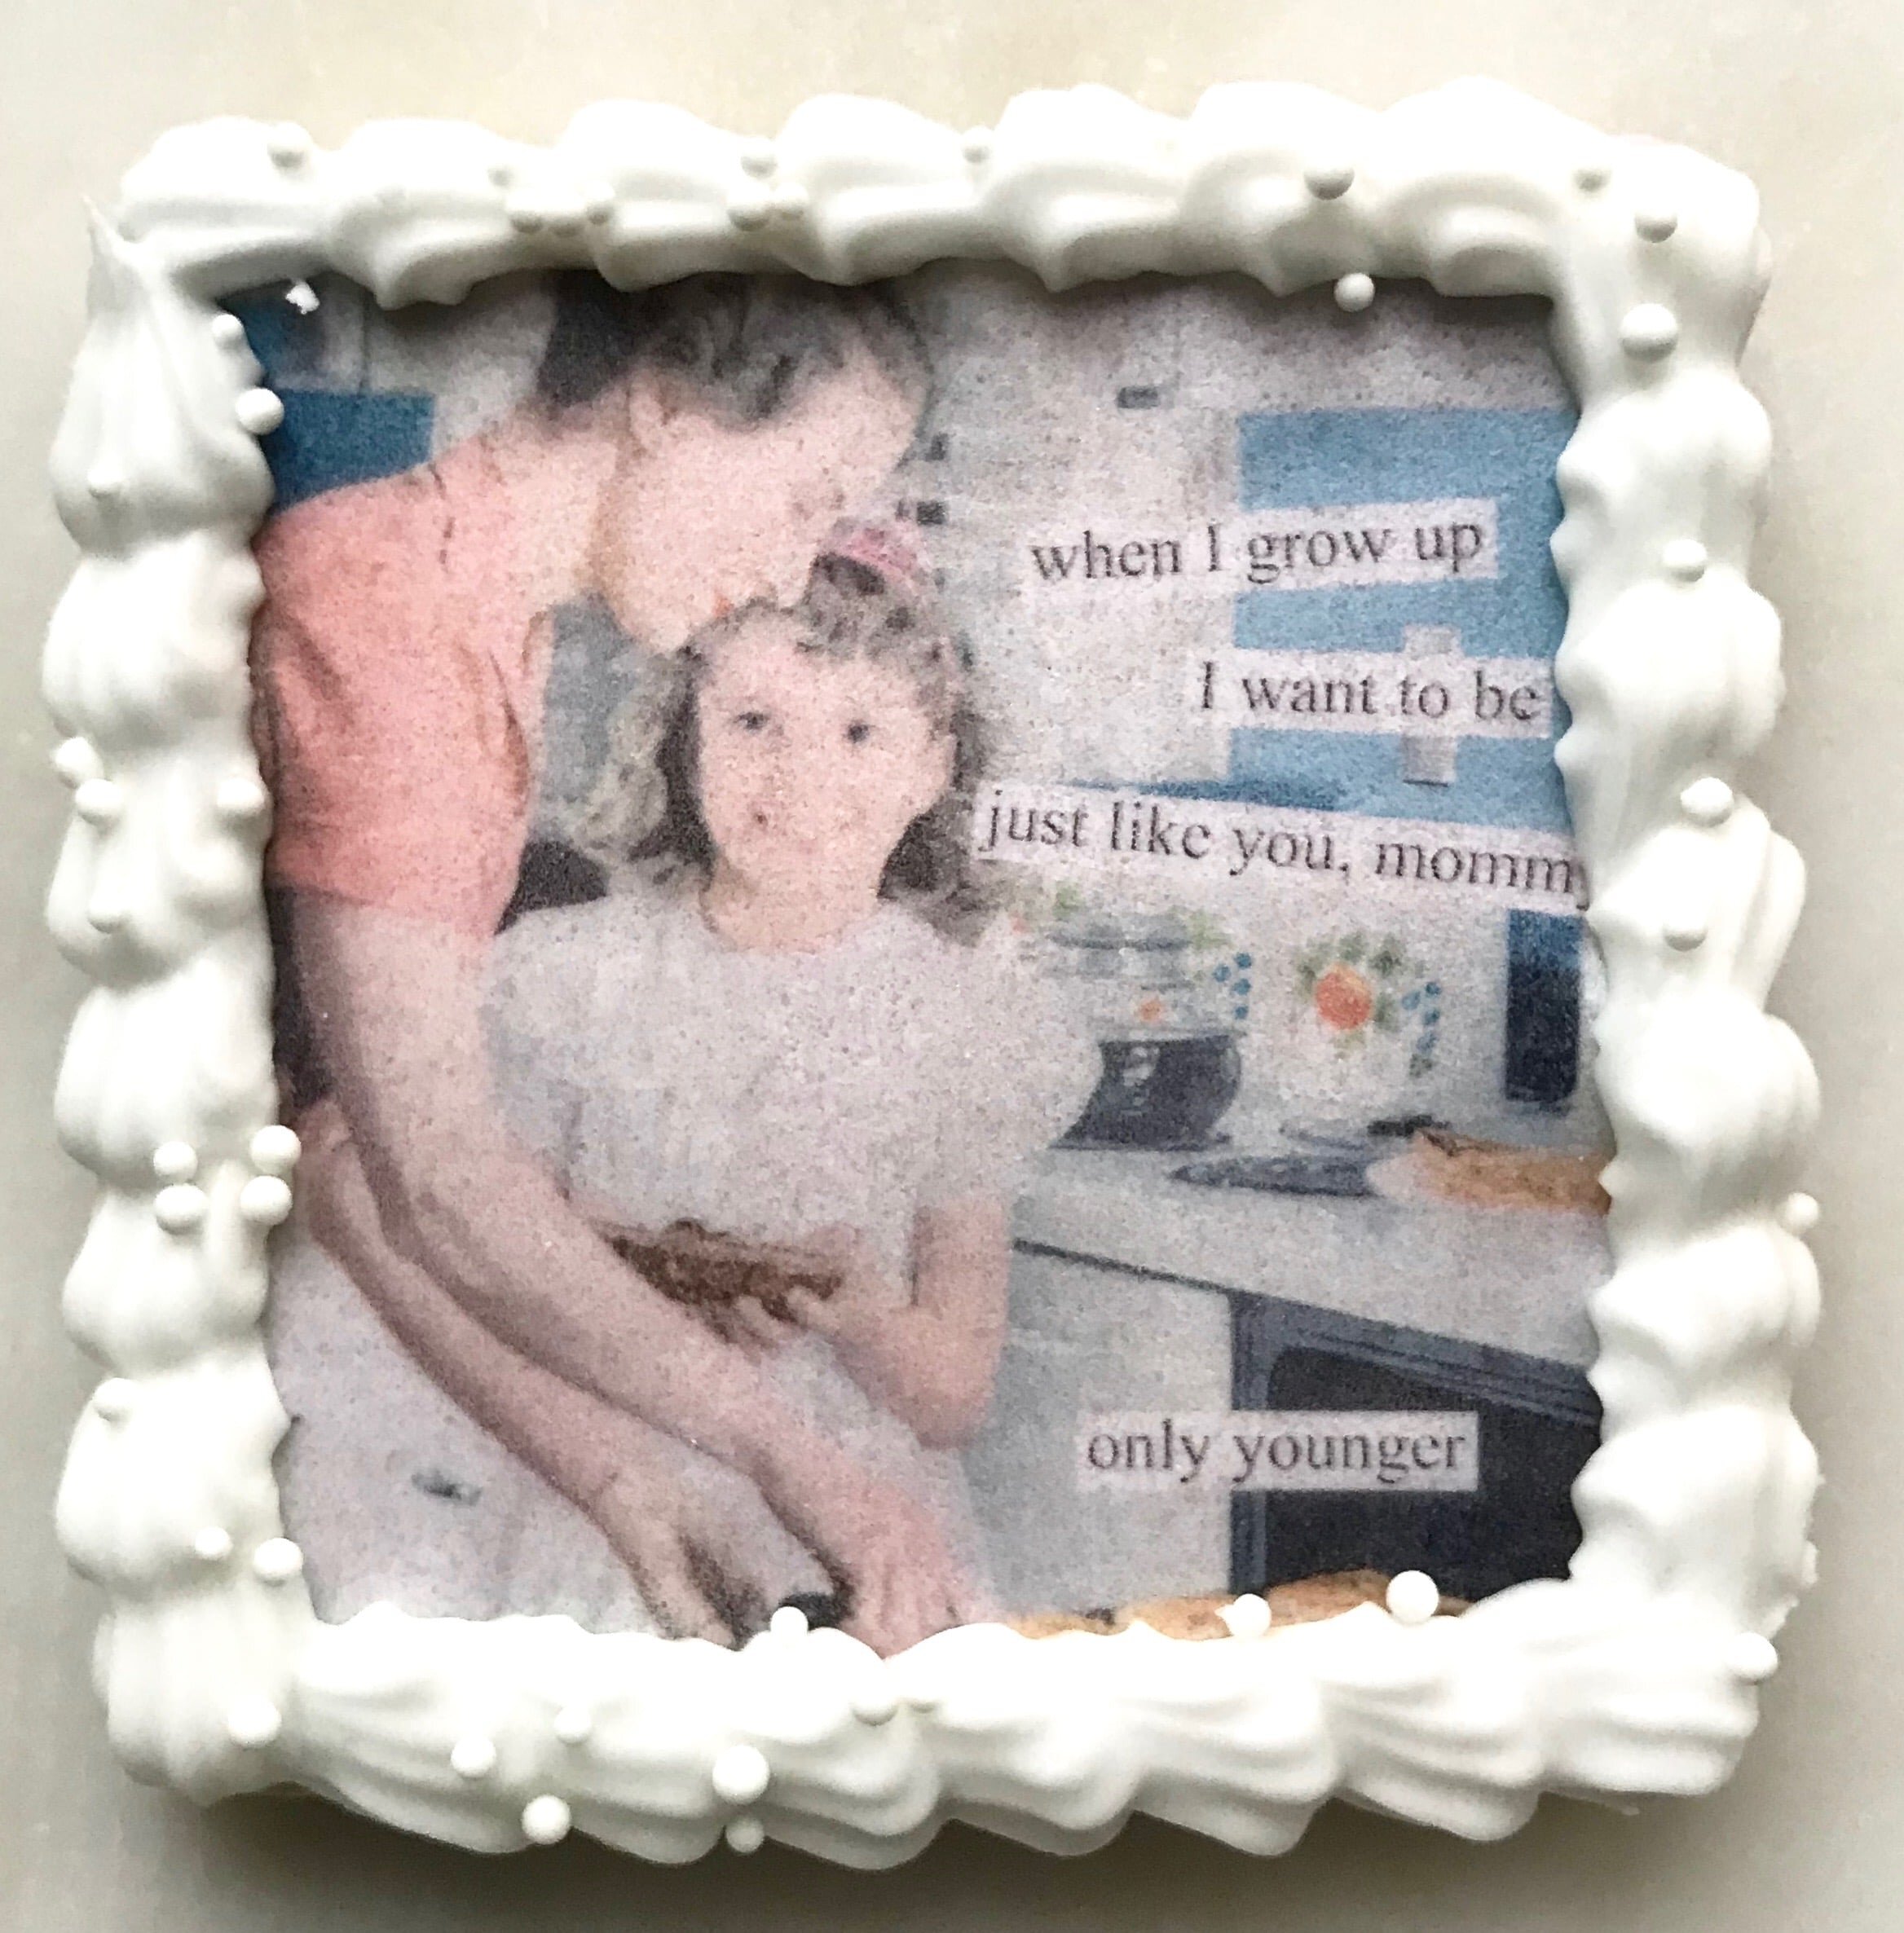
These cream cheese cookies with hibiscus icing are made with cream cheese (obviously) and are super yummy. But when you pair them with a hibiscus icing? Well, they get even better. You can see the video of the icing being made and how to decorate the cookies with the wafer paper on my youtube channel.
Change it up!
Not sure if these cream cheese cookies with hibiscus icing is right for you? No worries! Why not take a look at these other recipes?
Edible printing course
Want to learn how to get images onto cookies and even cakes and chocolates? Then check out my new online edible printing course that will guide you through everything you need to know about edible printing, from start to finish! You won't regret it! Not too sure if you want to buy something so pricey if you aren't sure you'd like it? Then you can certainly check out my array of edible paper images you buy and try out before making such a huge purchase. I even have other edible images here in my shop!
[mailerlite_form form_id=1]
Products I recommend for making this dessert.
Above are some products that I personally use and recommend for this recipe and to have for everyday use. You will definitely need the hibiscus flavoring for this recipe. It's not necessary to use the hibiscus sugar, but I thought it was fun to use it and add a little extra umph, if you will.
______________________________________________________________________________


cream cheese cookies
these cream cheese cookies are iced with a delicious hibiscus royal icing
cookies
- 8 oz cream cheese (room-temp)
- 1 stick butter (room-temp)
- 3/4 cup granulated sugar
- 1 egg
- 1 tsp vanilla extract
- 1 tsp baking powder
- 1/2 tsp salt
- 2 cup all-purpose flour
royal icing
- 1/2 tsp hibiscus flavor
- 3 tbsp water
- 2 cup powdered sugar
- 2 tbsp meringue powder
- 1 tsp glycerin (optional)
cookies
- preheat the oven to 350 degrees F. line a sheet pan with parchment paper. place the cream cheese, butter and the sugar into a bowl of an electric mixer fitted with a paddle attachment, and cream until light and fluffy, about 3 minutes. scrape the sides of the bowl and add in the vanilla and egg and mix until incorporated. place the flour, salt, and baking powder in another bowl and whisk together. gradually add the flour mixture to the butter mixture. wrap the dough in cling wrap and refrigerate the dough for about 30 minutes. roll the cookies out to 1/4 inch thickness and cut out desired shapes. place on the sheet pan and bake for 8-10 minutes or until the edges are golden brown.
royal icing
- in a small bowl combine the water and hibiscus flavor and microwave for about 30 seconds to dissolve the sugar. combine all of the ingredients in the bowl of an electric mixer fitter with a whisk attachment. gradually add in more water, a tablespoon at a time, until a thick yet pipable consistency forms. once you are done with the thicker icing for piping a boarder on the cookies add in a little more water gradually until the icing becomes slightly looser to flood the cookies.
- you don't have to use the hibiscus sugar. just add in some vanilla or almond extract instead and just continue to gradually add in water to get the desired consistency.

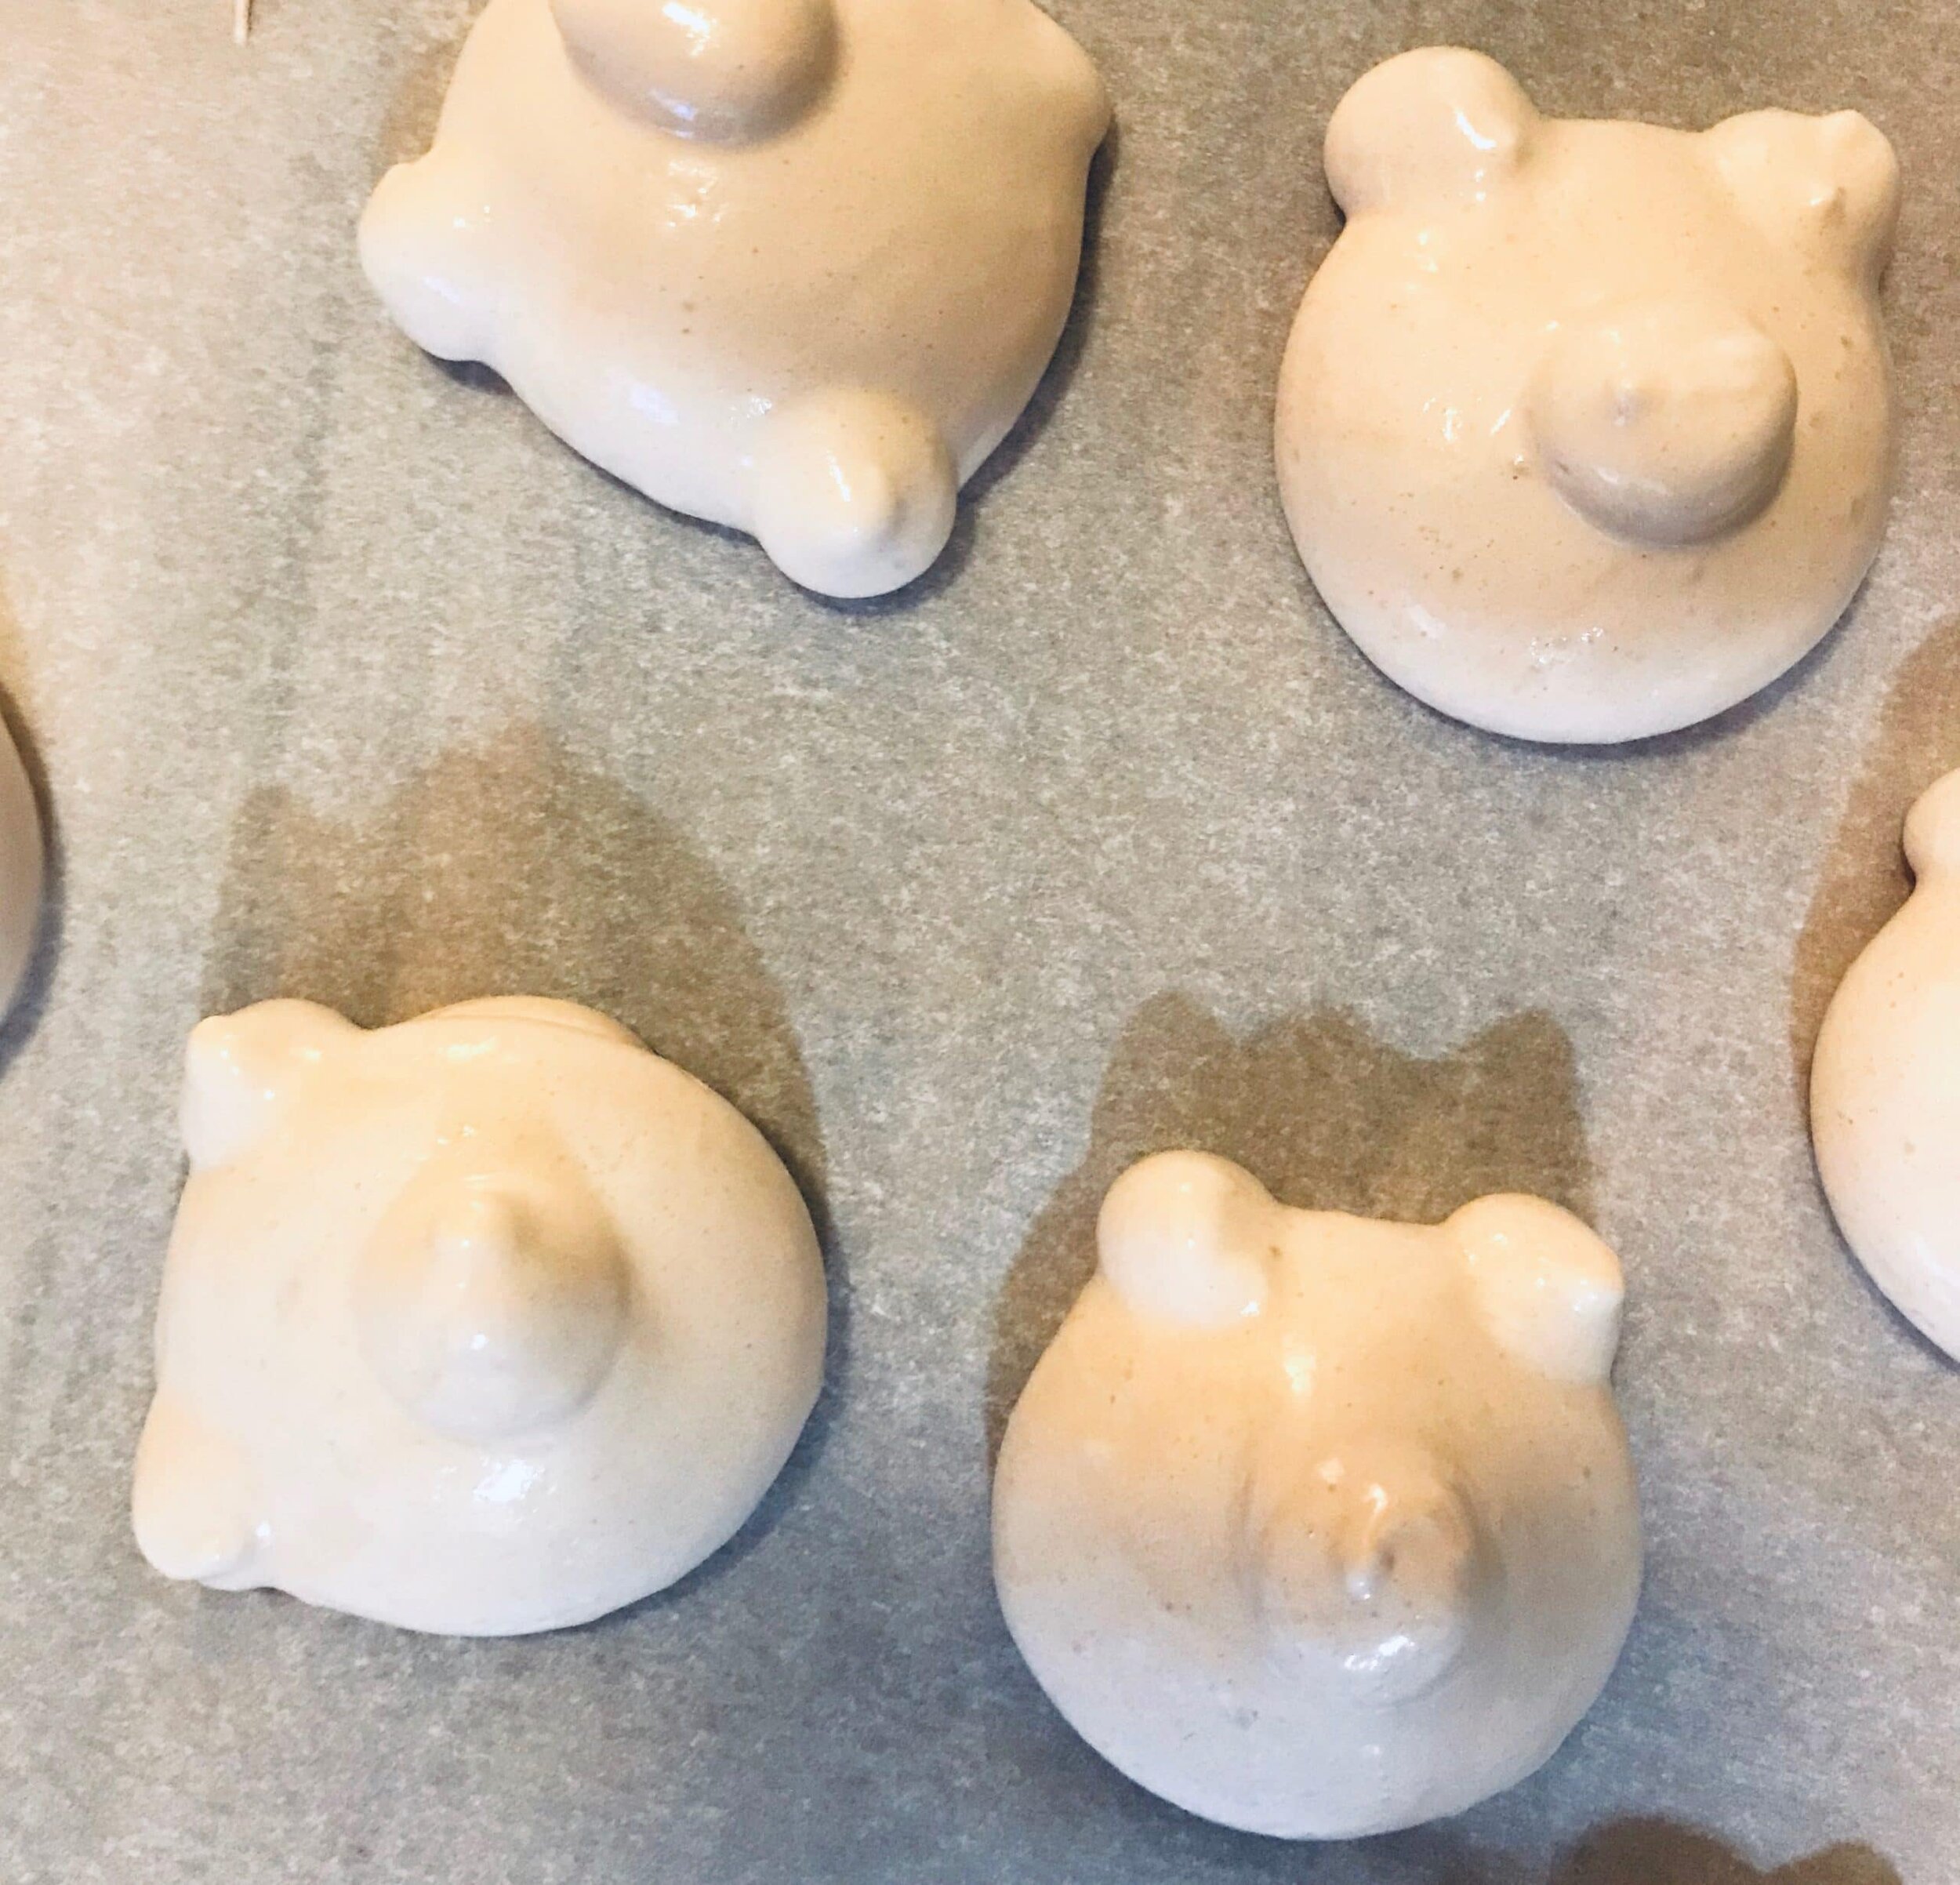
Peanut Butter and Jelly Meringue Cookies

[wprm-recipe-jump]
*This post contains affiliate links. Please read disclosure to learn more.
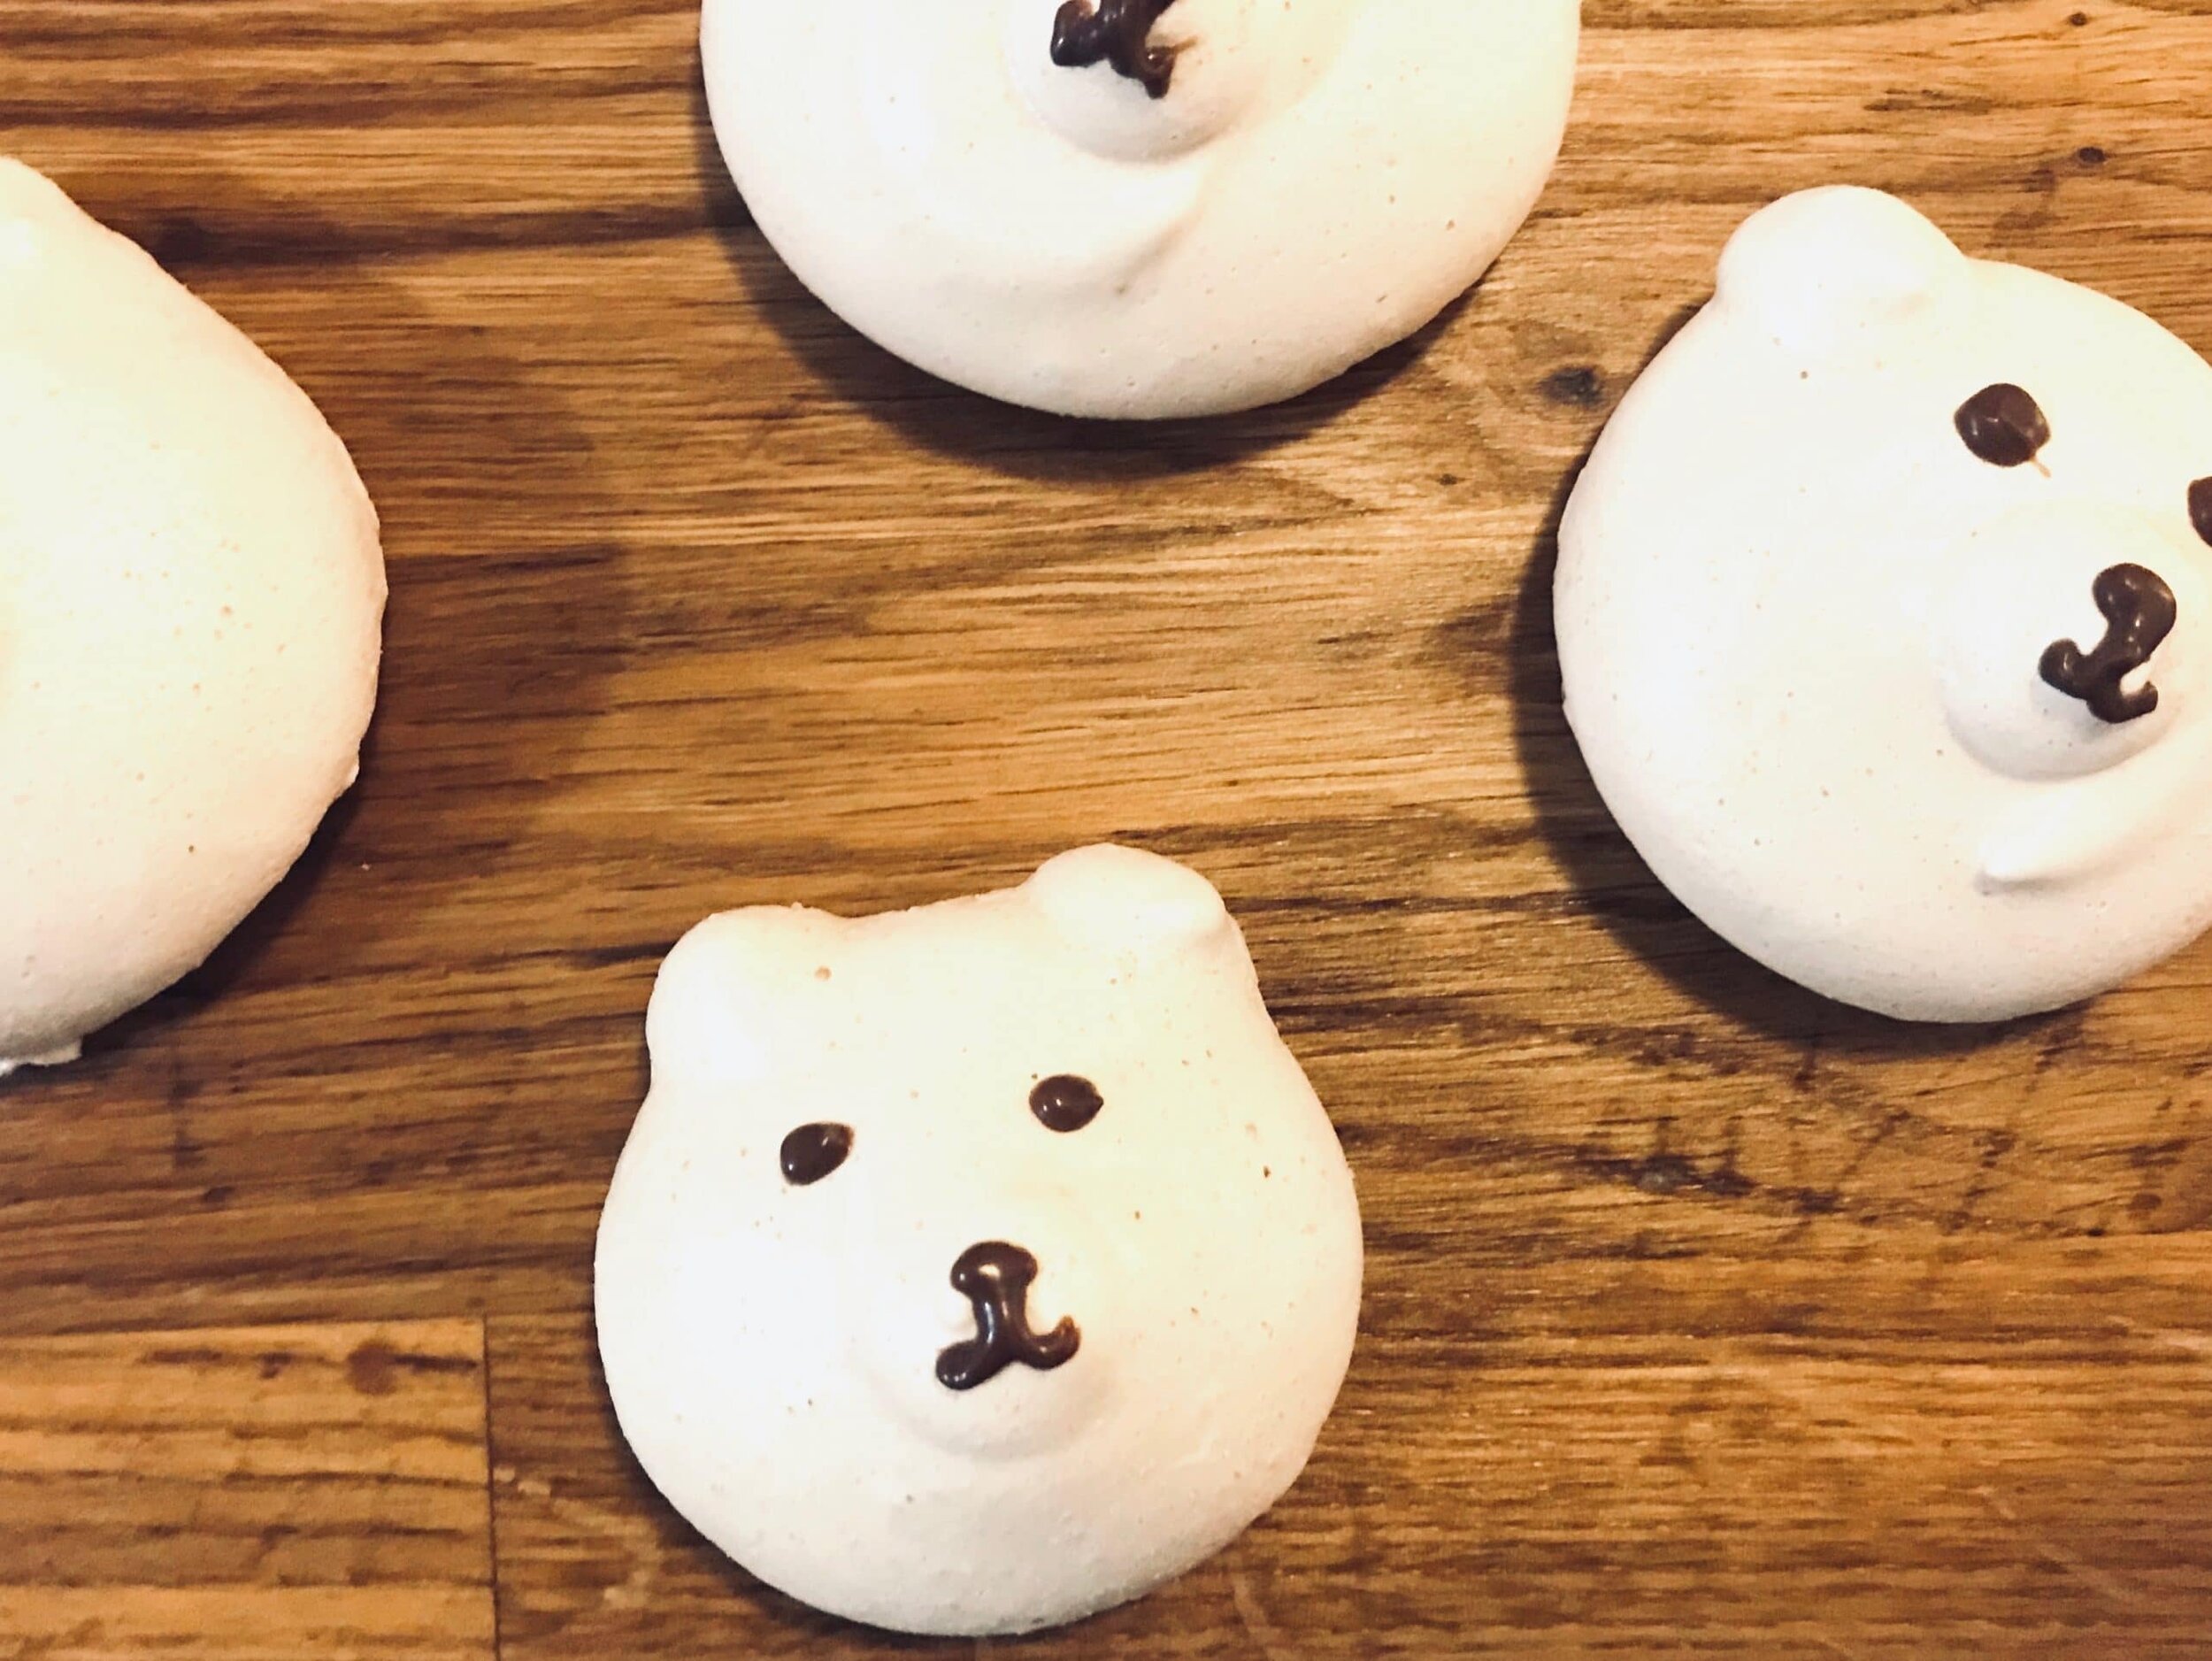
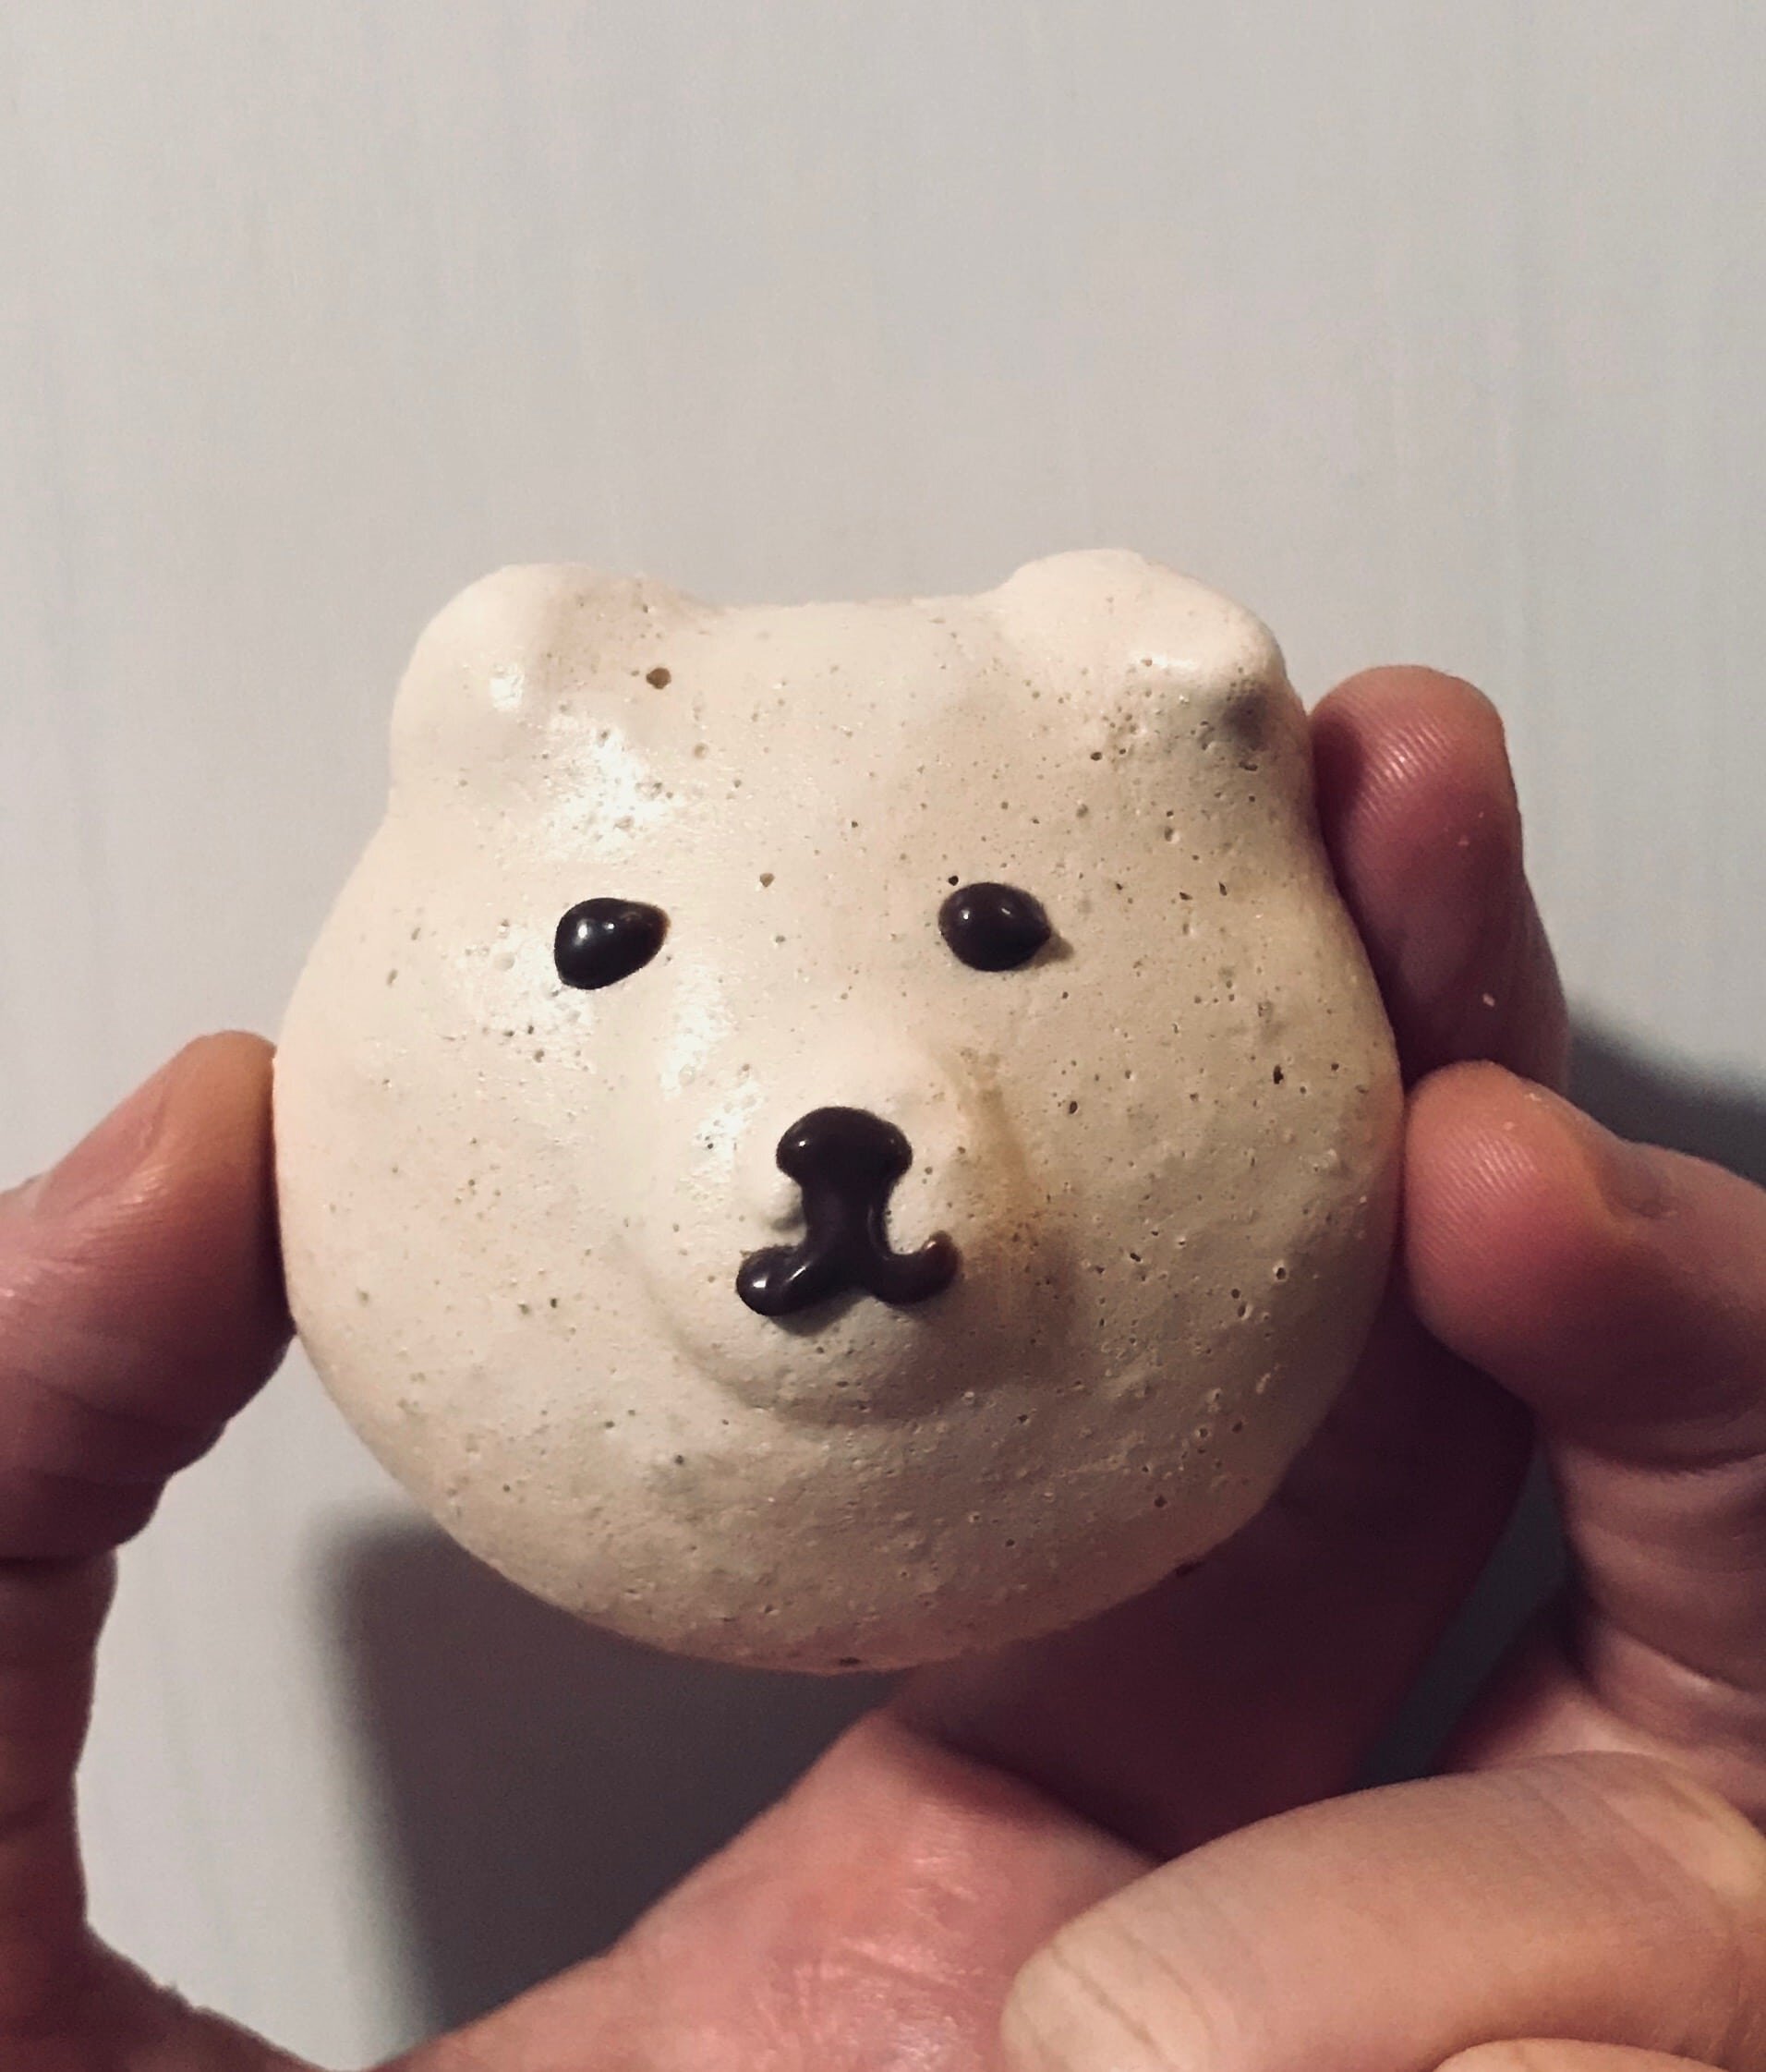
These peanut butter and jelly meringue cookies melt in your mouth! They are so good and so easy to make and your kids will love them. Filled with pb&j and shaped like a cute little bear these little guys will have you doing the happy dance.
Change it up!
These peanut butter and jelly meringue cookies are so fun, and you should be able to have fun and enjoy them. I used raspberry jam for these guys, but you can use your favorite combination of peanut butter and jelly. Whether it's grape or apple, it doesn't matter what you use. You could even use almond butter, although I find almond butter to be a lot more oily so it may not turn out as one would expect it too.
[mailerlite_form form_id=1]

Products I recommend for making this dessert.
Above are some products that I personally use and recommend for this recipe and to have for everyday use. One thing that I highly suggest getting when making french macarons is a silpat. A silpat is a reusable parchment paper and it's such a great investment. I find it easier to use a silpat versus parchment paper when making french macarons because it doesn't move around but it also makes it easier to remove the cookies too.
______________________________________________________________________________
peanut butter and jelly meringue cookies
melt in your mouth meringue cookies in the shape of an adorable bear that's stuffed with a peanut butter and jelly swirl
- 1/4 cup peanut butter (i used creamy but crunchy will work too)
- 1/4 cup jelly (i used raspberry, but really any jelly is good jelly!)
- 3 egg whites
- 1 cup granulated sugar
- pinch cream of tartar
- 1 tsp vanilla extract
- brown food color (optional)
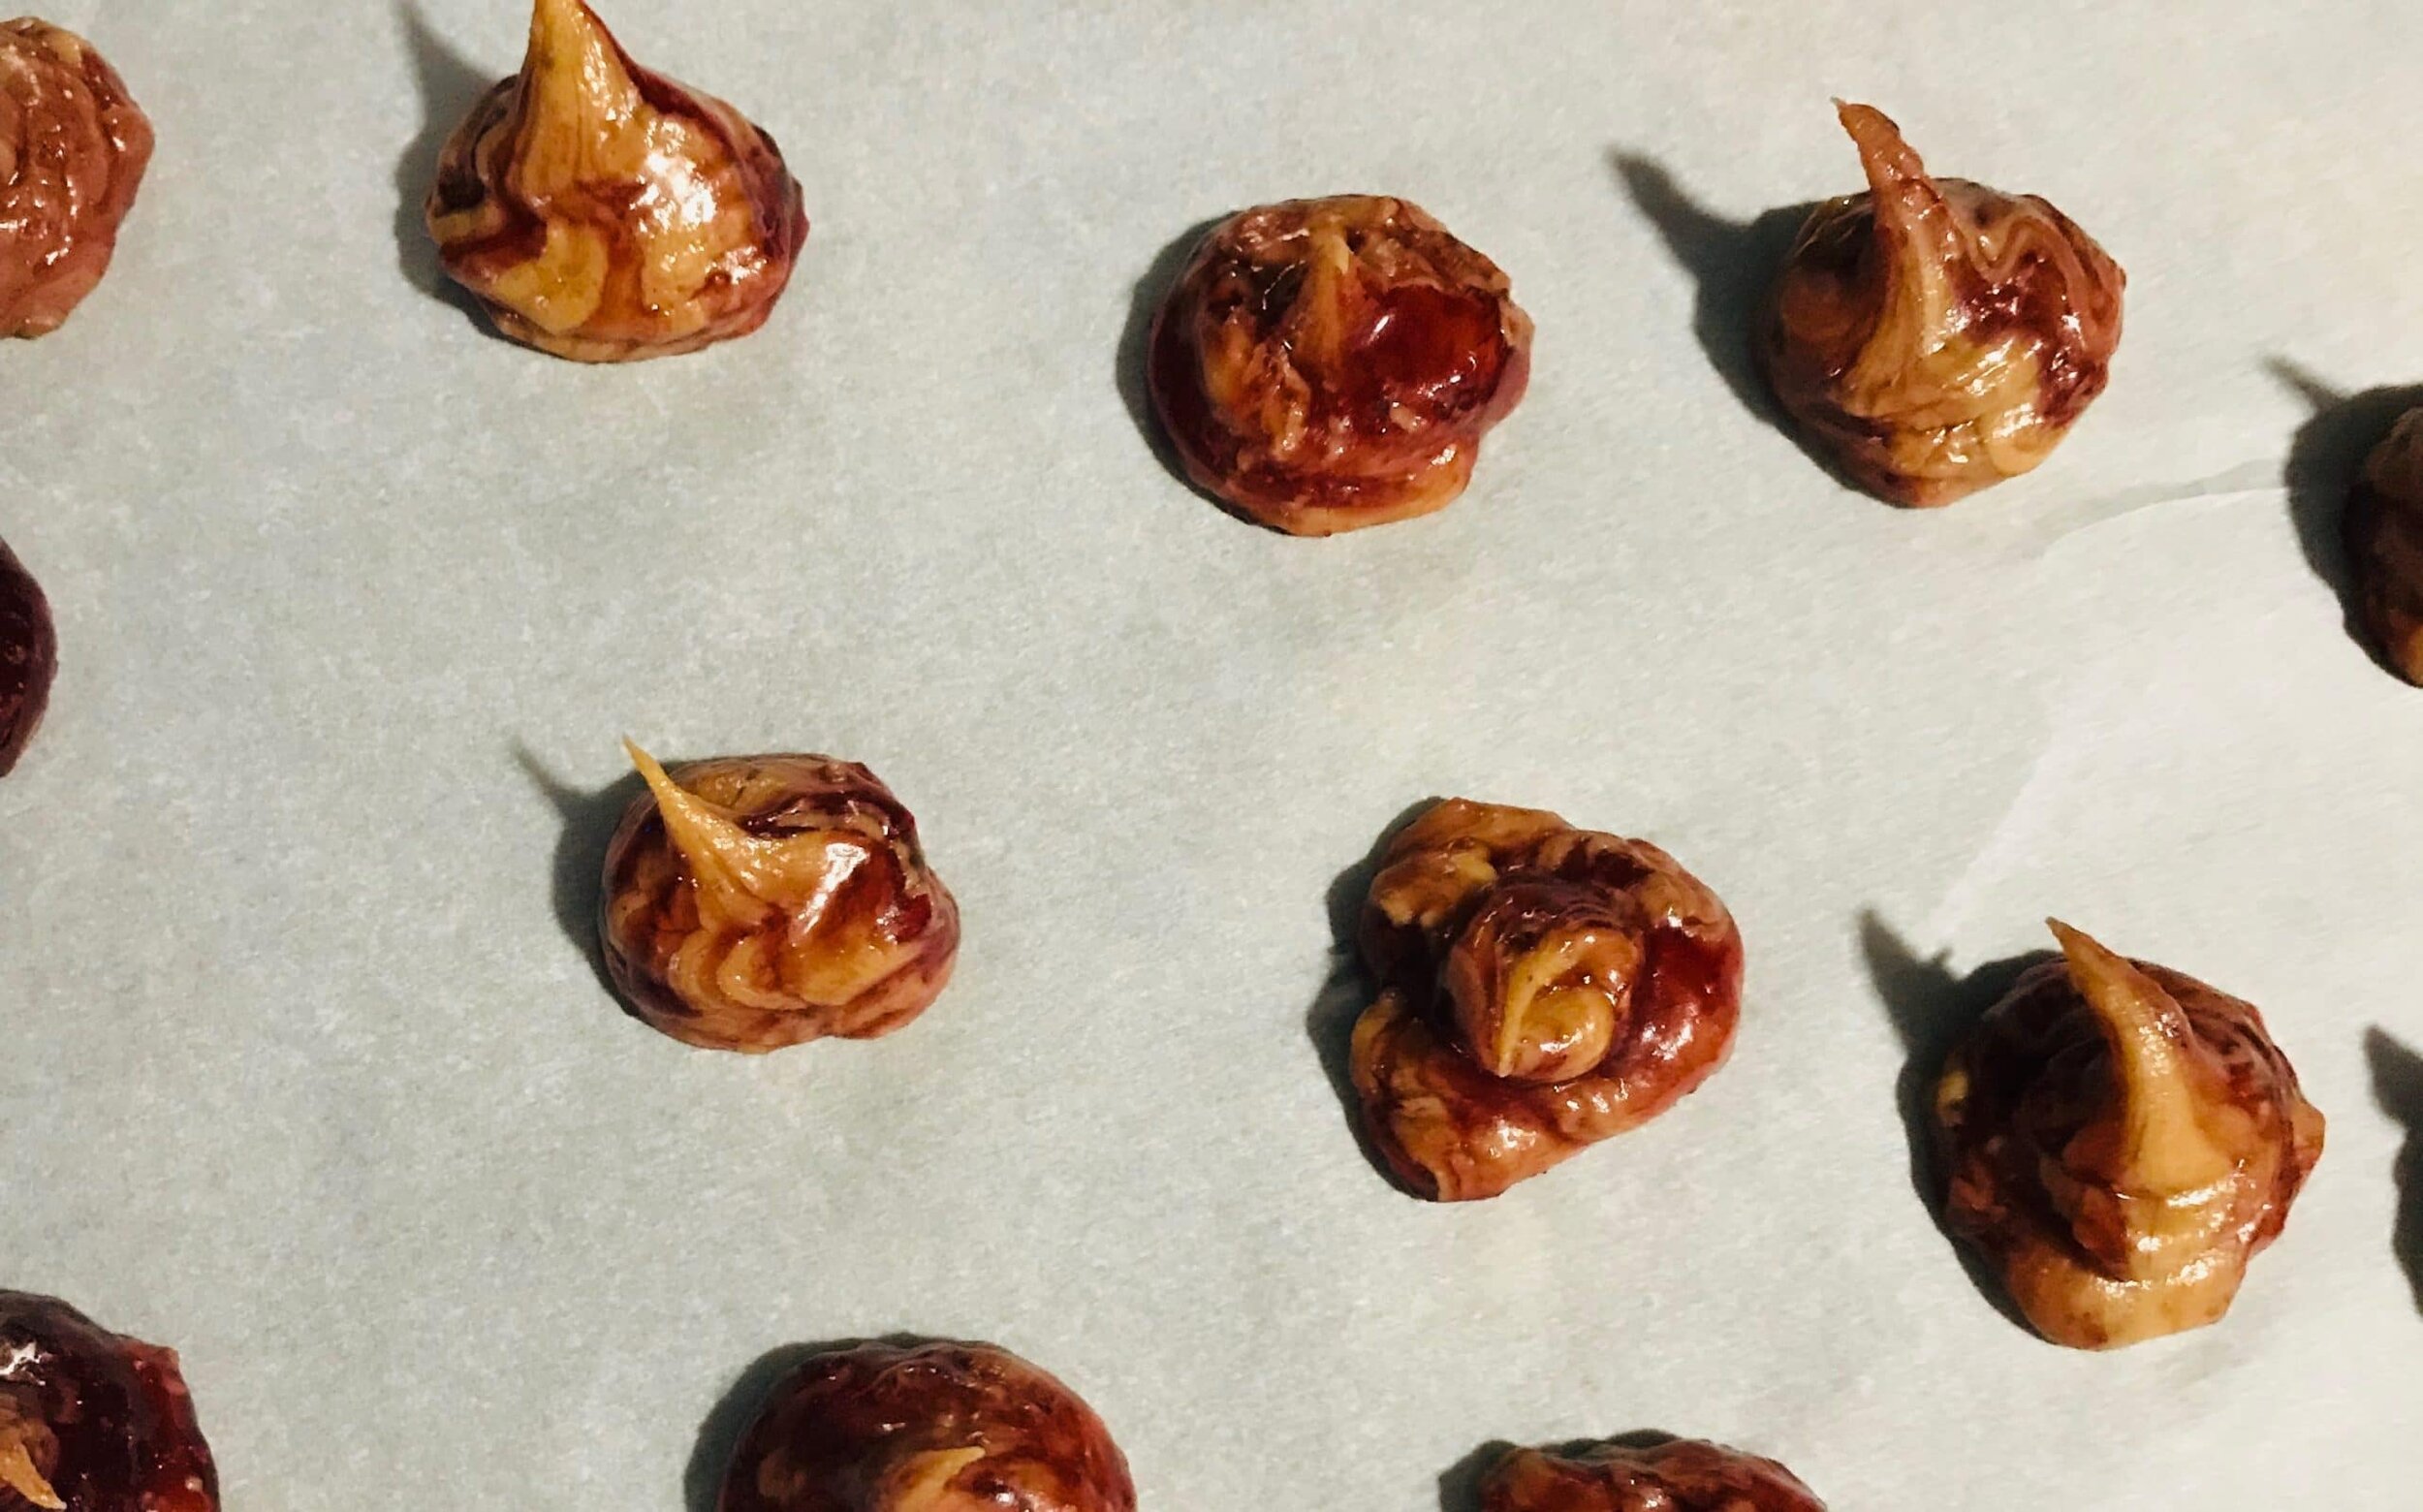
- swirl the peanut butter and jelly of your choice into a piping bag. pipe little dots onto a sheet-pan with parchment paper and then place into the freezer to harden.
- preheat the oven to 200 degrees F and line a sheet pan with parchment paper. in the bowl of an electric mixer, whip the egg whites until foamy and then add the cream of tartar. continue whipping on high until soft peaks start to form and then gradually add in the sugar and whip until stiff peaks form and the meringue is nice and glossy. add in the salt, vanilla and food coloring if desired. put some of the meringue into a bowl and take the frozen pb&j and roll in the meringue using a fork. place onto another sheet-pan with parchment paper then pipe more meringue on top, a smaller round in the center of that and 2 little dots on the top to form the ears. bake for 2 hours and let cool.
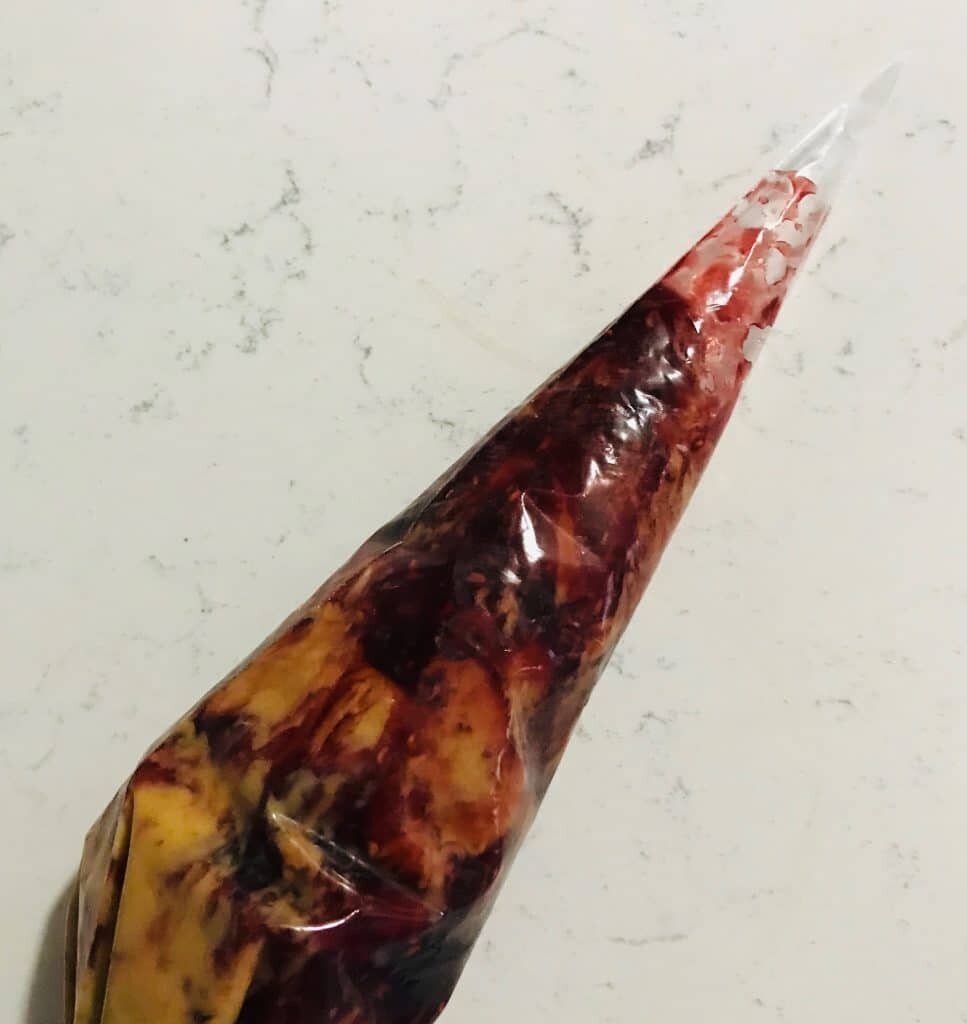
- take a little bag of melted chocolate and pipe the eyes and snout to make the face of the bear.
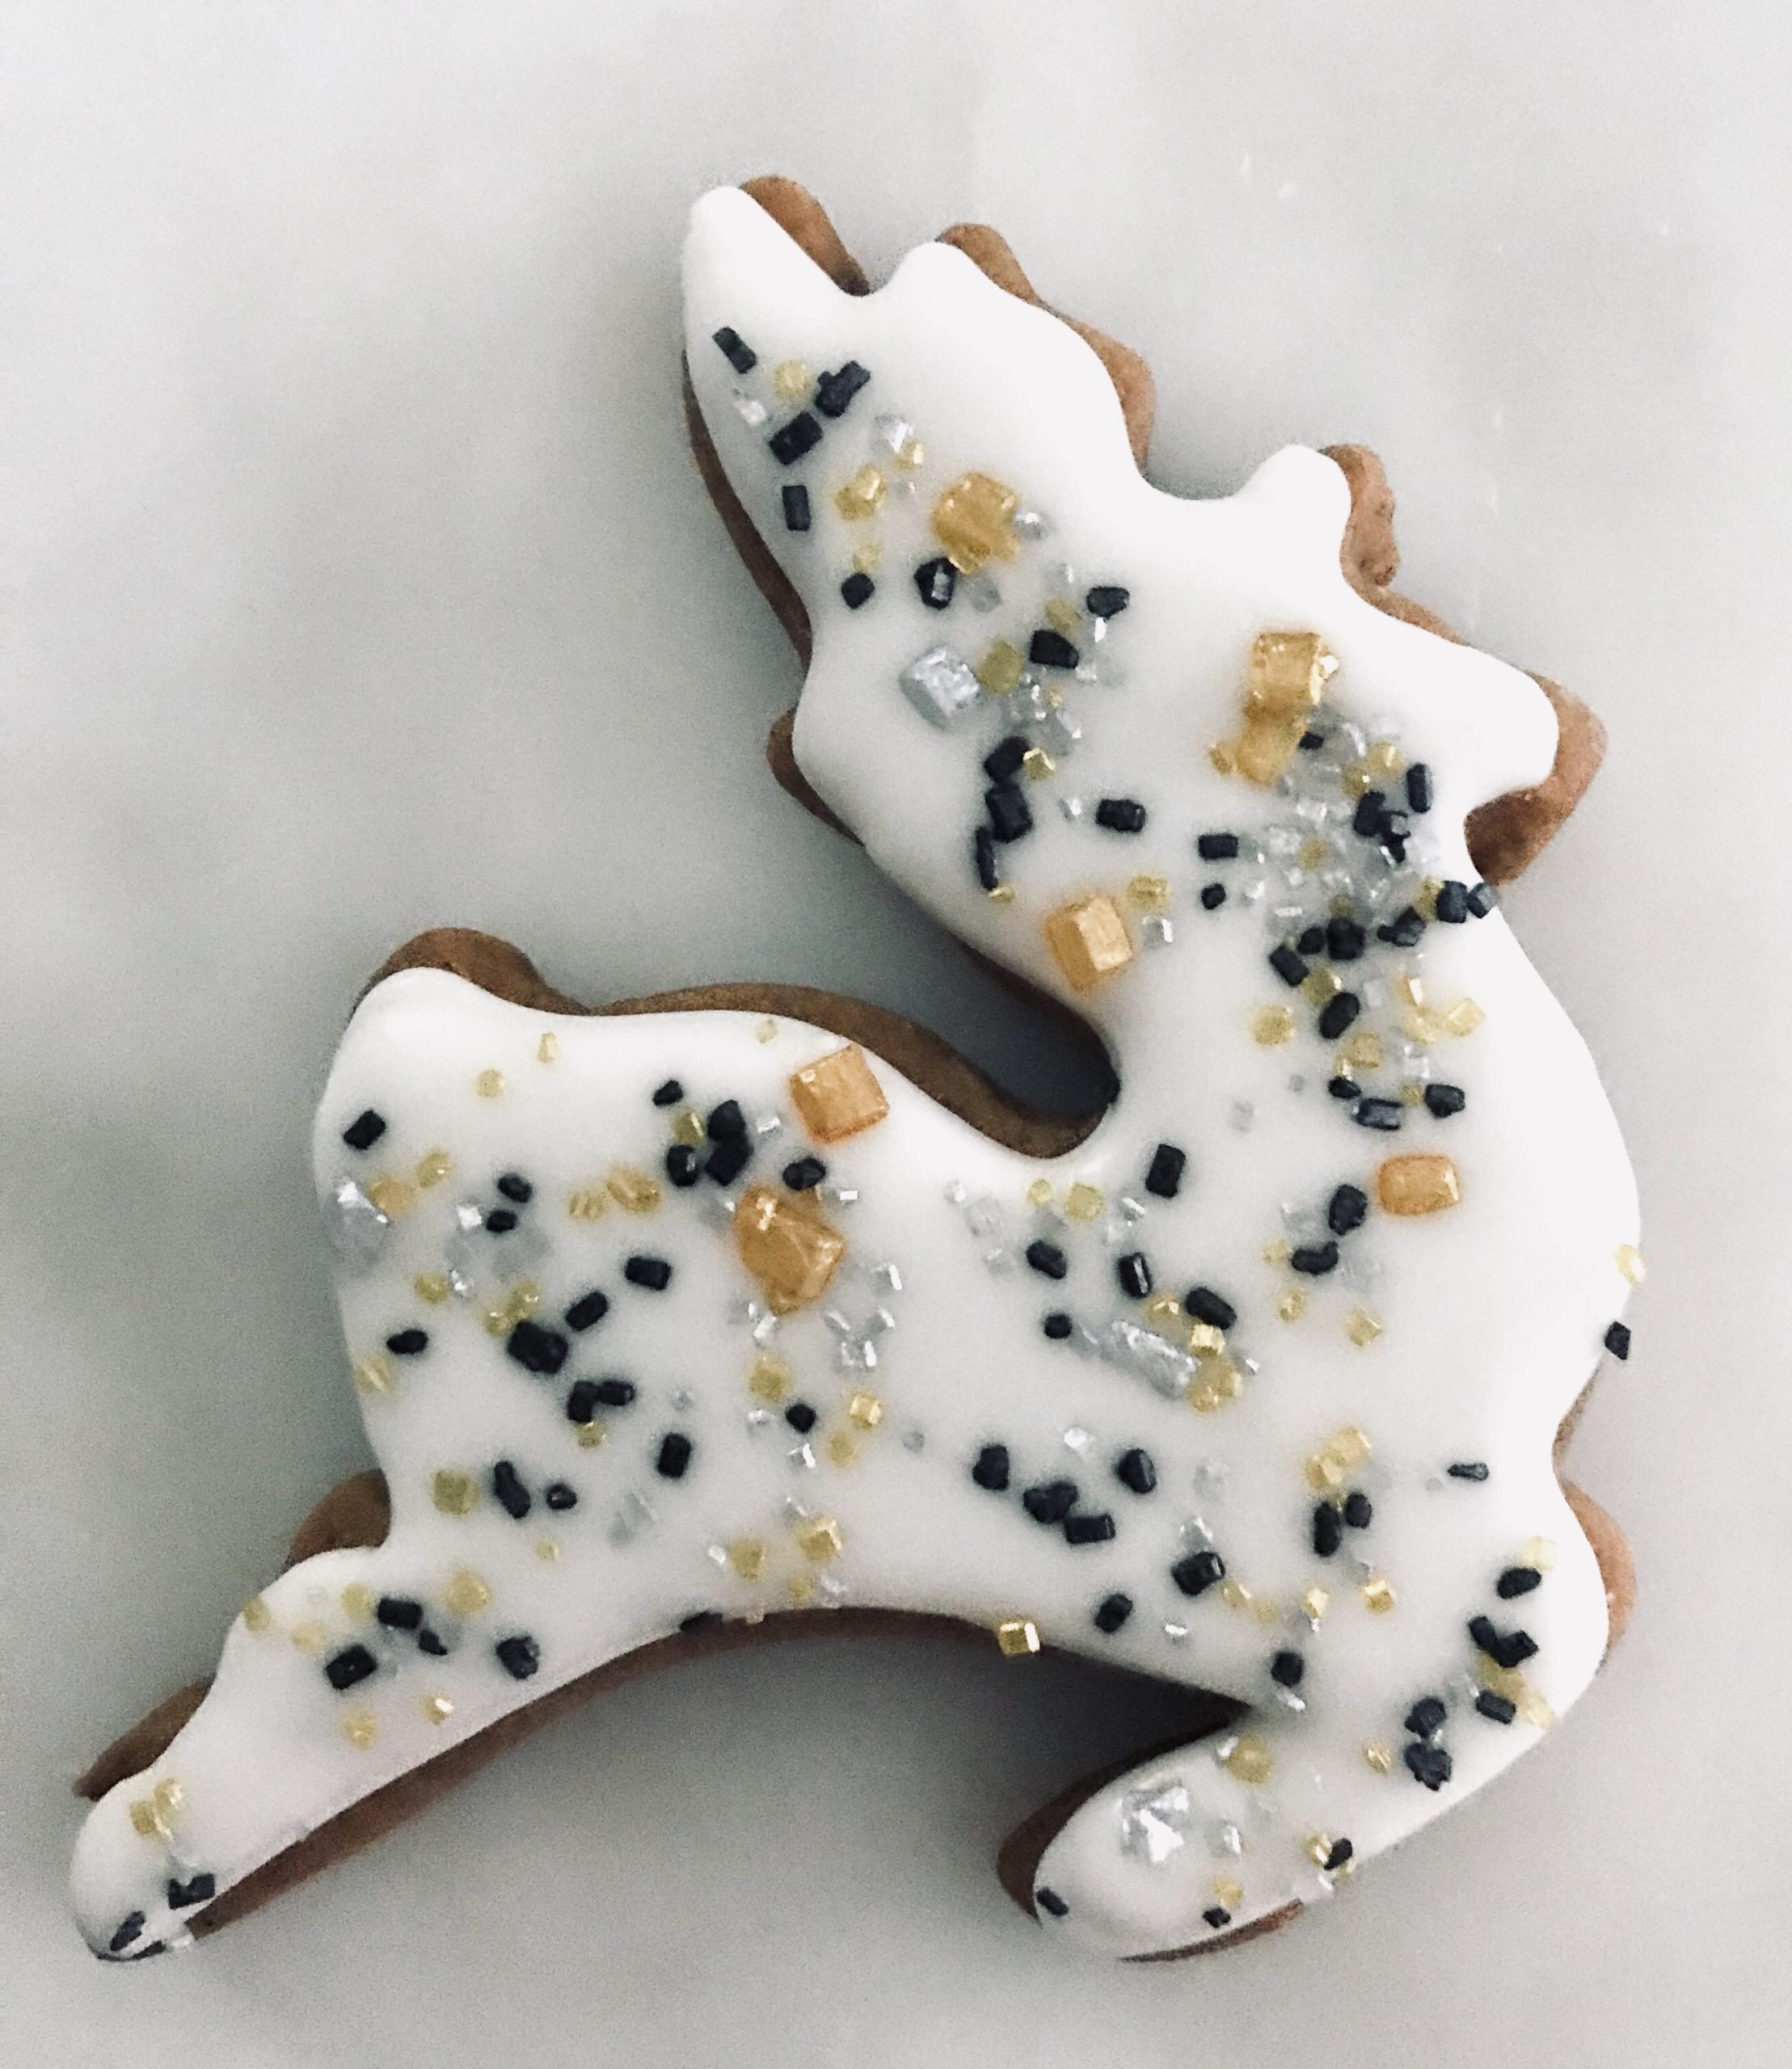
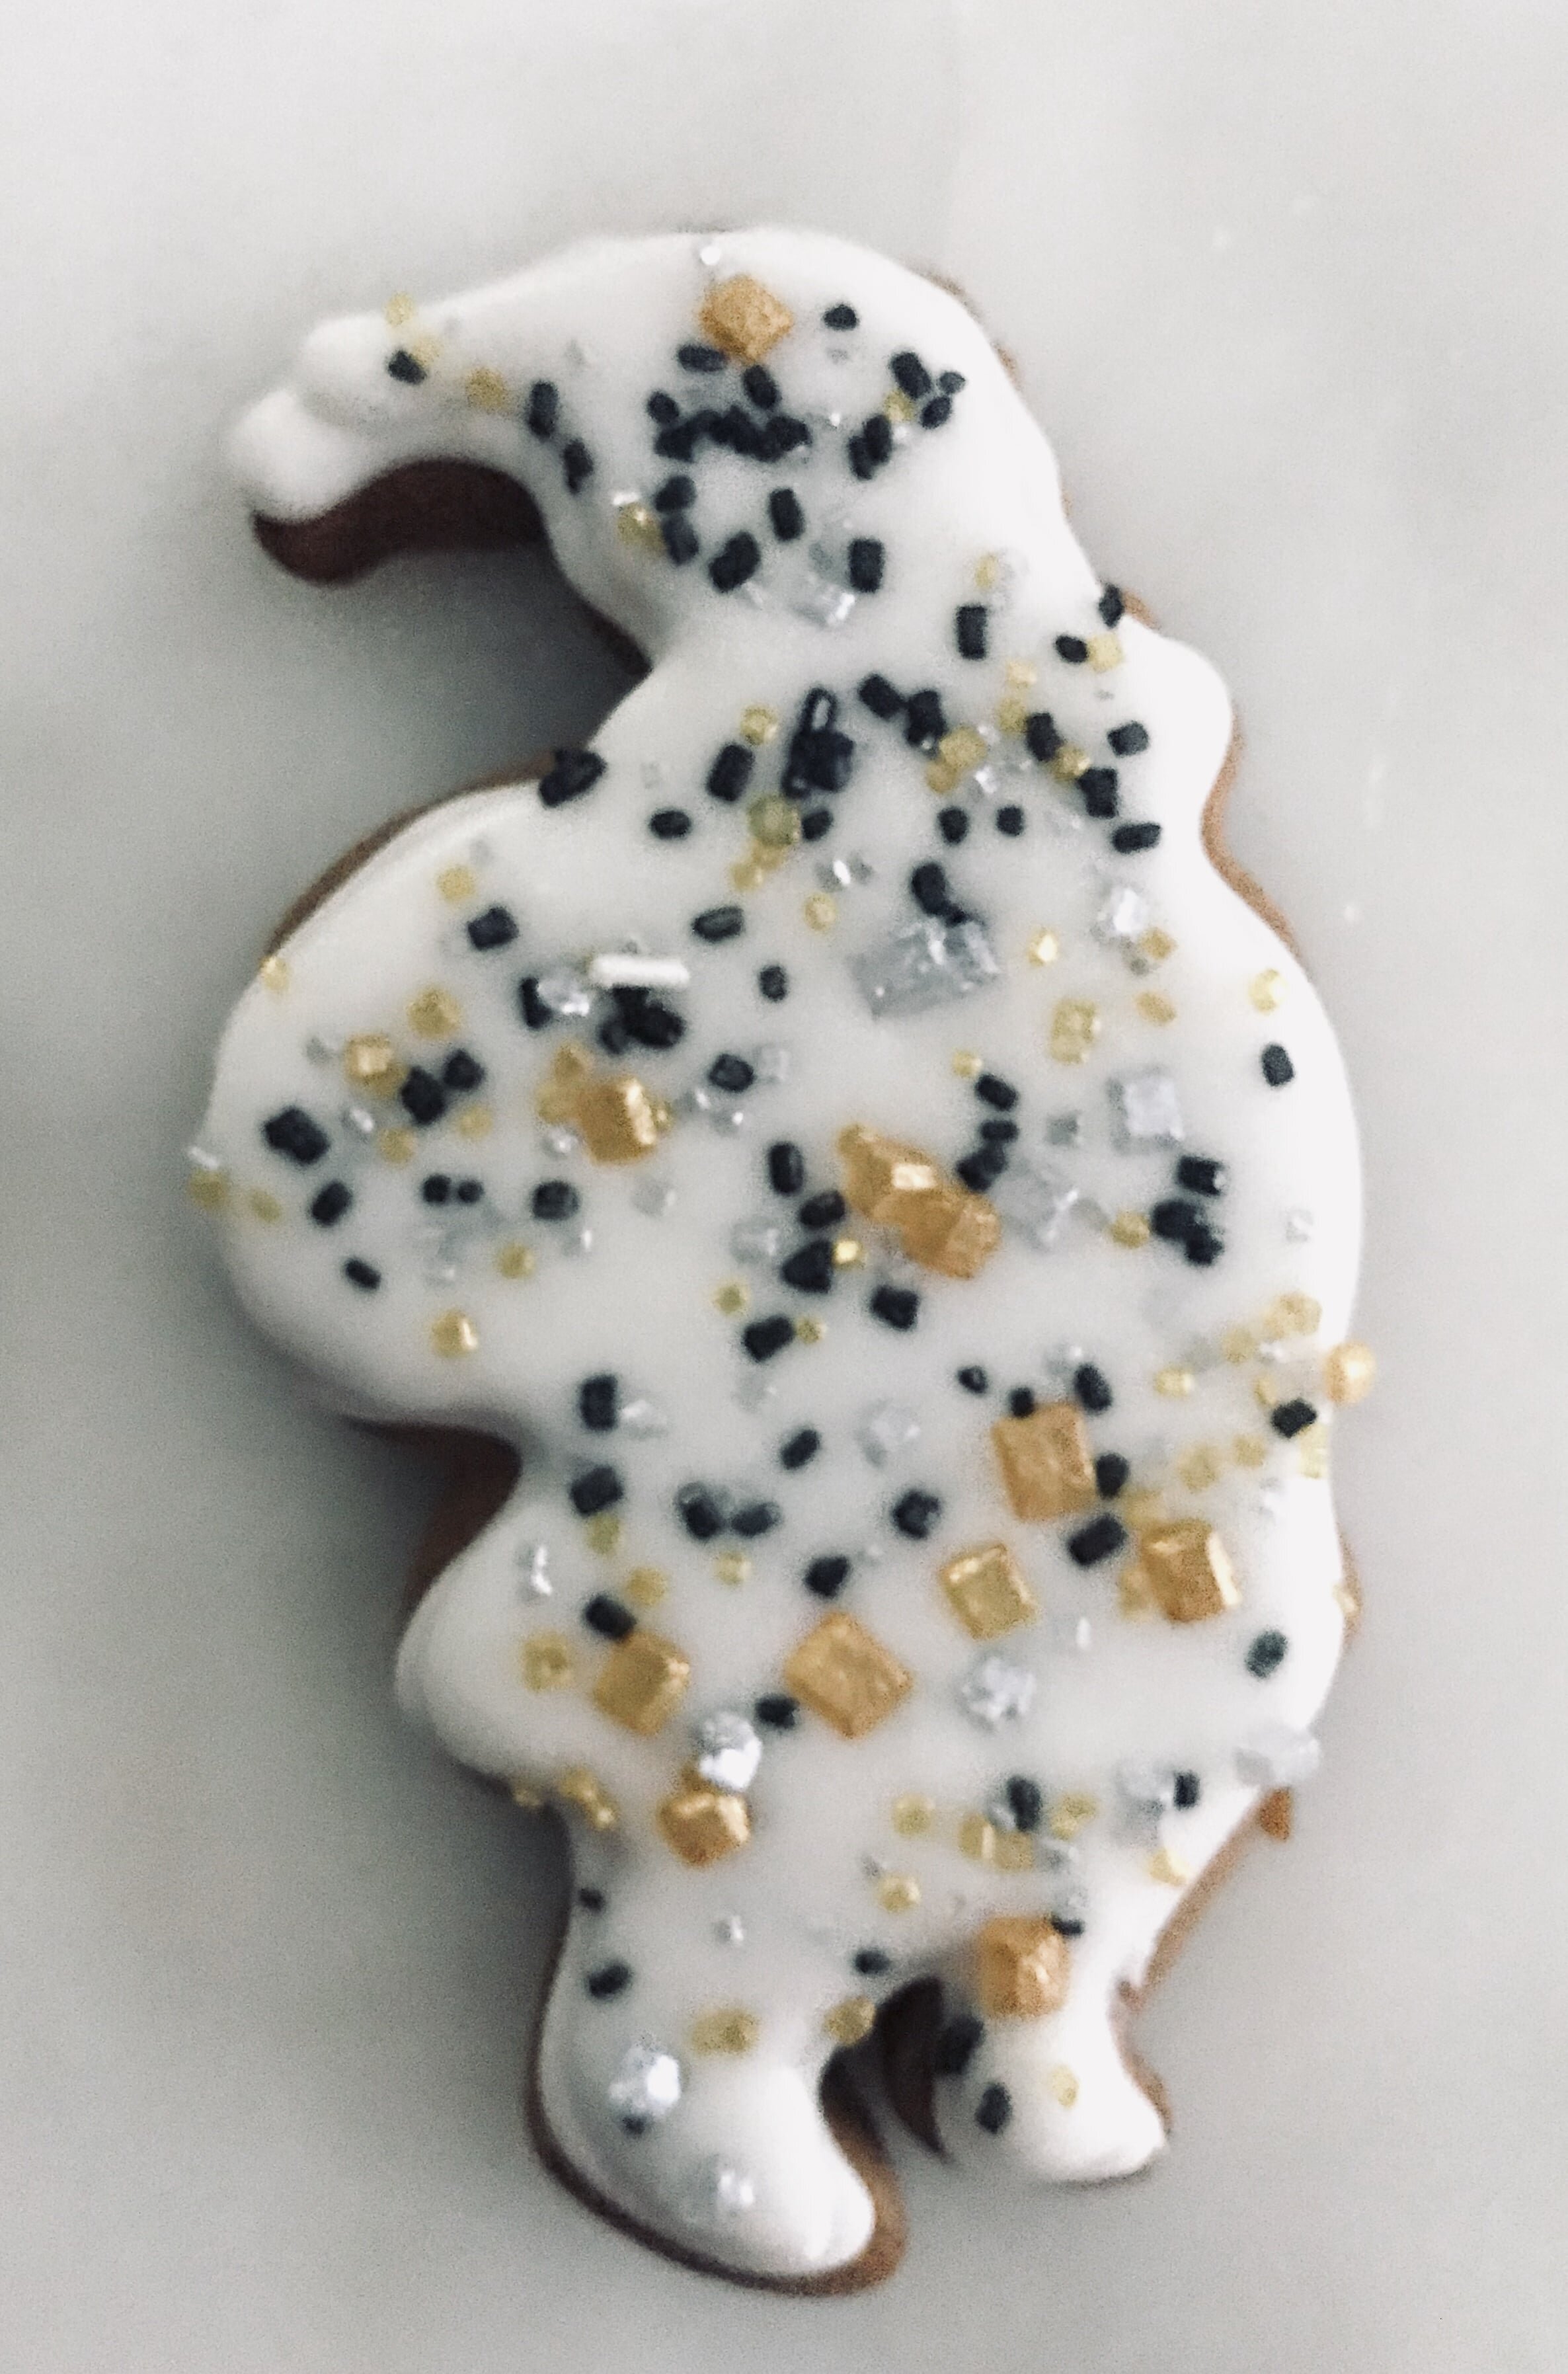
Gingerbread Cookies


[wprm-recipe-jump]
*This post contains affiliate links. Please read disclosure to learn more.
These gingerbread cookies are so good! They are filled with so many spices that leave your taste buds happy and the cookies itself is nice and soft. Now the holidays are never complete if there aren't some gingerbread cookies on the table. It's a Christmas classic that should be made every year. That's my opinion anyways.
Other holiday cookie favorites!
Cranberry spice French macarons
These are some of my other favorite cookies to make during the holidays! You can't go wrong with a good spiced cookie like a snickerdoodle or a ginger snap cookie. Plus you have to have a frosted sugar cookie too! Those are one of my favorites! The cranberry spice french macarons are also a great cookie to try. They are different but so good!
[mailerlite_form form_id=1]
Products I recommend for making this dessert.
Above are some products that I personally use and recommend for this recipe and to have for everyday use. One main thing that you will need in this recipe is the meringue powder for the buttercream. Meringue powder helps make the buttercream form a crust so that it won't make a mess and smudge everywhere. If you prefer to not use meringue powder, than I suggest making a crusting buttercream or a royal icing.
____________________________________________________________________________
gingerbread cookies
a spicy molasses cookie that is topped with a royal icing
cookies
- 2 sticks unsalted butter (softened)
- 3/4 cup brown sugar
- 1 egg
- 1/2 cup molasses
- 1 tsp vanilla extract
- 1 tsp baking soda
- 1 tbsp cinnamon
- 1 tbsp ginger
- 1/2 tsp cloves
- 1/2 tsp salt
- 3 1/2 cup all-purpose flour
royal icing
- 2 1/2 cup powdered sugar
- 2 tsp meringue powder
- 2 1/2 tbsp water
- 1 tsp vanilla extract
cookies
- preheat the oven to 350 degrees F. line a pan with parchment paper. in the bowl of an electric mixer fitted with a paddle attachment cream the sugar and the butter until light and fluffy, about 1 minute. scrape down the side of the bowl and then add in the egg, vanilla and molasses. in another bowl combine the flour, spices, baking soda, and salt and whisk together. scrape down the sides of the bowl then on low speed, gradually add in the dry ingredients. wrap the dough into cling-wrap and refrigerate for 30 minutes. roll to 1/4 inch thickness and cut out with desired shapes and bake for 8-10 minutes.
royal icing
- combine all of the ingredients and mix together until smooth.