
Scooby Doo Haunted Castle Cake Tutorial
This haunted castle cake featuring Scooby Doo and Shaggy is not only easy to make, but is an instant cake that any child or adult will fall in love with. With just a few tools and simple steps, you can create this cake at home too!
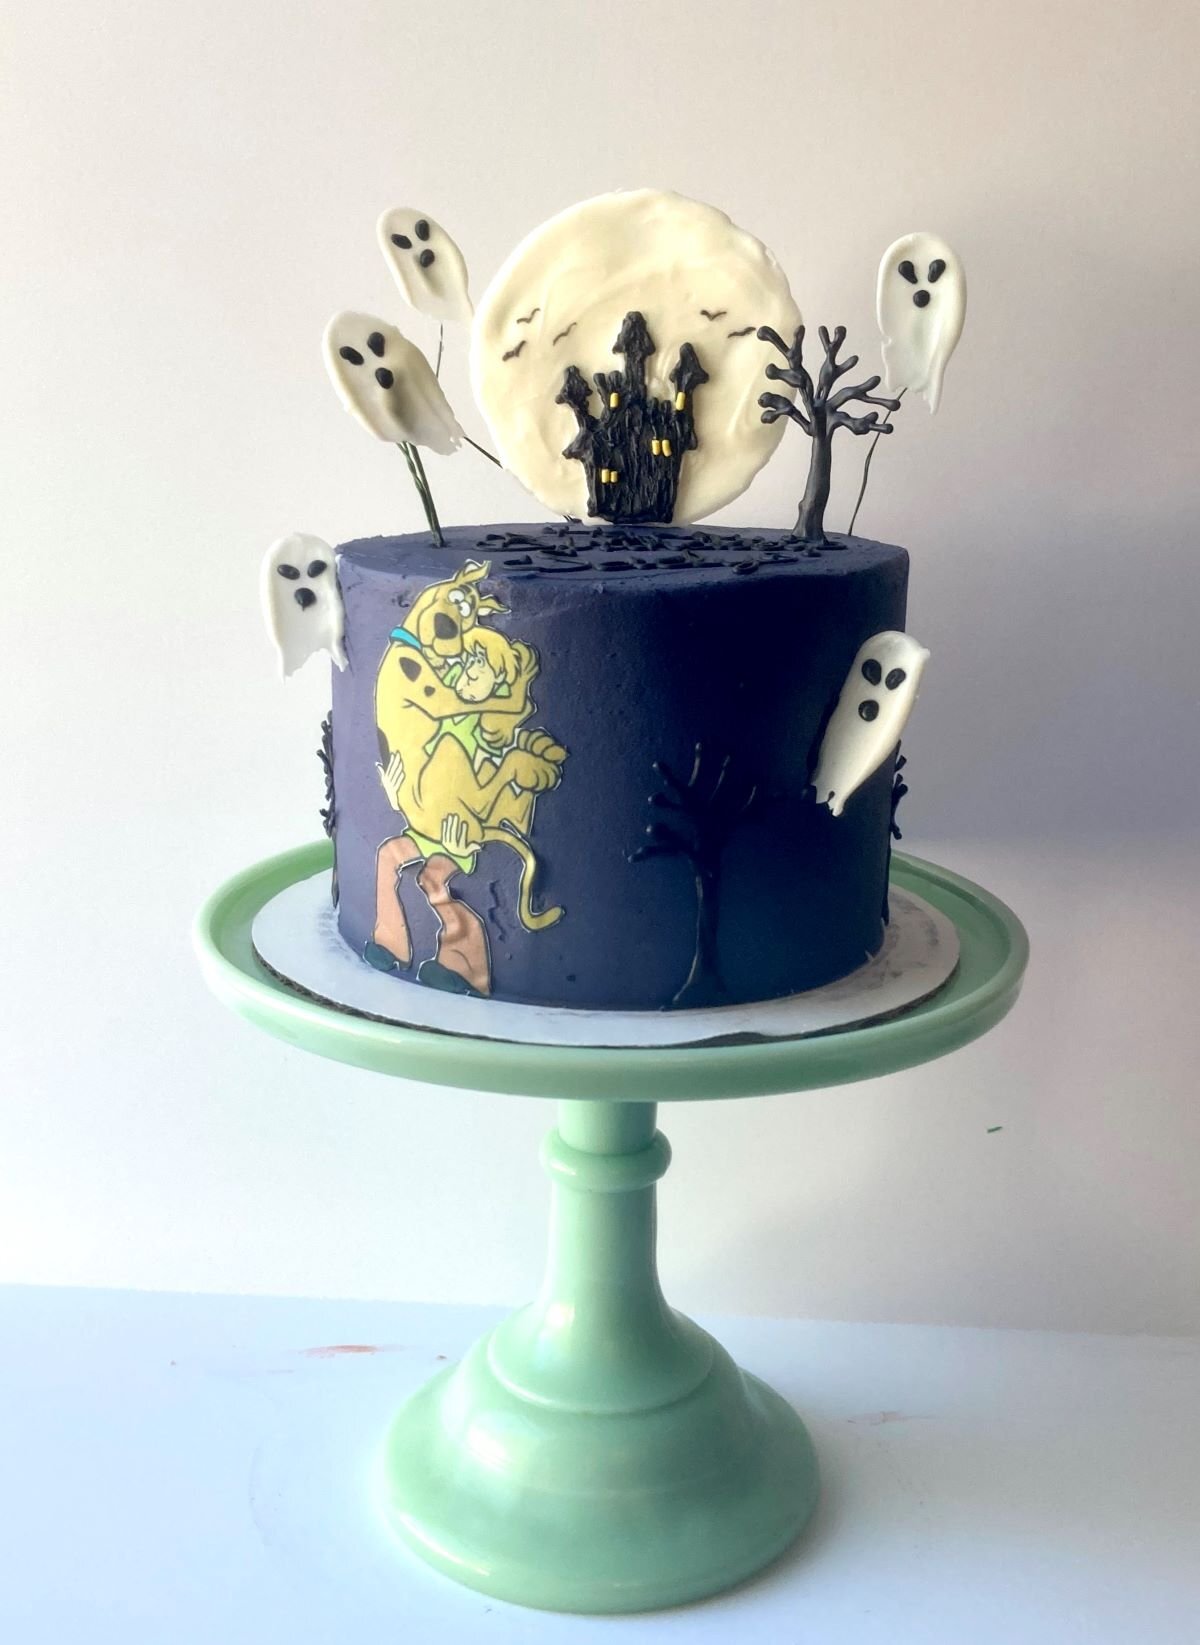
I had so much fun making this Scooby Doo haunted castle cake! My sister requested a birthday cake a few weeks back wanting it to be Scooby Doo themed. Like always, I have to research Pinterest for ideas, which usually ends up being combining 2 or even 3 different cake ideas into one. And then this haunted castle cake came about. Something easy, simple and not difficult to make at all. Just a few simple tools and pieces of equipment that are easy to find at your local craft store.
What You Will Need
- Cake: 3, 6-inch cake layers of your choice of flavor.
- Buttercream: 1 large batch of simple butter cream in a dark purple color.
- Black candy melts
- White candy melts
- Yellow jimmy sprinkles
- Floral wire
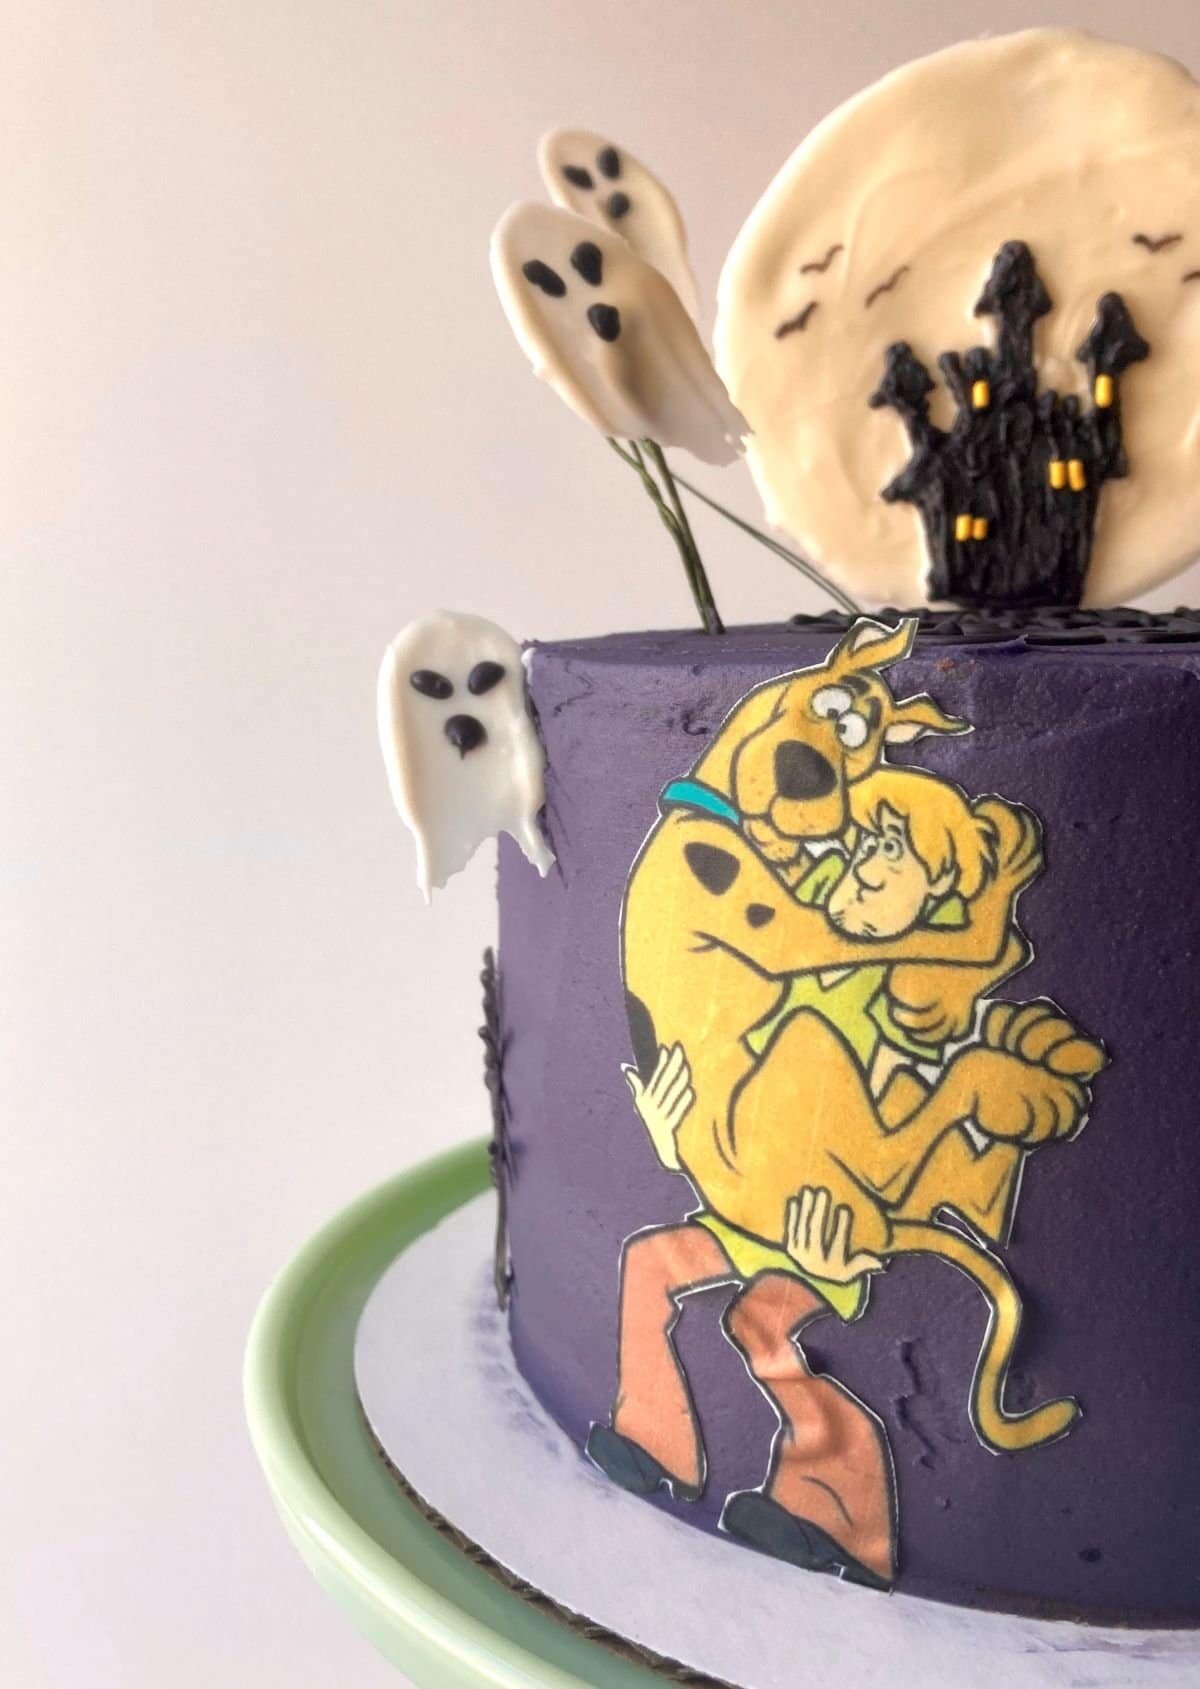
- Edible images of Scooby and Shaggy (optional).
How to Make This Haunted Castle Cake
Making this cake is really only a few simple steps that requires using candy melts! It's easy, straightforward, and customizable too! All you need is a few tools and some wax paper to get your chocolate decorations just right!
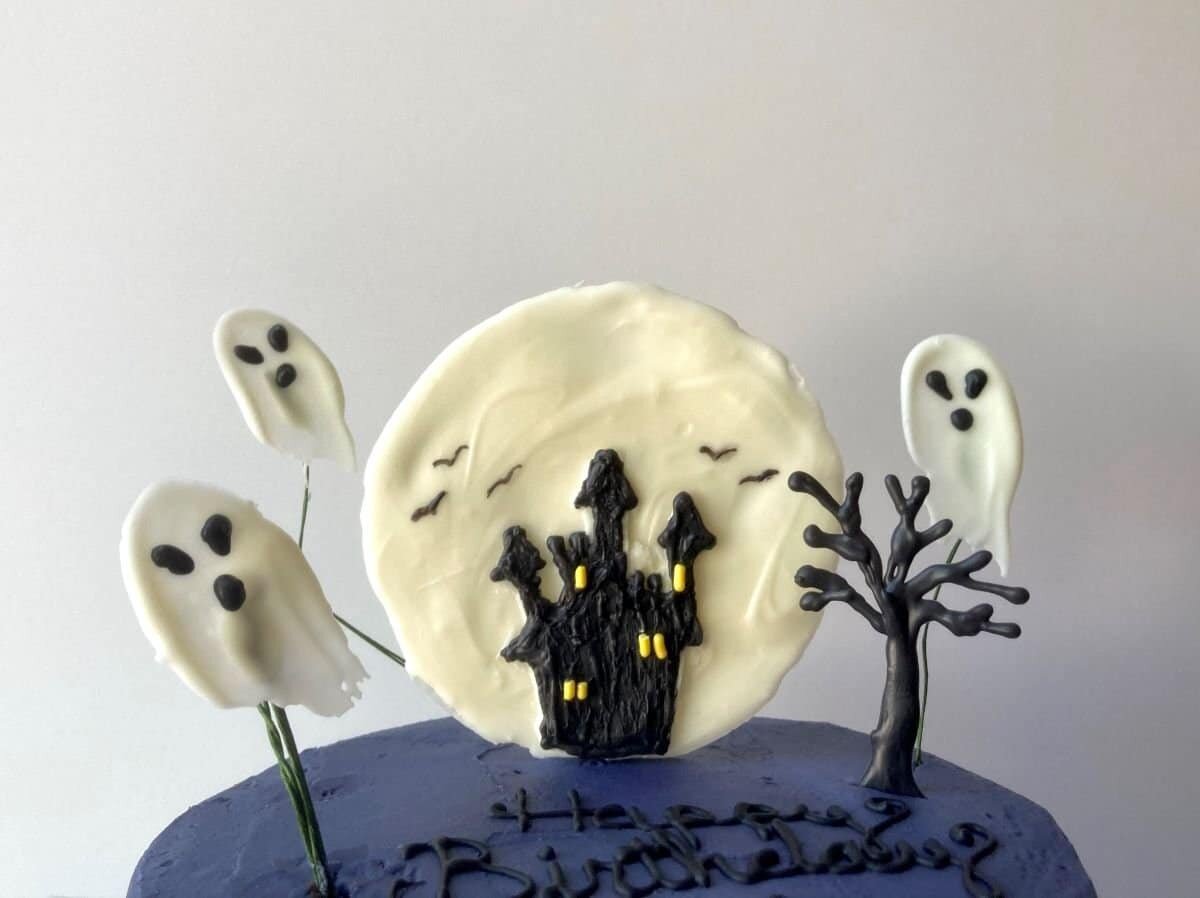
How To Make The Moon & Haunted Castle

- Melt the white candy melts and create a large round, about 4-5 inches in diameter.
- Melt the black candy melts and free hand a castle.
- Add some yellow jimmy sprinkles to the castle for the lights.
- When dry, flip over and place the large lollipop stick to the back of the chocolate moon and glue it with more chocolate.
How To Make The Ghosts

- Place a small dime size of melted white candy melts on some wax paper.
- Take a small offset spatula and place on the chocolate and drag down.
- Take a small piping bag of black candy melts and pipe a ghost face.
- Glue the floral wire to the back of the ghost.
Tips & Tricks
- Take the black candy melts and free hand some spooky trees to help bring the cake together even more! You can even add in some classic Scooby Doo spooky eyes to the side of the cake too.
- On the chocolate "moon", you can take a small paint brush and some black food color and paint on some bats for an added effect and to make the castle pop!
- If you don't have a way to get any edible images of Scooby Doo and Shaggy, then you can completely omit it. The cake will still look absolutely amazing either way! Or you can pipe it out using candy melts and a printed image as a stencil to place on the side of the cake instead!
Other Recipes You May Like
Scooby Doo Ice Cream Sandwiches
Scooby Doo Haunted Castle Cake
A easy cake tutorial on creating a haunted castle scene made with candy melts, featuring Scooby Doo and Shaggy.
- 1 cup white candy melts
- 1/2 cup black candy melts
- 1 cake (3, 6-inch layers)
- 1 batch buttercream (colored dark purple)
-
Frost your choice of cake with the dark purple buttercream. Let chill until the buttercream has set.
Chocolate Moon & Haunted Castle
-
Place a piece of wax paper on the counter. Melt the white candy melts in a piping bag, in 15 second intervals, until melted. Pipe out a large round, about 4-5 inches in diameter. Let set.
-
Melt the black candy melts in a piping bag and free hand a castle on top of the chocolate "moon". Before the chocolate starts to set, place the yellow jimmy sprinkles to resemble the windows of the castle. Let set.
-
Take the large lollipop stick or skewer and glue it to the back of the chocolate "moon". Let set.
Chocolate Ghosts
-
For the chocolate ghosts, pipe dime size rounds of the white candy melts on wax paper. Take a small offset spatula or a butter knife and gently place on top of the chocolate and drag down. Let set.
-
Take the black candy melts and pipe on the faces of the ghosts. Let set.
-
Using the floral wire, gently flip the chocolate ghosts over and glue the floral wire to the back of them using a little more white candy melts. Let set.
Assembly
-
To assemble, carefully place the lollipop stick with the chocolate "moon" into the cake.
-
Carefully take the chocolate ghosts on the floral wire and place randomly on the cake.
-
If you have edible images of Scooby and Shaggy, then carefully brush the back of the image with some corn syrup and place on the cake.

Butterfinger Poke Cake

This Butterfinger poke cake is filled with caramel, sprinkled with crushed Butterfinger candies and topped with a smooth layer of fresh whipped cream. It's easy to make and a crowd pleaser favorite!
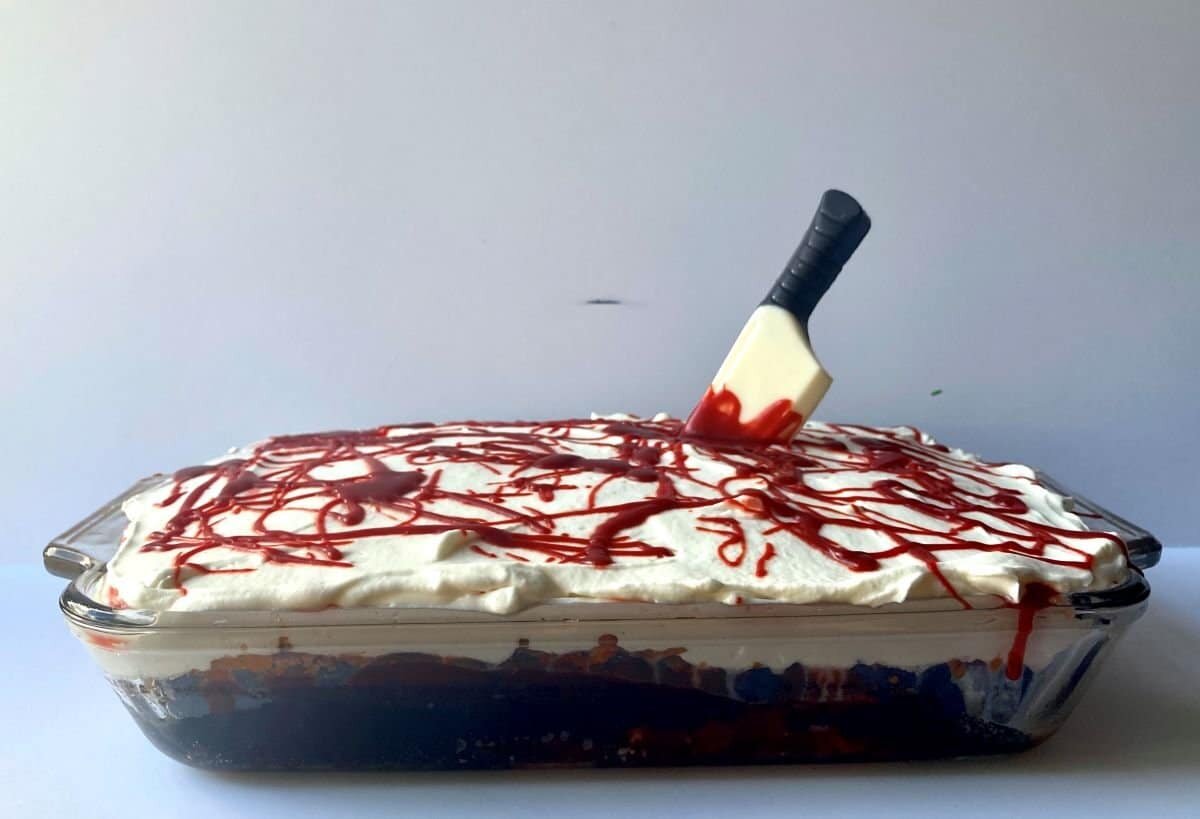
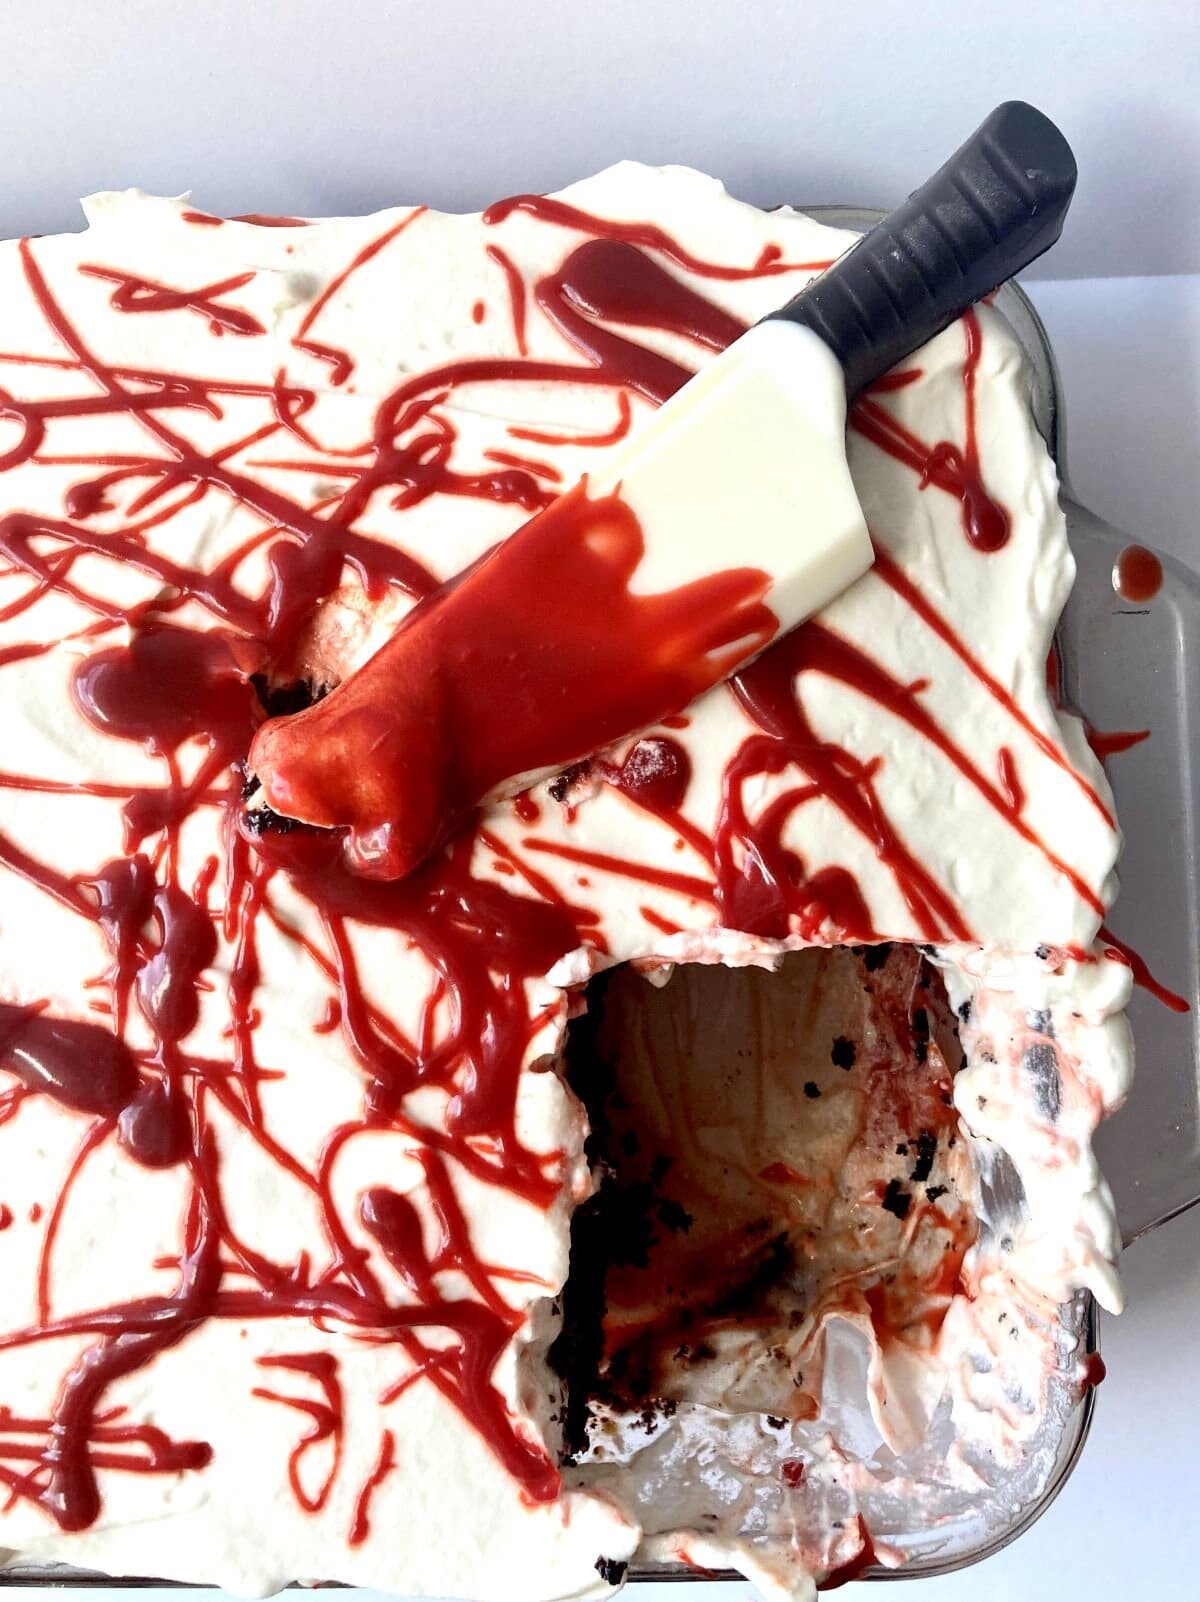
It’s almost Halloween and although this year hasn’t been the best, it doesn’t mean that you can’t celebrate a fun holiday! Grab your Scream mask from your hallway closet and show off this fun Butterfinger poke cake!
I made this Butterfinger poke cake into a gory scene by simply adding some red food color into the caramel sauce. It’s so easy and simple to make this cake as well. You can use just plain old box mix cake or go all out and make it from scratch! I highly suggest making homemade caramel sauce for this cake though. It amplifies the flavor and makes it easier to add in the red food color.
What You'll Need
- Chocolate sheet cake- you can use this recipe or you can use your favorite. Box mix works too!
- Caramel- this is important to make the cake flavorful and moist!
- Candy- I used Butterfingers but Heath bars would work really well with this too.
- Whipped cream- adding whipped cream to the top of this cake brings it to a whole new level.
How to Make This Butterfinger Poke Cake
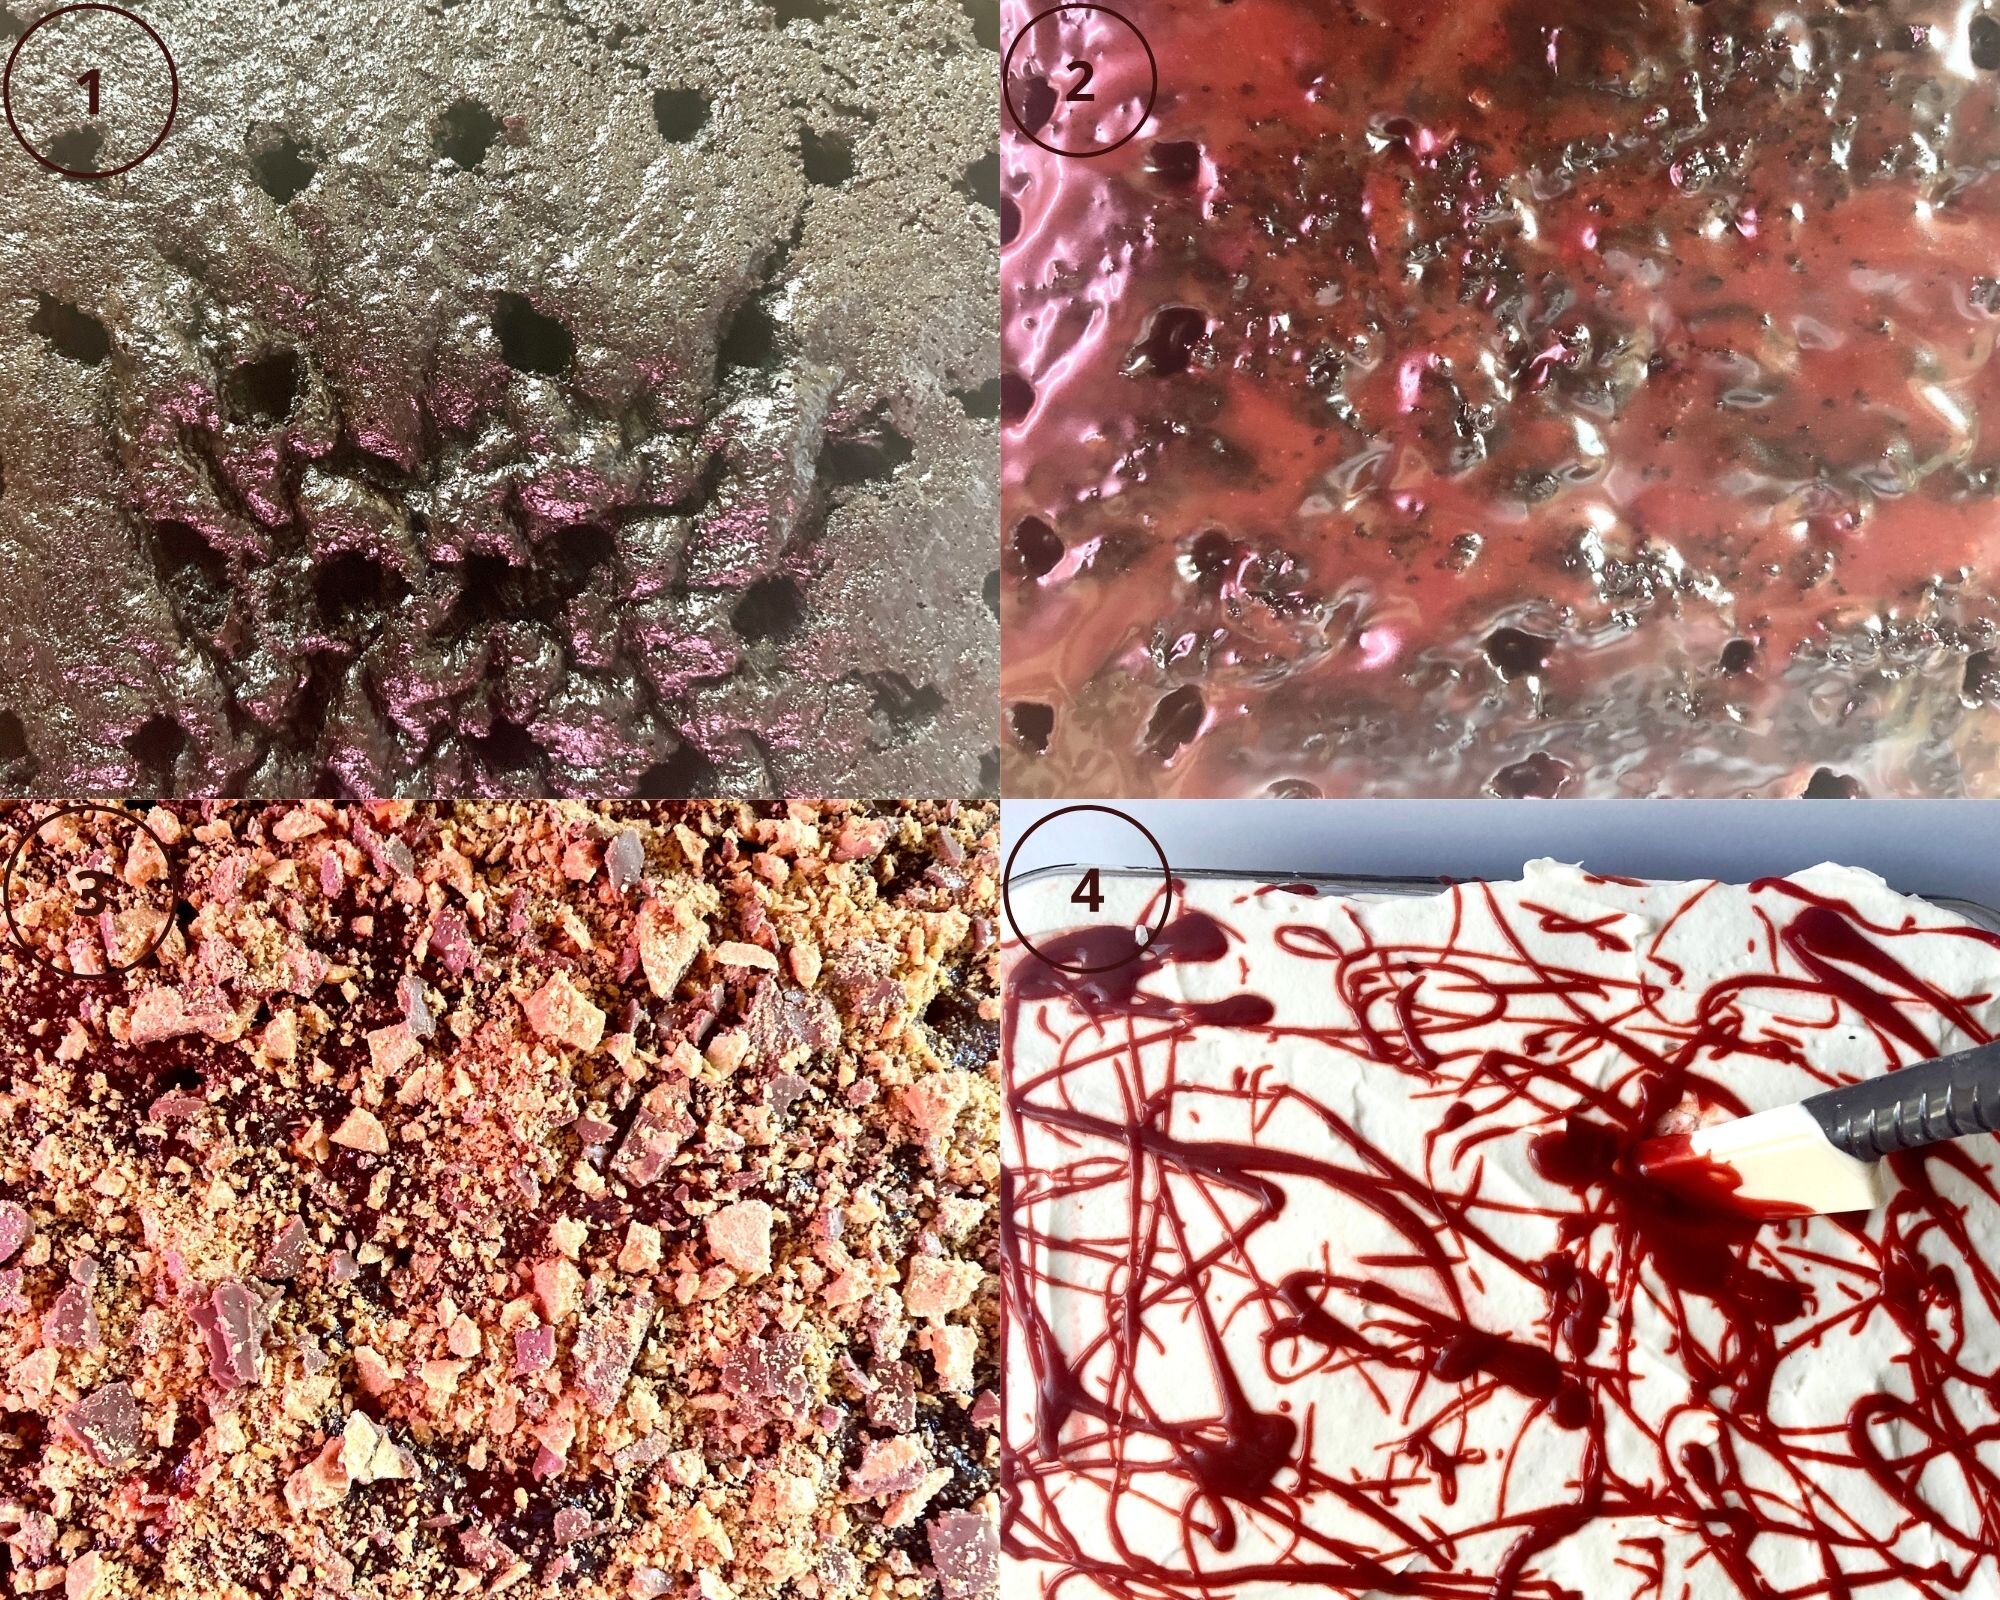
- Take your baked sheet cake and using either a large straw or a thick skewer, poke holes all throughout the cake.
- Pour the caramel over the cake, ensuring that it soaks into the holes of the cake.
- Take the Butterfinger candy and smash it into pieces. Sprinkle it all over the top of the cake.
- Spread the whipped cream over the top of the cake. You can then drizzle with more caramel and more candy pieces.
Tips & Tricks
To make this Butterfinger poke cake for Halloween, you simply just tweak one thing. The caramel. Just simply add in some red food color so it resembles blood and then add a chocolate knife on top to complete the murder scene.
Other ways to change it up is to use Heath candy bars instead of Butterfingers. It will add more of a crunch and a toffee flavor, but will still be delicious!
Other Recipes You May Like
Butterfinger Poke Cake
Chocolate cake that is soaked with a caramel sauce, topped with Butterfinger candy and fresh whipped cream.
Cake
- 3/4 cup all-purpose flour
- 3/4 cup granulated sugar
- 1/2 cup cocoa powder
- 1 tsp baking soda
- 1/2 tsp salt
- 2 eggs
- 2 tsp vanilla extract
- 1/2 cup oil
- 1/3 cup sour cream
- 1 cup buttermilk
Caramel Sauce
- 1/4 cup water
- 1/4 cup light corn syrup
- 1 cup granulated sugar
- pinch salt
- 2 tbsp unsalted butter
- 1 tsp vanilla extract
- 1/2 cup heavy cream
Topping
- Butterfinger candy (crushed)
Whipped Cream
- 1 cup heavy cream
- 1/2 cup powdered sugar
- 1 tsp vanilla extract
Cake
- Preheat the oven to 375*F and grease and line a 9.25 x 13.25 inch pan. In a large bowl combine the flour, sugar, cocoa powder, baking soda, and salt and mix to combine. In another bowl combine the eggs, oil, sour cream, buttermilk, and vanilla and whisk together. Slowly add the wet ingredients to the dry and mix to combine. Pour the batter into the prepared pan and then sprinkle as much chocolate chips as you want on top of the batter. Bake for 30-35 minutes or until a toothpick comes out clean in the center (although be careful to not mistake melted chocolate chips for batter). let the cake cool completely.
Caramel Sauce
-
Place the water, corn syrup, and sugar into a small sauce pot and place over medium high heat. Bring to a boil until the sugar starts to caramelize and turns a light brown, about 10 minutes.
-
Remove from heat and add in the butter. Mix until the butter is fully incorporated. Then slowly pour in the heavy cream, whisking at the same time. Once the heavy cream is fully added in, mix in the vanilla and salt.
Whipped Cream
-
Put all of the ingredients into the bowl of a stand mixer fitted with a whisk attachment, Whip on high until stiff peaks form.
Assembly
-
Take a straw or a thick wooden dowel and poke holes into the cake. Pour The caramel over the cake so that it soaks through completely. Sprinkle with the Butterfinger candy and then top with the whipped cream.
To make the cake gory, add in 1-2 tsp of red food color into the caramel sauce when you add in the heavy cream.
Reserve 1/4 cup of the caramel sauce to splatter the top of the cake with.
Decorate with a chocolate knife or even fake vampire teeth!

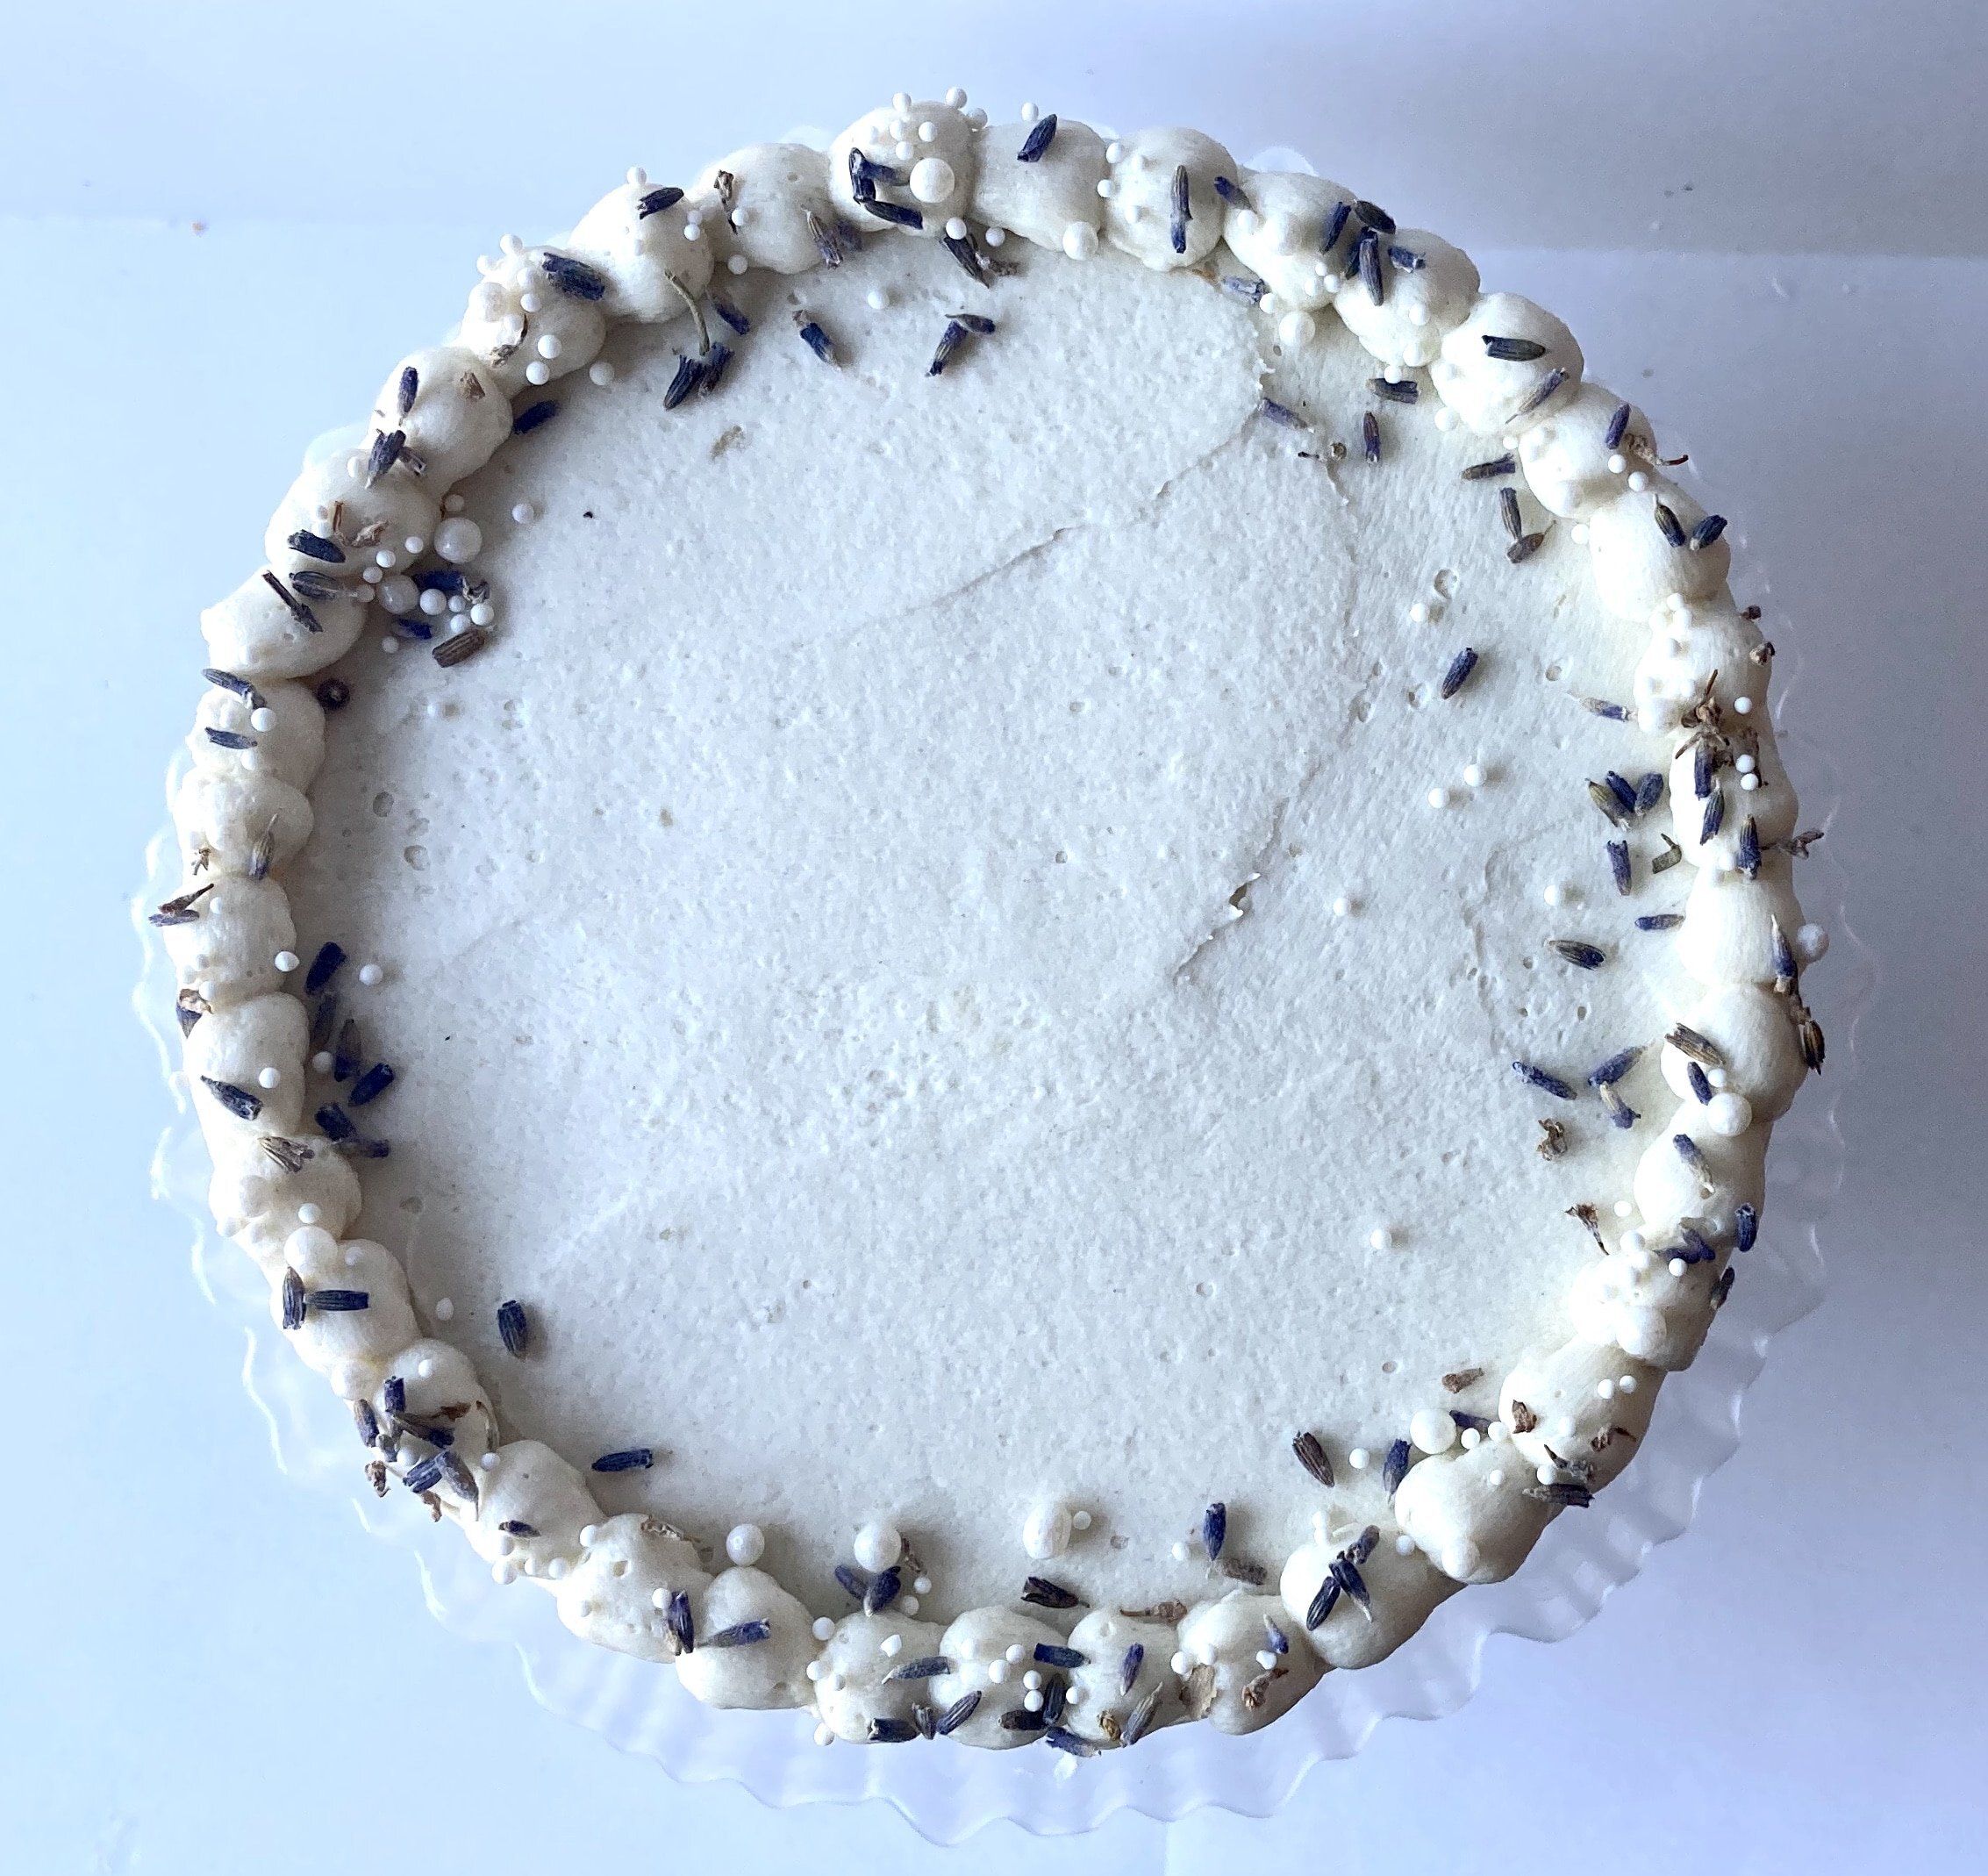
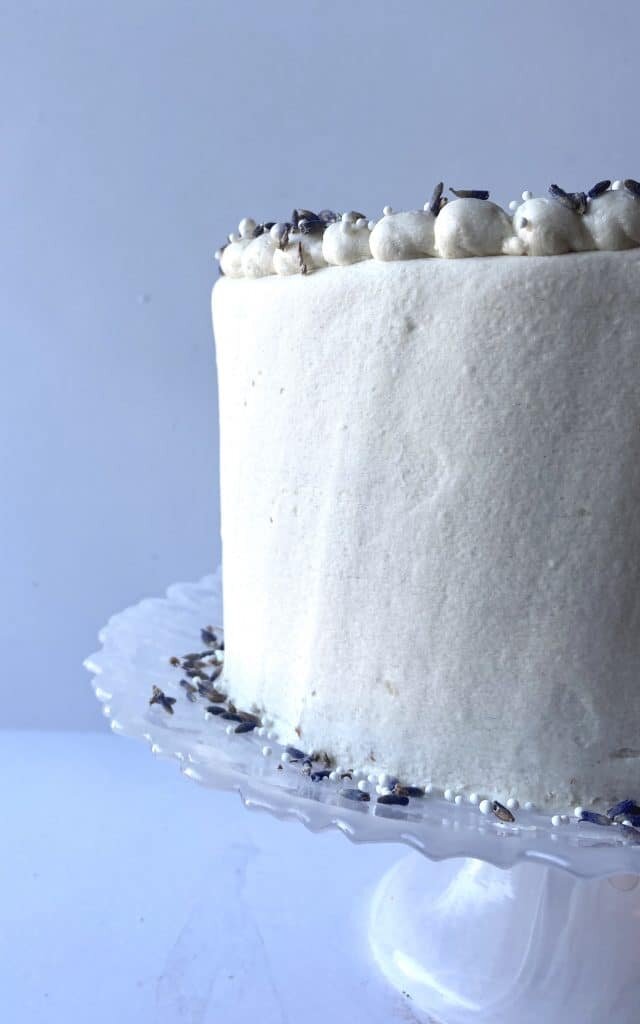
Lavender Vanilla Bean Cake

[wprm-recipe-jump]
*This post contains affiliate links. Please read disclosure to learn moreWhen I think of june I think of flowers blooming everywhere and people starting to really get into gardening for the summer. So why not enjoy a lovely lavender vanilla bean cake that is light, airy and coated in the most luscious buttercream you will ever have?The lavender in this cake is very subtle and not at all overpowering as it is only found in the buttercream and is nowhere in sight in the actual cake. It's perfect for a cute little tea party or picnic get together.Now if you don't have lavender than that is no problem at all! You can use dried rose petals, hibiscus or you can even use your favorite tea if you want to! Or you don't need to use any floral flavors at all and can just keep it simply vanilla. There is no wrong way to make a cake flavorful and everyone has different taste buds.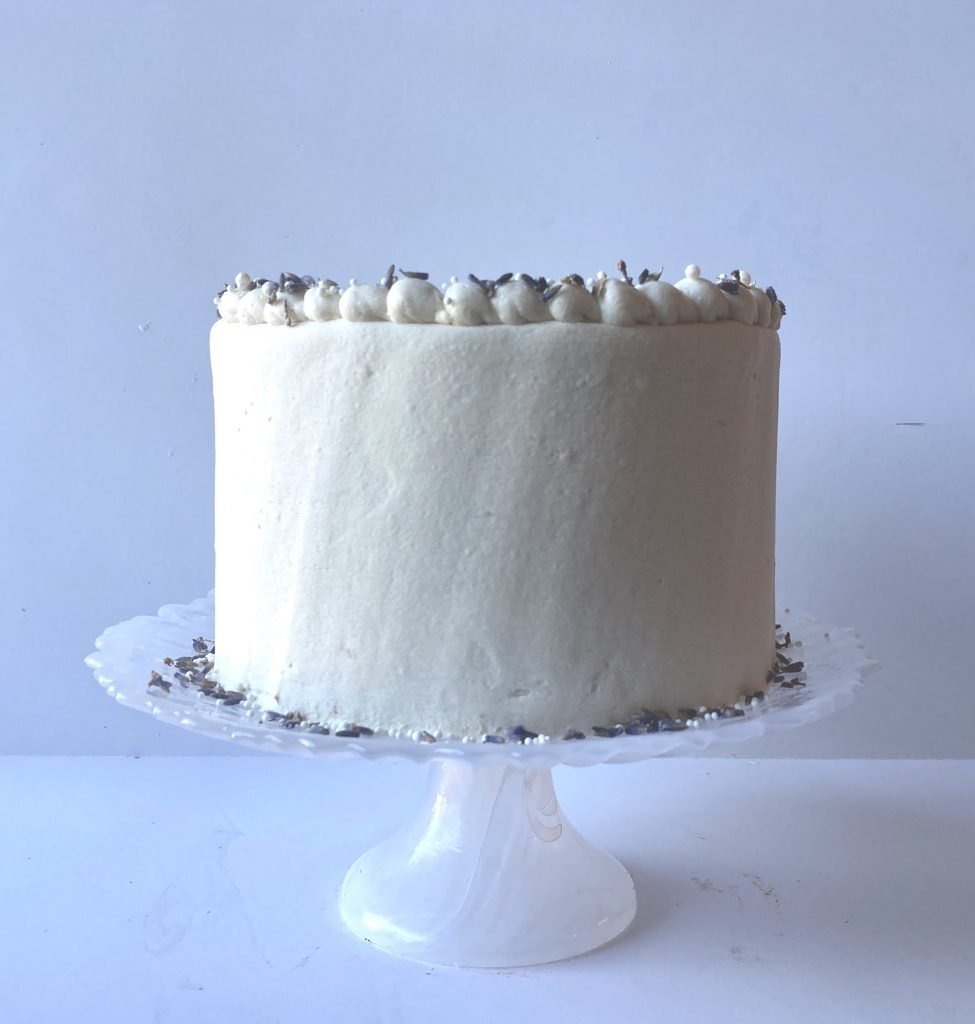
[mailerlite_form form_id=1]
Above are some products that I personally use and recommend for this recipe and to have for everyday use. When I make a cake, I will always use 6 inch cake pans. Now you don't have to use this cake pan size, but if you decide to use a different size than you will have to use some trial and error with the baking time. Baking is a science! So adjusting baking times will always be a given especially since not all ovens work the same way.
___________________________________________________________________________________________________
Lavender Vanilla Bean Cake
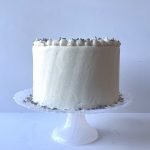
light vanilla bean cake with a lavender ermine buttercream.
makes one 3-layer, 6-inch cake
cake
- 2 cup cake flour
- 1 cup granulated sugar
- 1 1/2 tsp baking powder
- 1 1/2 tsp baking soda
- 1 tsp salt
- 2 eggs
- 4 egg whites
- 2/3 cup vegetable oil
- 1 tsp vanilla extract
- 1 vanilla bean (scraped)
- 1 1/4 cup milk
buttercream
- 1 cup milk
- 2 tbsp dried lavender
- 5 tbsp all-purpose flour
- 1 cup granulated sugar
- 1 1/2 tsp vanilla
- pinch salt
- 1 cup unsalted butter (room temp)
cake
- preheat the oven to 350 degrees F and line three 6-inch pans with parchment paper. in a large bowl, combine the cake flour, sugar, baking powder, baking soda and salt and whisk together. in another bowl, combine the oil, eggs, egg whites, vanilla bean, vanilla, and milk and whisk together. pour the wet ingredients into the dry and mix until fully combined. place the batter in the pan and bake for 20-25 minutes or until a toothpick comes out clean. let the cake cool for 10 minutes then carefully remove them from the pans to continue cooling. wrap in cling wrap until ready to use.
buttercream
-
in a saucepan combine the lavender and milk and place over medium-low heat and bring to a simmer. turn off the heat and cover with a lid and let stand for 30 minutes. strain out the lavender and place the pot with the milk back on the stove. whisk the sugar, flour and salt in a separate bowl and then slowly whisk into the milk. add the vanilla. turn the heat on to medium/high and whisk the mixture constantly until it starts to thicken, about 8-15 minutes. (this depends on if you have a gas or electric stove top.) once thick, remove from the heat. put the mixture into a bowl. place cling wrap directly over the mixture so a skin doesn’t form. let cool until room temp. once at room temp, place the butter into the bowl of an electric mixer fitted with a whisk attachment. whip until light and fluffy, about 5 minutes. add the flour mixture, a spoonful at a time, into the butter mixture. once the flour mixture is all added, whip on high for about a minute. the buttercream will resemble whipped cream.

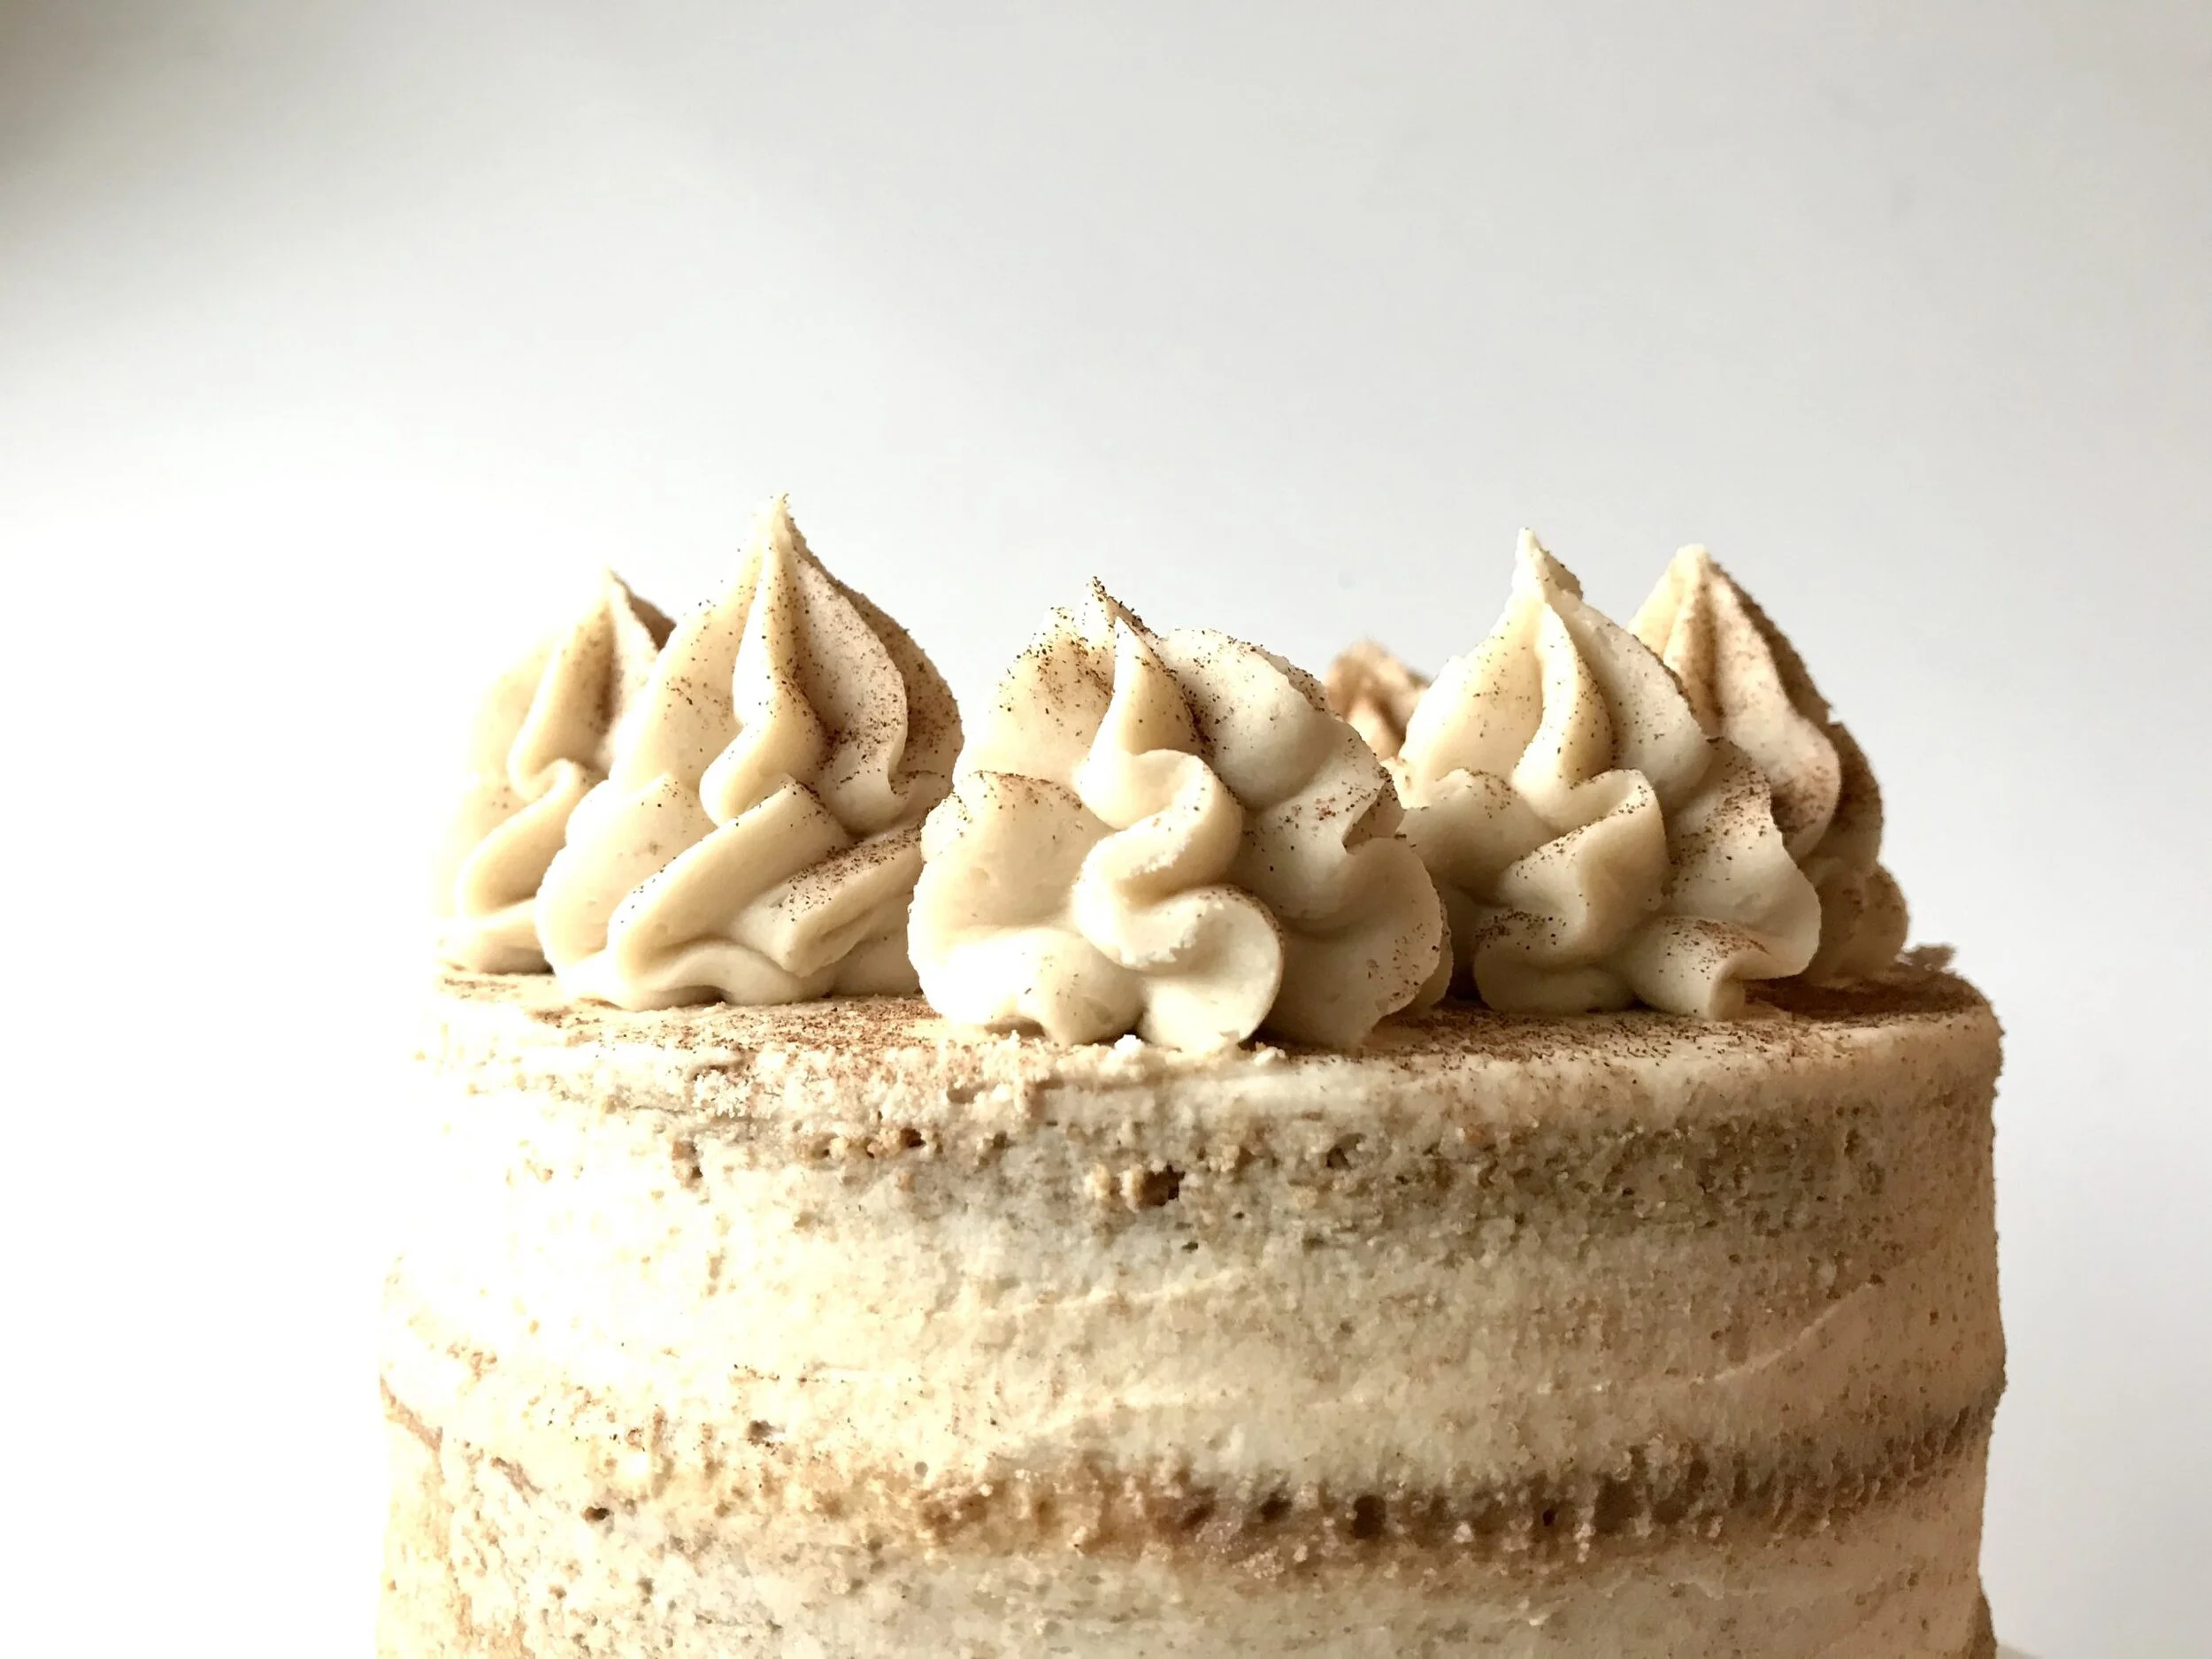
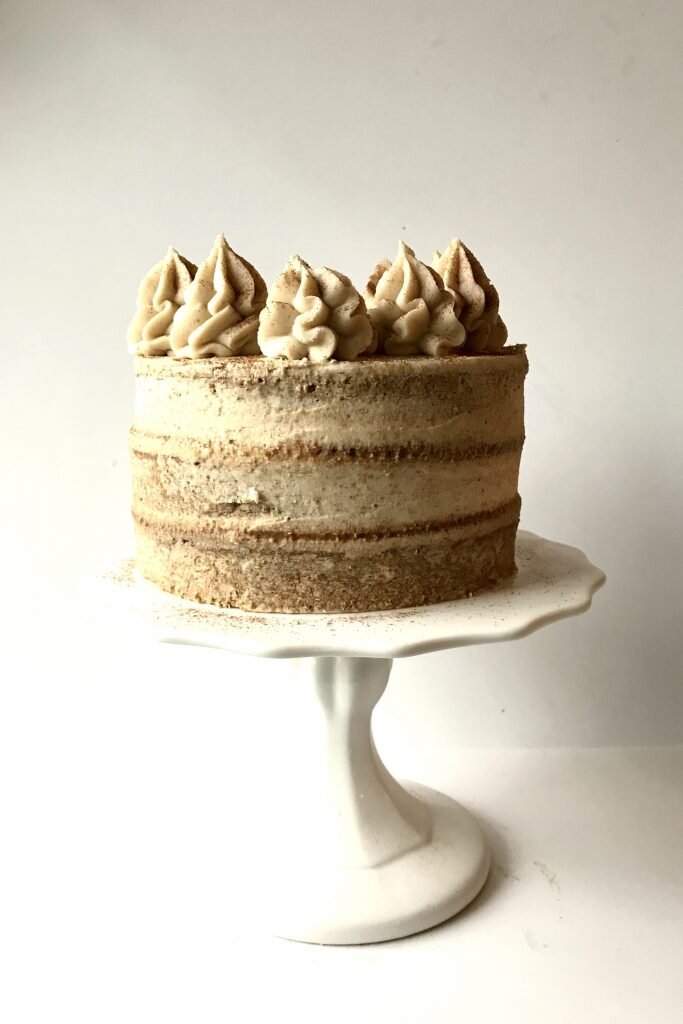
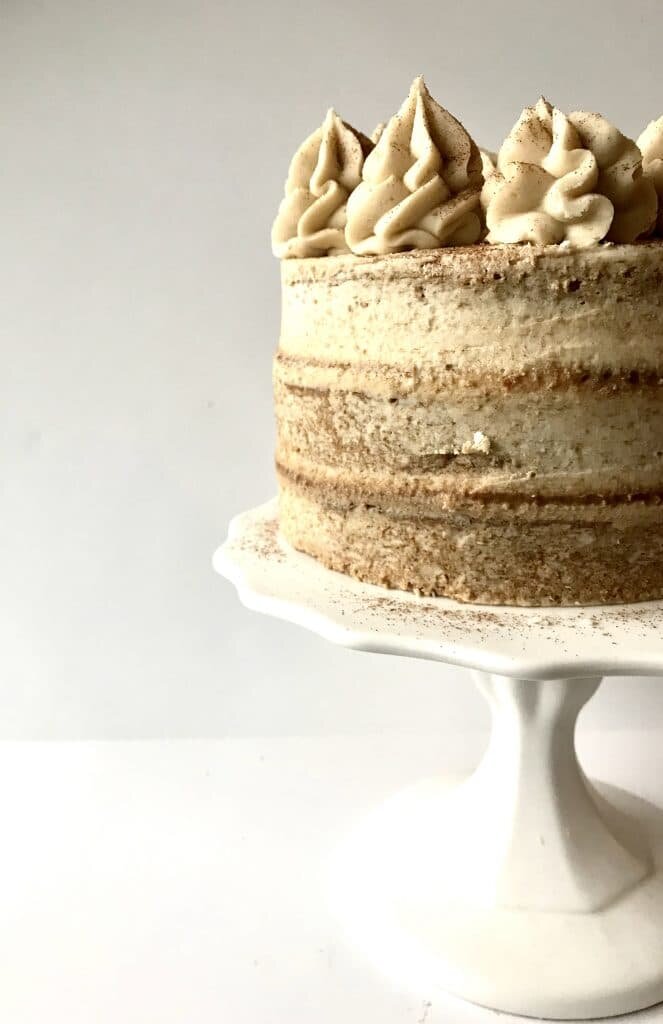
Cookie Butter Cake
[wprm-recipe-jump]
*Disclaimer: This post contains affiliate links. To learn more, please go here.This cookie butter cake is lovely in flavor and everyone will absolutely love it! It's made with biscoff cookies and a homemade cookie butter filling. The cake layers are soft with lovely bits of cookie pieces spread throughout and the spiced filling makes it all come together with a thin layer of simple buttercream.If you don't want to make homemade cookie butter than that is completely ok. You can always go to your local grocery store and buy a small tub of cookie butter that is available and ready to go for you. But I do suggest getting a package of the biscoff cookies too so you can add it into the batter. You can also use the cookies to decorate the cake as well or just enjoy it as a little snack while you make this cookie butter cake too!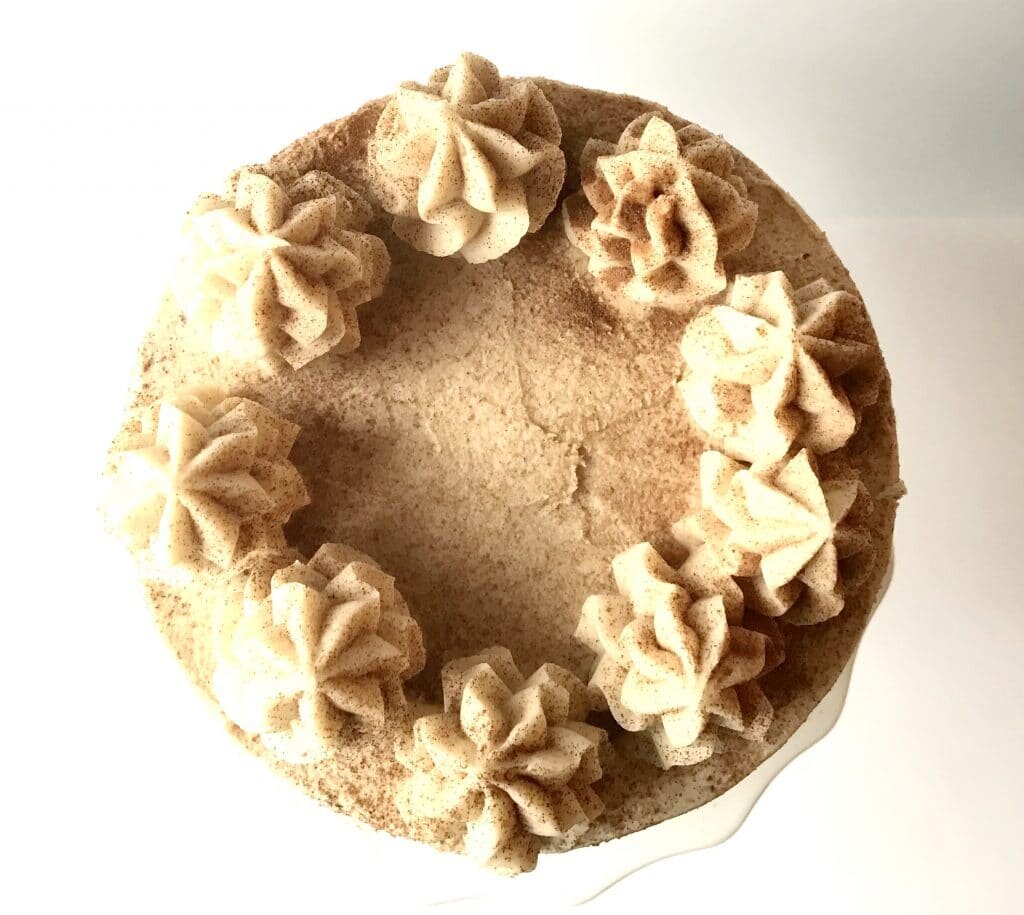
[mailerlite_form form_id=1]

Above are some products that I personally use and recommend for this recipe and to have for everyday use. Whenever I make a cake I will always use 6-inch cake pans. Growing up my mom didn't like having huge cakes in the fridge because no one would really eat it besides myself. That's when I came into the habit of making a smaller size layer cake instead which serves 8-10 people.
____________________________________________________________________________
cookie butter cake

this cookie butter cake is filled with a homemade biscoff cookie butter that gives it a nice spicey kick to it and lots of flavor!
makes one 3-layer, 6-inch cake
cake
- 2 cup all-purpose flour
- 3/4 cup granulated sugar
- 1 1/2 tsp baking soda
- 3/4 tsp salt
- 1/2 cup vegetable oil
- 2 eggs
- 1 tbsp vanilla extract
- 3/4 cup buttermilk
- 3/4 cup water
- 10 biscoff cookies (crushed)
cookie butter
- 20 biscoff cookies
- 1/2 tsp cinnamon
- pinch salt
- 1/2 cup powdered sugar
- 3 tbsp vegetable oil
- 4 tbsp unsalted butter (room temp)
buttercream
- 1 1/2 cup unsalted butter (room temp)
- 5 cup powdered sugar
- 1 tsp vanilla
- pinch salt
- 1/4 cup cookie butter (optional)
cake
- preheat the oven to 350 degrees F and line three 6-inch pans with parchment paper. in a large bowl, combine the flour, sugar, baking soda and salt and whisk together. in another bowl, combine the oil, eggs, vanilla, water, and buttermilk and whisk together. pour the wet ingredients into the dry and mix until fully combined. fold in the crushed biscoff cookie pieces. place the batter in the pan and bake for 30-35 minutes or until a toothpick comes out clean. let the cake cool for 10 minutes then carefully remove them from the pans to continue cooling. wrap in cling wrap until ready to use.
cookie butter
-
combine all of the ingredients into a food processor and pulse until the cookies are fine and everything comes together. let sit for an hour so it comes together and thickens.
buttercream
-
place the butter into a bowl of an electric mixer fitted with a paddle attachment. mix until smooth. scrape down the sides of the bowl and add in the rest of the ingredients. mix on slow speed and gradually increase the speed. let mix until fluffy and lighter in color, about 3 minutes. you can add in some cookie butter into the buttercream as well, but this is completely optional!
Chocolate Sheet Cake

[wprm-recipe-jump]
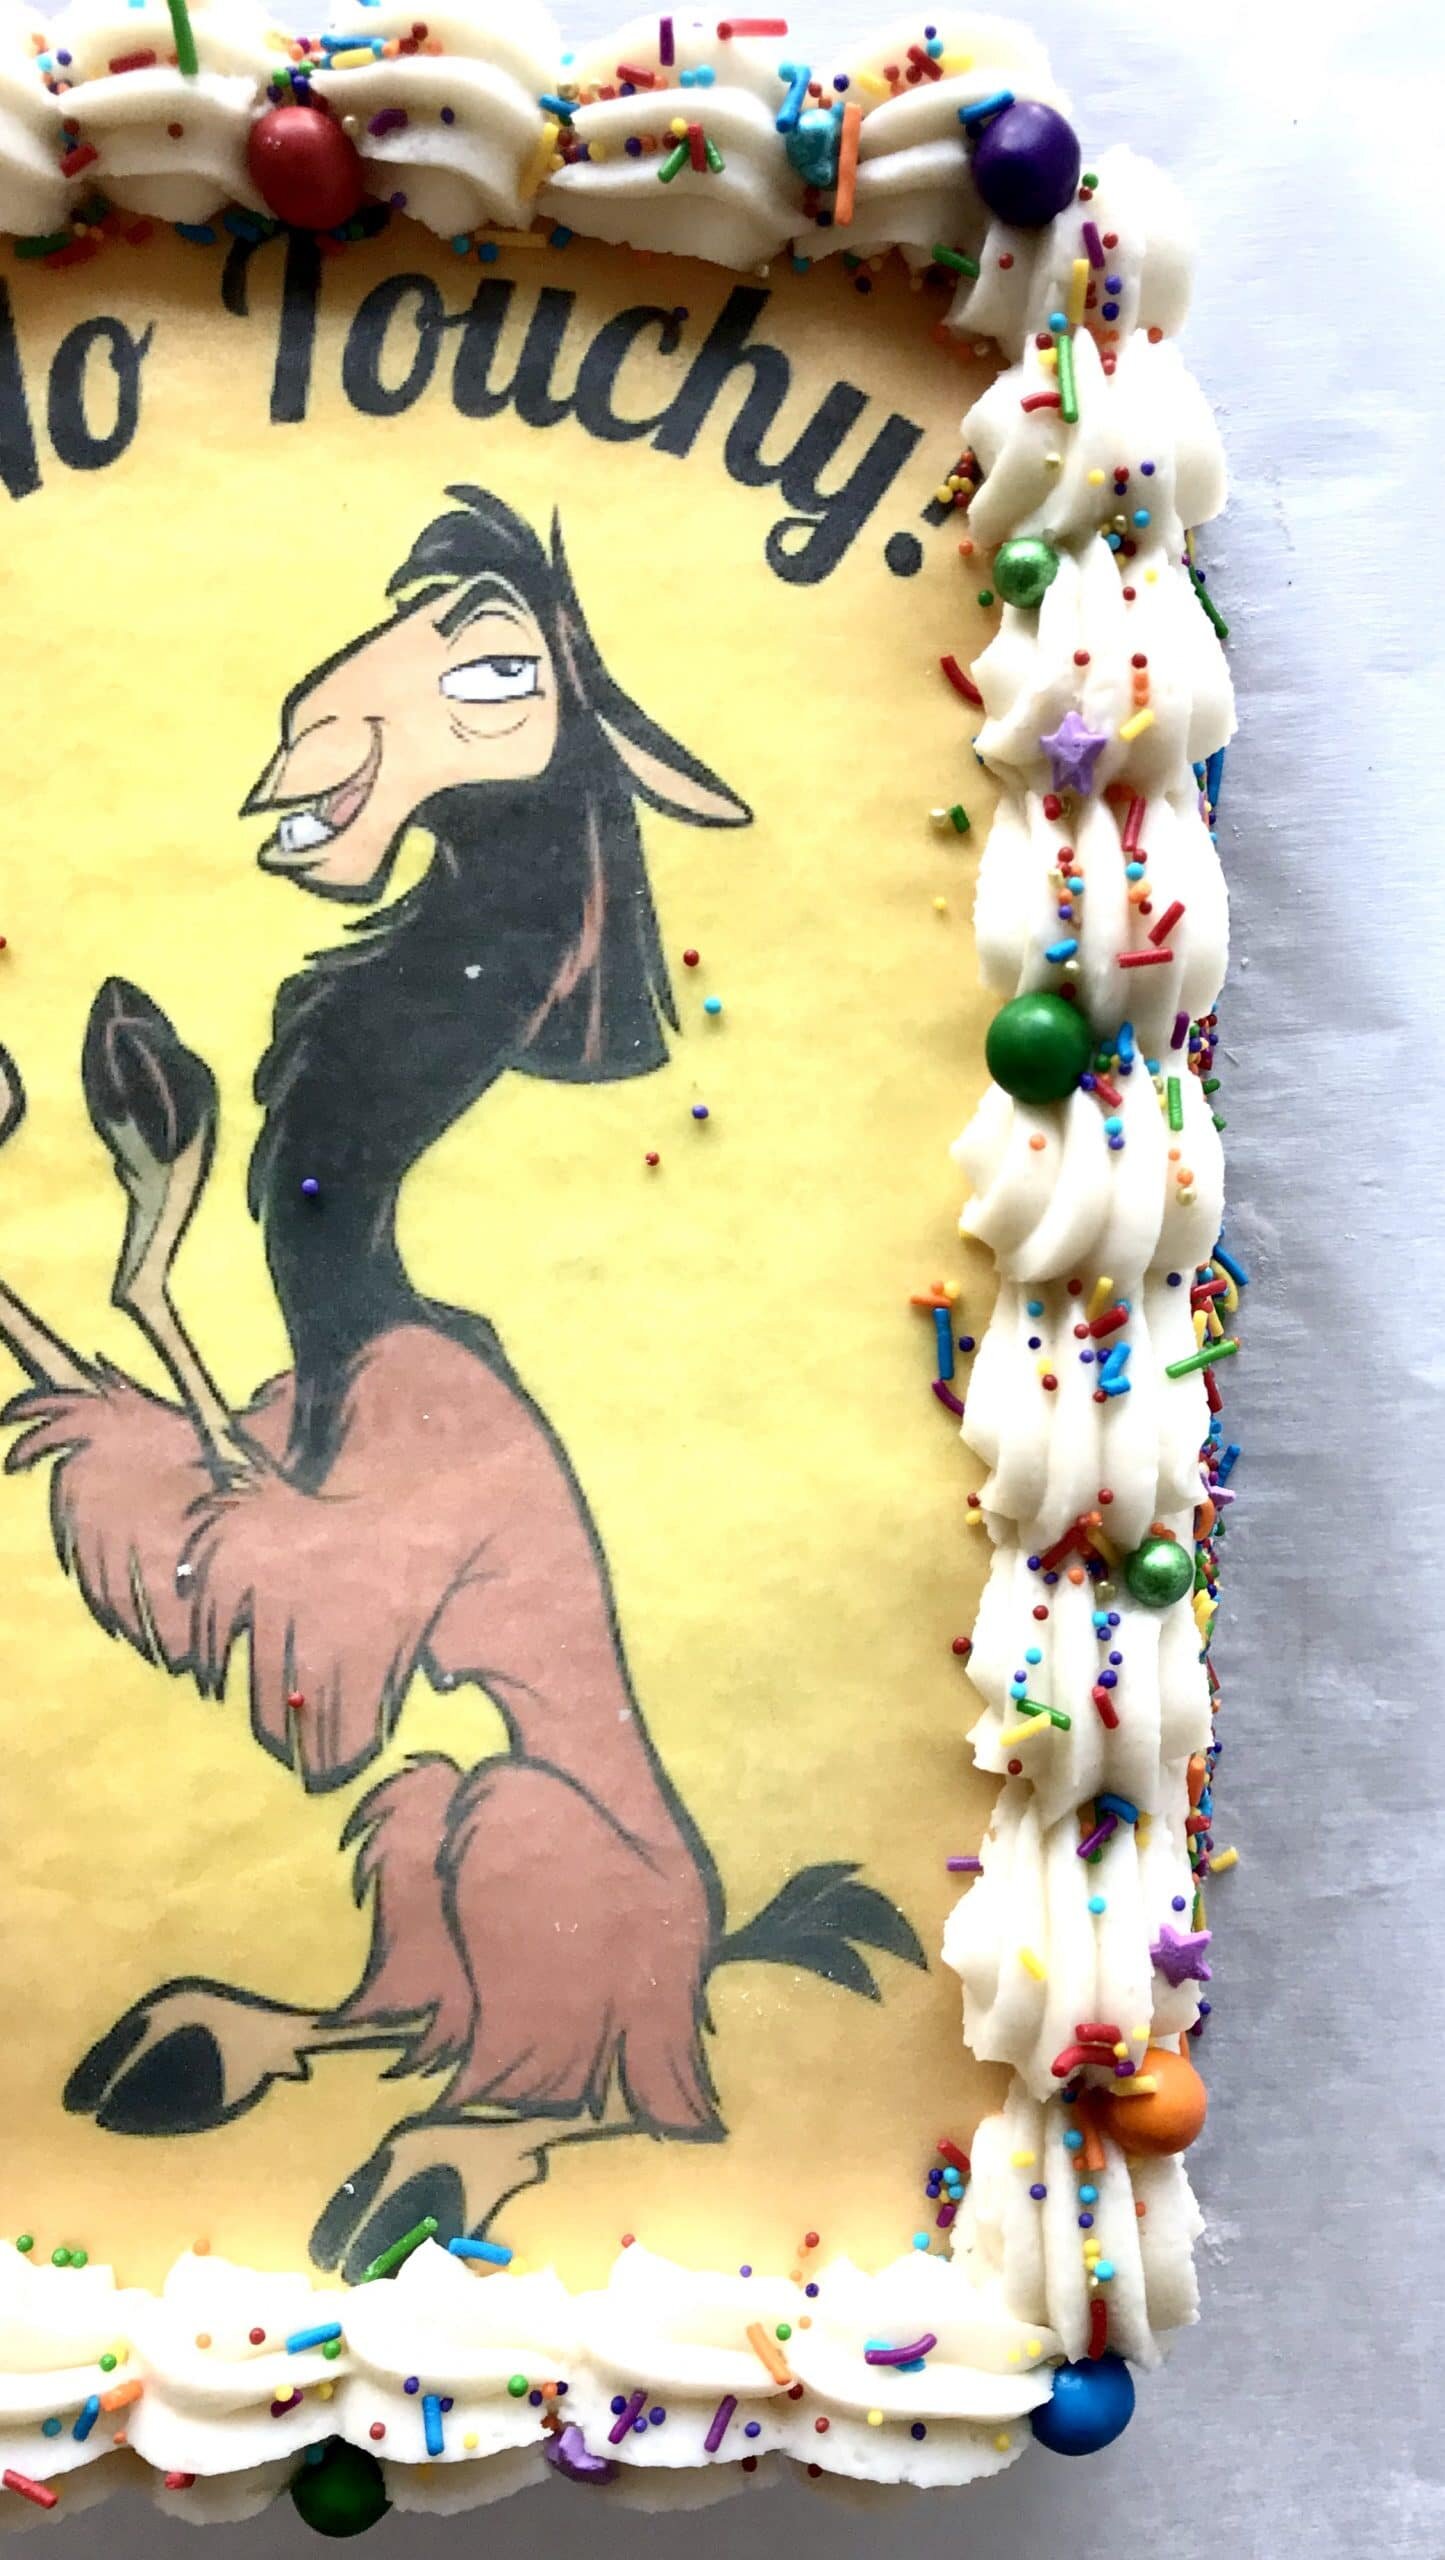
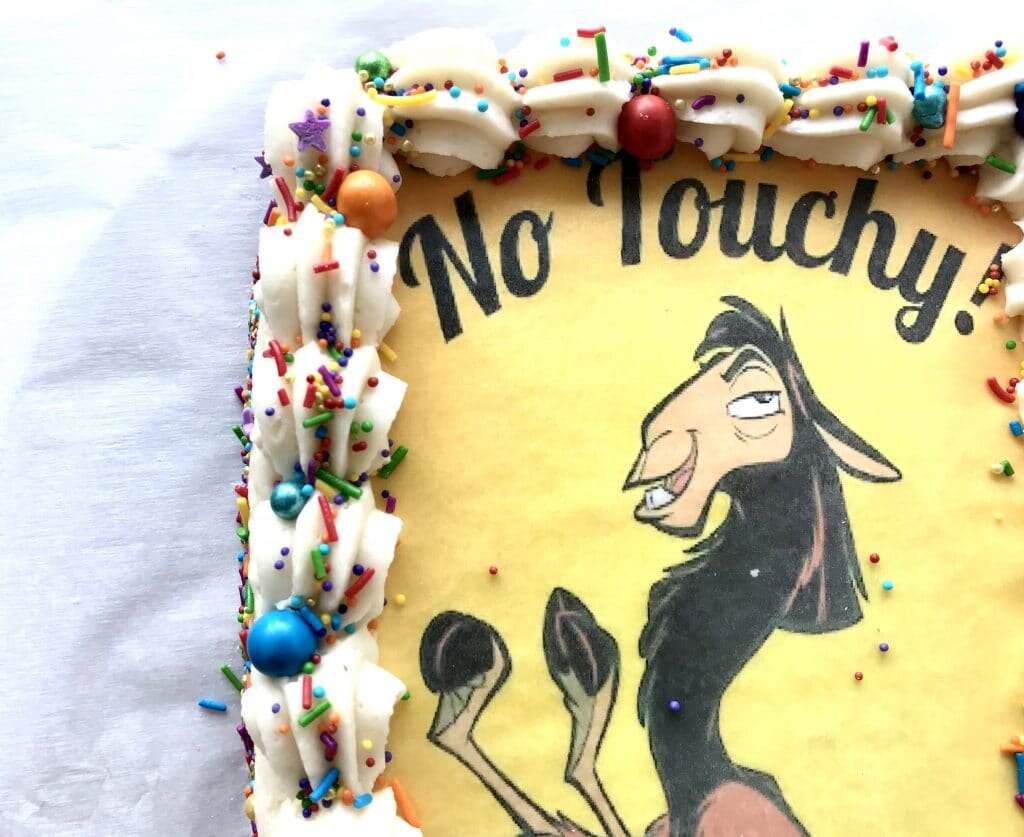
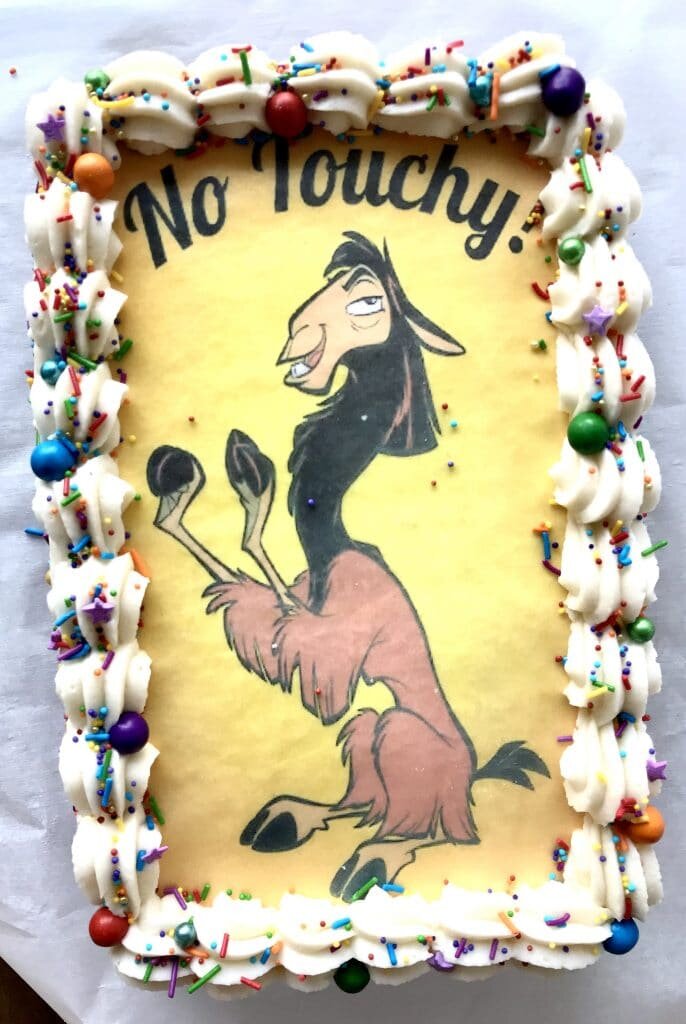
*Disclaimer: This post contains affiliate links. To learn more, please go here.Hopefully we are still all social distancing like kuzco here on this no touchy chocolate sheet cake. Meaning that no one can touchy my chocolate cake because it's mine and I won't share! But you can still make your own!Want to learn how to get images onto cookies and even cakes and chocolates? Then check out my new online edible printing course that will guide you through everything you need to know about edible printing, from start to finish! You won't regret it! Not too sure if you want to buy something so pricey if you aren't sure you'd like it? Then you can certainly check out my array of edible paper images you buy and try out before making such a huge purchase.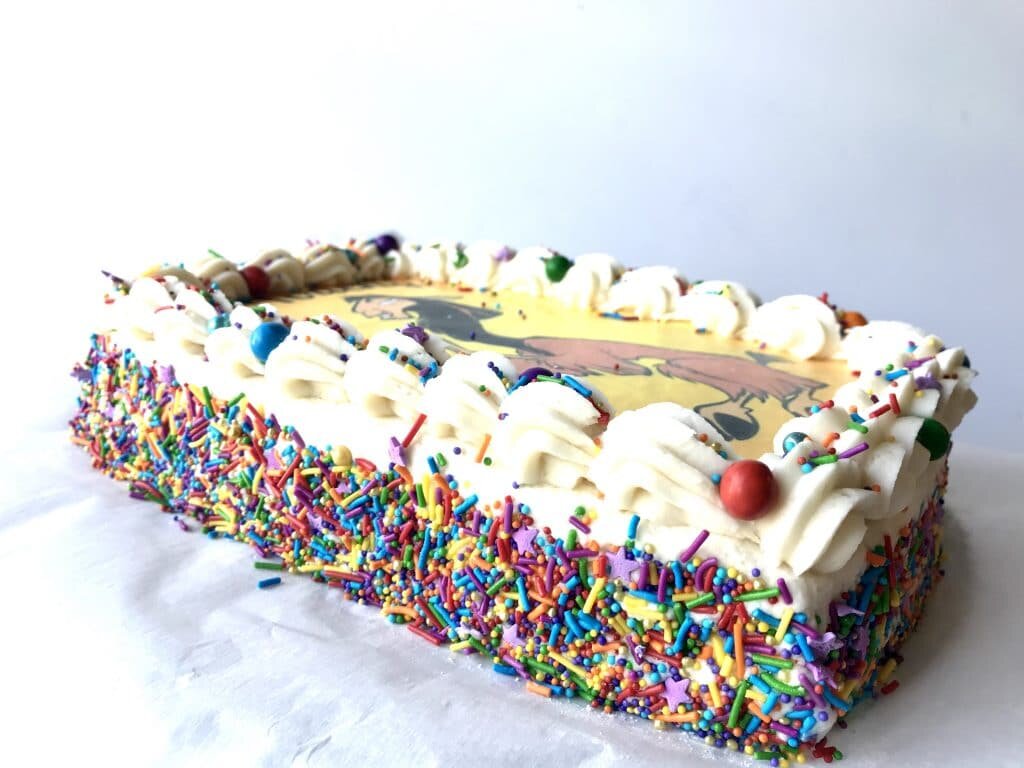
[mailerlite_form form_id=1]
Above are some products that I personally use and recommend for this recipe and to have for everyday use. Want to make the most of a really good baked good? Get yourself a high quality vanilla! I always use mexican vanilla and it enhances the flavor of whatever I use it in. It's a thick and potent vanilla and it's a decent price too!
chocolate sheet cake

a deep dark chocolate cake with chocolate chips throughout and surrounded with a simple buttercream.
- 3/4 cup all-purpose flour
- 3/4 cup granulated sugar
- 1/2 cup cocoa powder
- 1 tsp baking soda
- 1/2 tsp salt
- 2 eggs
- 2 tsp vanilla extract
- 1/2 cup oil
- 1/3 cup sour cream
- 1 cup buttermilk
- 1/2 cup chocolate chips
- Preheat the oven to 375*F and grease and line a 9.25 x 13.25 inch pan. In a large bowl combine the flour, sugar, cocoa powder, baking soda, and salt and mix to combine. In another bowl combine the eggs, oil, sour cream, buttermilk, and vanilla and whisk together. Slowly add the wet ingredients to the dry and mix to combine. Pour the batter into the prepared pan and then sprinkle as much chocolate chips as you want on top of the batter. Bake for 30-35 minutes or until a toothpick comes out clean in the center (although be careful to not mistake melted chocolate chips for batter). let the cake cool completely.
- Once the cake is done, let cool and then frost with your choice of frosting!
Ginger Carrot Cake

[wprm-recipe-jump]
*Disclaimer: This post contains affiliate links. To learn more, please go here.This ginger carrot cake is perfect for a quick easter dessert. It's so simple and straight forward and all of the mix-ins can be substituted or even omitted if you aren't a fan of raisins. Use walnuts instead of pecans, try dried cherries or apricots instead of raisins. You can't go wrong with a good carrot cake and since we are all stuck at home for easter why not try something new and mix up the classic carrot cake a bit?Want to make this carrot cake even more unique for your holiday? Instead of carrots, you could use zucchini or even parsnips! Both vegetables pair perfectly with these ingredients in the ginger carrot cake and you wouldn't even notice the difference. Or you can always go check out my brown butter coconut carrot cake too if that's something you'd like to try instead!

[mailerlite_form form_id=1]
Above are some products that I personally use and recommend for this recipe and to have for everyday use. One thing that I collect are cake stands. I love a good cake stand that is not only adorable, but is also a good quality too. This little easter bunny cake stand is perfect for the holiday but also as a fun spring cake stand to have around the house for all your treats!
______________________________________________________________________________
ginger carrot cake

carrot cake made with fresh ginger, raisins and a cream cheese buttercream to top it off
cake
- 1 1/2 cup all-purpose flour
- 1/3 cup granulated sugar
- 1/3 cup brown sugar
- 1 tsp baking soda
- 1 tsp baking powder
- 1 tsp salt
- 1 tsp cinnamon
- 1/3 cup greek yogurt
- 1/3 cup vegetable oil
- 1 egg
- 1 1/2 tsp vanilla extract
- 3/4 cup coconut milk (or regular milk)
- 1 tbsp freshly grated ginger root
- 2 cup shredded carrot
- 1/2 cup pecans
- 1/2 cup raisins
buttercream
- 8 oz cream cheese (room temp)
- 1 stick unsalted butter (room temp)
- 5 cups powdered sugar
- 1 tsp vanilla extract
- pinch salt
cake
- preheat the oven to 350 degrees F and line a 8 x 8 inch cake pan with parchment paper. in a large bowl, combine the flour, sugars, baking soda and powder, salt and cinnamon and whisk together. in another bowl, combine the oil, eggs, greek yogurt, vanilla, grated ginger, and coconut milk and whisk together. pour the wet ingredients into the dry and mix until fully combined. add in the carrots, pecans and raisins and fold in until everything is evenly distributed. place the batter in the pan and bake for 30-35 minutes or until a toothpick comes out clean. let the cake cool for 10 minutes then carefully remove them from the pans to continue cooling. wrap in cling wrap until ready to use.
buttercream
- place the butter and cream cheese into a bowl of an electric mixer fitted with a paddle attachment. mix until smooth. scrape down the sides of the bowl and add in the rest of the ingredients. mix on slow speed and gradually increase the speed. let mix until fluffy and lighter in color, about 3 minutes.

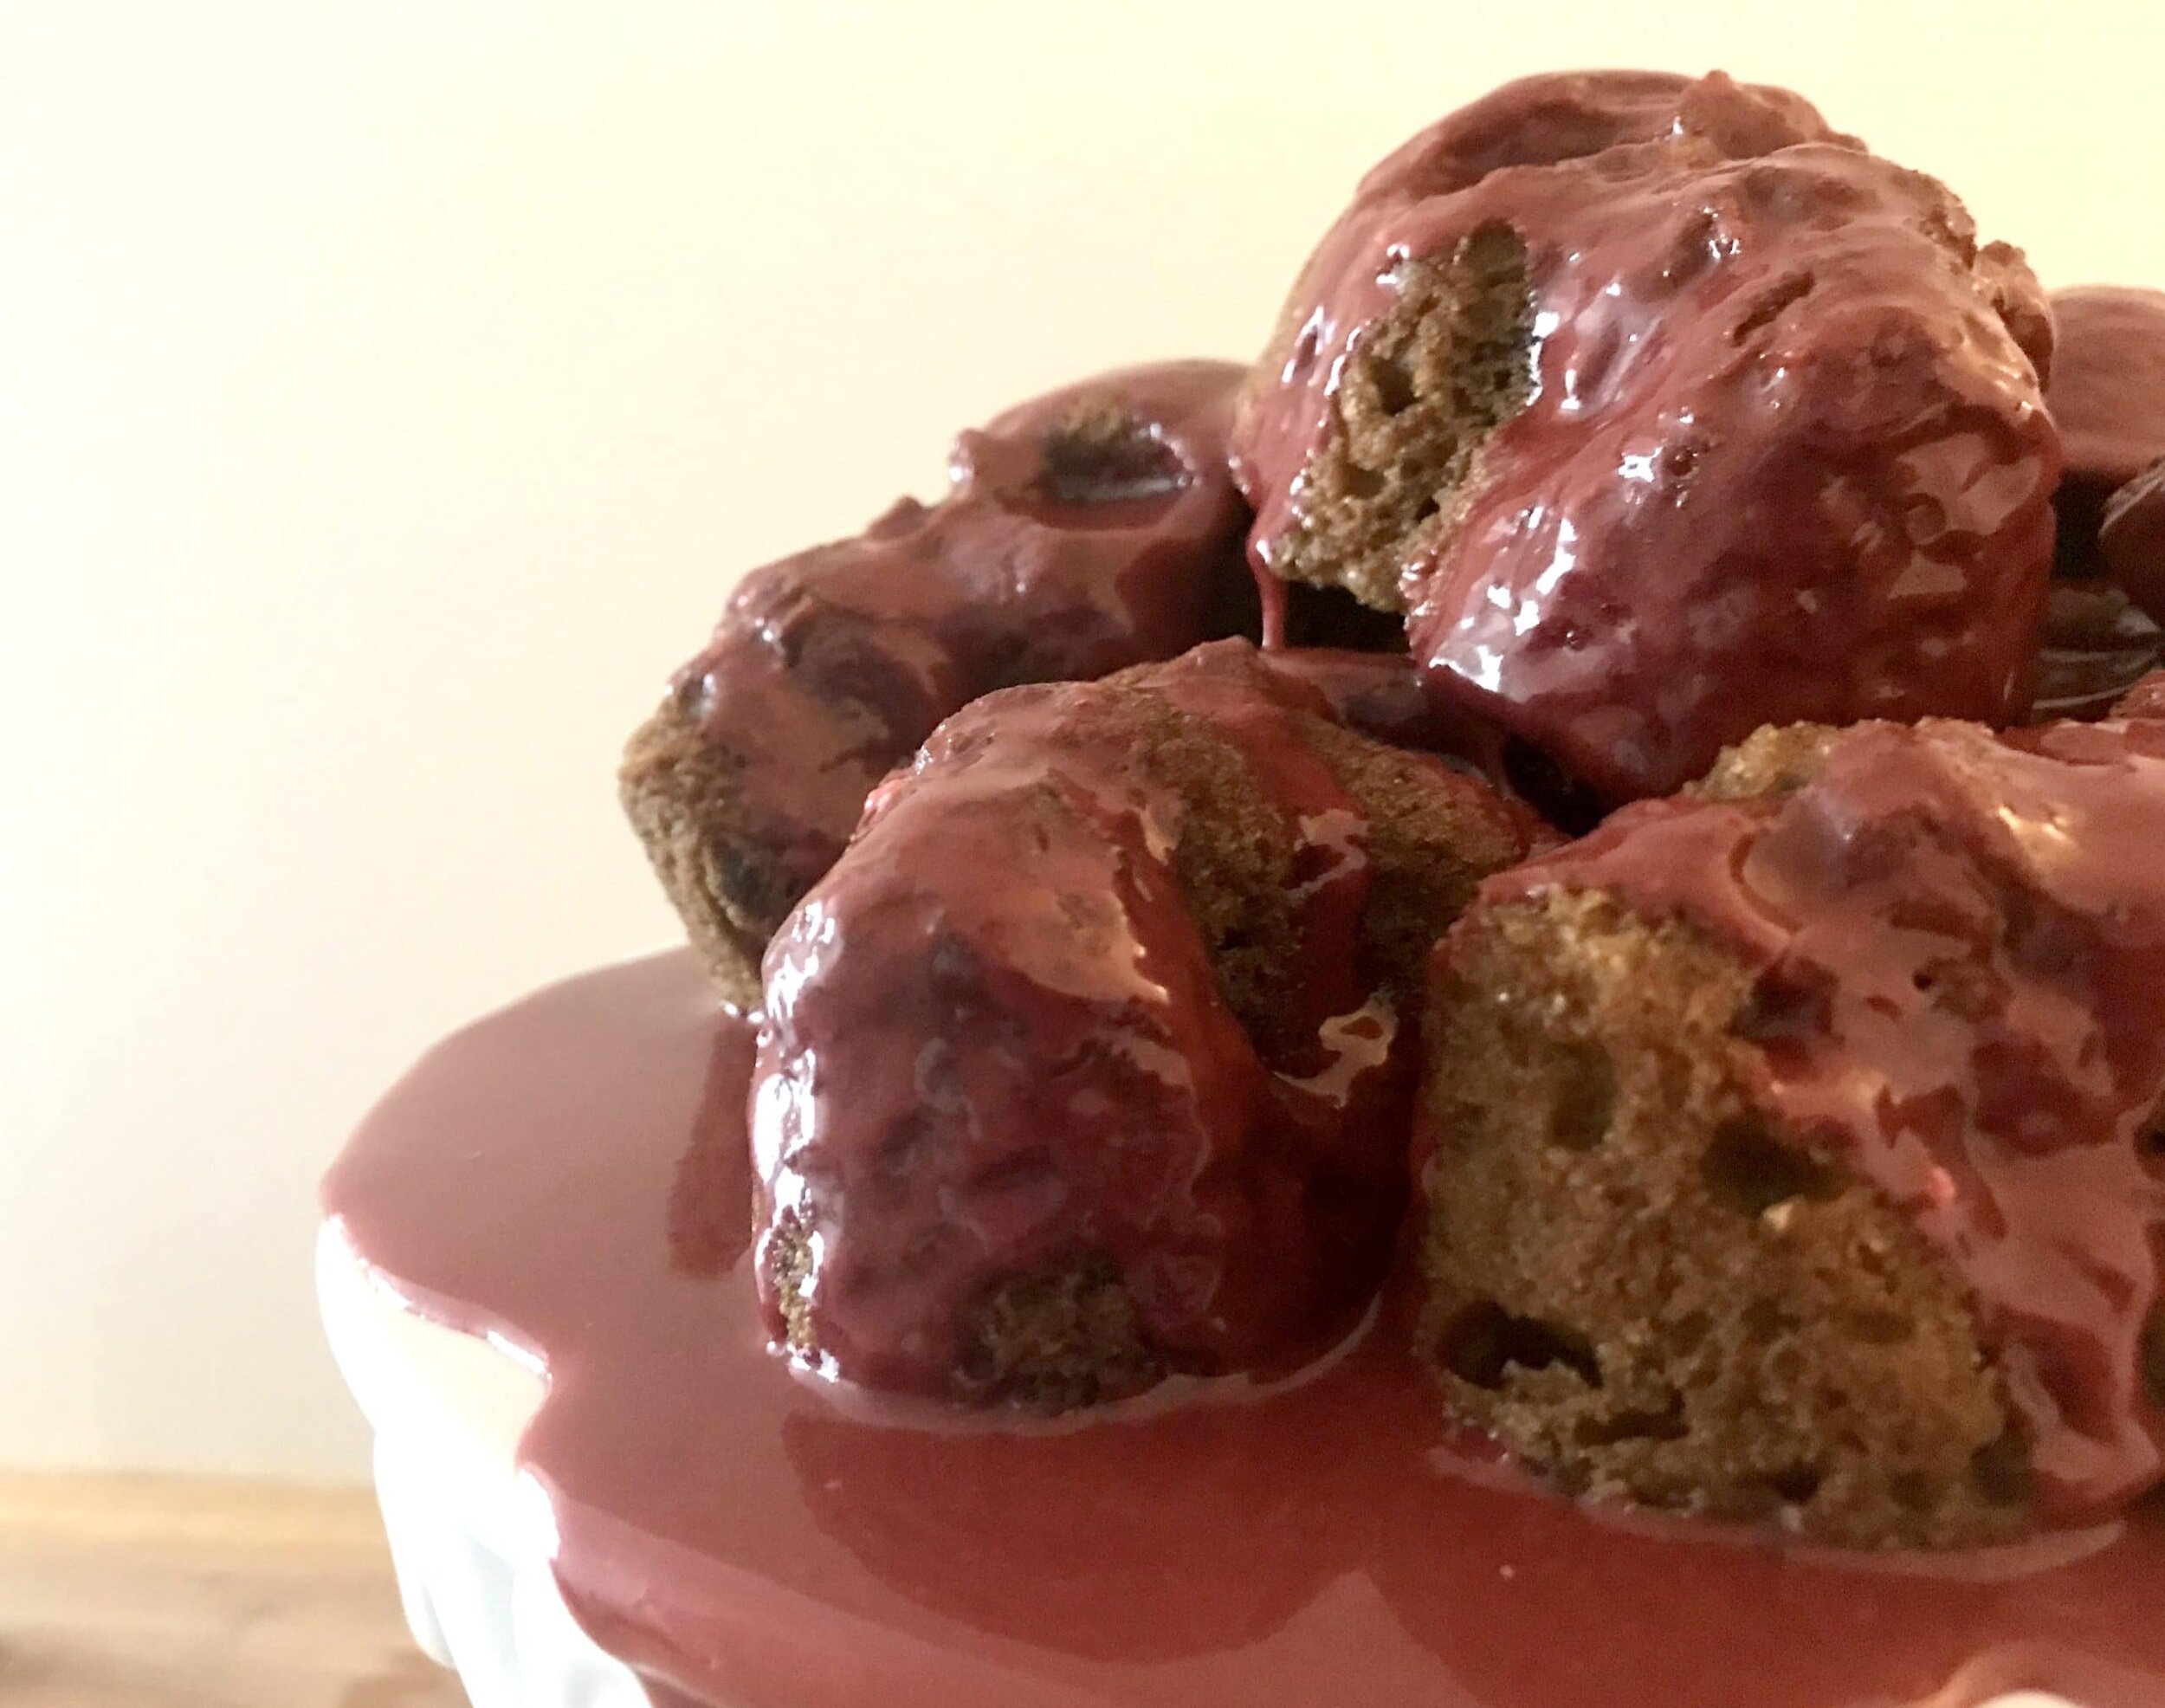
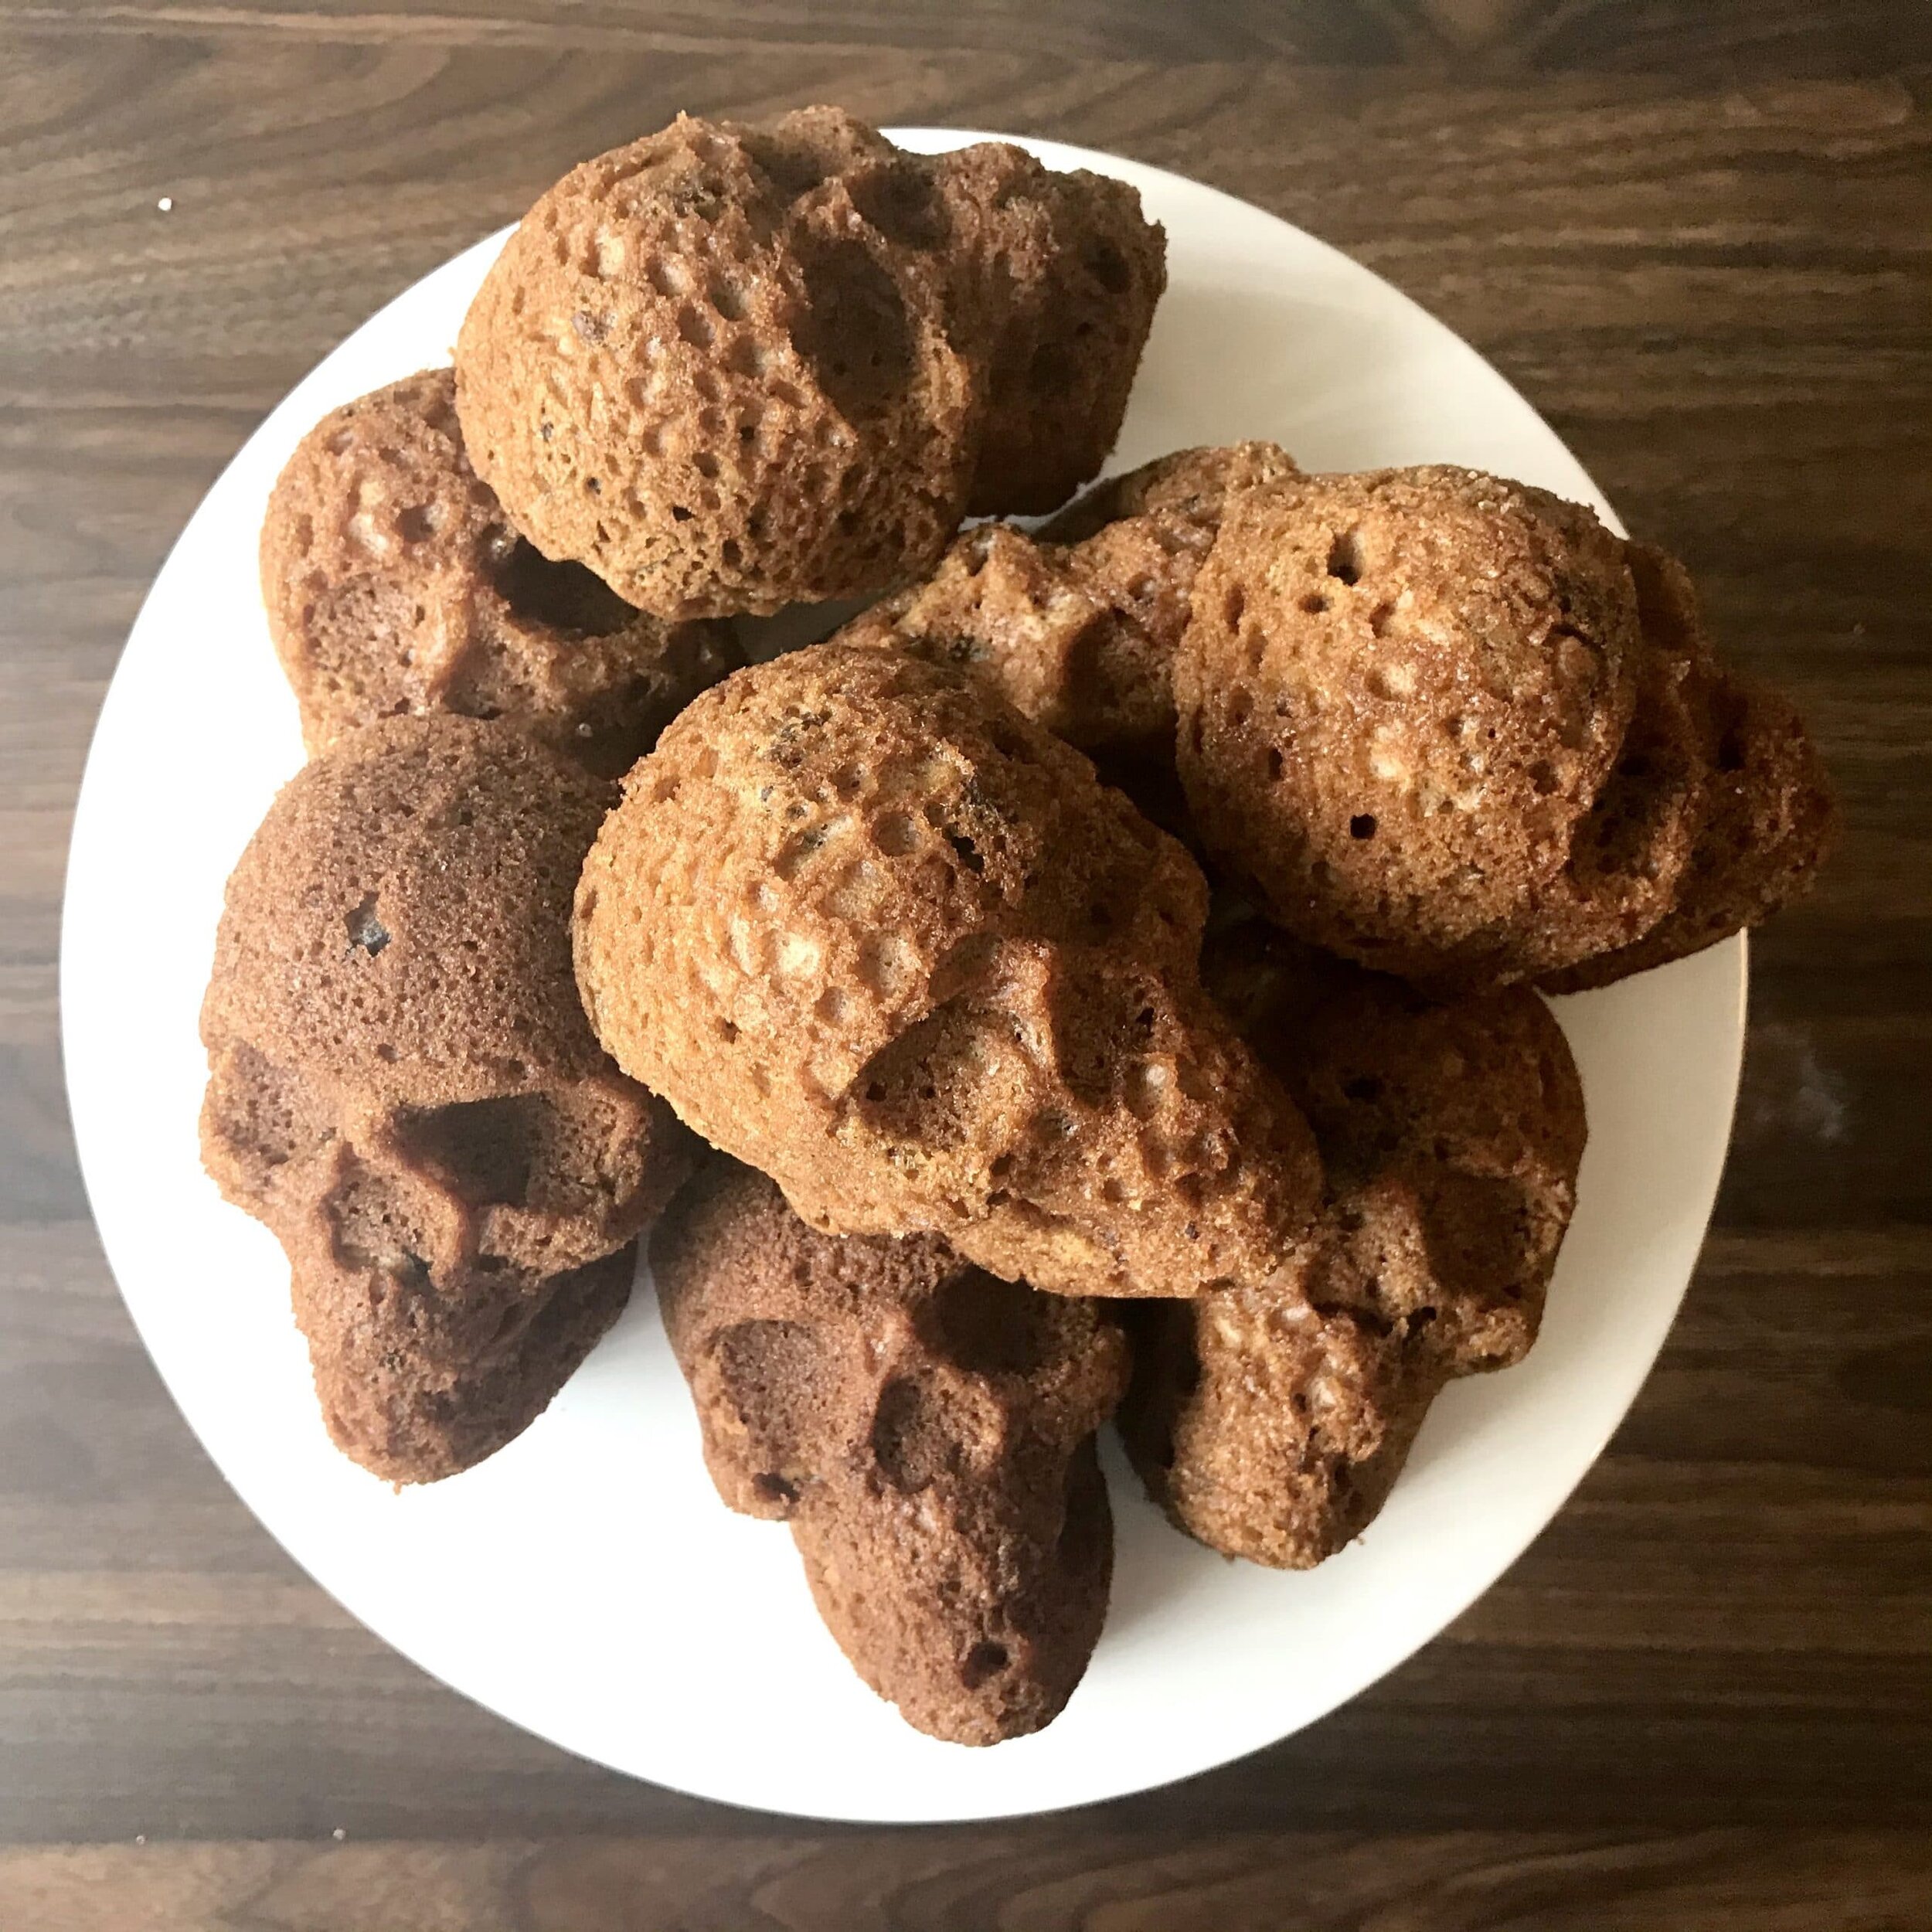
Spicy Skull Cakes


[wprm-recipe-jump]
*Disclaimer: This post contains affiliate links. To learn more, please go here.These spicy skull cakes are fun with a lot of oozy edible blood dripping off them. I had a great time pouring the glaze over these mini cakes for a dramatic effect. My mom got me this cake pan last year and I never got the chance to use it at all. This year I finally was able to use it and I'm so glad I did! I had so much fun making these guys and pouring the glaze on top. I find that the glaze on top makes it a show stopper and perfect for a halloween party dessert center piece.Not into spicy food? That's ok! Just adjust the cayenne pepper to how you can handle it or just completely take it out. You can even add in some mini chocolate chips into the batter too if you'd like! It's not even necessary to use the skull cake pan (as fun as it is) but you can make them into cupcakes instead. If you decide to make them into cupcakes, just remember that the time will need to be adjusted in the recipe. If you bake them for that long they will become over baked or even burnt.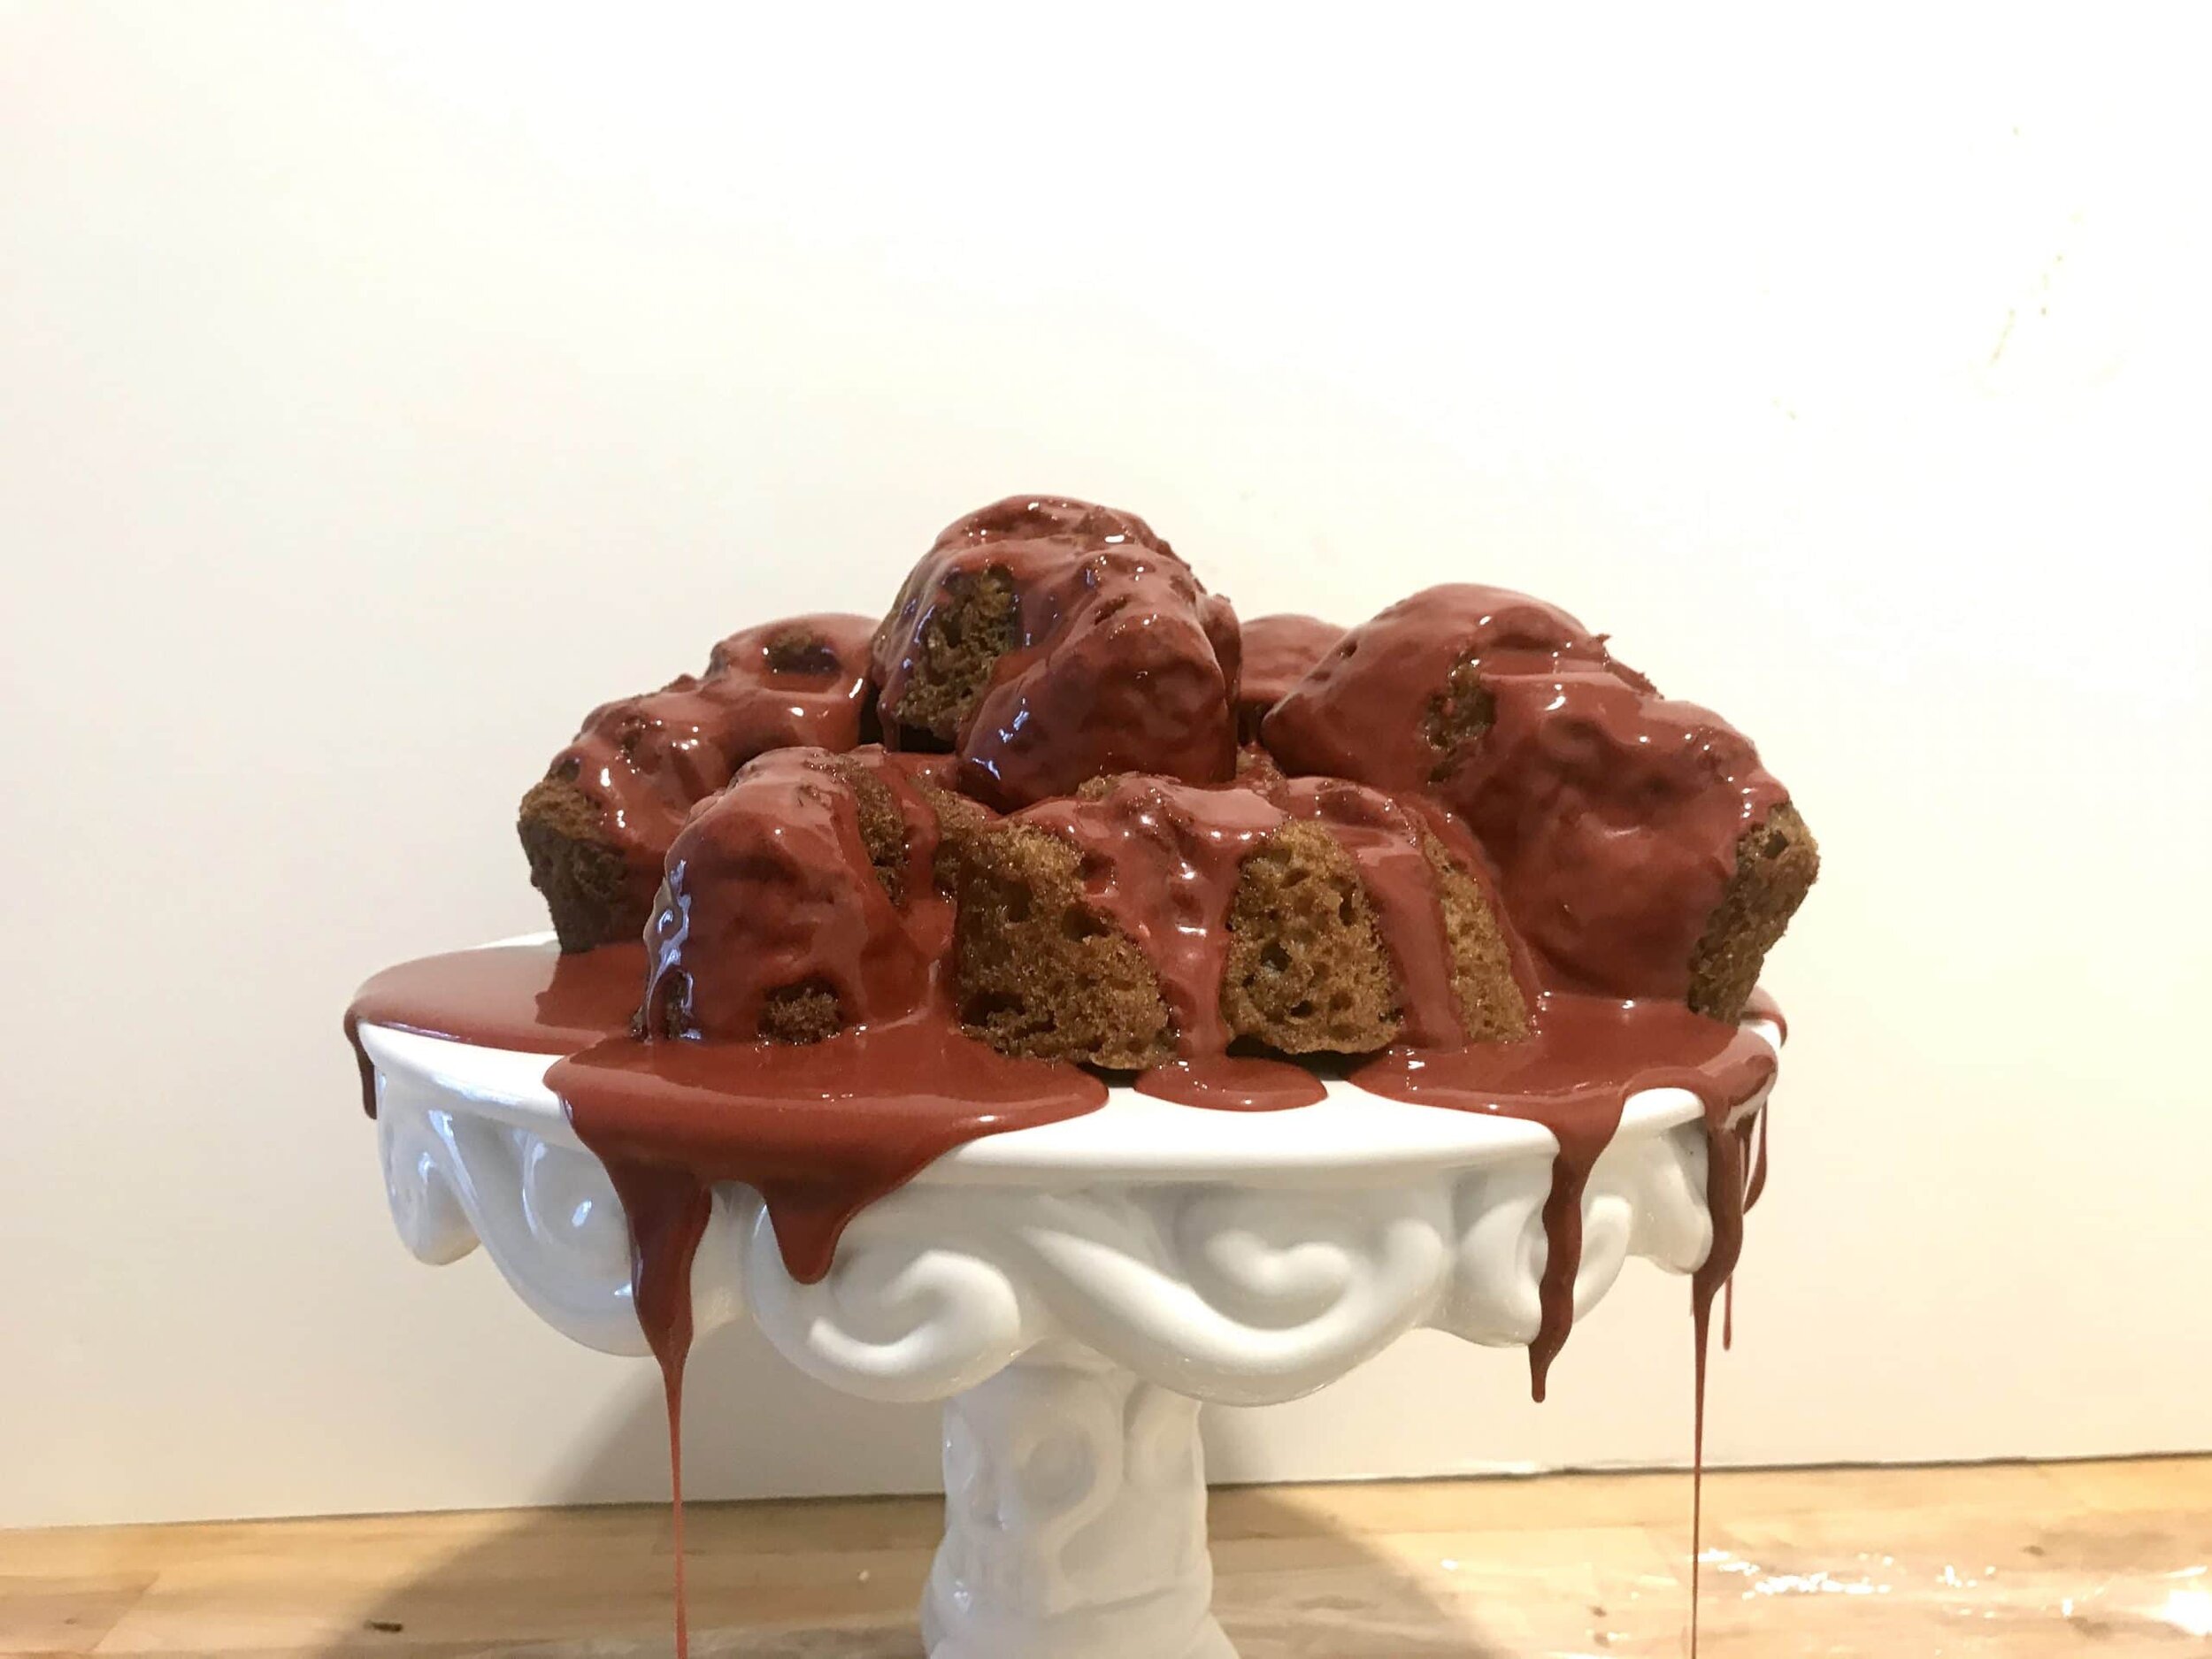
[mailerlite_form form_id=1]
Above are some products that I personally use and recommend for this recipe and to have for everyday use. To make these spicy skull cakes I highly recommend getting the mini skull cake pan. It gives the cakes so much detail and just adds that fun halloween aspect to it.
_________________________________________________________________________________
spicy skull cakes
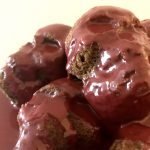
fun spicy cakes in the shape of skulls that are covered in a bloody red glaze
cake
- 1 3/4 cup all-purpose flour
- 2/3 cup brown sugar
- 1 1/2 tsp baking soda
- 1/2 tsp salt
- 1 tsp cinnamon
- 1/2 tsp cayenne pepper
- 2 eggs
- 1/2 cup vegetable oil
- 1 tbsp vanilla extract
- 3/4 cup milk
- 1 cup pecans (roughly chopped)
glaze
- 2 cup powdered sugar
- 1/4 cup light corn syrup
- 4 tbsp water
- 1 tsp vanilla extract
- 1/4 tsp cinnamon
- pinch cayenne pepper
- red food color
- black food color
cake
- preheat the oven to 350 degrees F and spray the skull cake pan. in a large bowl, combine the flour, brown sugar, baking soda, salt, cinnamon, and cayenne pepper and mix until incorporated. in another bowl, combine the oil, eggs, vanilla, and milk and whisk together. pour the wet ingredients into the dry and mix until fully combined. fold in the chopped pecans. scoop the batter into the pan and bake for 18-20 minutes or until a toothpick comes out clean. let cool for 10 minutes before removing from the pan.
glaze
- place all of the ingredients into a bowl and mix to combine until smooth. add in a tiny drop of black food color and enough red until you get the desired color that resembles blood. pour over the cakes.

Neapolitan Cake

meet pancake + neapolitan cake
[wprm-recipe-jump]

meet pancake + neapolitan cake

meet pancake + neapolitan cake
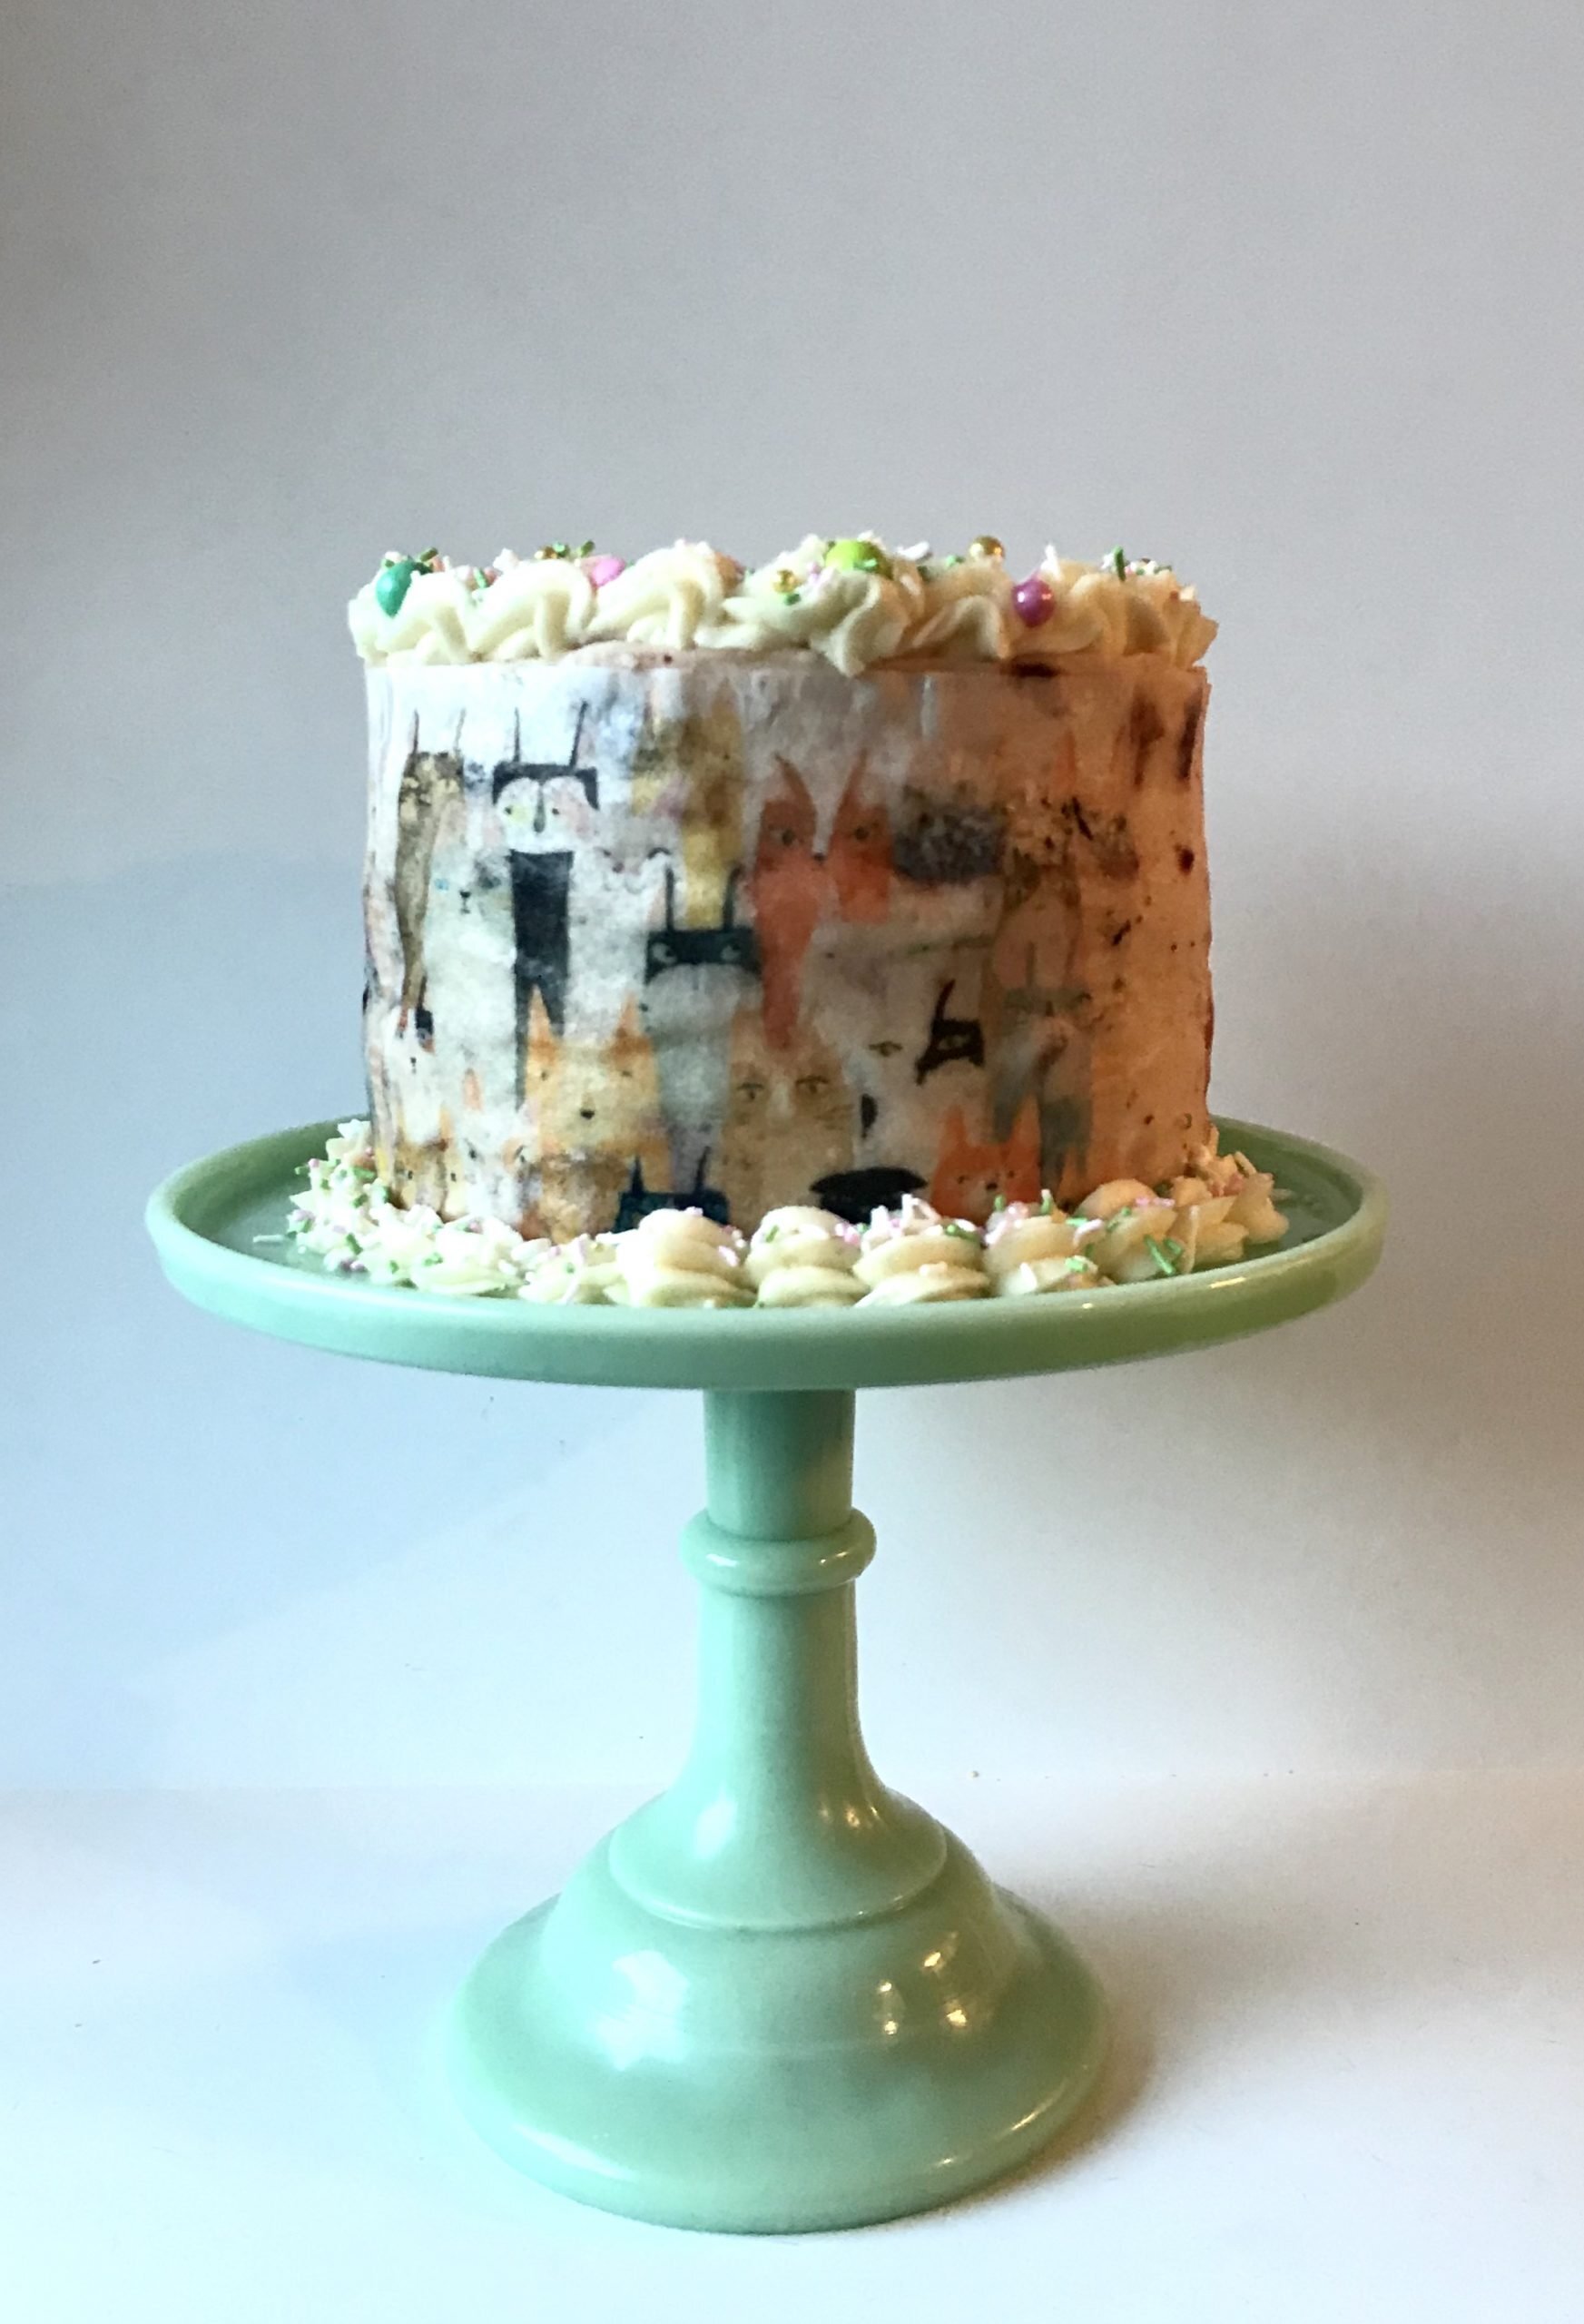
*Disclaimer: This post contains affiliate links. To learn more, please go here.I got a cat a few weeks ago. He's the cutest, cuddliest, and most vocal kitten I've ever met and I don't know what I'd do without him. His name is pancake! To welcome him to his new home, all the way from Dallas! I wanted to make a special cake with cute little cats all over it. It's a basic neapolitan cake. Vanilla cake. Chocolate ganache. Strawberry buttercream. Nuff said.Want to make this neapolitan cake a little differently? You could skip the ganache and do fresh strawberries in the middle and a chocolate buttercream. Now doesn't that sound like heaven!?!?Want to learn how to get images onto cookies and even cakes and chocolates? Then check out my new online edible printing course that will guide you through everything you need to know about edible printing, from start to finish! You won't regret it! not too sure if you want to buy something so pricey if you aren't sure you'd like it? Then you can certainly check out my array of edible paper images you buy and try out before making such a huge purchase.
[mailerlite_form form_id=1]

meet pancake + neapolitan cake

vanilla cake that's filled with a chocolate ganache and cloaked in a strawberry buttercream
cake
2 1/2 cup all-purpose flour
2/3 cup granulated sugar
2 tsp baking soda
1 tsp salt
2 eggs
1/2 cup vegetable oil
1/2 cup plain greek yogurt
1 tbsp vanilla extract
1 1/2 cup buttermilk
ganache
3/4 cup dark chocolate
1/2 cup heavy cream
buttercream
3 sticks unsalted butter
1/2 cup freeze dried strawberries
1 tsp vanilla extract
5 cup powdered sugar
2-3 tbsp heavy cream
cake
preheat the oven to 350 degrees F. and line three 6-inch cake pans. in a large bowl combine the eggs, oil, yogurt, vanilla, and buttermilk. in a separate bowl, combine the flour, sugar, baking soda, and salt. Add the wet mixture into the dry mixture and whisk until fully incorporated. divide the batter evenly among the cake pans and bake for 20-25 minutes or until a toothpick comes out clean. let cool and then remove from the pans.
ganache
combine the heavy cream and chocolate in a small bowl and microwave for 1 minute until the chocolate has melted. mix until fully incorporated and let chill until cool.
buttercream
put all of the ingredients into the bowl of an electric mixer fitted with a whisk attachment. start slow and then gradually increase the speed. whip on high until light and fluffy, about 3 minutes.

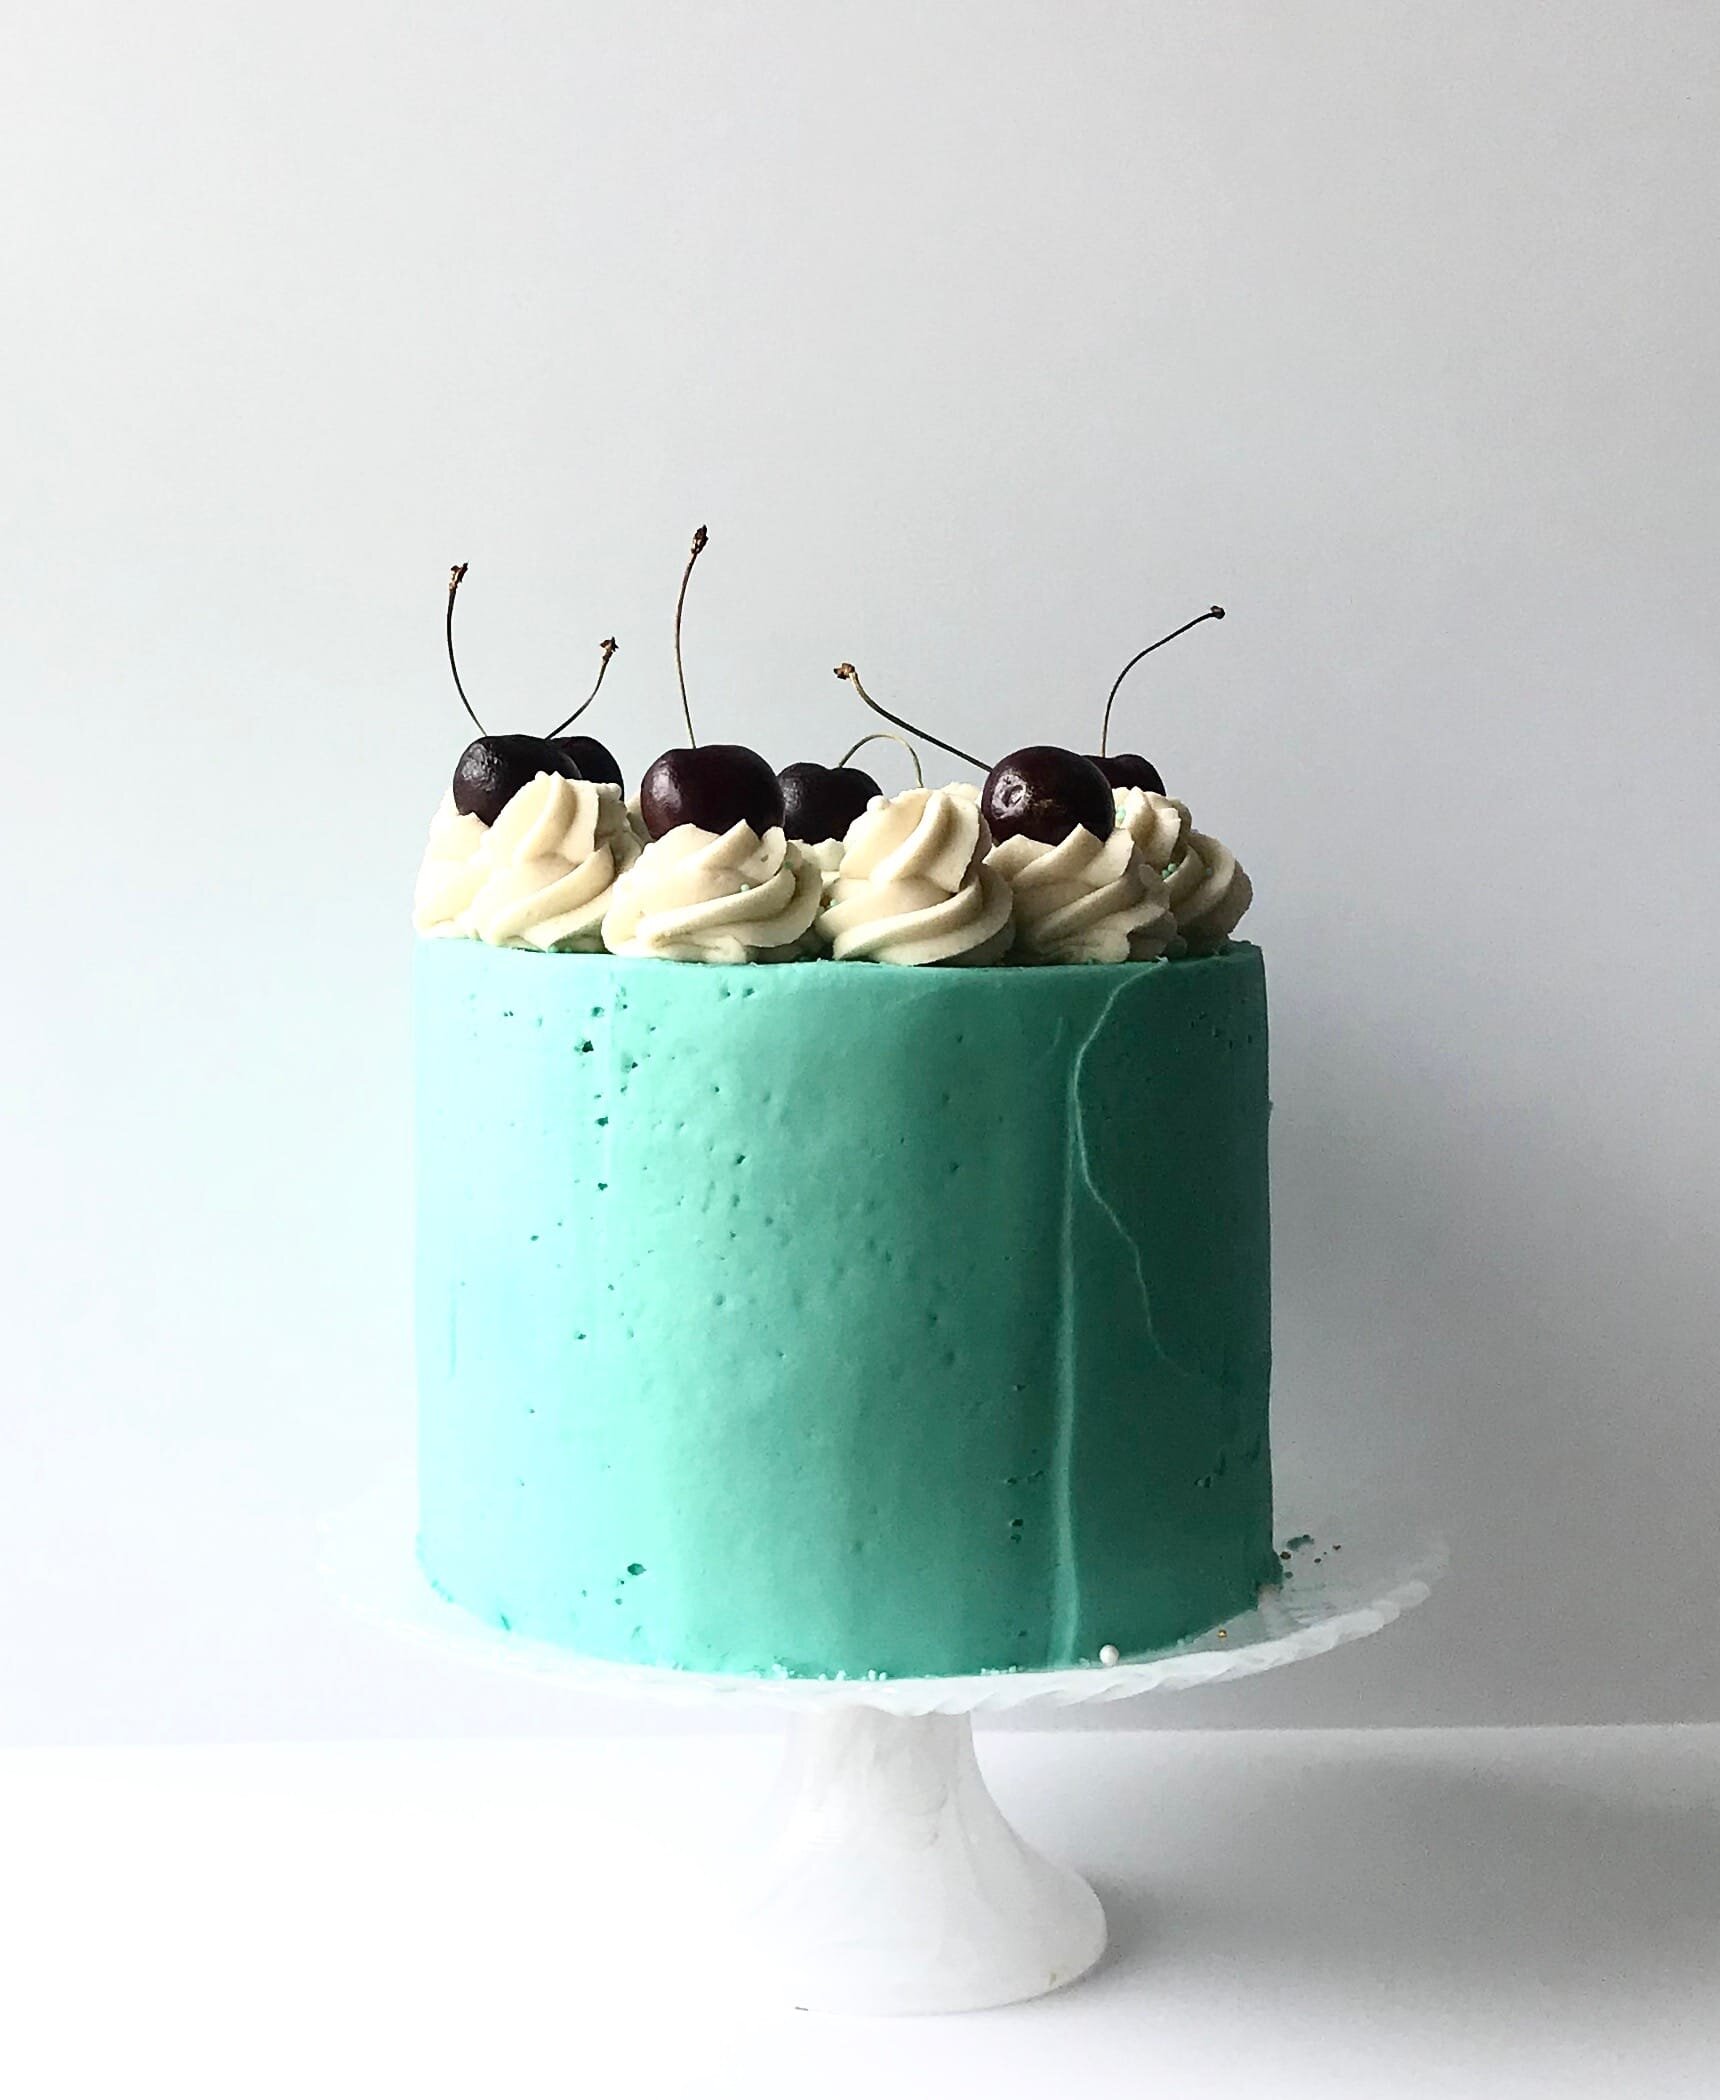
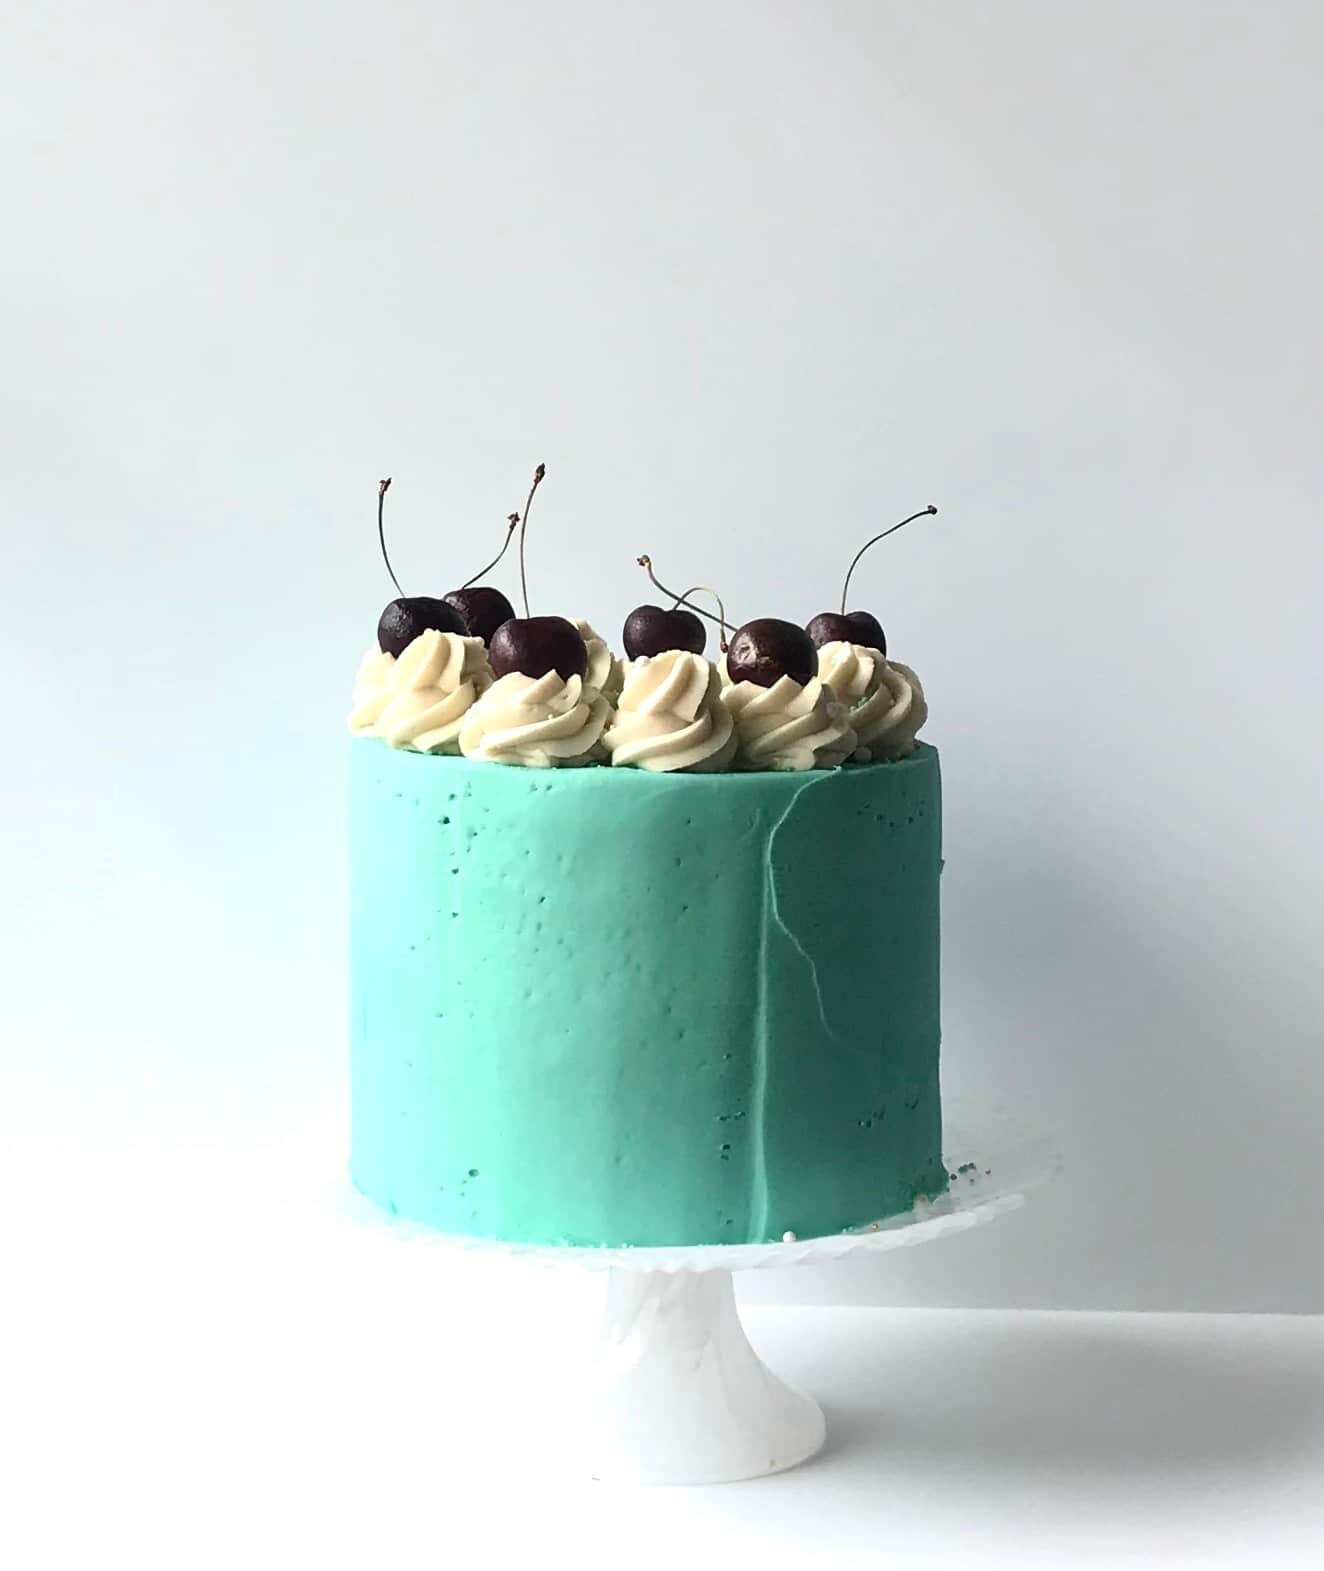
Cherry Lime Cake

[wprm-recipe-jump]
*Disclaimer: This post contains affiliate links. To learn more, please go here.A very pretty cherry lime cake that is so simple to make and is incredibly delicious! This cake is moist cake filled with lime juice and stuffed with a fresh black cherry filling. I will say when i finished removing the pits from the cherries it looked like I murdered someone with the red stains all over my hands and counter. But it beats using the cherry pie filling from the can!What I love about this cake is that it's nice and fresh! I'm honestly not a big cherry person. But this cake is delicious with the lime! It's beyond amazing! Some of you may not like cherries at all, so you could use cranberries, strawberries, blueberries. A lot of fruit go perfectly well with lime so there is no wrong way to go about the filling.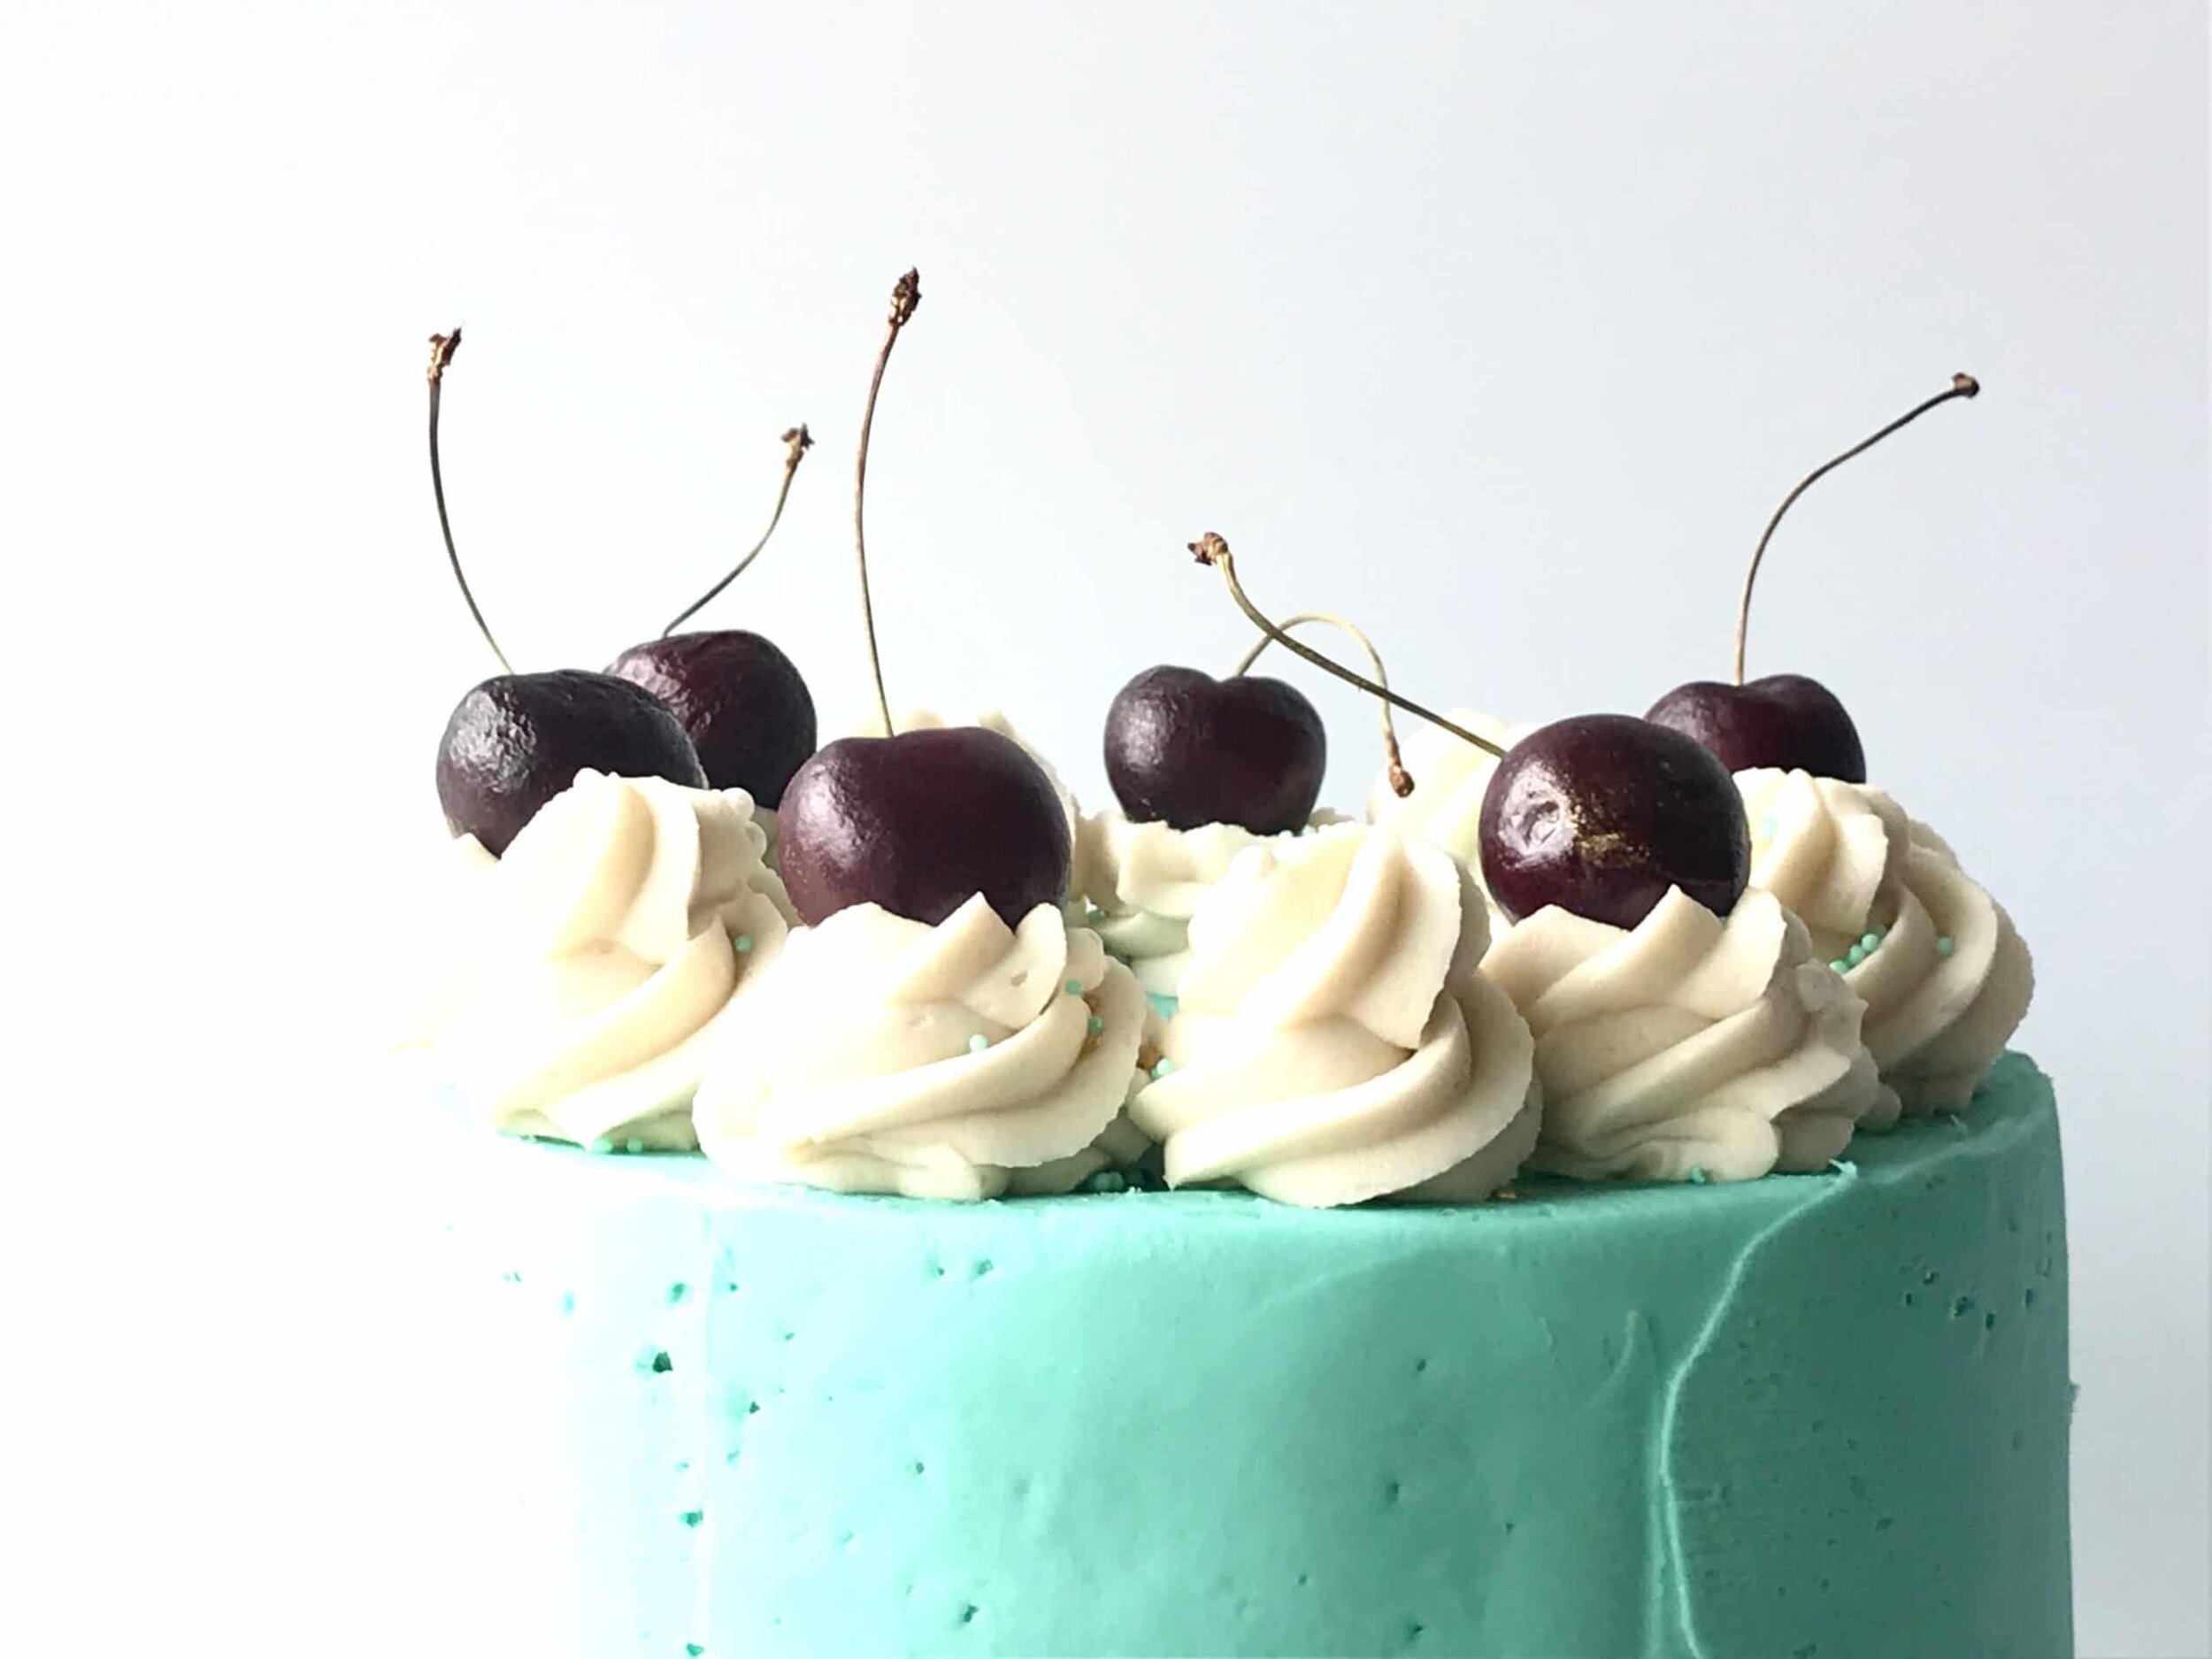
[mailerlite_form form_id=1]

Above are some products that I personally use and recommend for this recipe and to have for everyday use. One thing that is my absolute favorite thing in my kitchen is my little bottle of key lime oil. This oil is so potent that a little goes a long way but it enhances the lime flavor so perfectly that it makes everything so much better.
go to my youtube channel to see this cake being made!
__________________________________________________________________________
cherry lime cake

this lime cake is filled with a cherry filling and a sweet vanilla buttercream
cake
- 2 1/3 cup all-purpose flour
- 1 cup granulated sugar
- 1 1/2 tsp baking soda
- 1 1/2 tsp baking powder
- 1 tsp salt
- 2 eggs
- 1/2 cup vegetable oil
- 1/2 cup greek yogurt
- 1 tsp vanilla extract
- 1 tbsp lime zest
- 1/4 cup lime juice
- 1/2 tsp lime oil (optional)
- 1 cup buttermilk
filling
- 2 cup black cherries (pitted)
- 1/4 cup lime juice
- zest of 1 lime
- 1/3 cup granulated sugar
buttercream
- 3 sticks salted butter
- 5 cup powdered sugar
- 2 tsp vanilla extract
- 1-3 tbsp heavy cream
- food color
cake
- preheat the oven to 350 degrees F. spray and line three 6-inch cake pans. in a large bowl combine the eggs, oil, yogurt, vanilla, lime zest, lime juice, lime oil, and buttermilk and mix to combine. in a separate bowl, combine the flour, baking powder, baking soda, and salt. Add the dry mixture into the wet mixture and mix until incorporated. divide the batter evenly among the cake pans and bake for 30-35 minutes or until a toothpick comes out clean. let cool 10 minutes then carefully remove from the pans and continue cooling.
filling
- combine all ingredients into a pot and bring to a boil, reduce the heat and let simmer until it's nice and thick. let cool.
buttercream
- put all of the ingredients into the bowl of an electric mixer fitted with a whisk attachment. start slow and then gradually increase the speed. whip on high until light and fluffy, about 3 minutes.


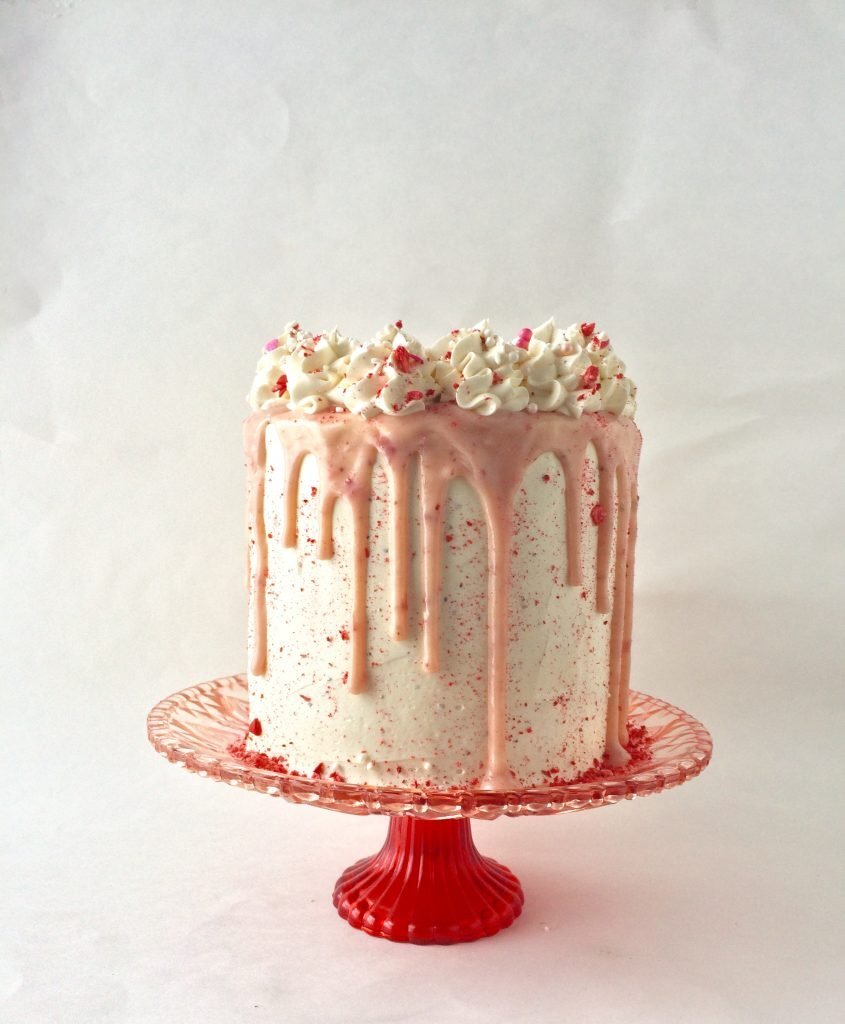
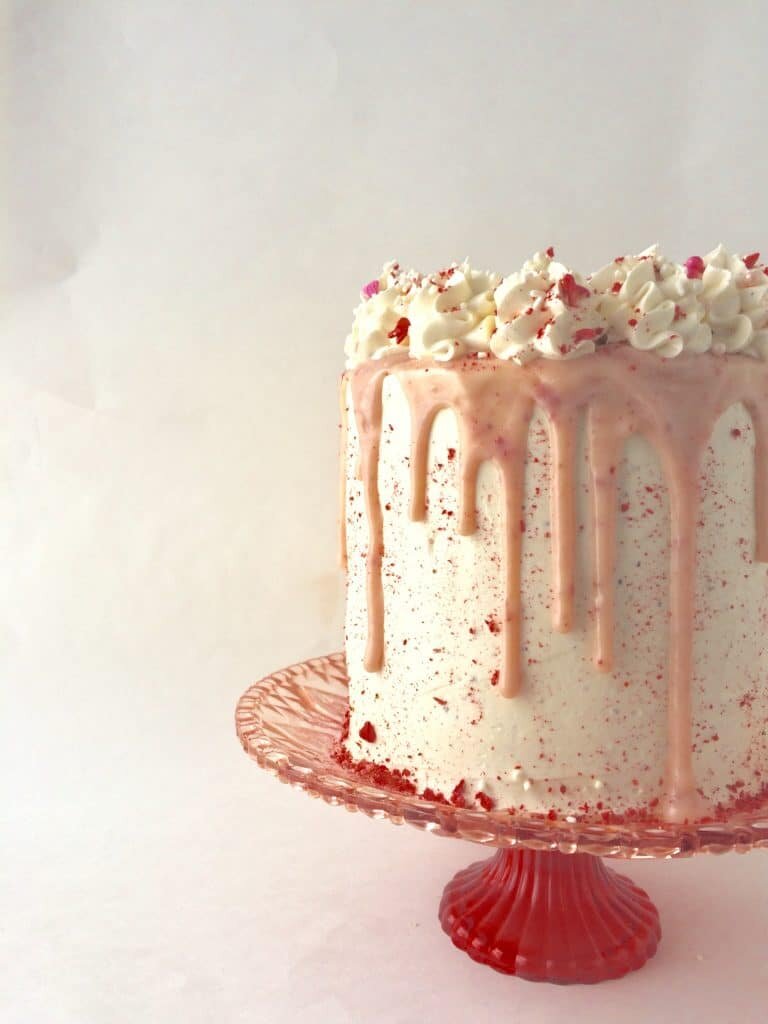
Malted Strawberry Milk Cake


[wprm-recipe-jump]
*disclaimer: this post contains affiliate links. to learn more, please go here.
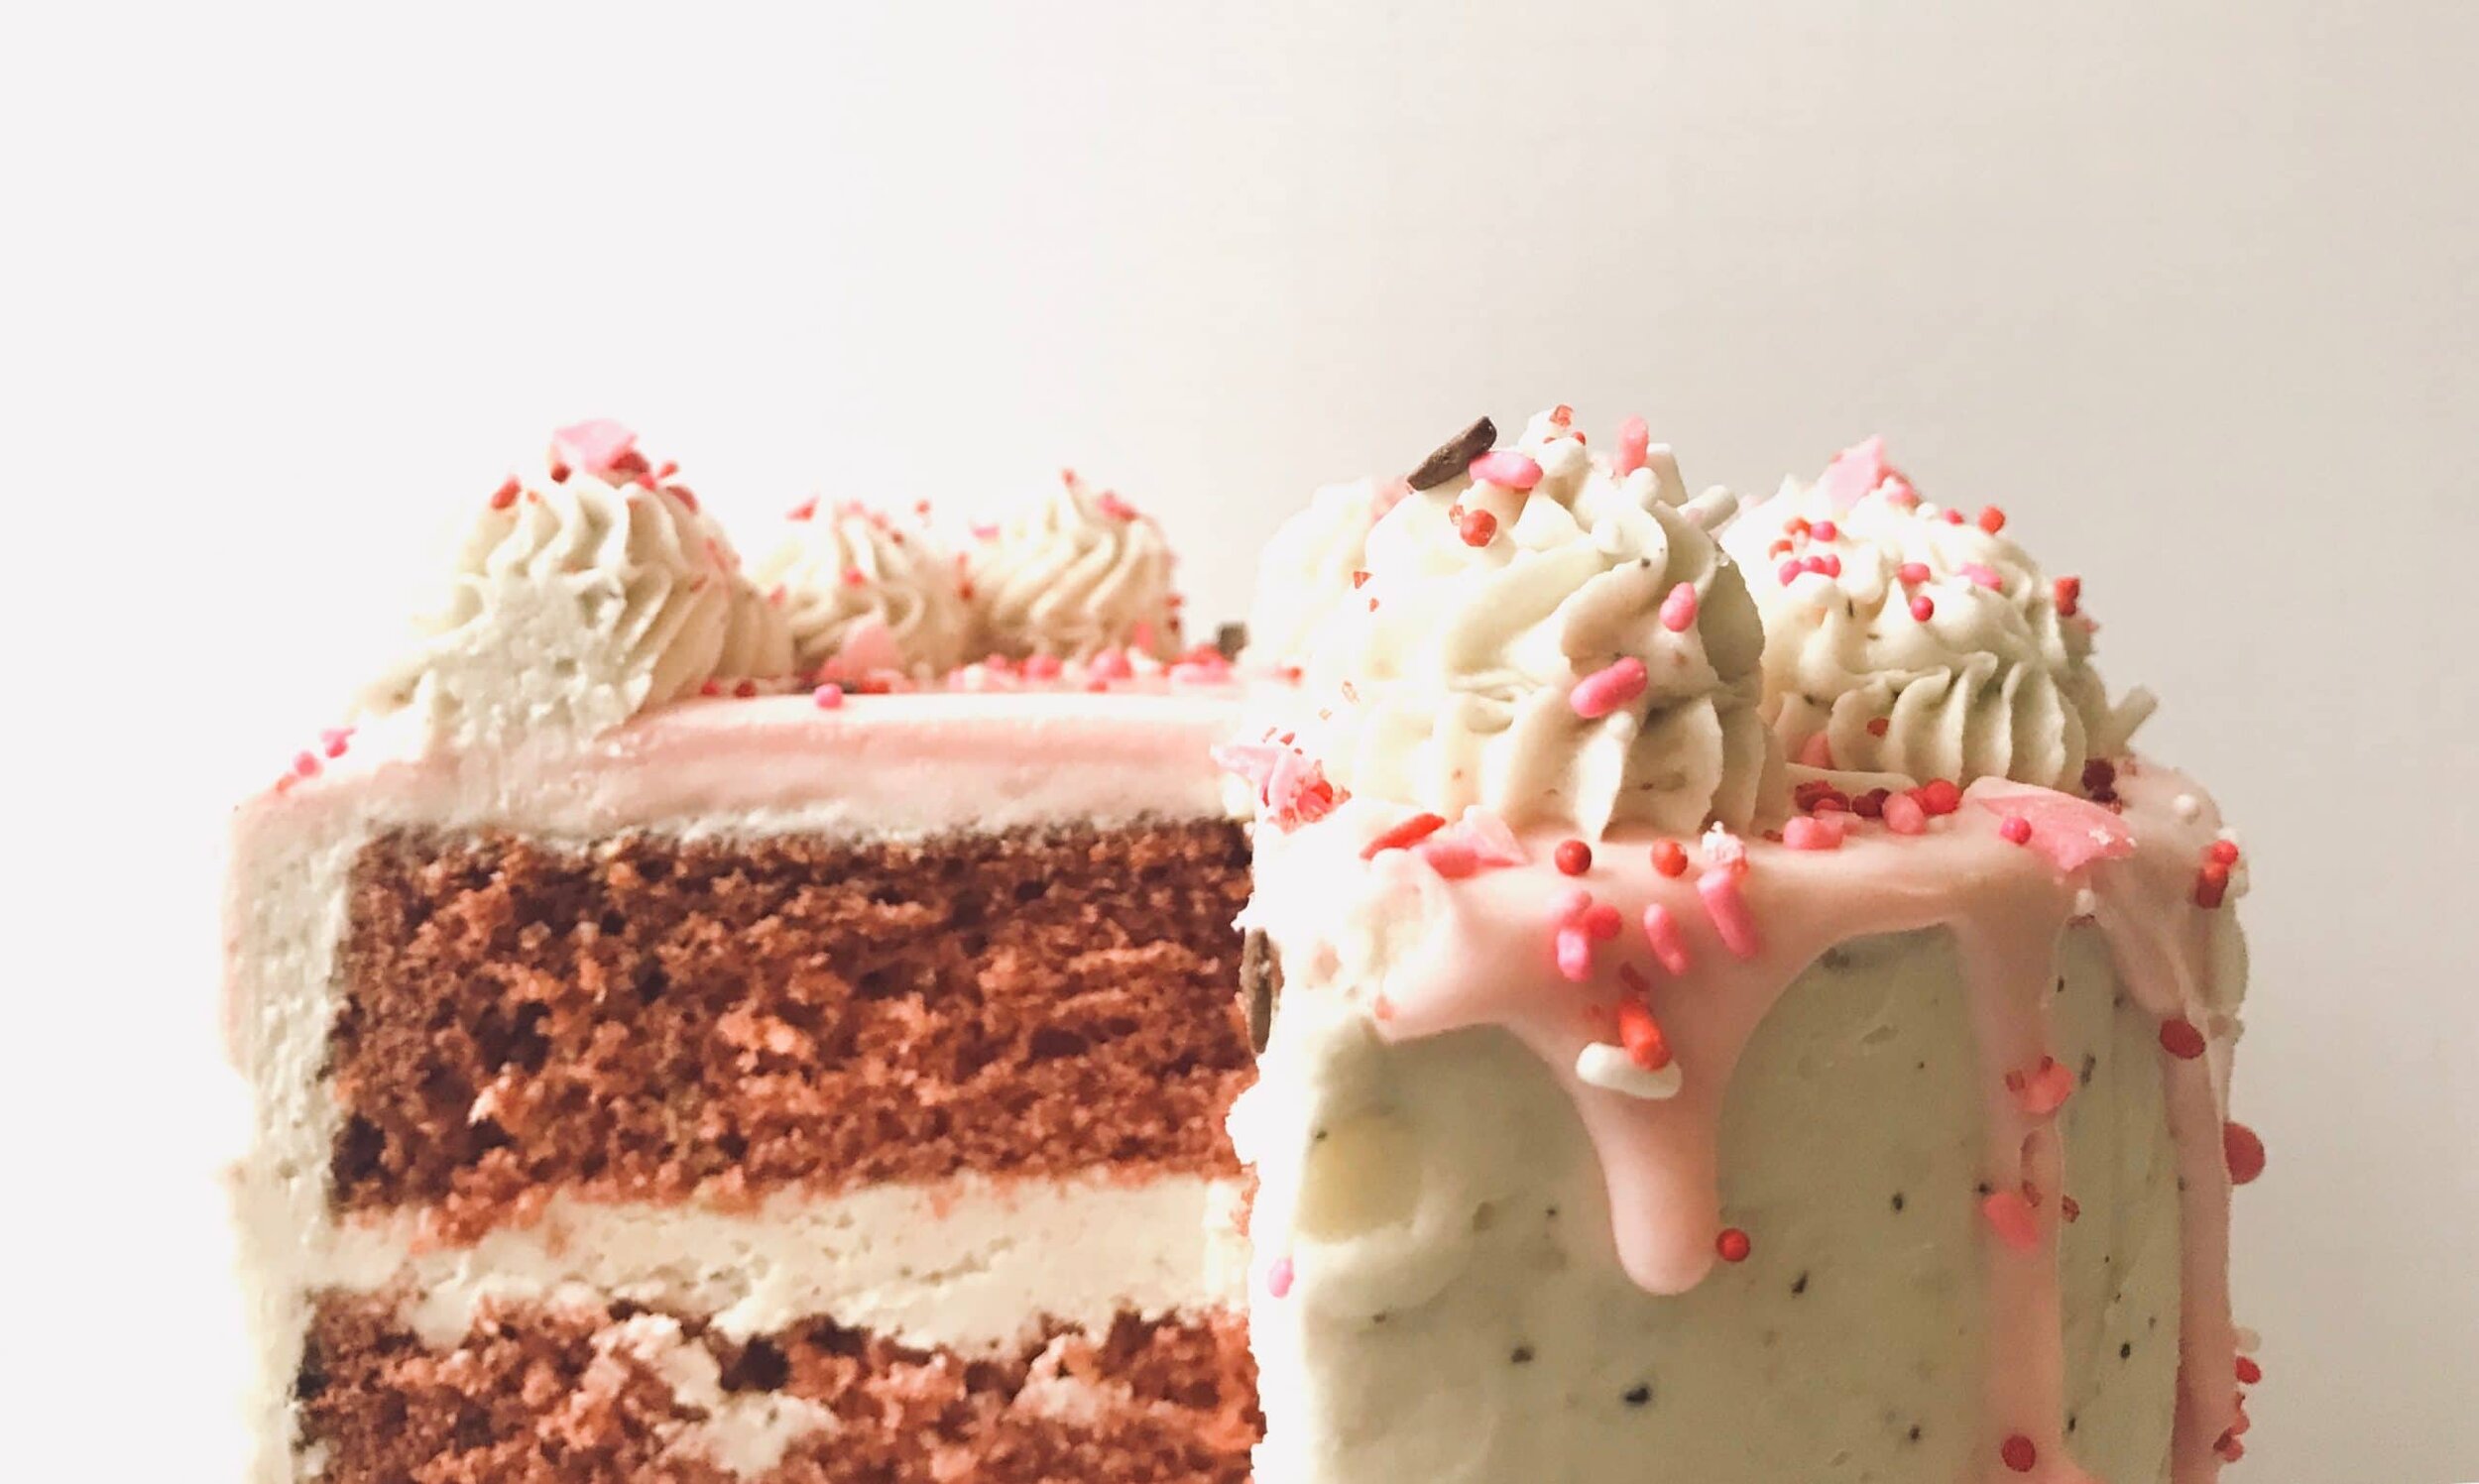
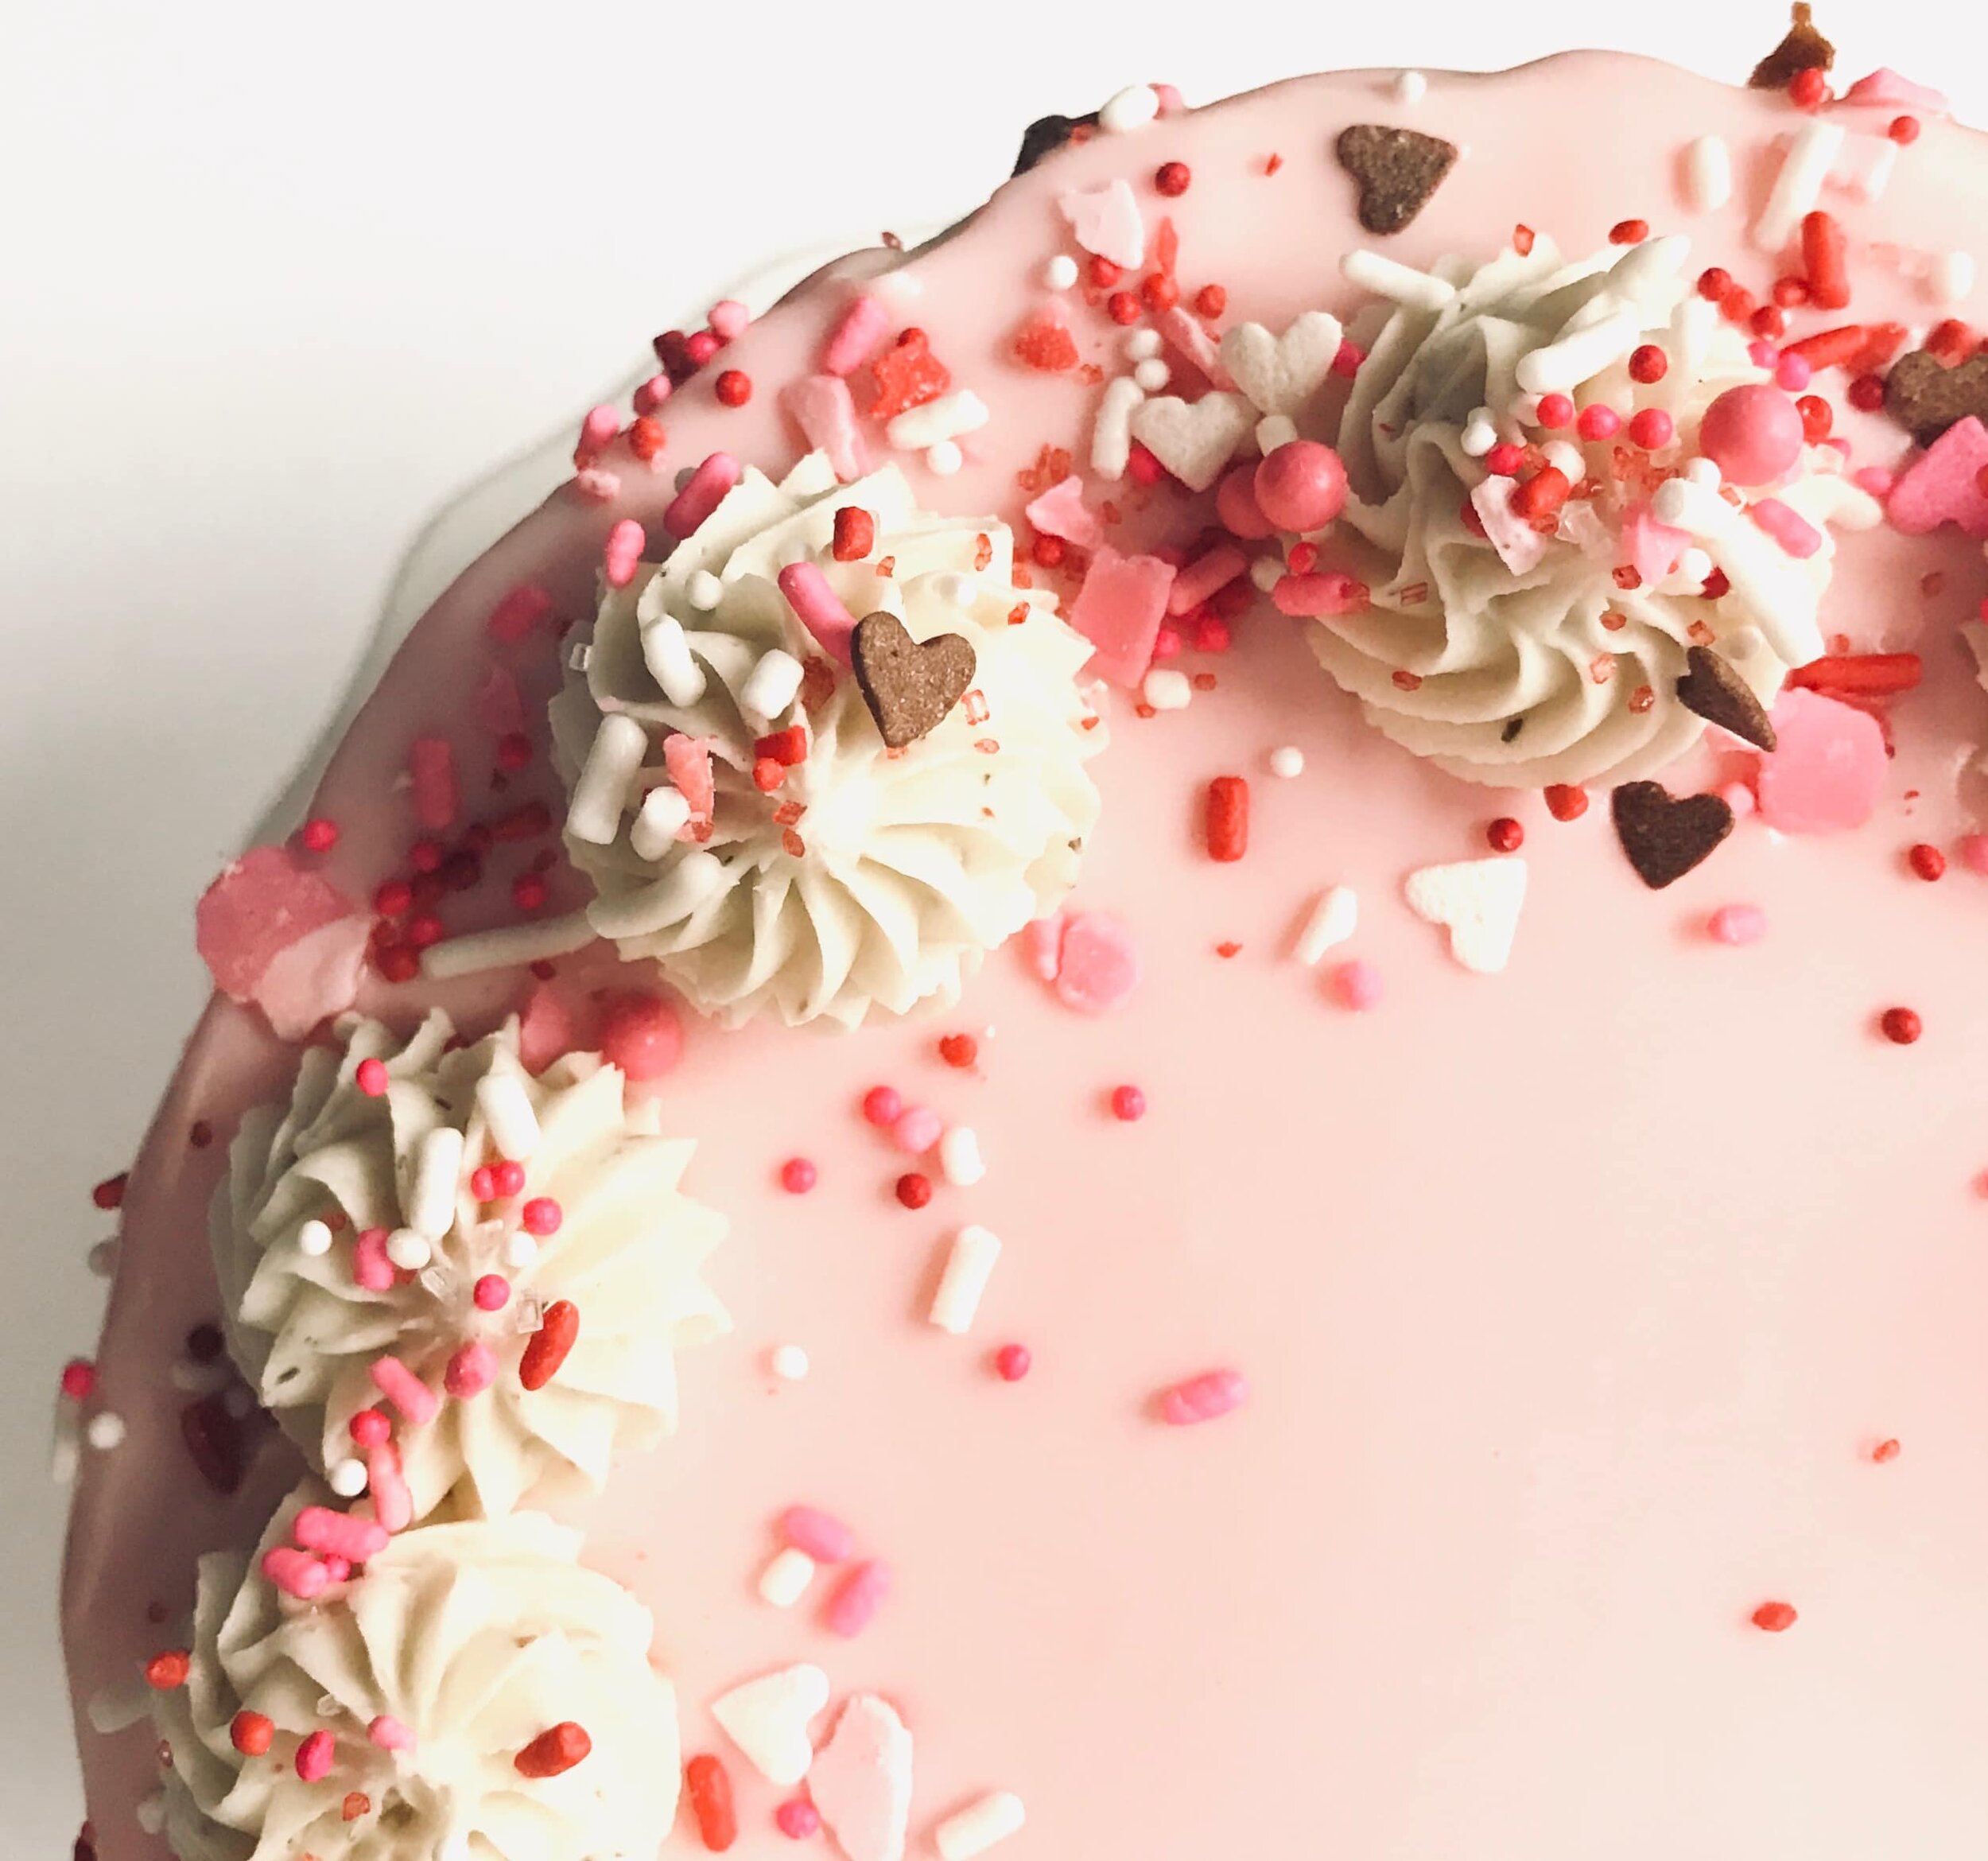
This here is a lovely pink malted strawberry milk cake. Like my favorite childhood drink, strawberry milk, it's even better in cake form.
It's the month of love. Is that a thing? Do people call February the month of love? Whatever, that is what I have dubbed this month because everything will be pink, heart shaped and maybe even a tad bit naughty; but what is valentine's day if there isn't a touch of naughty in the mix right?
Now I love strawberry milk. I grew up drinking it all of the time whenever I went to visit my grandma. She'd pour me a glass of milk and we would add in some of the strawberry syrup and, oh man. I could go for a glass of that right now. Anyways, this malted strawberry milk cake reminds me of just that. Strawberry milk.
[mailerlite_form form_id=1]

Want to see the cake being made? Go here and check it out!
Above are some products that I personally use and recommend for this recipe and to have for everyday use. My absolute favorite is the BlueQ oven mitts. I have a collection of them and I love them! They are great quality and it’s nice to have a kitchen item with a sense of humor.
______________________________________________________________________________
malted strawberry milk cake
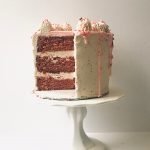
a strawberry malted milk cake with a simple buttercream and a pink chocolate drip
cake
- 1/2 cup malted milk powder
- 3/4 cup sweetened condensed milk
- 2 cup strawberries (fresh or frozen)
- 2/3 cup vegetable oil
- 3 eggs
- 1 tbsp vanilla extract
- 2 cup strawberry milk
- 2 1/3 cup all-purpose flour
- 1 cup granulated sugar
- 1 tsp baking soda
- 1 1/2 tsp baking powder
- 1 tsp salt
- pink food color (optional)
buttercream
- 3 sticks salted butter
- 4 cup powdered sugar
- 2 tsp vanilla extract
- 2 tbsp heavy cream
chocolate drip
- 1-3 tbsp heavy cream
- 1/4 cup white chocolate (i also added in a few pink candy melts for the color)
cake
- for the strawberry milk, combine the water and the malted milk powder into a pot and whisk together to remove the clumps. once the clumps are gone, whisk in the condensed milk then finally add in the strawberries. place over medium heat and bring to a boil. lower the heat and let simmer for about 10-15 minutes. the milk should become thicker and the strawberries should start to become soft and break down. remove from the heat and let cool. when cool, place the strawberry milk into a blender and blend until smooth. strain through a fine mesh sieve to get rid of the seeds and any clumps then set aside.
- preheat the oven to 350 degrees F. spray and line three 6-inch cake pans and set aside. in a large bowl combine the flour, sugar, baking soda, baking powder and salt; whisk together. add in the oil, eggs, vanilla and strawberry milk and whisk until fully combined. if desired, add in some pink food coloring to create a more strawberry color to the cake. divide the batter among the cake pans and bake for 30-35 minutes or until a toothpick comes out clean. let cool and then remove from the pans and wrap in cling-wrap until ready to use.
buttercream
- put all of the ingredients into the bowl of an electric mixer fitted with a whisk attachment. start slow and then gradually increase the speed. whip on high until light and fluffy, about 3 minutes.
chocolate drip
- combine the ingredients into a small bowl and microwave in 15 second bursts until melted and fully combined. let cool slightly and then add to the top of the cake that's been chilled. decorate as desired.

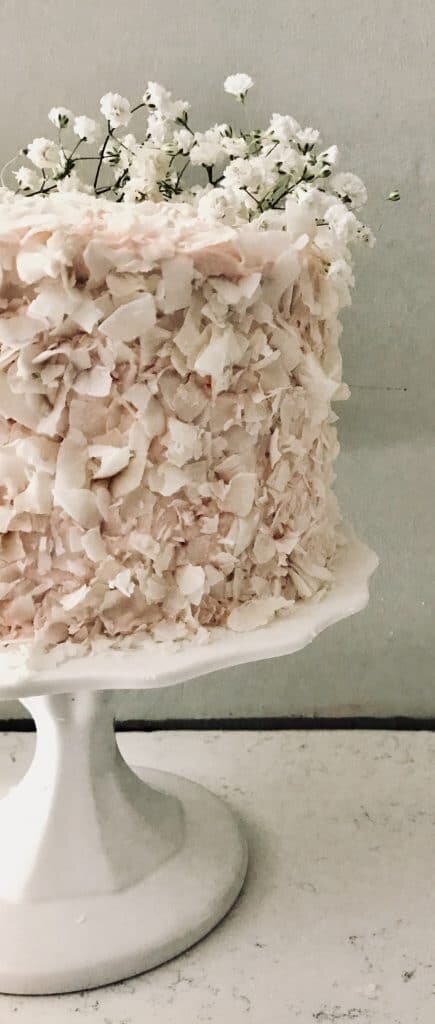
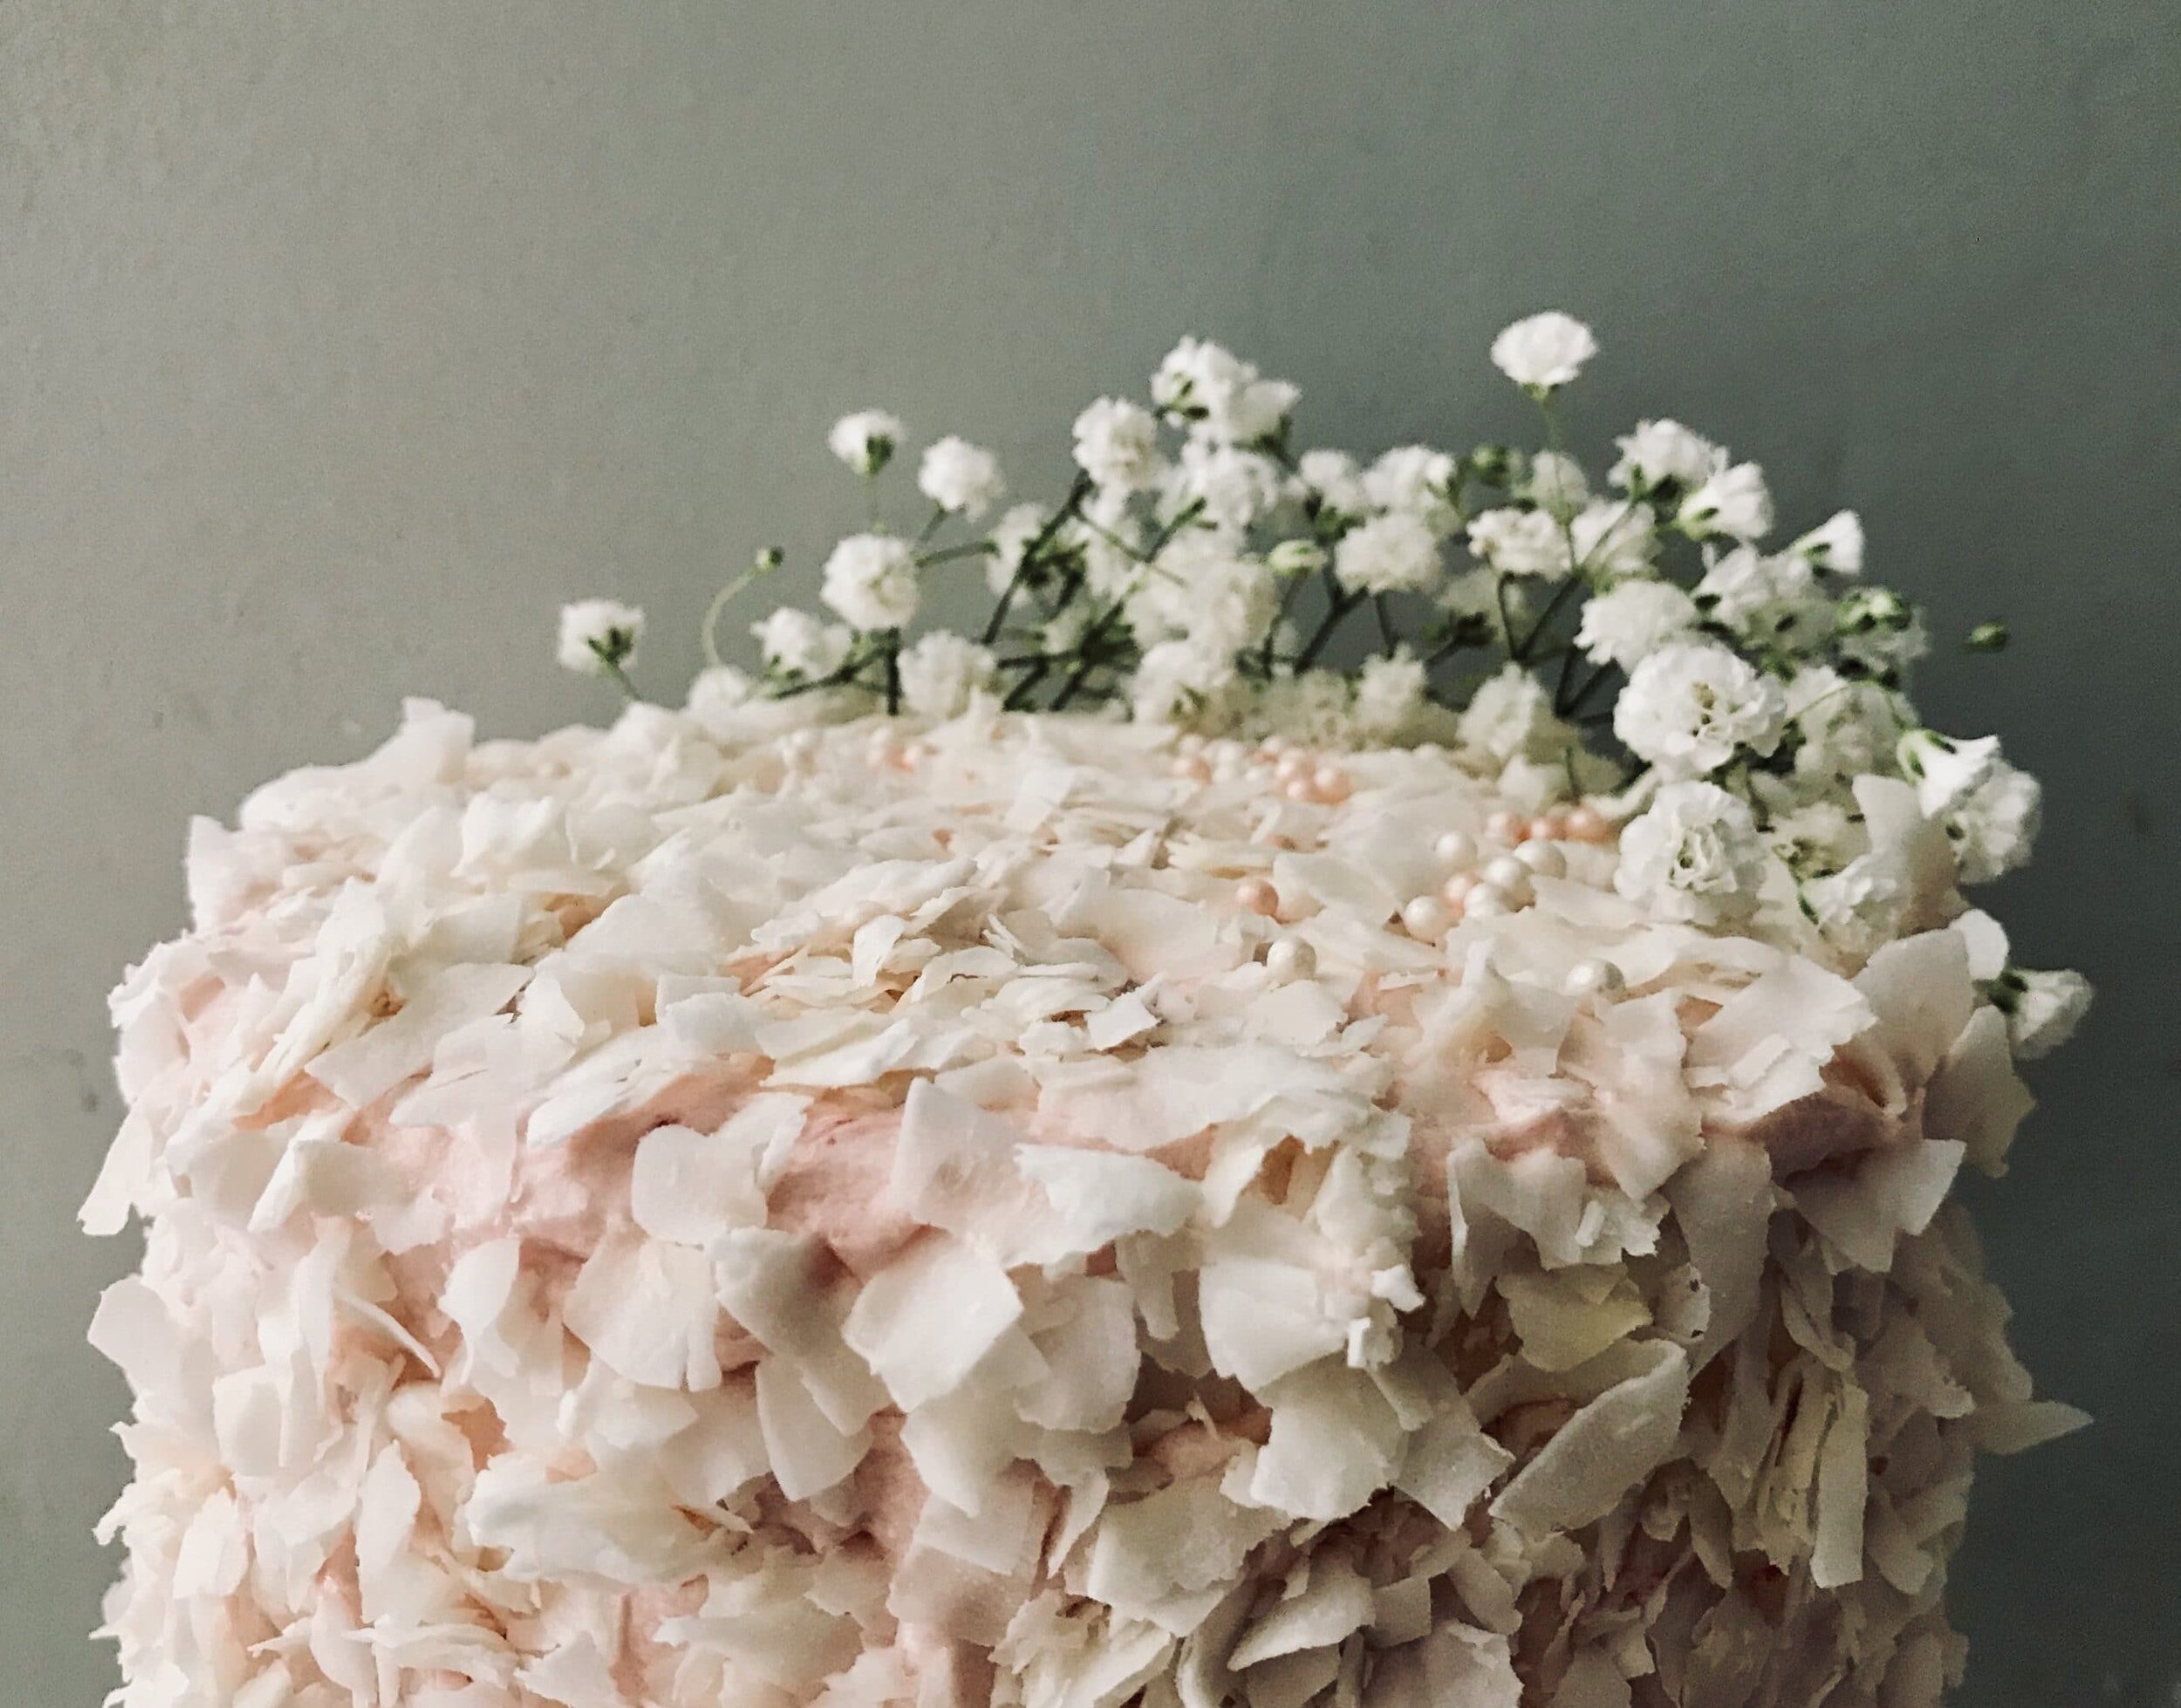
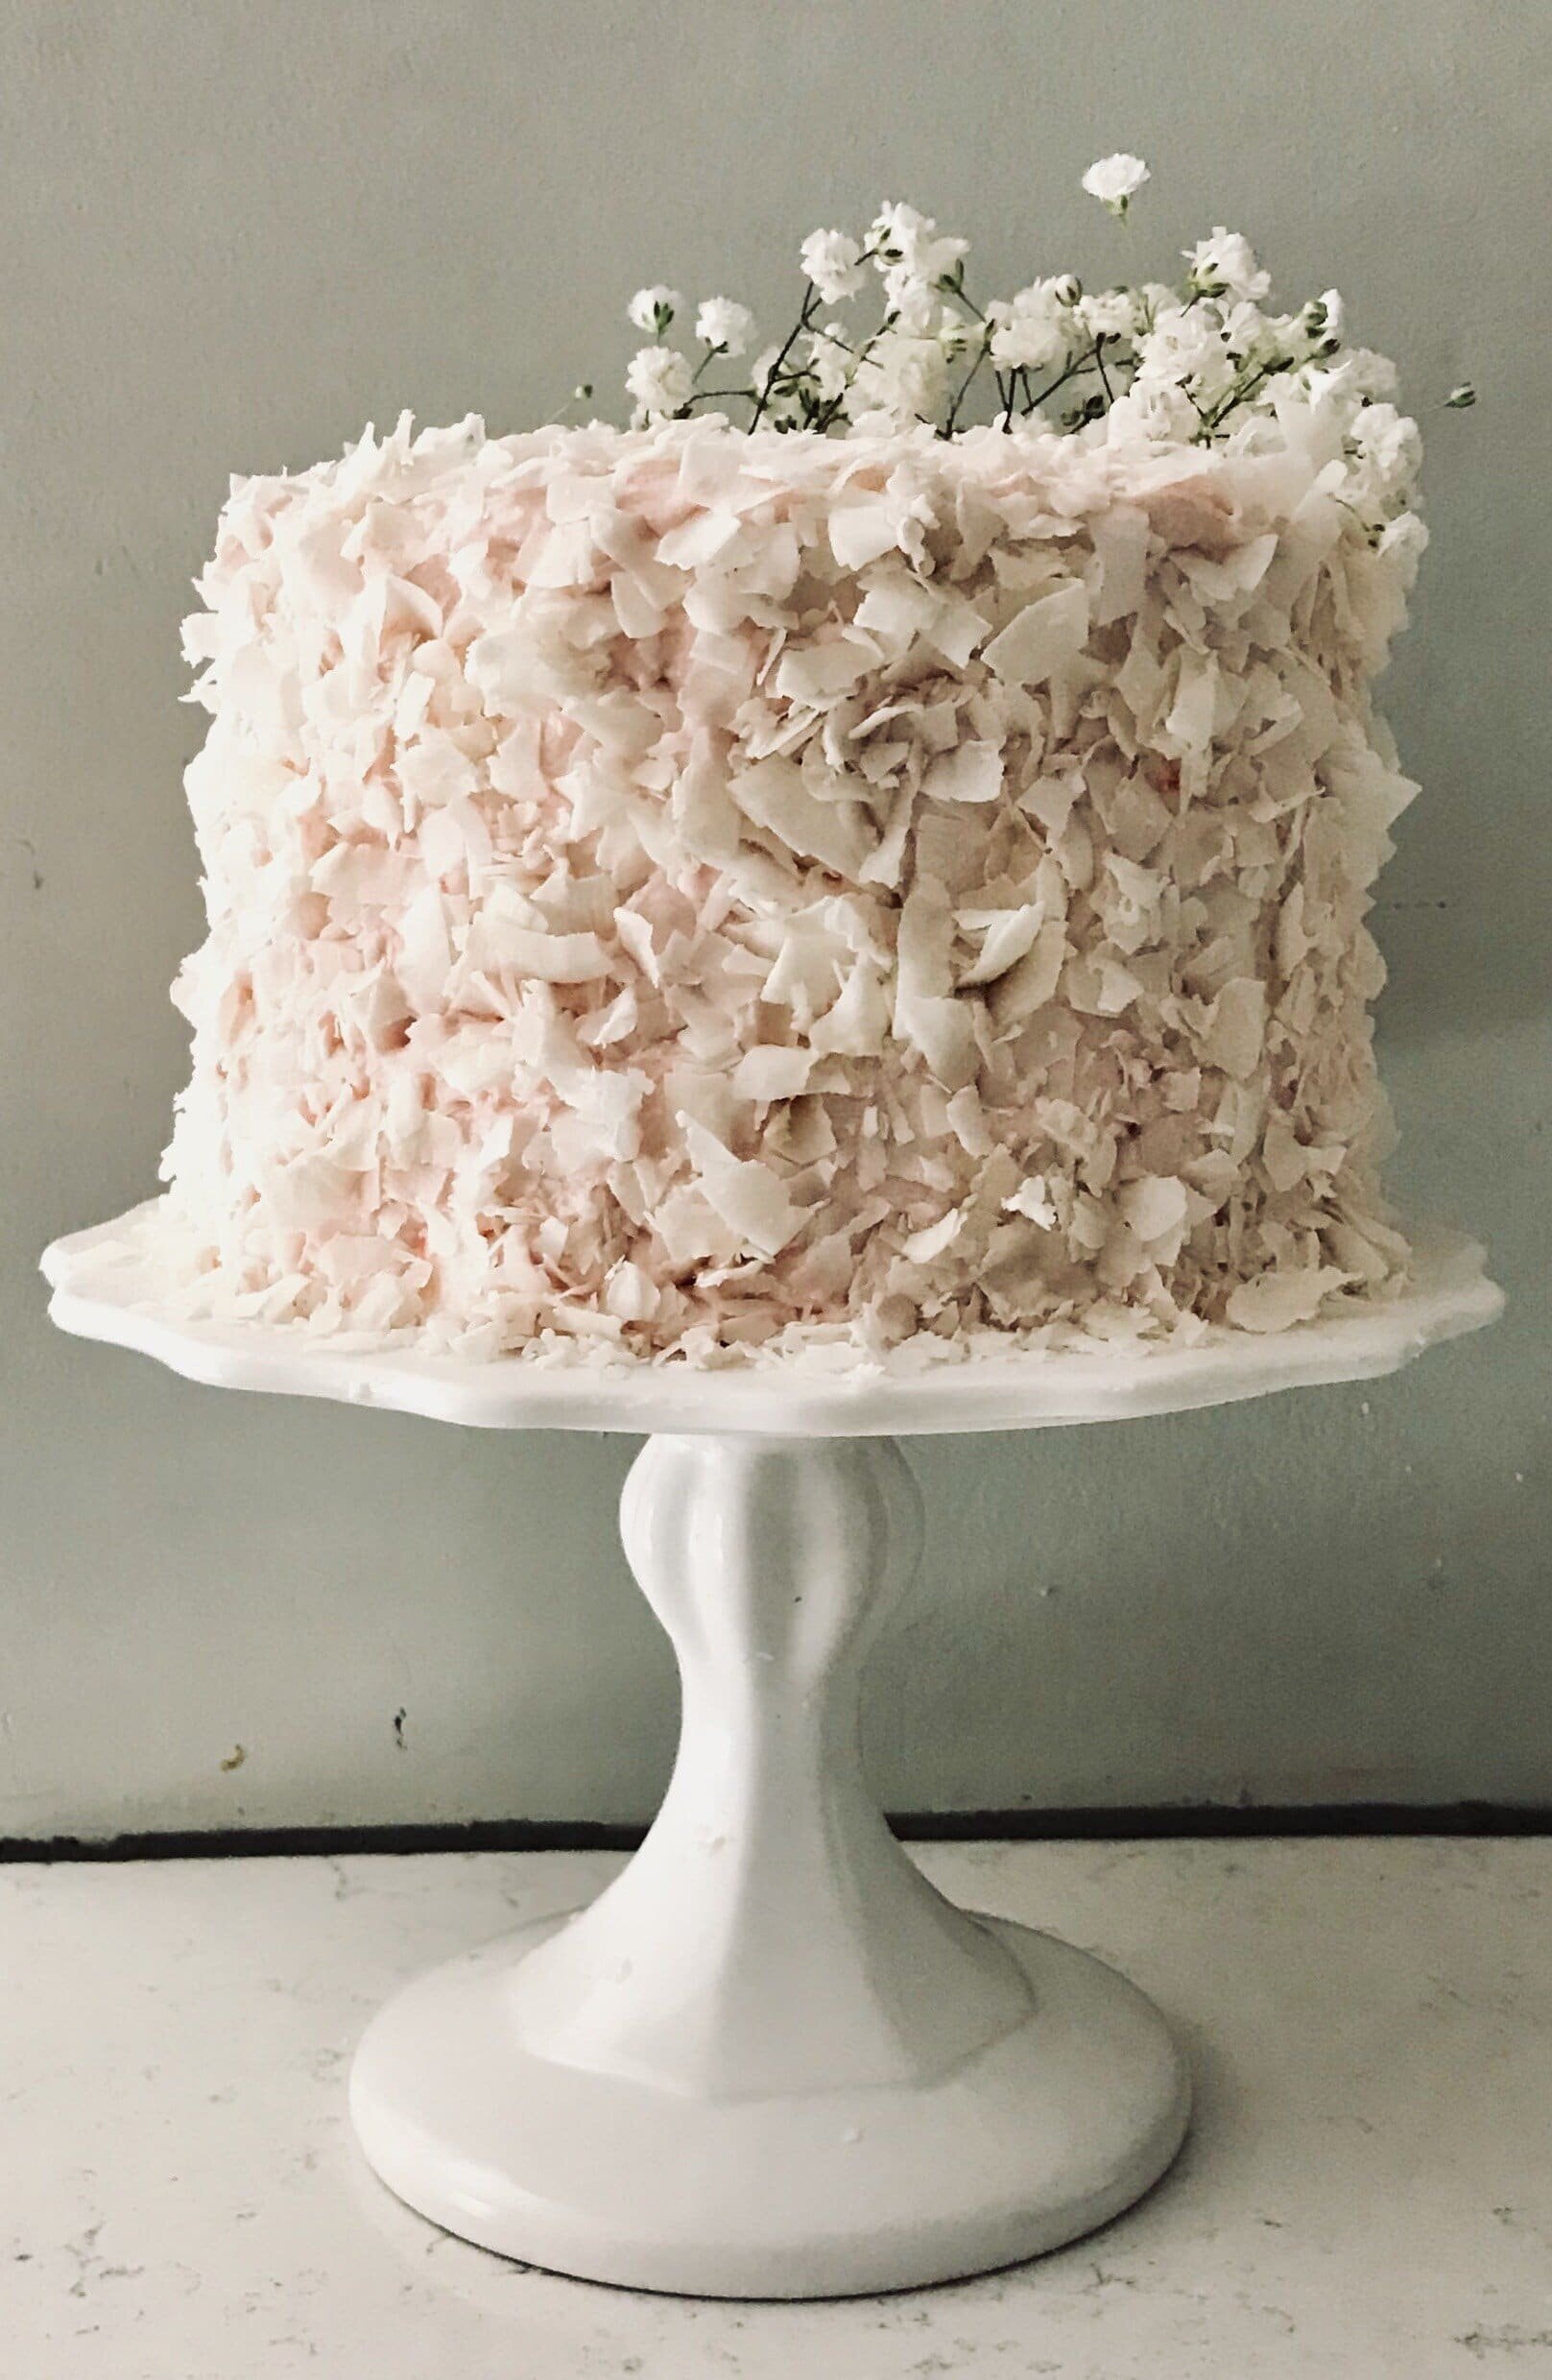
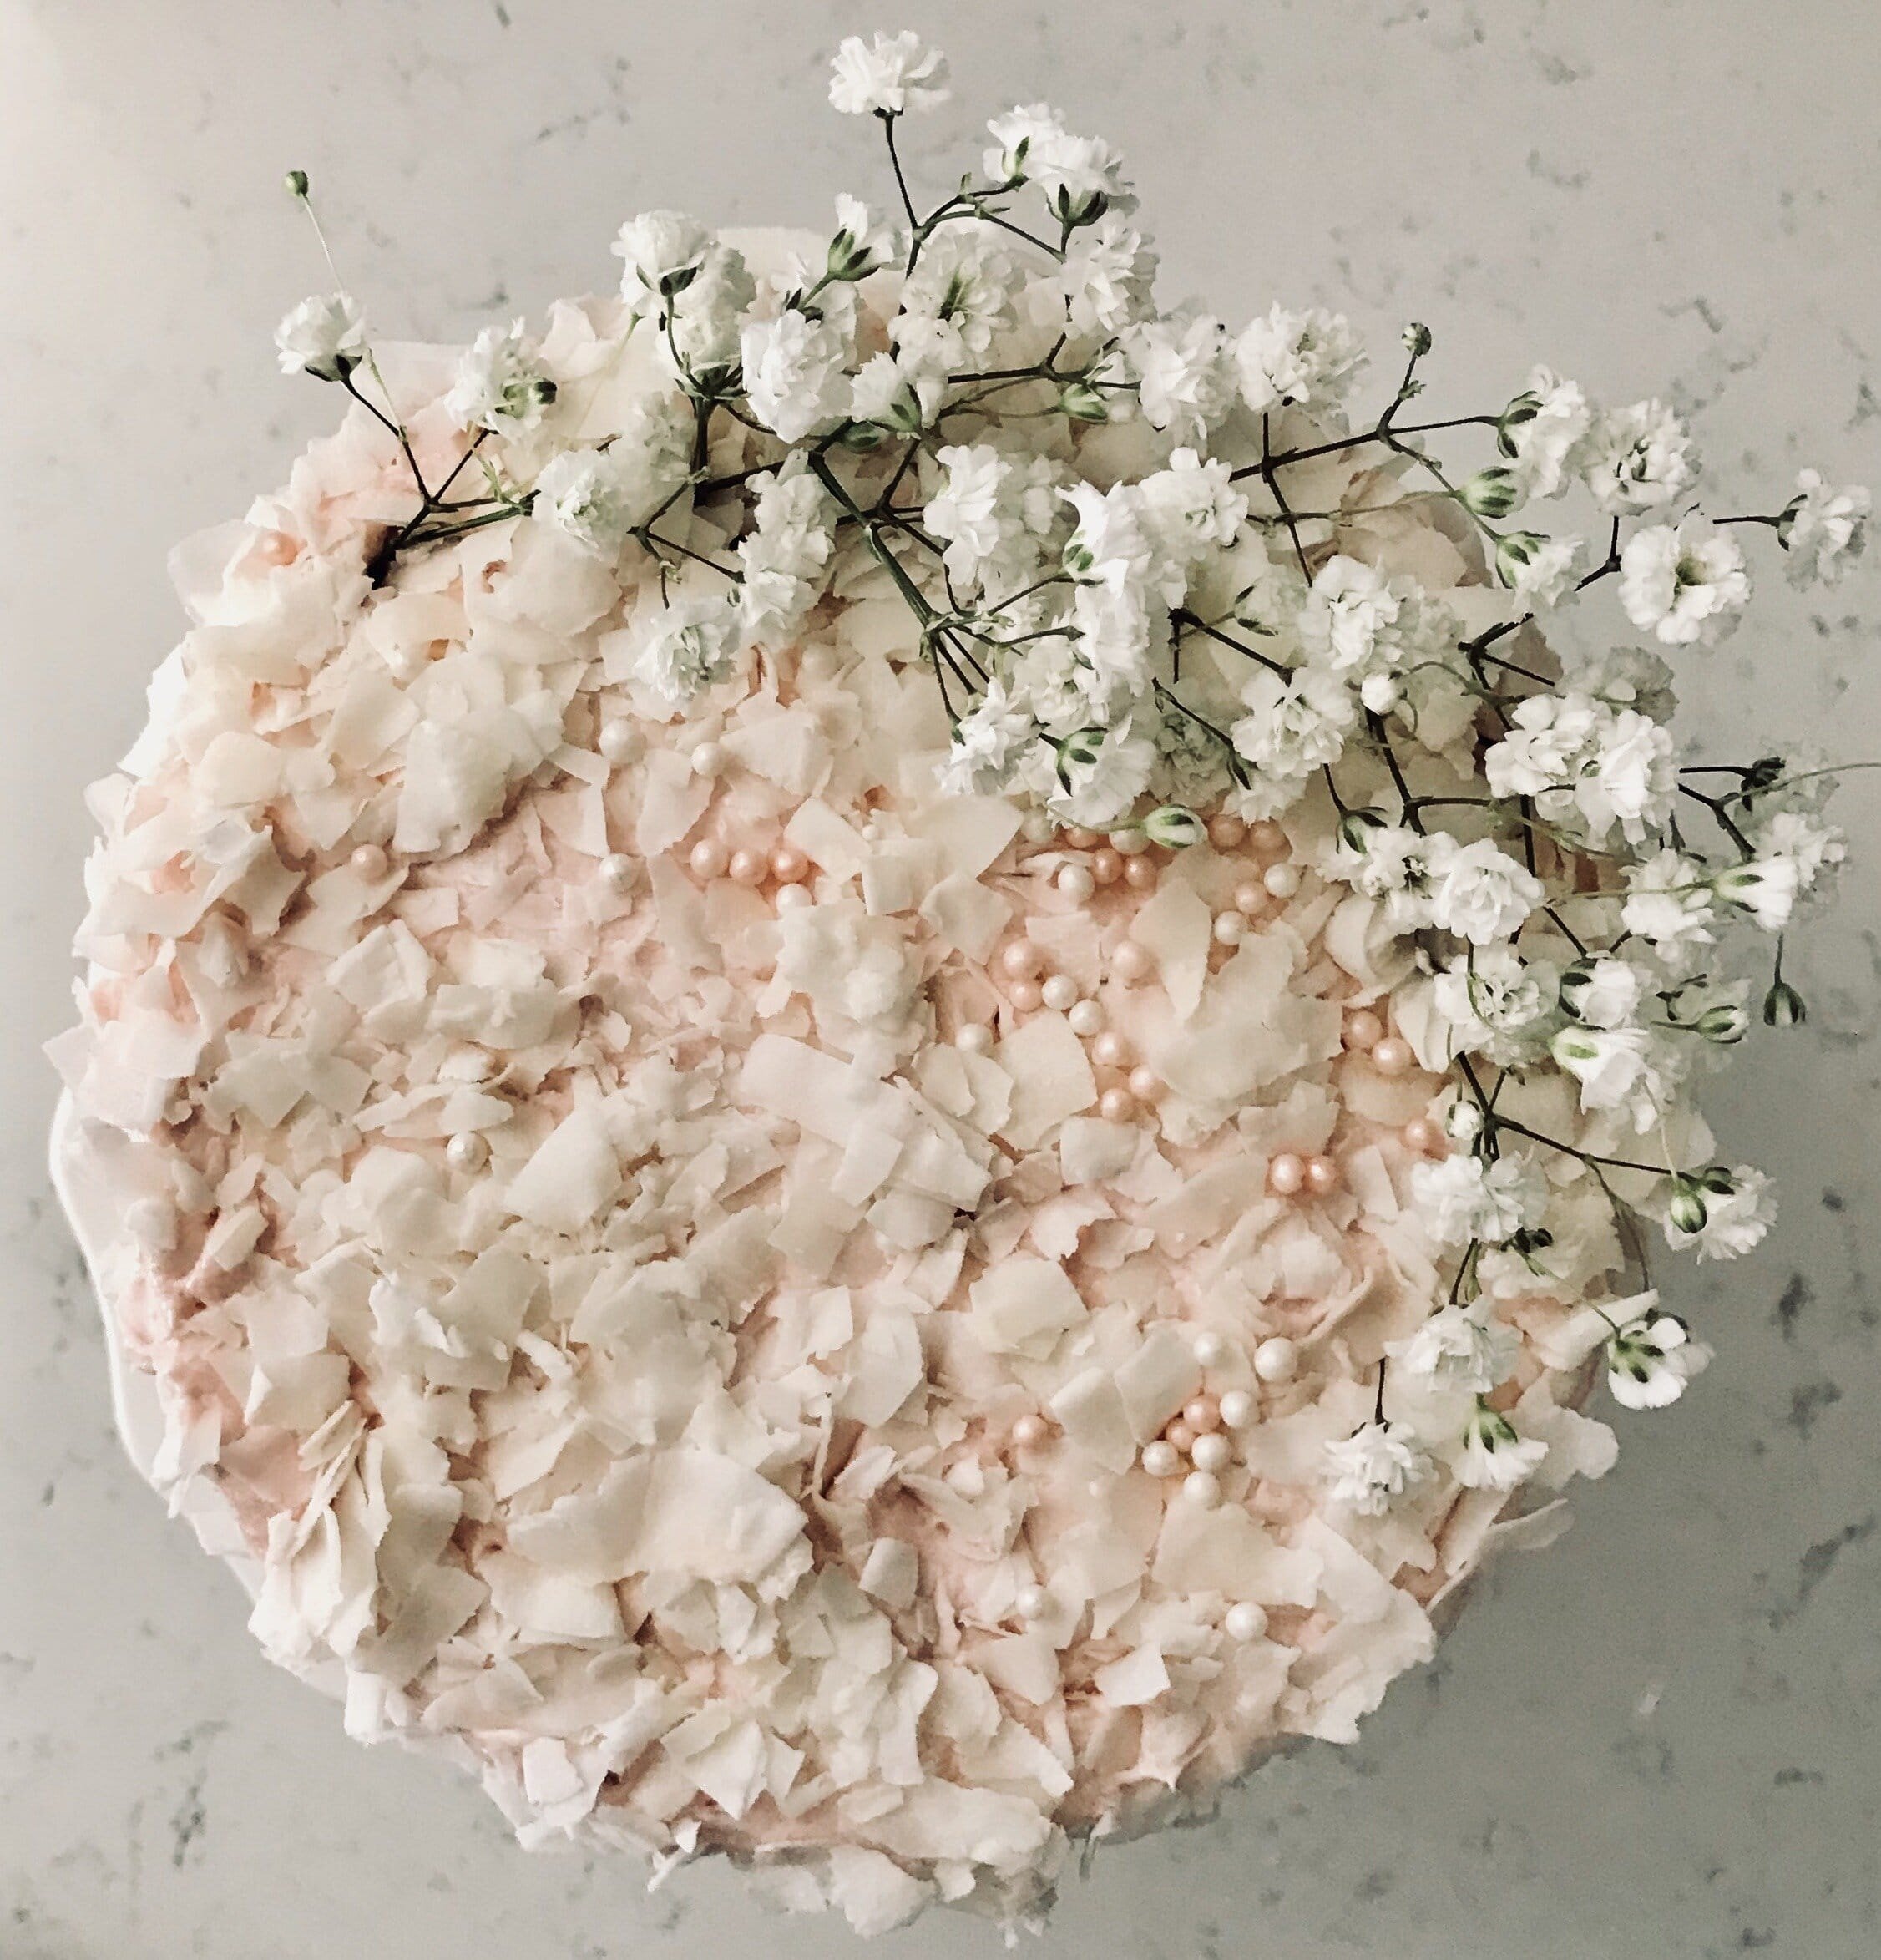
Coconut Cake with Strawberry Buttercream

[wprm-recipe-jump]
*This post contains affiliate links. Please read disclosure to learn more
This coconut strawberry cake is so luscious and simple. It's a beauty to look at too. A soft coconut cake that is layered with a creamy strawberry buttercream and coconut chips to garnish. Not to mention the super pretty delicate flowers on top too. If you can't find coconut chips than don't worry! Decorate the cake in the way you want to. You don't have to do it exactly the way I did it; have fun with it and make it your own. Otherwise I've linked some coconut chips off of amazon that you can get down below.
Change it up!
Instead of using strawberries for this coconut strawberry cake, why not try using raspberries instead? Want to make it even more fun? Why not add in a filling? Instead of making strawberry buttercream, make a simple buttercream and a strawberry compote to fill the cake. Or you could make a lemon curd and pair it with the strawberry buttercream for a delicious summer treat!

Products I recommend.
Above are some products that I personally use and recommend for this recipe and to have for everyday use. One of my favorite things that I have many of are the BlueQ oven mitts. They aren't just really funny and a great statement piece for your kitchen, but they are great quality too!
___________________________________________________________________________
coconut strawberry cake

a fluffy coconut cake with a simple strawberry buttercream that's garnished with coconut chips
cake
- 2 1/3 cup all-purpose flour
- 1 1/2 cup granulated sugar
- 1 1/2 tsp baking soda
- 1 1/2 tsp baking powder
- 1 tsp salt
- 1/2 cup vegetable oil
- 2 eggs
- 1/4 cup egg whites
- 1 tsp vanilla extract
- 1/2 tsp coconut extract
- 1/4 tsp almond extract
- 1 cup coconut milk
- 2/3 cup half & half
buttercream
- 1/2 cup diced strawberries
- 3 sticks unsalted butter (room temp)
- 2 tbsp heavy cream
- 1 1/2 tsp vanilla extract
- pinch salt
- 6 cups powdered sugar
cake
- preheat the oven to 350 degrees F and line three 6-inch cake pans with parchment paper. in a large bowl combine the flour, sugar, salt, baking soda, and baking powder and whisk together. in another bowl combine the egg whites, eggs, vegetable oil, vanilla, coconut and almond extracts, coconut milk, and half & half; whisk until incorporated. pour the wet mixture into the dry mixture and mix until fully combined. separate the batter evenly among the cake pans. bake for 30-35 minutes or until a toothpick comes out clean. let the cakes cool for 10 minutes and then carefully remove from the pans to continue cooling. wrap in cling wrap until ready to use.
buttercream
- place the butter, fresh strawberries, heavy cream, vanilla, and salt into a bowl of an electric mixer fitted with a whisk attachment and whip until most of the strawberries have broken down, about 5 minutes. add in the powdered sugar and continue whipping until well combined and light and fluffy.

Lemon Baked Alaska

[wprm-recipe-jump]
*Disclaimer: This post contains affiliate links. To learn more, please go here.
Since it's June and it's so freaking hot out I thought it would be a great idea to make something tangy, creamy, and cold: lemon baked Alaska.
This baked Alaska starts off with a pound cake base (that I may have bought from the store). On top of the base is a lovely dome of lemon ice cream that is stuffed with a light cream cheese mousse to help balance off all of the tang from the lemon. And to top it all off, a beautifully toasted meringue. It is so good, it reminds me of a orange creamsicle, but lemon flavored! I suggest making this dessert for a summer night barbecue that your family can enjoy on a hot night.
Toasting the Meringue
Now when it comes to toasting the meringue, don't do what I did. Please don't. I read that you can use a broiler to brown it if you don't have a torch (which I do have, but didn't feel like hunting down a propane canister all over Minneapolis just to use it). J figured "oh, I have a broiler in my oven! I'll use that instead." Well instead of getting a beautiful golden brown all over the baked Alaska, it only slightly burned the top.
Stupid. Annoying. Piece. Of. Crap.
So please use a torch! Or if you have a different method, then let me know in the comments! I'm always looking to learn new techniques from others.


Products I recommend.
Above are some products that I personally use and recommend for this recipe and to have for everyday use. I highly recommend starting off with the cuisinart ice cream machine as your first ice cream maker. It's the cheapest one on amazon and I personally use it and love it! I also suggest getting a reusable ice cream container as well, it's dishwasher safe and you can use it over and over again!
__________________________________________________________________________
lemon baked alaska
a simple pound cake topped with a dome of tart lemon ice cream with a cream cheese filling and toasted meringue
cake
- 6 inch (round pound cake (i bought mine from the store. you can always make your own favorite pound cake recipe too!))
filling
- 1 tbsp cream cheese
- 1/4 tsp vanilla
- 3 tbsp powdered sugar
- 1/3 cup heavy cream
ice cream
- 1/2 cup heavy cream
- 1 1/3 cup half and half
- 1/2 cup lemon juice
- 2 tsp lemon zest
- 1 1/3 cup granulated sugar (split)
- pinch salt
- 2 tsp vanilla extract
- 3 egg yolks
meringue
- 3 egg whites
- 1/3 cup granulated sugar
- 1/4 tsp cream of tartar
- 1/4 tsp vanilla extract
- pinch of salt
filling
- in a small bowl with a hand-held mixer, whip the cream cheese, vanilla, and powdered sugar until smooth. add in the heavy cream and whip until stiff peaks form. place the mousse into a silicone mold or a small bowl with plastic wrap and place into the freezer until solid.
ice cream
-
place the half and half, heavy cream, lemon juice, lemon zest, pinch of salt, and 1 cup of the granulated sugar into a pot and bring to a boil. in a bowl, whisk together the egg yolks, vanilla, and the remaining 1/3 cup of sugar. once the milk mixture is at a boil, slowly pour into the egg yolks whisking at the same time to prevent the eggs to scramble. strain the base through a fine mesh sieve and place into the fridge over night. turn the ice cream base following the instructions of your ice cream machine. put 3/4 of the ice cream into a cereal size bowl lined with plastic wrap or tinfoil, place the small dome of frozen cream cheese mousse into the center, and then place the rest of the lemon ice cream on top and smooth out with a spatula. freeze overnight until solid.
meringue
- place the egg whites, cream of tartar, vanilla, and salt in the bowl of an electric mixer fitted with a whisk attachment. start on low speed and slowly sprinkle the sugar into the egg whites. once all of the sugar is added, increase the speed to high and let whip until stiff peaks form, about 5 minutes.
assembly
- place the pound cake on serving platter. carefully un-mold the ice cream and place on top of the cake. if you haven't made the meringue yet, place the cake and ice cream into the freezer and make the meringue. once the meringue is made, pipe of frost it onto the ice cream and down to cover the cake so nothing is exposed. using your torch, lightly brown the meringue. serve right away.

Sugar Redefined: Strawberry Vanilla Black Pepper Cake

[wprm-recipe-jump]
*Disclaimer: This post contains affiliate links. To learn more, please go here.
This strawberry vanilla black pepper cake that I will feature for Sugar Redefined. It's super fun, cute, and very pink! Fruity with a bite of fresh strawberry, a little kick with the black pepper, and a hint of sweetness from a lovely white chocolate ganache drip.
Sugar Redefined
I figured I should probably give some more detail on what Sugar Redefined contains. There are all sorts of weird flavors in this book that you probably would never have thought of. Some ingredients include: herbs, odd spices, like curry, fruits, veggies, and even spirits because who doesn't like a little extra in their cake? These ingredients are paired with the best side kicks to make the oddness stick out more but also blend in. I wouldn't purposely make a cake be beyond disgusting and inedible. So when you see curry, don't worry, it's with something that makes it so good that it will become your new favorite cake.
If you missed the lime and pink pepper corn cake feature of my new and very first book Sugar Redefined go check it out! Otherwise here is the strawberry vanilla black pepper cake that is also in the book!

always have that creative spark; find your inspiration and make it into something great

Products I recommend.
Above are some products that I personally use and recommend for this recipe and to have for everyday use. One of my favorite things that I have many of are the BlueQ oven mitts. They aren't just really funny and a great statement piece for your kitchen, but they are great quality too!
___________________________________________________________________________
strawberry vanilla black pepper cake
this black pepper cake is layered with a strawberry white chocolate ganache and a strawberry black pepper swiss meringue buttercream. it's sweet with a little spicy and it's delicious!
cake
- 3 sticks unsalted butter (room temp)
- 1 1/2 cup granulated sugar
- 5 eggs
- 2 vanilla beans (scraped)
- 1 tsp vanilla extract
- 2 2/3 cup all-purpose flour
- 2 tsp baking powder
- 1 1/2 tsp baking soda
- 1 1/2 tsp salt
- 1 tsp fresh ground black pepper
buttercream
- 1 cup strawberries (cut and diced)
- 6 egg whites
- 1 3/4 cup granulated sugar
- 6 sticks unsalted butter
- 1 tsp vanilla
- 3/4-1 1/2 tsp fresh ground black pepper
ganache
- 2 oz heavy cream
- 2 oz white chocolate
- 1 tbsp dried strawberries (pulverized)
cake
- preheat the oven to 375 degrees F. spray and line three 6-inch cake pans. in the bowl of an electric mixer fitted with a whisk attachment, beat the butter and sugar until pale and fluffy, about 3 minutes. scrape the sides of the bowl, add the eggs, vanilla bean, and vanilla and mix until incorporated. in a separate bowl, combine the flour, baking powder, baking soda, salt, and black pepper. add the dry mixture and the buttermilk alternating starting and ending with the dry in three parts. divide the batter evenly among the cake pans and bake for 35-40 minutes or until a toothpick comes out clean. let cool 10 minutes then carefully remove from the pans and continue cooling. (suggested to use a sheet pan with raised edges as this cake gets tall and more spill over the edges.)
buttercream
- for the buttercream, place the egg whites and sugar into the bowl of an electric mixer and place that over a pot of boiling water to create a double boiler. whisk together and let sit until the sugar has fully dissolved. using a whisk attachment, whip the egg whites until a meringue forms, about 3 minutes, and then slowly add the butter. let whip until fully incorporated, on high, for about 4 minutes. add the vanilla and black pepper.
ganache
- for the ganache, place all the ingredients into a microwaveable bowl and heat in 15 second bursts, stirring, until the chocolate is melted. let cool.
assemble
- to assemble, spread some buttercream on the first layer of cake, pipe around the edge of the cake, add the sliced strawberries, pushing them into the buttercream and top with more buttercream. repeat with the second layer of cake. Pour the ganache over the top of the frosted cake and let drip over the sides.
Sugar Redefined: Lime & Pink Peppercorn Cake


[wprm-recipe-jump]
*Disclaimer: This post contains affiliate links. To learn more, please go here.
I finally finished my very first book, Sugar Redefined. I'm so excited to actually accomplish something even though it was a self-published project, it was fun to experiment and learn in putting something together. To give you a little taste I will be posting 2 of the recipes from Sugar Redefined to give you an idea of what you will find. Starting with this lime pink peppercorn cake. 
This cake features lime and pink peppercorn. It's a very interesting flavor combination that actually has a bit of a story to it. In my last year of college my friends and I got accepted into a study abroad program in Italy. It was such an amazing experience and to end college in such a fun way with my friends was perfect.
One thing that I discover when visiting other countries is the odd flavored snacks that you find. This cake was inspired by a bag of potato chips! Yes, potato chips. Flavored with lime and pink peppercorn. My thought was if this combination is so good in a salty way, then it has to be good in a sweet way. So why not make it into a cake and add a tangy cream cheese frosting to go with it?
The cake.
 Not only is the inside fun and different but the outside of this cake is to. I love the colors of the lime green and pink which helps highlight what the flavors are. You have green representing the lime and the pink for the pink peppercorn. It's so cute and pretty on the outside but with a tangy, slightly spicy flavor on the inside.
The book
 This is what sugar redefined represents. Odd flavors that you would never expect to see in a dessert. Some people get super curious with odd trends in the food world, like charcoal ice cream. Why not try out this fun book filled with surprises and beautiful cake photos that you can try at home and join in on all the fun?
Products I recommend.
Above are some products that I personally use and recommend for this recipe and to have for everyday use. One of my favorite things that I have many of are the BlueQ oven mitts. They aren't just really funny and a great statement piece for your kitchen, but they are great quality too!
__________________________________________________________________________
lime pink peppercorn cake
this cake is citrusy with a fun twist of pink peppercorn throughout and a generous layering of cream cheese frosting on top.
cake
- 2 cups all-purpose flour
- 1 1/4 cup granulated sugar
- 2 tsp baking powder
- 1 tsp baking soda
- 1 tsp salt
- 1 1/2 tbsp pink peppercorns (crushed)
- 2/3 cup vegetable oil
- 3 eggs
- 1 tsp vanilla extract
- zest + juice of 3 limes
- 3/4 cup buttermilk
buttercream
- 8 oz cream cheese
- 2 sticks unsalted butter
- 5 cups powdered sugar
- 1 tsp vanilla extract
- 2-3 tbsp heavy cream
cake
- preheat the oven to 350 degrees F and spray and line three 6-inch cake pans. in a bowl, combine the flour, sugar, baking powder, baking soda, salt, and crushed pink peppercorns and mix together with a whisk. in a separate bowl, combine the oil, eggs, vanilla, lime zest and juice, and the buttermilk and whisk together until fully mixed. pour the wet mixture into the dry and mix until fully combined. evenly divide the batter among the cake pans and bake for 30-35 minutes or until a toothpick comes out clean. let cool 10 minutes, then carefully remove the cake and continue to cool.
buttercream
- in the bowl of an electric mixer fitted with a paddle attachment, combine the cream cheese and butter and beat until smooth, about 2 minutes. scrap down the sides of the bowl and then add the vanilla and powdered sugar and continue mixing until fully combined. gradually add in the heavy cream until it is a spreadable consistency.

Cereal Milk Cake

[wprm-recipe-jump]
*This post contains affiliate links. Please read disclosure to learn more
I love fruit loops! It may be some little kid food but I still consider myself a kid sometimes. So why not have a nice big bowl of fruit loops or even better, a fruit loop cereal milk cake?
This is a very light and flavorful cake with a yummy fruit loop flavor and a fluffy cereal milk frosting to go with it. To get this cake though it will be an overnight process, but the wait is so worth it.
The process is pretty simple by just soaking the cereal in the milk overnight to get the flavor absorbed. To make it even more over the top you can blend the cereal and the milk together. When you are making this cake, the smell is so good it made me crave a bowl of cereal. Too bad all the cereal went to the cake.
[mailerlite_form form_id=1]


Products I recommend
Above are some products that I personally use and recommend for this recipe and to have for everyday use. One of my favorite things that I have many of are the BlueQ oven mitts. They aren't just really funny and a great statement piece for your kitchen, but they are great quality too!
___________________________________________________________________________
cereal milk cake
this cake is childhood, filled with cereal milk and a creamy ermine buttercream. it's best to have cake for breakfast.
cereal milk
- 2 1/2 cup fruit loop cereal
- 3 cup milk or almond milk
cake
- 2 sticks unsalted butter (room temp)
- 1 cup granulated sugar
- 3 eggs
- 1 tsp vanilla extract
- 1 tsp salt
- 2 tsp baking soda
- 1 1/2 cup all-purpose flour
- 1 1/4 cup cereal milk
- rainbow sprinkles (optional)
- 1 cup cereal milk
- 5 tbsp all-purpose flour
- 2 sticks unsalted butter (room temp)
- 1 cup granulated sugar
- 1 tsp vanilla extract
cereal milk
- place the cereal and the milk in a bowl and soak overnight in the fridge. the next day, blend the cereal and milk together until smooth. if there are any small cereal clumps i left them in the milk, but you can strain it as well. you need a total of 2 1/4 cups of the cereal milk for the whole recipe. if you are short on milk from the cereal absorbing it, just add more milk until you have the right amount.
cake
- preheat the oven to 350 degrees F. spray and line three 6-inch cake pans. in the bowl of an electric mixer fitted with a paddle attachment, beat the butter and sugar until pale and fluffy, about 1 minute. scrape the sides of the bowl, add the eggs, and vanilla and mix until incorporated. in a separate bowl, combine the flour, baking soda, and salt. add the dry mixture and the cereal milk alternating starting and ending with the dry in three parts. fold in the sprinkles if desired. divide the batter evenly among the cake pans and bake for 30-35 minutes or until a toothpick comes out clean. let cool 10 minutes then carefully remove from the pans and continue cooling.
buttercream
- in a saucepan combine the flour and cereal milk and place over medium-low heat. whisk the mixture constantly until it starts to thicken, about 8-15 minutes. (this depends on if you have a gas or electric stove top.) once thick, remove from the heat. put the mixture into a bowl and mix in the vanilla extract. place cling wrap directly over the mixture so a skin doesn’t form. let cool until room temp. once at room temp, place the butter and sugar into the bowl of an electric mixer fitted with a whisk attachment. whip until light and fluffy, about 5 minutes. add the flour mixture a spoonful at a time into the butter mixture. once the flour mixture is all added, whip on high for about a minute. the buttercream will resemble whipped cream.

Jasmine Chocolate Cake


[wprm-recipe-jump]
*disclaimer: this post contains affiliate links. to learn more, please go here.
Happy Valentines day... I think. I'm not a fan of this holiday, probably because I've never actually got to celebrate it with anyone. At least I'm not the only one who is in the same boat. Am I right? But at least I have this jasmine chocolate cake to love my stomach instead.
This jasmine chocolate cake is actually inspired by someone who I deeply care about and stupidly fell in love with. Oops. Jasmine is his favorite flower and it's special to him so I wanted to make something that would make him happy. Which is something that makes me happy in turn.
Cake is love.
Now although he may not feel the same way and I'll never get to celebrate this stupid holiday with him, I'm just glad that I stupidly fell for the idiot no matter how much that it hurts. Like the saying goes, it's better to have love and lost then never loved at all. Not to mention that time heals all wounds. And cake. Cake heals all wounds too. I love cake.
P.S. He loved it. So I hope that you will love it too!

Products I recommend.
For this cake I recommend buying this jasmine tea to get the most flavor. If you can't find it in your local grocery store or have the time to wait for an amazon delivery, than I suggest getting this jasmine green tea instead. Enjoy yourself a hot glass of tea while you make this cake too! I add in some honey and lemon in mine and it's delish!
_________________________________________________________________________
Jasmine Chocolate Cake
a rich chocolate cake that is flavored with jasmine tea for a slight floral flavor
jasmine tea
- 1 cup water
- 4 jasmine tea bags
cake
- 1 1/3 cup all-purpose flour
- 1 1/2 cup granulated sugar
- 3/4 cup cocoa powder
- 1 tbsp baking soda
- 1 1/2 tsp salt
- 3 extra-large eggs
- 1/2 cup vegetable oil
- 2 tsp vanilla extract
- 3/4 cup buttermilk
- 1 cup chocolate (chopped)
- 3/4 cup of the jasmine tea water
buttercream
- 5 oz egg whites
- 1 1/2 cup granulated sugar
- 3 sticks unsalted butter
- 1 tsp vanilla extract
- 1-2 jasmine tea bags (optional)
cake
-
preheat the oven to 350 degrees F. spray and line three 6-inch cake pans. place the jasmine tea bags and water into a pot and bring to a boil for 5 minutes. let sit until cool to let the jasmine tea infuse into the water. measure out 3/4 cup of the jasmine tea and poor over the 1 cup of chocolate and mix until chocolate is melted. set aside.
-
in a large bowl combine the flour, sugar, cocoa powder, baking soda, and salt and mix together. in another bowl whisk together the eggs, oil, vanilla,and buttermilk. add the wet ingredients to the dry and whisk together until fully combined. add in the jasmine tea water and chocolate mixture and mix until incorporated.
-
divide the batter evenly among the cake pans and bake for 30-35 minutes or until a toothpick comes out clean. let cool 10 minutes and then carefully remove from the cake pans to continue cooling. wrap in cling wrap until ready to use.
buttercream
- in the bowl of an electric mixer combine the egg whites and the sugar and place over a pot of boiling water. whisk together until the sugar dissolves. once the sugar is dissolved, place on the mixer fitted with a whisk attachment and whip on high until a meringue forms and the bottom of the bowl is no longer hot. slowly add in the butter and continue whipping until the mixture comes together and doesn't look curdled. add in the vanilla and the jasmine tea leaves (removed from the bag) and mix until just combined.

Vanilla Cake with Chocolate Frosting

This classic vanilla cake with chocolate frosting combo is needed at every birthday party! A perfect vanilla cake that isn't too sweet and is surrounded with a creamy chocolate buttercream; and of course all the sprinkles you can imagine.
*This post contains affiliate links. Please read disclosure to learn more.

Who doesn't love a great classic cake? This vanilla cake with chocolate frosting is the atypical dessert for most birthday parties, as you get a little bit of both worlds. Unless you go for a marble cake, but this cake is better in my opinion.
It's a soft, moist vanilla cake that isn't all that sweet in my opinion. Maybe that's just me and it is a lot sweeter to other people. For me it's the chocolate frosting that really makes this cake special. It's filled with all the cocoa that all good chocolate frostings need!

Change it up!
Now I know that a vanilla cake with chocolate frosting is just so basic. But that's why it's called a classic. But that doesn't mean you can't make it fun and make it yours. Add a fun filling, like Oreo's or add some chocolate candies. Make it a Neapolitan cake and add in some sliced strawberries into the mix! You can't go wrong a good vanilla, chocolate, strawberry combo.

Make it extra!
If you are making this for someones big birthday celebration, than you should load it up with sprinkles and all the candles. Make it look fabulous! Add in some of those fun sparklers and adorable shaped candles that look like animals!
Make it even more fun and turn it into a pinata cake! Just hollow out the center and fill it with all the goodies. Chocolate, gummy bears, mini cookies. The works! It's a birthday cake so make it specials.

Other recipes you might like!
vanilla cake
a classic vanilla cake that is generously layered with chocolate buttercream
cake
- 2 sticks unsalted butter
- 1 1/2 cup granulated sugar
- 4 eggs
- 1 tbsp vanilla extract
- 1 1/2 tsp baking powder
- 1 1/2 tsp baking soda
- 1 tsp salt
- 2 1/2 cup all-purpose flour
- 1 1/2 cup buttermilk
buttercream
- 2 sticks unsalted butter
- 2/3 cup boiling water
- 1 cup cocoa powder
- 8 cups powdered sugar
- 1 tsp vanilla
cake
-
preheat the oven to 350 degrees F. spray and line three 6-inch cake pans.
-
In the bowl of an electric mixer fitted with a paddle attachment, beat the butter and sugar until pale and fluffy, about 2 minutes. Scrape the sides of the bowl, add the eggs and vanilla and mix until incorporated.
-
in a separate bowl, combine the flour, baking powder, baking soda, and salt. Add the dry mixture into the butter mixture and mix until almost incorporated. with the mixer still running, slowly add in the buttermilk. continue mixing until fully incorporated.
-
divide the batter evenly among the cake pans and bake for 30-35 minutes or until a toothpick comes out clean. let cool 10 minutes then carefully remove from the pans and continue cooling.
buttercream
- put all of the ingredients into the bowl of an electric mixer fitted with a whisk attachment. start slow and then gradually increase the speed. whip on high until light and fluffy, about 3 minutes.

White Chocolate Cake with Cranberry Buttercream


[wprm-recipe-jump]
*Disclaimer: This post contains affiliate links. To learn more, please go here.
Merry Christmas everyone! This white chocolate cranberry cake is filled with lots of white chocolate, a hint of nutmeg to give it a little spice, and a tart cranberry buttercream. The combination of flavors makes one drool worthy cake for the holiday.
Change it up!
There are a few ways that you can change up this cake. One thing you could do is that instead of adding the cooked cranberries into the buttercream, you could use it as a filling instead. Just keep the buttercream a plain vanilla and make a small dam when stacking the cake and fill it up with the cooked cranberries.
Or you can make whatever filling or buttercream you want! It's a simple white chocolate cake. No need to add in the nutmeg, that's optional. Just make your favorite buttercream and even add in a fun fruit filling! Anything really goes with white chocolate so the possibilities are endless.
Other white chocolate desserts.
White chocolate ice cream with roasted strawberries
White chocolate cut out cookies
Peppermint white chocolate cake


Products I recommend.
Above are some products that I personally use and recommend for this recipe and to have for everyday use. My absolute favorite is the BlueQ oven mitts. I have a collection of them and I love them! They are great quality and it’s nice to have a kitchen item with a sense of humor.
_____________________________________________________________________
white chocolate cake with cranberry buttercream
this white chocolate cake has a hint of nutmeg for a lovely added flavor and is lightly frosted with a tart cranberry buttercream
cake
- 2 cups all-purpose flour
- 3/4 cup granulated sugar
- 1 1/2 tsp baking soda
- 1 tsp salt
- 1/2 tsp nutmeg
- 3 eggs
- 1/2 cup vegetable oil
- 1 tsp vanilla extract
- 1 1/3 cup milk
- zest of 1 orange
- 1 cup white chocolate (melted)
buttercream
- 1 cup fresh cranberries
- 2 tbsp granulated sugar
- 1 tbsp water
- 4 oz egg whites
- 3/4 cup granulated sugar
- 2 sticks unsalted butter (room temp)
- 1/2 tsp vanilla extract
ganache
- 3 tbsp heavy cream
- 1/3 cup white chocolate chips
cake
- preheat the oven to 350 degrees F. spray and line three 6-inch cake pans. in a small microwavable bowl, melt the white chocolate in 15 second bursts and set aside. in a large bowl combine the flour, sugar, baking soda, salt, and nutmeg and mix together. in another bowl whisk together the eggs, oil, vanilla, milk and orange zest. add the wet ingredients to the dry and whisk together until fully combined. add in the white chocolate and mix until incorporated. divide the batter evenly among the cake pans and bake for 30-35 minutes or until a toothpick comes out clean. let cool 10 minutes and then carefully remove from the cake pans to continue cooling. wrap in cling wrap until ready to use.
buttercream
- in a small pot, combine the cranberries, sugar and water and bring to a small boil. cook until the cranberries are soft and the mixture starts to thicken, about 10 minutes. remove from the heat and let cool. once cool put the mixture into a food processor and puree until smooth. if there are some small chunks then don't worry about it.
- in the bowl of an electric mixer combine the egg whites and the sugar and place over a pot of boiling water. whisk together until the sugar dissolves. once the sugar is dissolved, place on the mixer fitted with a whisk attachment and whip on high until a meringue forms and the bottom of the bowl is no longer hot. slowly add in the butter and continue whipping until the mixture comes together and doesn't look curdled. add in the vanilla and cranberries and mix until just combined.
ganache
- place both ingredients in a small microwaveable bowl and microwave for about 30-45 seconds. mix together until it comes together. spoon on top of the chilled cake to form a drip down the sides of the cake.

Sweet Potato Spice Cake


Move over pumpkin! Hello sweet potato spice cake! Who says that you can't put vegetables into a cake? Although sweet potatoes are often eaten with loads of marshmallows on top, I guess it is more of a sweet veggie than a savory one? But adding it into a cake with some spices, a hint of orange, and some cream cheese frosting and you have something super drool worthy to make for the holidays. It is super moist and tender with tons of flavor with hints of spices and a little orange zest here and there.
Change it up!
If you aren't into sweet potato then you can easily replace it with pumpkin puree instead. There's no need to dis pumpkin in this chilly fall weather! Some may even say that fall is pumpkin spice season.
Other fun treats to enjoy this fall!
Ginger cake with pumpkin buttercream


Products I recommend
Above are some products that I personally use and recommend for this recipe and to have for everyday use. My absolute favorite is the BlueQ oven mitts. I have a collection of them and I love them! They are great quality and it’s nice to have a kitchen item with a sense of humor.
__________________________________________________________________________
sweet potato spice cake

a fall cake filled with sweet potatoes, spices and lots of cream cheese buttercream
cake
- 15 oz can sweet potatoes (drained)
- 2 eggs
- 1/2 cup vegetable oil
- 1 tsp vanilla extract
- zest and juice of 1 large naval orange
- 2 cups all-purpose flour
- 3/4 cup granulated sugar
- 1/3 cup brown sugar
- 1 tsp salt
- 2 tsp baking soda
- 1 1/2 tsp cinnamon
- 3/4 tsp ginger
- 1/4 tsp cloves
- 1 1/4 cup milk
buttercream
- 8 oz cream cheese
- 2 sticks unsalted butter (room temp)
- 5 cups powdered sugar
- 1 tsp vanilla extract
- 1 tsp orange zest
- 1 tbsp orange juice
- 1/4 tsp cinnamon
cake
- preheat the oven to 350 degrees F. spray and line three 6-inch cake pans. in a food processor, puree the sweet potatoes, eggs, oil, vanilla, and orange zest and juice until smooth. in a large bowl, combine the flour, both sugars, salt, baking soda, and spices. whisk in the sweet potato mixture and then slowly add in the milk until the batter is smooth. divide evenly among the cake pans and bake 30-35 minutes or until a toothpick comes out clean. let cool 10 minutes, remove from the pans to continue cooling and then wrap in plastic wrap until ready to use.
buttercream
- combine all ingredients in the bowl of an electric mixer fitted with a paddle attachment. start mixing slowly and build up speed. beat until light and fluffy, about 5 minutes.

Banana Pecan Mini Loaf Cakes with Caramel

[wprm-recipe-jump]
It's almost Christmas! That means lot's of shopping for gifts and Christmas baking too. I find it hard sometimes to come up with a gift idea for some people. You never have any idea on what to get them! Why not just bake them something? I mean it is a holiday where people are making a crap ton of cookies and other baked goods; and we all know that your family isn't going to actually eat all of them. So why not give some of it as a gift? Like these caramel pecan banana mini loaf cakes?
I was in Michael's one day, which is totally a bad thing because I will literally buy everything that I don't own or need. Especially since they always have really good coupons. ALL. THE. TIME! So I was browsing and walking along the baking aisles when I came across some super cute and very reasonably priced mini loaf pans. So I had to buy them and came up with these cute banana loaf cakes to use as cute little gifts!
Change it up!
Instead of using pecans you could use walnuts or even almonds! It's also super easy to replace the spices and use your own spice mix instead too. For the glaze, whiskey is completely optional. You can completely omit the whiskey and keep it family friendly.
Other banana flavored treats!
Banana cupcakes with chocolate buttercream

________________________________________________________________________
banana pecan mini loaf cakes
these mini loaf cakes are packed with flavor. spices, pecans, and a caramel whiskey glaze to top it off.
cake
- 2 ripe bananas (mashed)
- 3 eggs
- 1 tsp vanilla
- 1/2 cup vegetable oil
- 1/2 cup granulated sugar
- 1/4 cup brown sugar
- 2 cups all-purpose flour
- 1 tsp salt
- 2 tsp baking soda
- 1/2 tsp pumpkin spice
- 1/2 cup milk
- 1 cup chopped pecans
- 1/2 cup caramel pieces
- 1/2 cup coconut chips (optional)
whiskey glaze
- 1/4 cup evaporated milk
- 1 stick unsalted butter
- 3/4 cup granulated sugar
- 3/4 tsp vanilla extract
- 2 tbsp whiskey
cake
- preheat the oven to 350 degrees F. in a small bowl combine the mashed bananas, eggs, vanilla, oil, and milk and mix together. in a large bowl combine the sugar, brown sugar, flour, baking soda, salt, and pumpkin spice and whisk together. slowly add the wet ingredients to the dry whisking together until fully incorporated. fold in the pecans, caramel pieces, and coconut chips. divide evenly among the mini loaf pans and bake for about 30 minutes or until a toothpick comes out clean. let cool.
whiskey glaze
-
combine all of the ingredients in a small pot and place over medium high heat. bring to a boil, whisking once every minute or so until it starts to thicken. this takes about 10-15 minutes. once it thickens, take off of the heat and whisk. drizzle over the cakes while the glaze is still warm before it starts to harden and becomes unusable.